Why Your Navien’s Hot Water Issues Often Point to the 3-Way Valve
A Navien 3 way valve replacement is a common repair for combi-boiler owners with hot water issues. If you have low flow, inconsistent, or scalding hot water, the 3-way diverter valve is the likely culprit.
Quick Answer: What You Need to Know
- The Problem: The 3-way valve directs water for heating and hot water. When it fails (often by sticking partially open), it causes low flow and incorrect water temperatures.
- The Challenge: Replacing this valve is complex, requiring removal of the PCB, control panel, piping, and circulator pump.
- DIY or Pro?: This is an advanced job. Most homeowners should hire a professional due to the difficulty and risk of damage.
- Cost: The valve costs $40-$80, but professional labor runs $300-$600 due to the extensive disassembly.
- Time Required: 2-4 hours for a pro; longer for a first-time DIYer.
Frustratingly, this valve is known to fail often, yet it’s buried deep inside the boiler. As one technician noted, “Nearly half the boiler must be removed to replace a part that is known to fail more than most other parts on the unit.”
While the valve swap itself is simple, accessing it requires patience and the right tools. Whether you’re a DIYer or want to understand the job, this guide covers the entire process, from diagnosis to testing.
 Shut off power, water, and gas supplies 2) Remove front panel and disconnect PCB 3) Remove circulator pump and access valve housing 4) Pull locking pin and extract old cartridge 5) Clean housing and install new cartridge 6) Reassemble all components and test system. Includes estimated time of 2-4 hours and difficulty rating of advanced. - navien 3 way valve replacement infographic")
What is a Navien 3-Way Valve and Why Does It Fail?
The Navien 3-way diverter valve is a critical component in your combi-boiler. It acts like a traffic cop for water, directing it to provide either space heating or on-demand domestic hot water (DHW). When you open a hot water tap, the valve prioritizes DHW by diverting heated water to a flat plate heat exchanger. Once the tap is closed, it returns to its idle state, ready to provide space heating. This efficient flow diversion is key to a combi-boiler’s performance.
Common Failure Modes
Unfortunately, the Navien 3-way valve is known to fail. Its piston-type design is susceptible to getting stuck in a partially open position, meaning it doesn’t fully switch between heating and DHW functions. The primary cause is mineral scaling from the water supply, which builds up inside the housing and on the piston, preventing smooth movement. As one user noted, “Minor scaling inside the housing has been suggested as a possible cause for the Navien 3-way valve not sliding out smoothly.” This leads to the frustrating symptoms below.

If you suspect your valve is failing, it’s important to diagnose it correctly, much like understanding the Signs Your Water Heater May Need Repair or Replacement.
Common Symptoms of a Failing Navien 3-Way Valve
When the valve malfunctions, it sends clear signals related to its inability to direct water flow. Here are the tell-tale signs that a navien 3 way valve replacement may be needed:
- Lukewarm or No Domestic Hot Water: If the valve is stuck favoring the heating system, not enough hot water reaches your taps.
- Low Water Flow at Hot Water Faucets: A partially obstructed valve restricts water flow, reducing pressure from your hot water taps.
- Higher Than Desired Temperatures: A stuck valve can also cause scalding water by improperly mixing superheated water or failing to regulate flow. Research confirms a common failure mode is a partially open valve, “leading to low flow and higher than desired temperatures at the domestic hot water faucet.”
- Inconsistent Heating Performance: While DHW is primarily affected, a faulty valve can also divert heat away from your radiators, causing them to heat up slowly or not at all.
If you’re experiencing these issues, your 3-way valve is the likely culprit. For more on how these systems work, see our guide on Tankless Water Heaters 101.
Preparing for Your Navien 3-Way Valve Replacement
A Navien 3 way valve replacement is a major repair requiring careful preparation. Because the valve is so inaccessible, the process involves disassembling much of the boiler and can be very time-consuming. You’ll need the right tools, genuine parts, and a clear plan.
Essential Tools and Parts
Gather all necessary equipment before you begin to save time and frustration.
- Screwdrivers: Phillips and flathead.
- Pliers: Needle-nose or channel-lock.
- Wrenches: Adjustable or open-end.
- Bucket and Towels: To catch residual water.
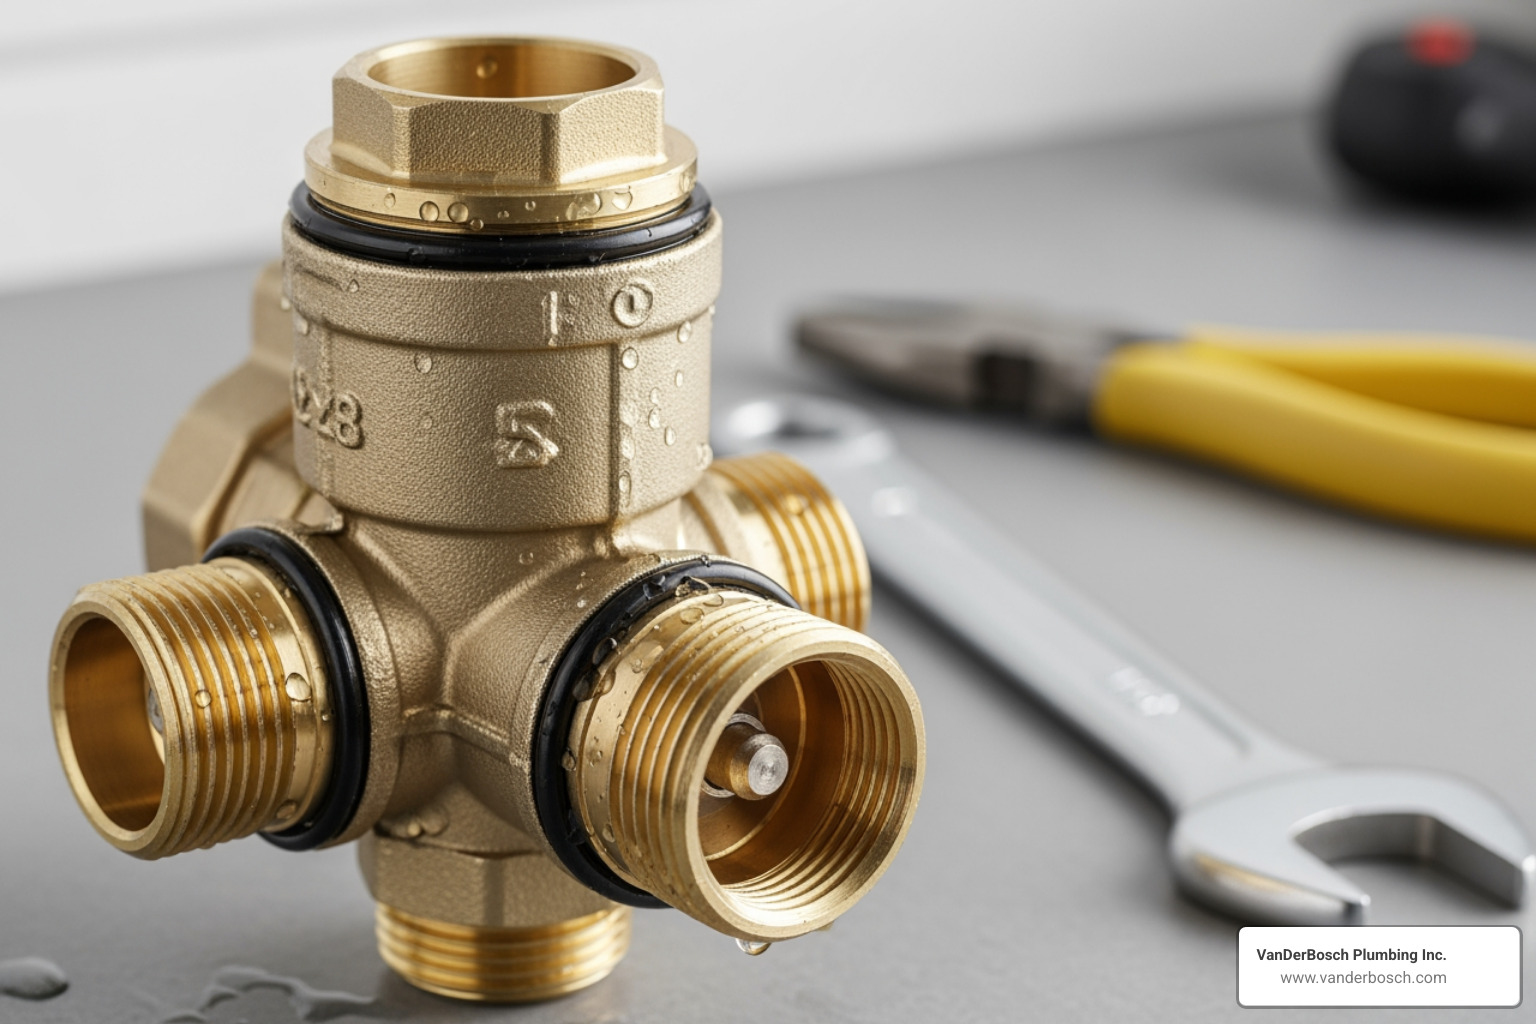
- New Navien 3-Way Valve Cartridge: Ensure you have the correct model for your unit.
- O-rings and Locking Pin: These often come with the new valve.
- Pipe Thread Sealant: Teflon tape or pipe dope for reassembly.
We recommend using genuine Navien factory OEM parts for a lasting repair. You can find a NAVIEN 3 WAY VALVE or other Navien Parts & Accessories from specialized suppliers. Always verify the part number is compatible with your specific Navien model.
 - navien 3 way valve replacement")
DIY vs. Hiring a Professional: Making the Right Choice
Deciding whether to DIY this repair or call a pro is a crucial decision. While saving on labor is tempting, you must weigh the difficulty, time, and risks.
| Feature | DIY Replacement | Professional Replacement (VanDerBosch Plumbing Inc.) |
|---|---|---|
| Difficulty Level | Advanced. Requires significant mechanical aptitude and patience. | Expert. Handled by licensed, experienced technicians. |
| Time Commitment | 4-8+ hours, especially for first-timers. Can be very time-consuming. | 2-4 hours for an experienced technician. |
| Component Access | Requires removing nearly half the boiler (PCB, control panel, piping, circulator pump). | Technicians are familiar with the boiler’s layout and access points. |
| Risk of Damage | High. Risk of damaging sensitive electronic components, breaking stuck parts, or causing leaks. | Low. Professionals have specialized tools and expertise to minimize risks. |
| Warranty Concerns | DIY repairs can potentially void your Navien warranty. | Repairs performed by licensed professionals typically maintain warranty validity. |
| Building Codes | Homeowners may not be aware of or adhere to local plumbing codes. | Professionals ensure all work complies with local building and fire codes in Chicagoland. |
| Tools Required | Must purchase or rent specialized tools. | Technicians arrive with all necessary tools and genuine parts. |
| Peace of Mind | Can be stressful, especially if unexpected issues arise. | Guaranteed satisfaction, expert advice, and emergency support. |
This is a challenging task due to the intricate disassembly and potential for stuck parts. One user noted they had to replace the entire assembly because “the old valve could not be removed from the housing without breaking it.”
For most homeowners in Chicagoland, hiring a licensed professional is the safest choice. Our team at VanDerBosch Plumbing Inc. specializes in these repairs, offering transparent pricing and a 100% satisfaction guarantee. If you need professional help, Contact Us.
Step-by-Step Guide to the Replacement Process
If you’re attempting the Navien 3 way valve replacement yourself, this guide outlines the process. Safety is paramount.
Step 1: Safety and Preparation
Prioritize safety by shutting off all utilities to the boiler before you begin.
- Shut Off Power: Turn off the circuit breaker for the boiler and unplug the unit.
- Turn Off Water: Shut off the main water supply to your house and close any isolation valves leading to the boiler.
- Turn Off Gas: Turn the gas shut-off valve on the line leading to the boiler to the “OFF” position.
- Depressurize: Open a hot water faucet to release pressure from the lines.
- Drain the Boiler: Connect a hose to the boiler’s drain valve and route it to a floor drain. Open the valve to drain the unit completely to prevent spills.
Step 2: Gaining Access to the Valve
This step is complex, as the valve is buried deep within the unit, requiring careful disassembly.
- Remove Front Cover: Unscrew and remove the boiler’s front panel.
- Disconnect Control Panel (PCB): Take photos of the wiring for reference. Carefully disconnect all harnesses from the PCB, remove it, and set it in a safe place.
- Remove Internal Piping: Disconnect the necessary water lines to create access. Have a bucket and towels ready for residual water.
- Remove Circulator Pump: Disconnect the pump’s electrical connection and unbolt it from its housing. This often obstructs the valve assembly.
- Locate Valve Assembly: With the components removed, you should now see the 3-way valve assembly, which is typically secured with a locking pin.
Step 3: Performing the navien 3 way valve replacement
This is the core of the repair. Be patient, as the old valve may be stuck.
- Remove Locking Pin: Use needle-nose pliers to pull the small locking pin straight out.
- Extract Old Cartridge: Gently try to pull the old valve cartridge from its housing. If it’s stuck (a common issue), refer to our troubleshooting tips below. Avoid using excessive force, which can damage the housing.
- Clean the Housing: Once the old valve is out, use a soft brush or cloth to thoroughly clean the inside of the housing, removing all scale and debris.
- Insert New Cartridge: Lightly lubricate the O-rings on the new Navien 3 way valve replacement cartridge with silicone grease. Align the new valve and push it straight in until fully seated.
- Secure with Locking Pin: Reinsert the locking pin to secure the new cartridge.
For a visual guide, you might find it helpful to Watch a video of the replacement process.
Step 4: Reassembly and Testing
With the new valve installed, carefully reverse the disassembly process.
- Reinstall Components: Reattach the circulator pump, internal piping, and the PCB. Double-check that all wiring harnesses are securely reconnected.
- Replace Front Cover: Secure the front panel.
- Repressurize the System: Close the drain valve. Slowly turn the water supply back on and listen for the system to fill. Check for any leaks around your work area.
- Check for Leaks: Carefully inspect all connections. Tighten any fittings that drip.
- Restore Power and Gas: Once you are certain there are no leaks, turn the gas supply back on. Then, restore power at the circuit breaker.
- Test System: Turn on a hot water faucet to test for consistent flow and temperature. Then, set your thermostat to call for heat and ensure the heating system functions correctly.
Potential Challenges and Professional Tips
The Navien 3 way valve replacement can be complicated by a few common issues, especially a stuck valve.
Troubleshooting a Stuck Valve Cartridge
The most common challenge is a stuck valve cartridge. Many users report being unable to remove it after pulling the locking pin. This is usually caused by physical damage to the valve’s internal plastic parts or by mineral scaling that glues it in place.
What to Do:
- Gentle Persuasion: Try gently wiggling and twisting the valve while pulling. Avoid brute force, which can break the housing and lead to a much more expensive repair.
- Inspect for Debris: Use a flashlight to check for broken plastic or heavy scale in any visible gap.
- Use Firm Force (with Caution): If the valve is only slightly stuck, a firm, steady pull might work. Proceed with extreme caution to avoid breaking components.
- Replace the Entire Assembly: As a last resort, if the cartridge is fused or broken inside the housing, you may need to replace the entire 3-way valve assembly. This is more costly but prevents catastrophic damage to the boiler.
This job can get complicated quickly. For a real-world look, you can Read a technician’s perspective on the job.
Preventative Maintenance for Your Navien 3-Way Valve
To extend the valve’s lifespan and avoid a premature Navien 3 way valve replacement, consider these preventative steps:
- Annual System Flush: An annual flush removes sediment and scale buildup, which are major causes of valve failure.
- Water Softener: In areas with hard water like Chicagoland, a water softener significantly reduces mineral buildup in your boiler and plumbing system.
- Install a Thermostatic Mixing Valve (TMV): A TMV on the DHW outlet delivers a consistent, safe water temperature, reducing stress on the 3-way valve. One expert suggests to “spec and install a thermostatic mixing valve on the domestic side outlet when dealing with Navien combi-boilers.”
- Regular Professional Inspections: Annual service by a qualified plumber can catch potential issues like scaling or valve stiffness early.
These measures can save you hassle and expense. For more on maintaining your water heater in Roselle, visit our Roselle Services: Water Heater page.
Frequently Asked Questions about navien 3 way valve replacement
Here are answers to common questions about Navien 3 way valve replacement.
How much does a Navien 3-way valve replacement cost?
The total cost includes the part and labor.
- Part Cost: The valve cartridge typically costs $40 to $80.
- Labor Cost: Because the job is time-consuming (2-4 hours for a pro), labor costs in the Chicagoland area usually range from $300 to $600.
- Total Cost: Expect a professional replacement to cost between $350 and $700. The final price depends on the complexity of the repair.
For an accurate quote, it’s best to Schedule Appointment with a professional.
How do I know for sure the 3-way valve is the problem?
While symptoms like low DHW flow and inconsistent temperatures are strong indicators, a professional diagnosis is the best way to be certain. The valve is a likely culprit if:
- The symptoms are consistent across all hot water taps.
- The boiler is not showing other error codes.
- The space heating system works correctly.
A qualified technician can perform tests to confirm the diagnosis. Since the 3-way valve is a “common failure point” on Navien units, it’s a primary suspect for experienced plumbers.
Can I just replace the motor on the 3-way valve?
It depends on what has failed. The assembly has two main parts: the motorized actuator and the valve cartridge (with the piston). Most often, the piston inside the cartridge gets stuck from scaling or wear, not the motor itself. If the motor runs but water flow doesn’t change, the cartridge is the problem. If the motor is humming or not turning, the motor may be the issue. However, given the difficult labor involved, most professionals recommend replacing the entire cartridge to ensure a reliable, long-lasting repair.
When to Call a Professional for Your Water Heater Needs
While this guide is comprehensive, a Navien 3 way valve replacement is a complex, time-consuming, and potentially risky job best left to professionals.
At VanDerBosch Plumbing Inc., we provide licensed plumbing services throughout Chicagoland, including Roselle, Niles, Winnetka, Elmhurst, and Mount Prospect. We understand how frustrating a malfunctioning Navien boiler can be.
Why trust us with your Navien 3 way valve replacement?
- Safety and Expertise: Our experienced, background-checked technicians handle gas, electric, and water systems safely and are experts on Navien units.
- Efficiency: We can complete this complex job in 2-4 hours, saving you time and hassle.
- Guaranteed Quality: We use genuine OEM parts to protect your warranty and back our work with a 100% satisfaction guarantee.
- Reliable Service: We offer transparent, upfront pricing and 24/7 availability for emergencies.
Don’t let a faulty valve leave you in the cold. For complex jobs like this, trust our experts for all your water heater service needs. We’re ready to get your Navien running smoothly again. Book a Time with us today!