
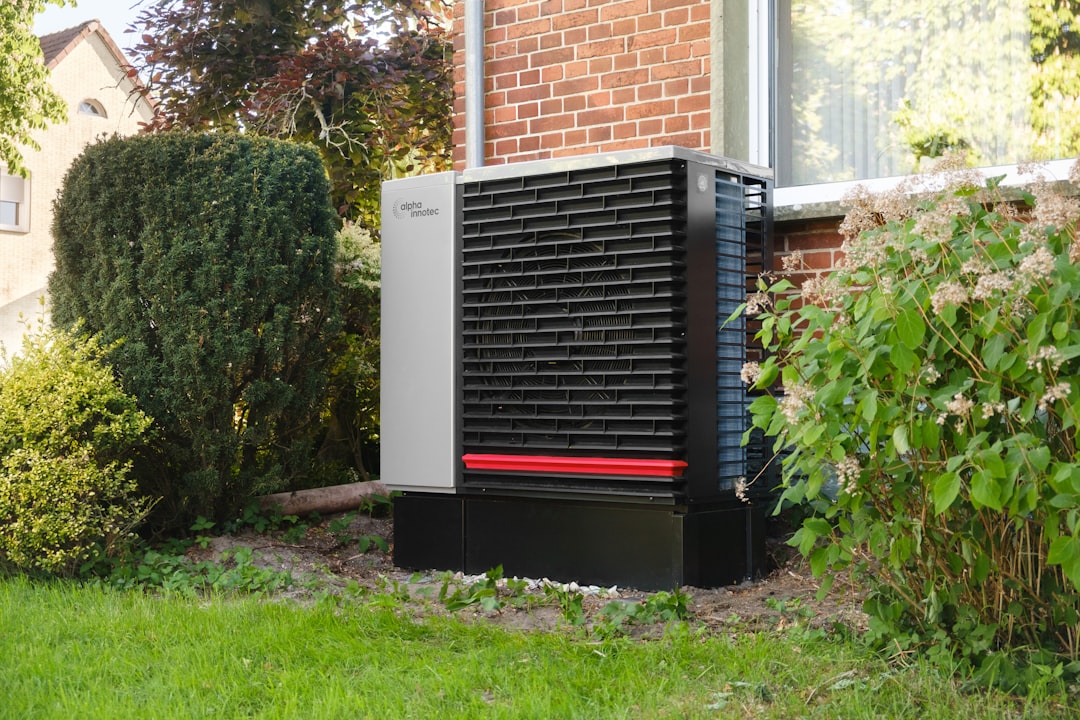
Is It Safe to Install a Tankless Water Heater Outside?
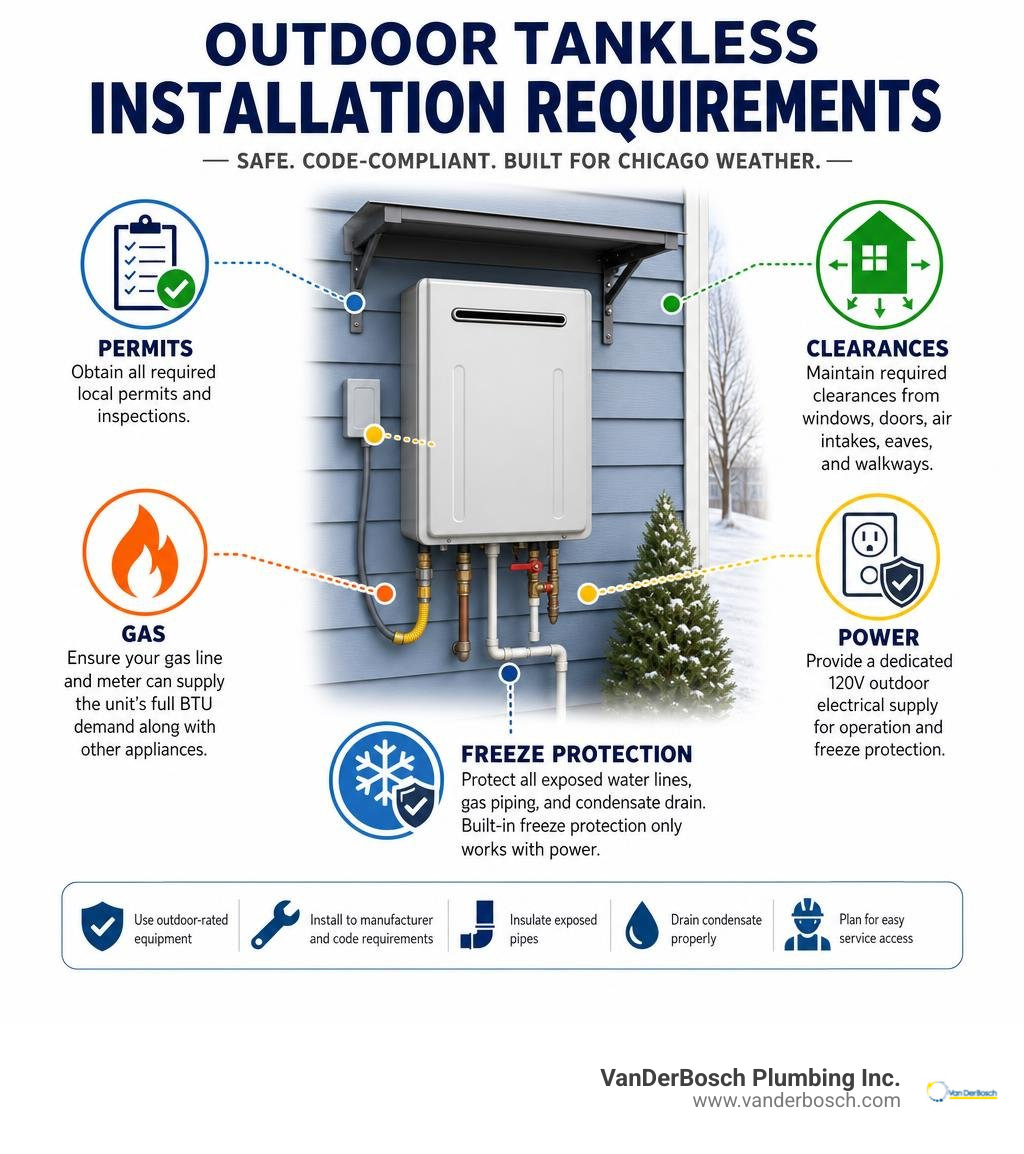
You can install tankless water heater outside when you use an outdoor-rated model, follow local permit rules, meet required clearances, and protect the water and gas connections from Chicago-area weather.
Outdoor installation can free up indoor space and avoids the long exhaust vent runs required by many indoor gas units. But it is not a simple wall-mount project. A tankless heater can demand far more gas than a standard storage tank, and built-in freeze protection only works while the unit has power. Exposed pipes, driving wind, snow, and power outages all need careful planning.
Before installation, a licensed professional should confirm:
- The unit is rated specifically for outdoor use.
- The exterior wall location meets local code and manufacturer clearance rules for windows, doors, air intakes, eaves, and walkways.
- The gas line and meter can supply the unit’s full BTU demand alongside every other gas appliance.
- A protected 120V outdoor electrical supply is available for controls and freeze protection.
- Water piping, condensate drainage, and service access are designed for year-round maintenance.
For Chicagoland homes and businesses, freeze risk deserves special attention. Many outdoor units protect internal components only to a limited temperature and only with uninterrupted power; they do not protect the pipes outside the heater.
I am Hugh Hodur, President of VanDerBosch Plumbing Inc., where I oversee residential and commercial plumbing work throughout Chicagoland, including water heater service, gas piping, and burst-pipe response. Our team helps property owners plan when it makes sense to install tankless water heater outside and when cold-weather conditions call for a different approach.
Simple install tankless water heater outside glossary:
Local Building Codes and Location Requirements to Install Tankless Water Heater Outside
Deciding to install tankless water heater outside begins with understanding building codes and location constraints. Local plumbing and gas codes exist to ensure that high-output fuel-burning appliances operate safely without risking fire, gas leaks, or carbon monoxide accumulation inside nearby living spaces.
Before mounting any unit, a permit must be pulled through your municipal building department—whether in Chicago, Evanston, Niles, Elmhurst, or surrounding Cook County communities. Municipal inspections verify that the gas line volume, electrical supply, and spatial clearances strictly align with both the National Fuel Gas Code (ANSI Z223.1/NFPA 54) and the manufacturer manual. Refer to your specific manufacturer guide, such as an Outdoor Tankless Water Heater Manual, for brand-specific restrictions.
Skipping permits or ignoring installation codes can void your manufacturer warranty, create severe safety hazards, and cause issues when selling your property. For details on compliance and expert setup, check out Why You Need A Licensed Plumber For Water Heater Installation.
Selecting an Exterior Location to Install Tankless Water Heater Outside
When choosing an exterior mounting point to install tankless water heater outside, ambient conditions and technician accessibility are top priorities.
Key considerations for location placement include:
- Ambient Operating Temperatures: Most standard outdoor tankless units are engineered to operate within ambient air temperatures between 5°F (-15°C) and 104°F (40°C). Installing a unit where ambient temperatures frequently dip below this threshold without supplementary heating measures will lead to system shutdowns or severe mechanical damage.
- Service Access Clearances: Technicians must be able to perform regular maintenance safely. Manufacturers require a minimum of 24 inches of clear space in front of the unit for routine servicing and inspection. If mounted in a tight side corridor or alleyway between houses, this clearance requirement often increases up to 47 inches.
- Roof Overhang and Weather Protection: Mount the heater under a supportive roof overhang or eave whenever possible. Protecting the upper cabinet from direct driving rain, heavy snowfall, and falling roof ice prolongs the lifespan of the metal cabinet and electrical connections.
- Wind Exposure Shielding: High winds blowing directly into the unit’s exhaust vent can disrupt the burner flame, cause incomplete combustion, or extinguish the pilot ignition system. Place the water heater on a wall protected from prevailing winter winds.
Code Clearances from Windows, Doors, and Vents
Outdoor tankless gas water heaters vent hot exhaust directly out of the front or top of their chassis into the open air. Because flue gas contains moisture, carbon dioxide, and small amounts of carbon monoxide, exact clearance rules prevent these gases from recirculating back into your home.
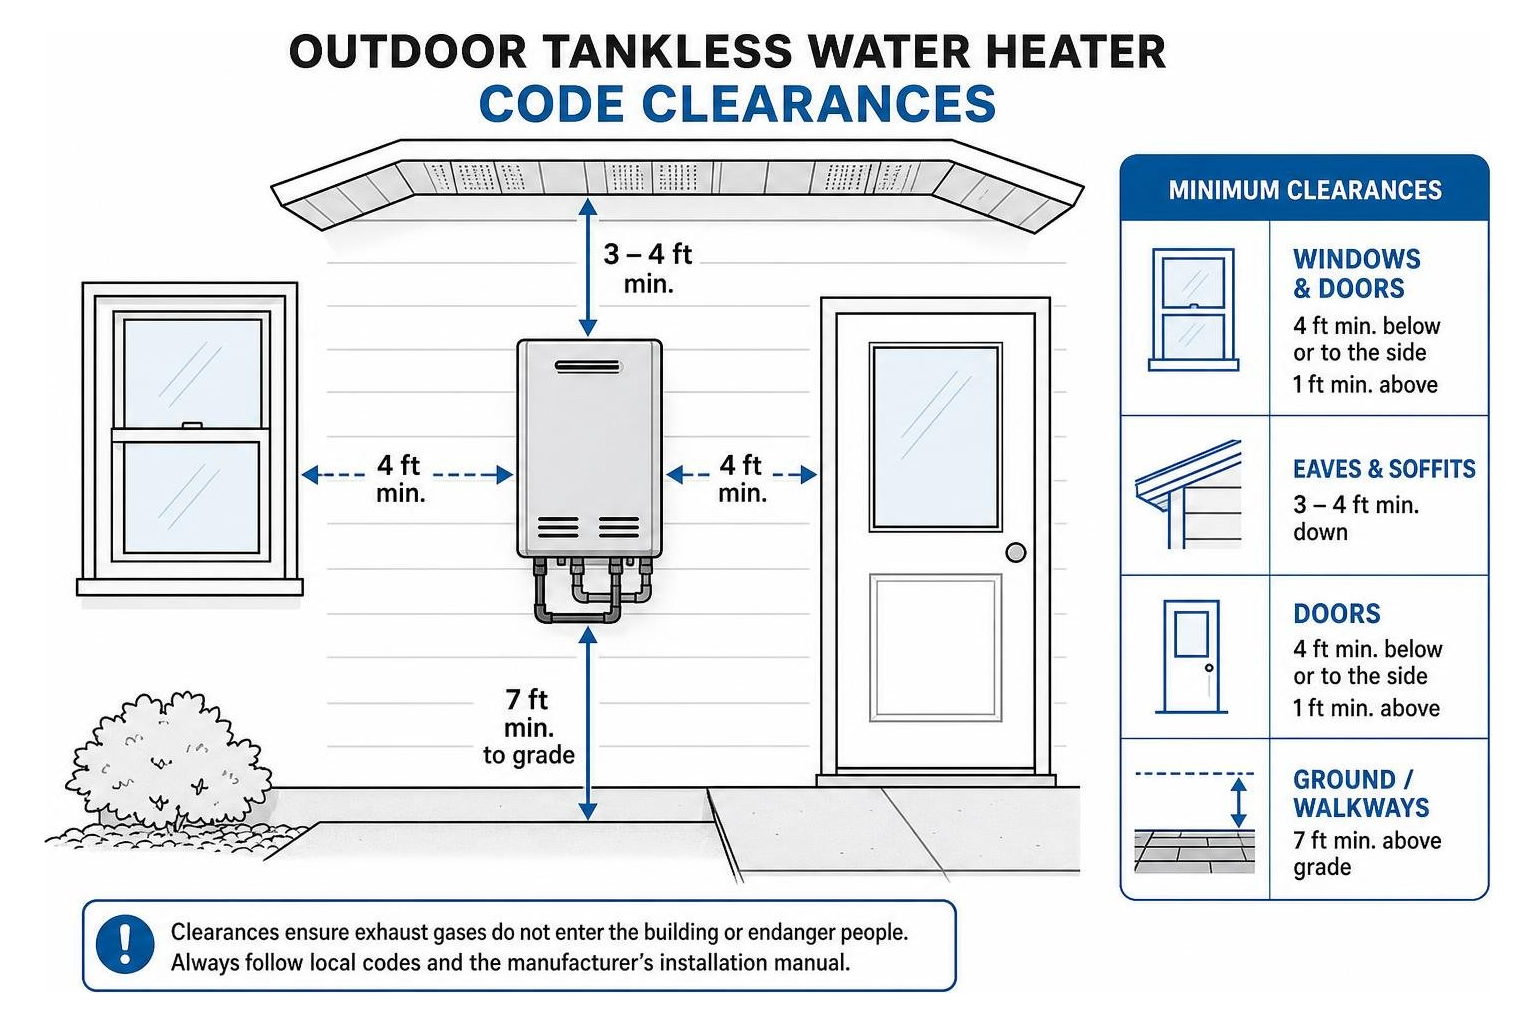
According to standard US national fuel gas codes and local municipal amendments, you must maintain the following minimum clearance boundaries:
- Operable Windows and Doors: The exhaust vent must maintain at least 4 feet of clearance below or to the side of any window, door, or gravity air inlet that can be opened. If placed above an opening window or door, a minimum vertical clearance of 1 foot is required.
- Soffits and Roof Eaves: Maintain a minimum distance of 3 to 4 feet down from roof eaves, soffits, or overhangs unless an approved deflector shield is installed according to manufacturer specifications.
- Driveways and Paved Walkways: If the unit exhaust faces a public sidewalk, private driveway, or shared patio, the exhaust termination must be situated at least 7 feet above grade level to prevent hot exhaust from scalding pedestrians.
- Ground Clearance and Snow Drift Line: Mount the bottom edge of the water heater cabinet at least 12 to 24 inches above ground level. In Midwest winter climates, this distance must be raised higher than the local maximum snow drift line to ensure intake air pathways remain clear.
- Mechanical Fresh Air Intakes: Maintain a strict 10-foot minimum distance from any mechanical air intake vent (such as a furnace fresh air intake or heat recovery ventilator).
Gas Pipe Sizing, Electrical, and Condensate Requirements
Transitioning from a traditional storage tank water heater to an outdoor tankless unit requires a major mechanical system upgrade. While standard storage tank water heaters operate on a relatively modest heat input of roughly 30,000 to 40,000 BTU/H, a residential tankless water heater heats cold ground water instantly on demand. This requires an immense heat burst ranging from 90,000 to 199,900 BTU/H.
Failure to upgrade existing utility infrastructure leads to starved gas burners, frequent diagnostic fault codes, cold water sandwiches, or electrical tripping. If you ever suspect fuel supply issues, our team provides expert Services/Gas Line Repair to ensure safe operating pressure.
Gas Line Sizing and Supply Pressure
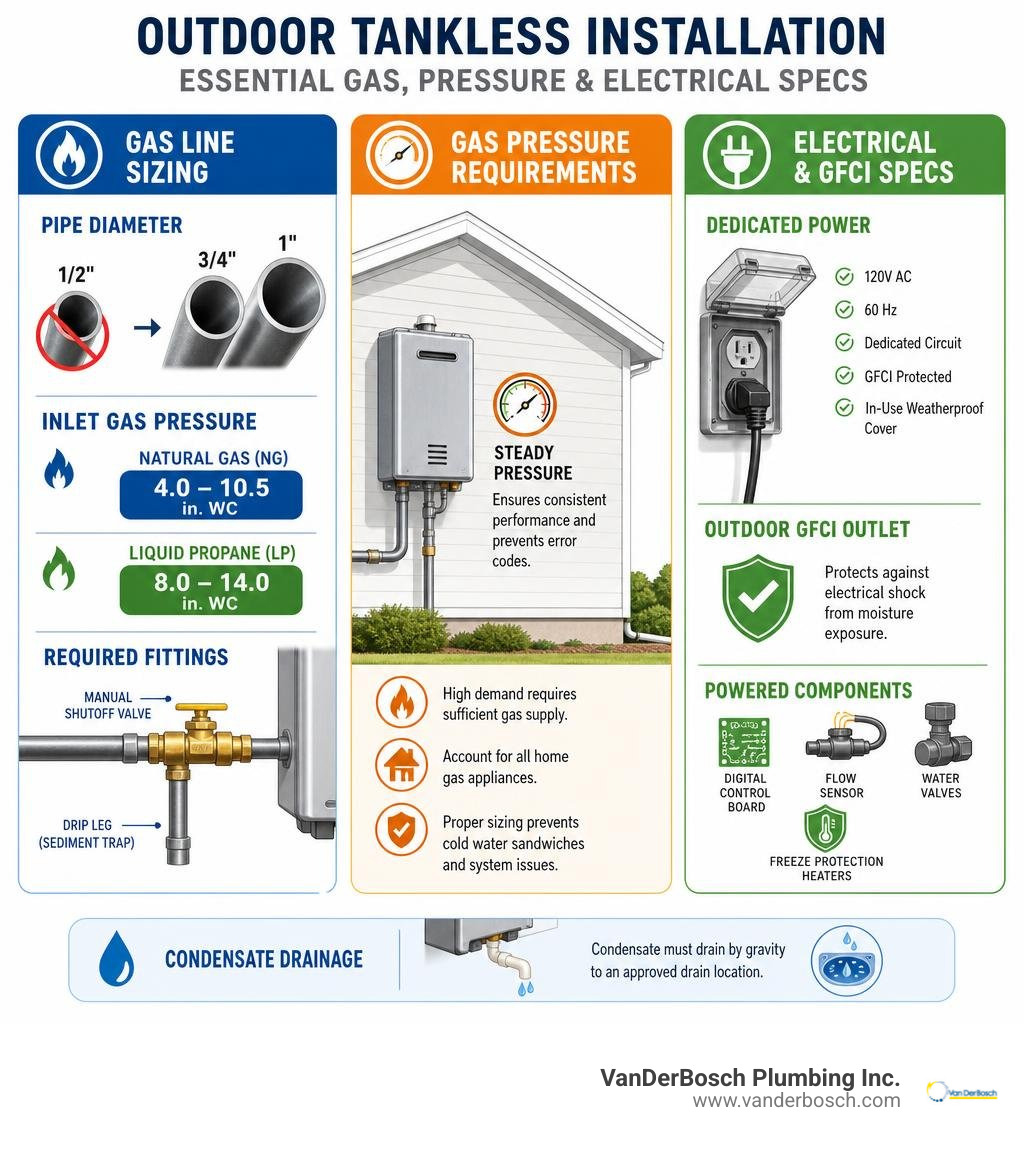
Due to high peak heat demands, standard 1/2-inch gas lines that served older tank units are rarely sufficient when you install tankless water heater outside.
- Gas Pipe Diameter: A dedicated tankless water heater almost always requires a 3/4-inch or 1-inch gas supply line. While certain short-run high-pressure applications allow 1/2-inch piping, the overall pipe volume must be calculated based on total distance from the meter and total BTU loads of all home gas appliances (dryers, furnaces, ranges, and fireplaces).
- Inlet Gas Pressure Requirements: During peak operation with every household gas fixture running, operating pressure must remain stable:
- Natural Gas (NG): Minimum incoming static and dynamic pressure must be between 4.0 in. WC (Water Column) and 10.5 in. WC.
- Liquid Propane (LP): Minimum incoming pressure must remain between 8.0 in. WC and 14.0 in. WC.
- Sediment Traps and Drip Legs: Outdoor gas supply connections must incorporate a vertical drip leg (sediment trap) and a manual gas shutoff valve directly upstream of the appliance connection. This trap collects trace moisture, pipe scale, and debris before it can enter the delicate gas valve assembly inside the unit.
Electrical Power Supply and Condensate Drainage
Even though gas provides the thermal energy to heat the water, outdoor tankless water heaters still depend on electricity to operate internal digital control circuit boards, flow sensors, motorized water valves, and built-in electric freeze protection heating elements.
- Dedicated Weatherproof Outlet: The unit must be connected to a dedicated 120V AC, 60 Hz electrical circuit protected by a Ground Fault Circuit Interrupter (GFCI). The outdoor receptacle must feature an “in-use” weatherproof bubble cover to protect the electrical plug from driving rain and snow melt.
- Built-In Freeze Element Power: The internal electric heating block draws continuous power during winter. If power drops or the unit is unplugged, internal freeze protection fails immediately.
- Managing Acidic Condensate (Condensing Units): High-efficiency condensing tankless units extract extra heat from exhaust gas, producing an acidic liquid condensate byproduct (pH 3 to 4). This condensate cannot be allowed to drip onto metal brackets, concrete footings, or lawn space, as it corrodes steel and kills vegetation.
- Condensate Line Routing: Condensate must be collected through an internal trap, routed through an inline condensate neutralizer kit (containing calcium carbonate chips to raise pH to neutral levels), and drained via a UV-resistant PVC pipe to an approved discharge point.
Step-by-Step Installation and Assembly Guide
Installing an outdoor tankless water heater requires strict precision across structural mounting, gas fitting, and plumbing assemblies.
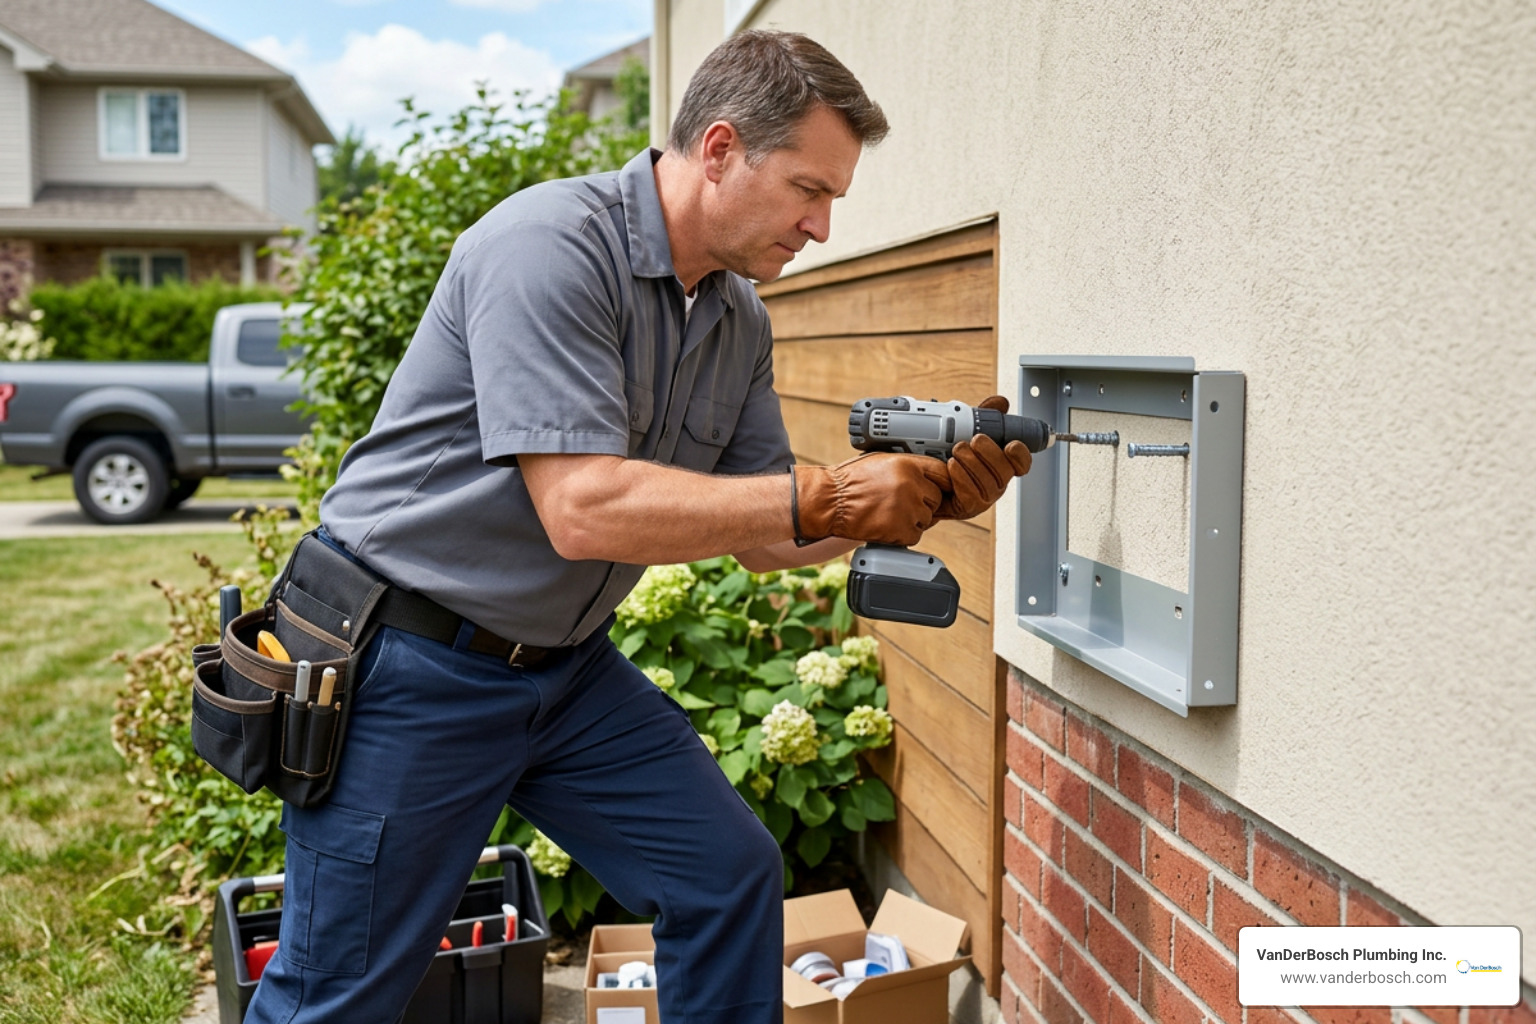
Before beginning physical installation work, review all relevant technical instructions, including the manufacturer’s Outdoor Kit Installation Instructions for Tankless Water Heaters to ensure proper bracket alignment and weather-housing assembly.
Key Steps to Install Tankless Water Heater Outside Correctly
- Construct a Sturdy Mounting Surface: Outdoor tankless units weigh between 40 and 80 pounds when filled with water. Mount the system to solid structural framing studs using lag bolts, or attach a 3/4-inch exterior-grade painted plywood mounting plate securely to brick, masonry, or siding.
- Mount the Appliance Level and Upright: Secure the mounting brackets to the back of the tankless chassis. Position the water heater perfectly level in a vertical position. Mounting an outdoor tankless unit at an angle disrupts water flow sensors and prevents exhaust condensate from draining correctly.
- Apply Weatherproof Sealing: Apply high-temperature exterior silicone sealant around all wall penetration holes, bolt anchors, and rear housing edges to stop moisture from seeping behind the appliance into your building’s envelope.
- Attach Exterior Enclosure Covers: If transforming an indoor unit using an approved outdoor conversion kit, snap together top weather baffles, front access panels, and lower pipe covers to shield interior components from rain penetration.
Plumbing Connections and System Purging
Once the cabinet is anchored securely, the cold water supply, hot water distribution lines, and gas supply line can be dry-fitted and connected. You can watch practical visual examples of piping setups in video guides like Ask This Old House Tankless Installation.
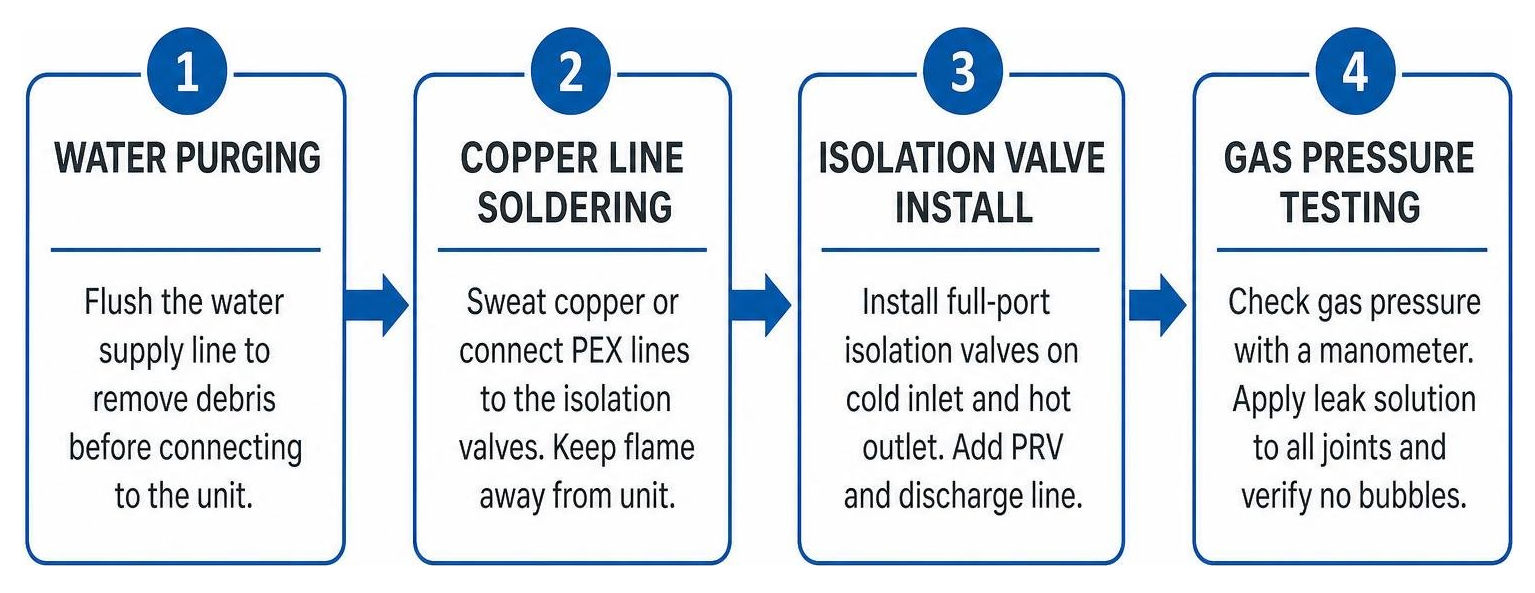
- Flush Water Supply Piping: Before connecting cold supply lines to the water heater inlet filter screen, flush the main water line into a bucket for several minutes. Construction dust, copper shavings, sand, and pipe solder can instantly clog internal turbine flow meters.
- Install Full-Port Isolation Valves: Always thread heavy-duty, full-port isolation valves (service valves) onto both the cold water inlet and hot water outlet ports. These valves feature dedicated hose bib drain ports that allow technicians to flush scale buildup without disconnecting permanent plumbing lines.
- Mount a Pressure Relief Valve: Install an ANSI Z21.22-approved Pressure Relief Valve (PRV) rated up to 150 PSI onto the hot water isolation valve assembly. Route the PRV discharge pipe down toward ground level, terminating 2 to 6 inches above grade pointing downward.
- Solder and Insulate Water Lines: Sweat copper or connect PEX lines to the service valves. Keep open flame torches far away from the water heater cabinet during soldering to avoid melting internal rubber gaskets or wiring harnesses.
- Manometer Gas Leak Testing: Thread the 3/4-inch gas line to the inlet gas connection using thread sealant approved for fuel gas. Connect a digital manometer gauge to measure static and dynamic gas pressure. Apply non-corrosive leak detection fluid (soapy water) over every gas joint, checking closely for bubbles before lighting the main burner.
Freeze Protection and Long-Term Maintenance Strategies
In Northern climates—especially in Chicagoland and across Cook County—freezing weather is the biggest threat to an outdoor tankless water heater. Water expands as it freezes, exerting up to 30,000 PSI of mechanical force, which can burst internal copper heat exchanger coils and shatter brass valve bodies in a single sub-zero night.
| Freeze Protection Method | Temperature Threshold | Power Dependency | What It Protects | Primary Risk Factor |
|---|---|---|---|---|
| Built-In Electric Heaters | Operates down to -4°F to 5°F | Requires uninterrupted 120V AC power | Internal heat exchanger & ceramic blocks | Complete failure during winter power outages |
| Thermostatically Controlled Heat Tape | Effective down to -20°F or lower | Requires external GFCI electrical outlet | Exposed exterior water piping & valves | Cable burnout or improper insulation installation |
| Auto-Drain Solenoid Valves | Actuates automatically upon power loss | Uses backup battery / spring release | Internal water channels & service manifolds | Improper pipe pitch blocking total gravity drainage |
| Complete System Winterization Drain | Sub-zero protection (unlimited) | None (Manual operation) | Entire unit & exterior plumbing lines | System unavailable for hot water use while drained |
Understanding cold-weather plumbing protection is essential for long-term reliability. Learn more by reviewing our guides on Tips On Keeping Your Plumbing Safe In Colder Temperatures and Frozen Pipes In Chicago Il What Homeowners Need To Know.
Protecting Exterior Water Pipes Against Freezing
Relying entirely on built-in factory freeze protection is dangerous in severe climates. Built-in ceramic heat blocks only keep the internal components inside the box warm down to approximately 5°F (-15°C) or -4°F (-20°C). They provide zero heat to the copper pipes, shutoff valves, and filter housings located directly beneath the unit.
To completely freeze-proof an outdoor installation:
- Install Thermostatically Controlled Heat Cable: Wrap self-regulating, commercial-grade heat tape around every exposed inch of cold water inlet pipe, hot water outlet pipe, and isolation valve assembly. Secure the tape with fiberglass electrical tape.
- Apply Closed-Cell Foam Insulation: Cover the heat-taped pipes with thick, closed-cell polyethylene foam pipe insulation (at least 3/4-inch wall thickness). Wrap exterior insulation joints tightly with UV-resistant weatherproof tape or aluminum cladding to shield insulation from sunlight degradation.
- Install an Automatic Solenoid Drain Valve Kit: Consider adding an auto-drain down valve kit. If electric power drops during a winter storm, an internal solenoid spring opens automatically, discharging standing water out of the bottom of the heater before it can freeze into solid ice.
- Integrate Recirculation Loop Control: Setting up a continuous or temperature-activated hot water recirculation pump keeps water moving through outdoor piping networks, making it far harder for static ice crystals to form.
Descaling and Preventative Annual Maintenance
Because tankless water heaters transfer immense thermal energy through compact heat exchanger coils, mineral scale (calcium and magnesium carbonate) drops out of hard municipal water and bakes onto internal coil walls.
Over time, limescale acts as an insulating blanket, forcing the gas burner to run hotter, decreasing energy efficiency, and eventually causing heat exchanger thermal stress cracking (error code 11 or 12).
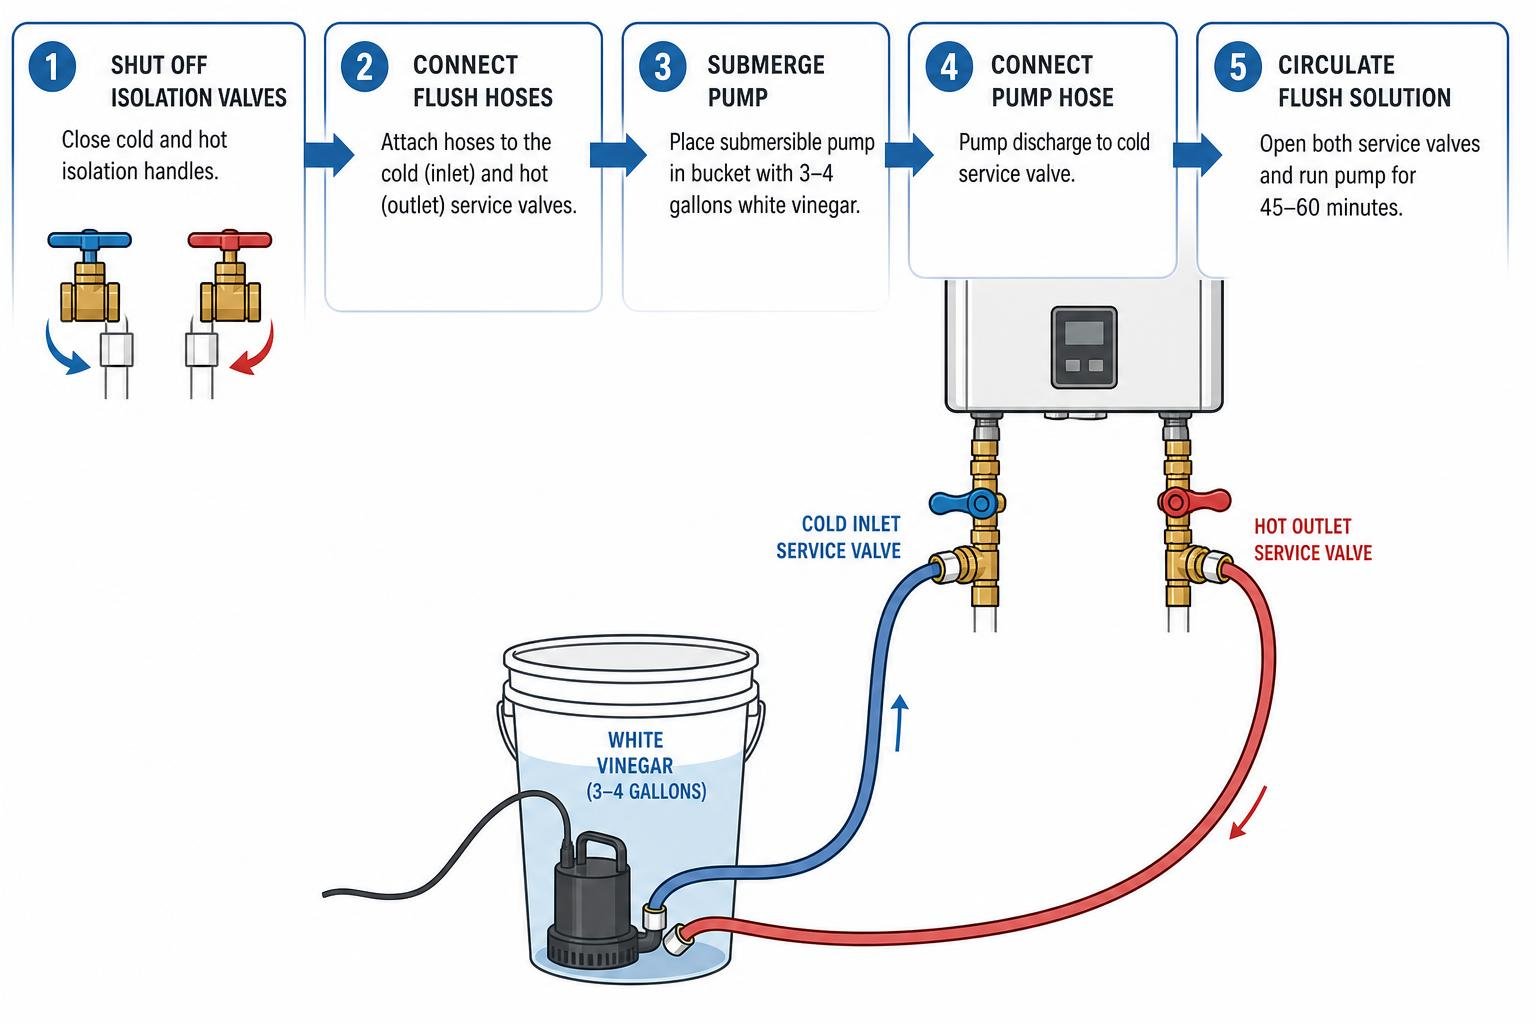
To descale your outdoor unit annually:
- Shut off Isolation Valves: Turn the main cold and hot isolation handles to the closed position to lock out domestic home plumbing.
- Connect Flush Hoses: Attach color-coded washing machine hoses to the hose bib ports on the cold and hot service valves.
- Submerge Submersible Pump: Place a small 1/6 HP submersible utility pump into a 5-gallon bucket containing 3 to 4 gallons of virgin food-grade white vinegar or an approved descaling solution.
- Circulate Flush Solution: Connect the pump discharge hose to the cold service valve port and run a return hose from the hot service port back into the bucket. Open both service valves and run the pump for 45 to 60 minutes.
- Rinse and Clean Filter: Flush the unit with clean tap water for 5 minutes, close the service valves, and unscrew the cold water inlet filter screen to clean out trapped sediment. Detailed steps are available in our guide on How To Flush A Tankless Water Heater And Prevent Scale Build Up.
Frequently Asked Questions About Outdoor Tankless Gas Water Heaters
Can an outdoor tankless gas water heater freeze in cold winter climates?
Yes, an outdoor tankless gas water heater can freeze if ambient temperatures drop below the system’s rating, if cold winds blow directly into the cabinet, or if electrical power is lost during sub-freezing weather.
While outdoor models feature internal electric heating elements that protect internal water channels down to roughly 5°F (-15°C), these components require continuous 120V AC electrical power. If a winter blizzard cuts electrical power to your home, internal freeze protection stops immediately. Water trapped inside heat exchanger tubes can freeze and rupture coils within hours.
In regions subject to severe sub-zero winters, exterior water lines must be protected with self-regulating heat tape, thick closed-cell insulation, and auto-drain valves—or installed indoors in a mechanical utility room instead.
Do outdoor tankless water heaters require specialized venting pipes?
No, outdoor tankless water heaters do not require specialized vent piping through roof lines or exterior sidewalls. This is one of the main advantages when you install tankless water heater outside.
Indoor gas tankless models require expensive Category III or IV stainless steel, polypropylene, or specialized PVC vent pipes to push flue gases safely outside the structure.
In contrast, outdoor tankless units feature integrated vent hoods built right into their exterior cabinet cover. Combustion air is drawn naturally from surrounding outdoor air, and exhaust gases discharge directly into the atmosphere, saving significantly on venting materials and labor costs.
How does distance from indoor fixtures affect water heater performance?
The distance between an outdoor tankless water heater and indoor plumbing fixtures directly affects water delivery speed and energy consumption.
When a hot water faucet is opened, cold water sitting inside the domestic pipe network between the water heater and the faucet must be pushed out first before hot water arrives. Longer pipe runs increase delivery lag time, leading to wasted water down the drain.
In addition, thermal transmission loss occurs as hot water travels through long exterior or crawl space plumbing runs. Water can lose 2% to 6% of its thermal energy over long uninsulated distances.
To maximize system performance when installing outdoors:
- Locate the unit on an exterior wall as close to high-demand fixtures (such as the primary bathroom or kitchen) as clearances allow.
- Insulate all indoor and outdoor hot water distribution piping.
- Install an integrated recirculation pump system to keep hot water continuously ready in supply lines.
Conclusion
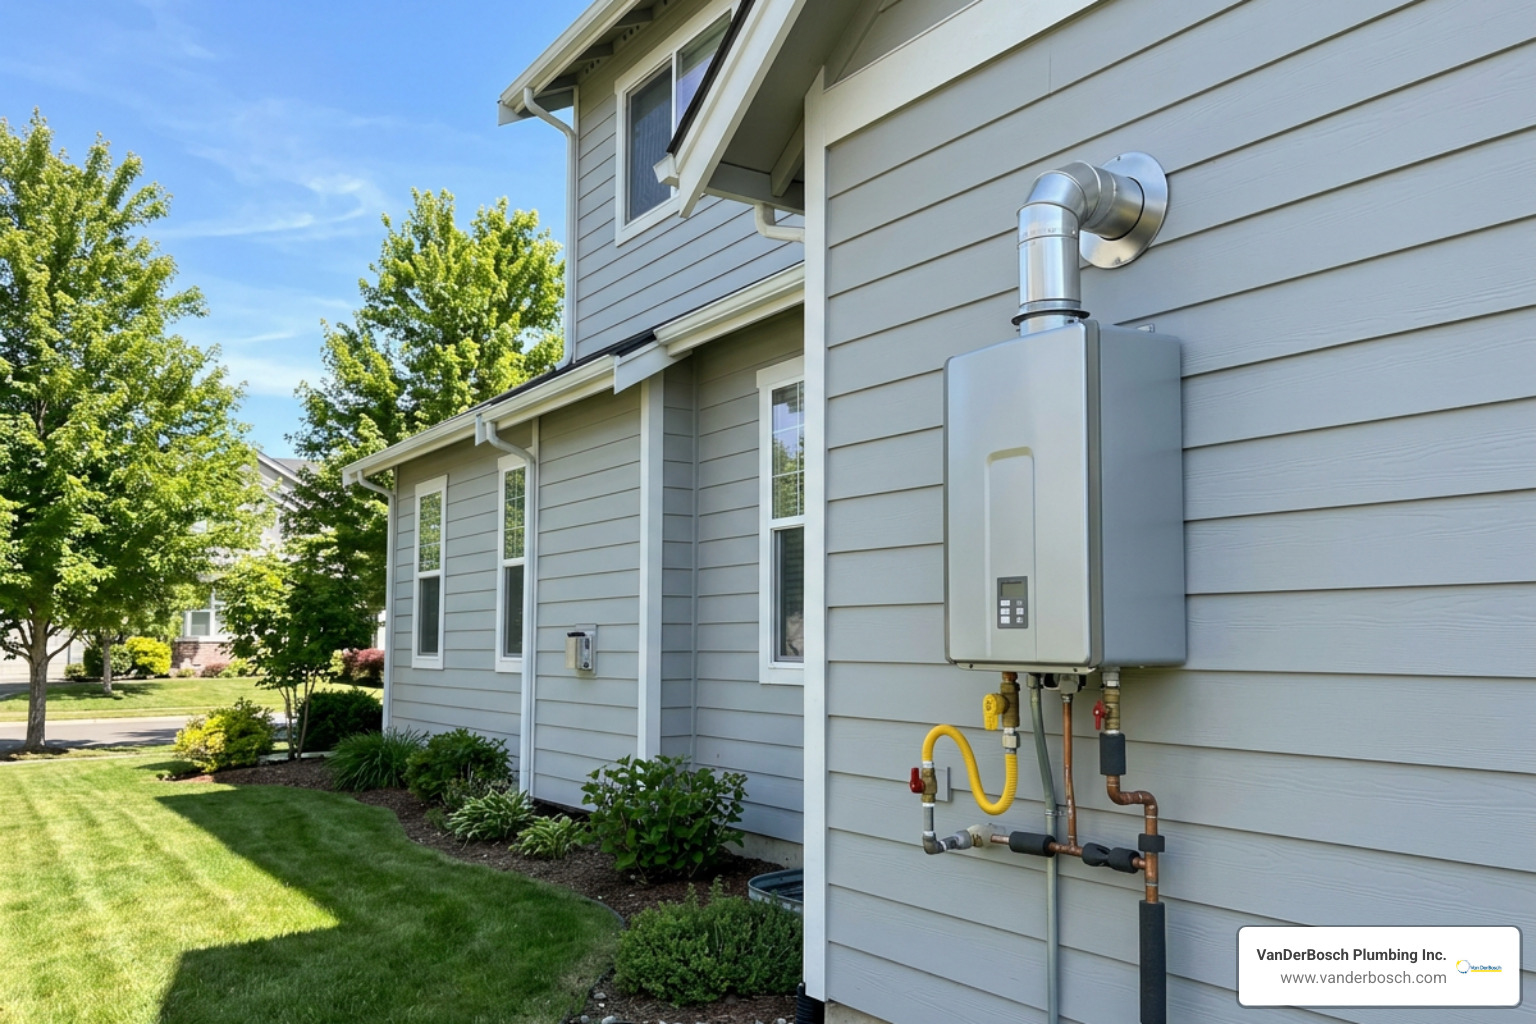
Choosing to install tankless water heater outside is an exceptional space-saving solution that delivers continuous hot water, lowers utility bills by up to 30%, and eliminates expensive indoor vent pipe installations. However, achieving long-term efficiency and safety requires strict compliance with local gas codes, meticulous clearance planning, correct gas pipe sizing, and reliable freeze-protection measures.
At VanDerBosch Plumbing Inc., our licensed, background-checked technicians bring decades of hands-on expertise to every water heater installation across Chicago, Winnetka, Niles, Roselle, Elmhurst, and neighboring Cook County communities.
We back every project with transparent pricing, zero hidden service fees, 24/7 emergency availability, and a 100% satisfaction guarantee.
Whether you are upgrading an old storage tank, adding a high-efficiency outdoor gas unit, or protecting your home’s plumbing against extreme weather, explore our full range of professional solutions on our Water Heater service page, or contact our team today to schedule an expert installation consultation!