
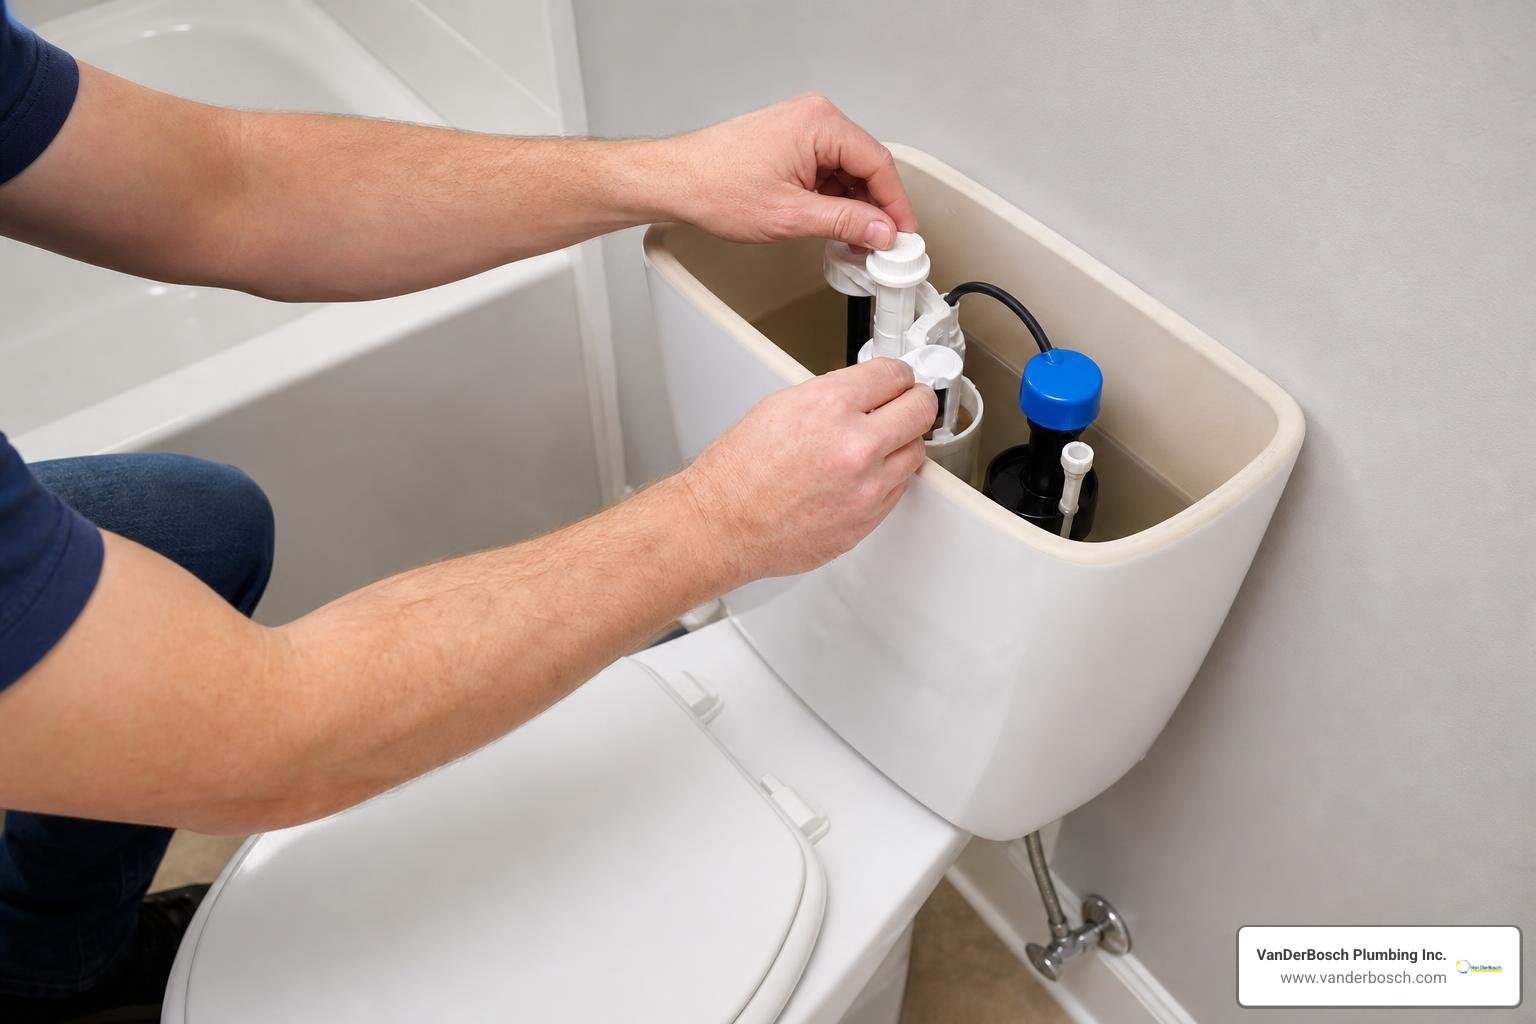
Why Fixing a Toilet Cistern Is Urgent (And Often Easier Than You Think)
Fixing a toilet cistern is something most Chicagoland homeowners can tackle themselves — and the sooner, the better. A running or leaking cistern can waste up to 400 litres of water per day, quietly driving up your utility bills.
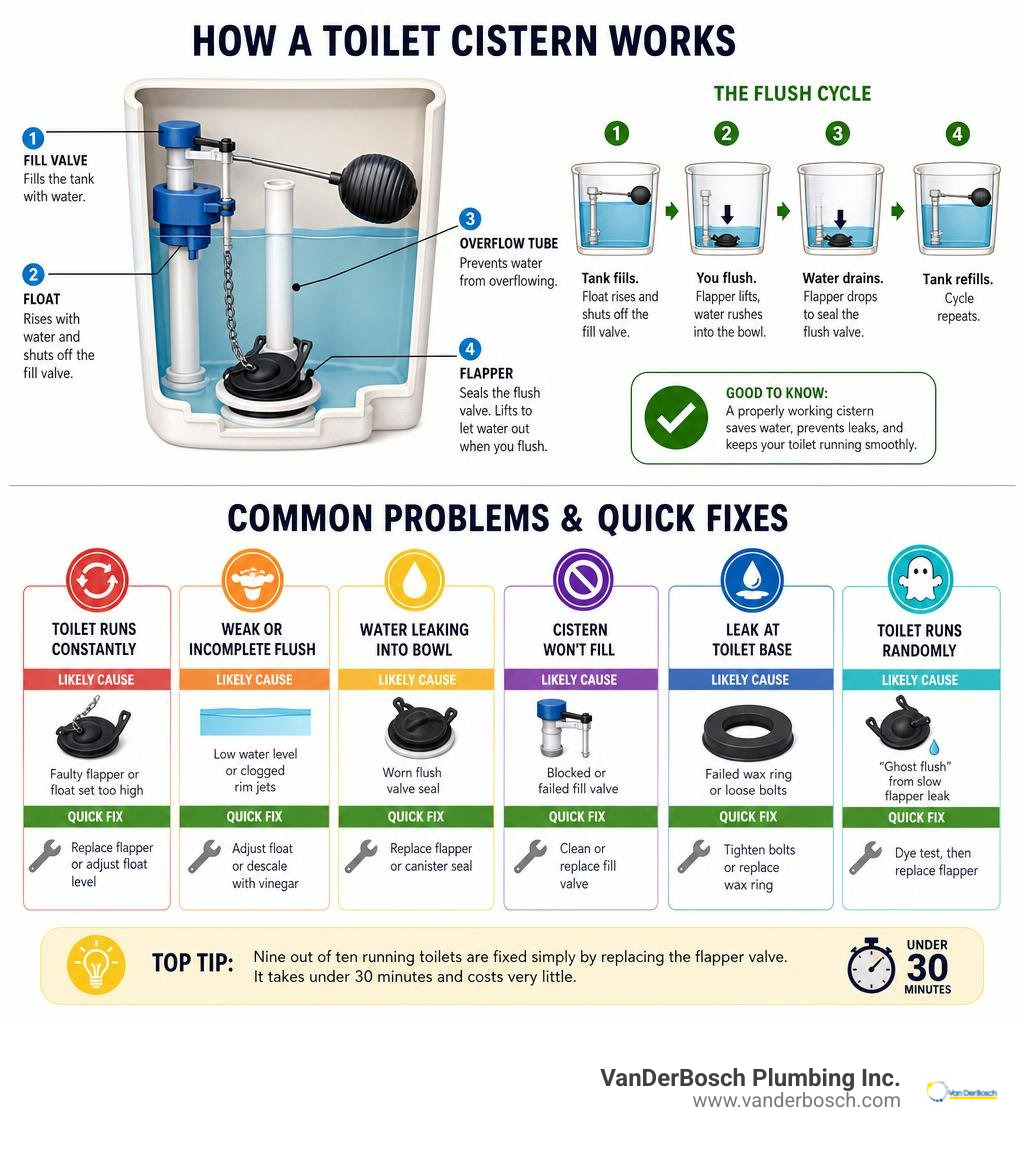
Here’s a quick overview of the most common cistern problems and their fixes:
| Problem | Likely Cause | Quick Fix |
|---|---|---|
| Toilet runs constantly | Faulty flapper or float set too high | Replace flapper or adjust float level |
| Weak or incomplete flush | Low water level or clogged rim jets | Adjust float or descale with vinegar |
| Water leaking into bowl | Worn flush valve seal | Replace flapper or canister seal |
| Cistern won’t fill | Blocked or failed fill valve | Clean or replace fill valve |
| Leak at toilet base | Failed wax ring or loose bolts | Tighten bolts or replace wax ring |
| Toilet runs randomly | “Ghost flush” from slow flapper leak | Dye test, then replace flapper |
The good news? Nine out of ten running toilets are fixed simply by replacing the flapper valve — a repair that takes under 30 minutes and costs very little. Toilet flushing already accounts for around 20% of domestic water use, so even a minor leak adds up fast.
I’m Hugh Hodur, President of VanDerBosch Plumbing Inc., and after years of overseeing residential and commercial plumbing repairs across Chicagoland, fixing toilet cistern issues ranks among the most common — and most preventable — problems I see. In this guide, I’ll walk you through exactly how to diagnose and fix yours, step by step.
Related content about fixing toilet cistern:
Essential Tools and Preparation for Fixing Toilet Cistern Systems
Before you roll up your sleeves and dive into the inner workings of your toilet, you need to gather the right tools. Nothing kills DIY momentum faster than a half-opened toilet tank and an unexpected trip to the hardware store. Fortunately, most of the tools required for fixing toilet cistern setups are already sitting in your garage or under your kitchen sink.
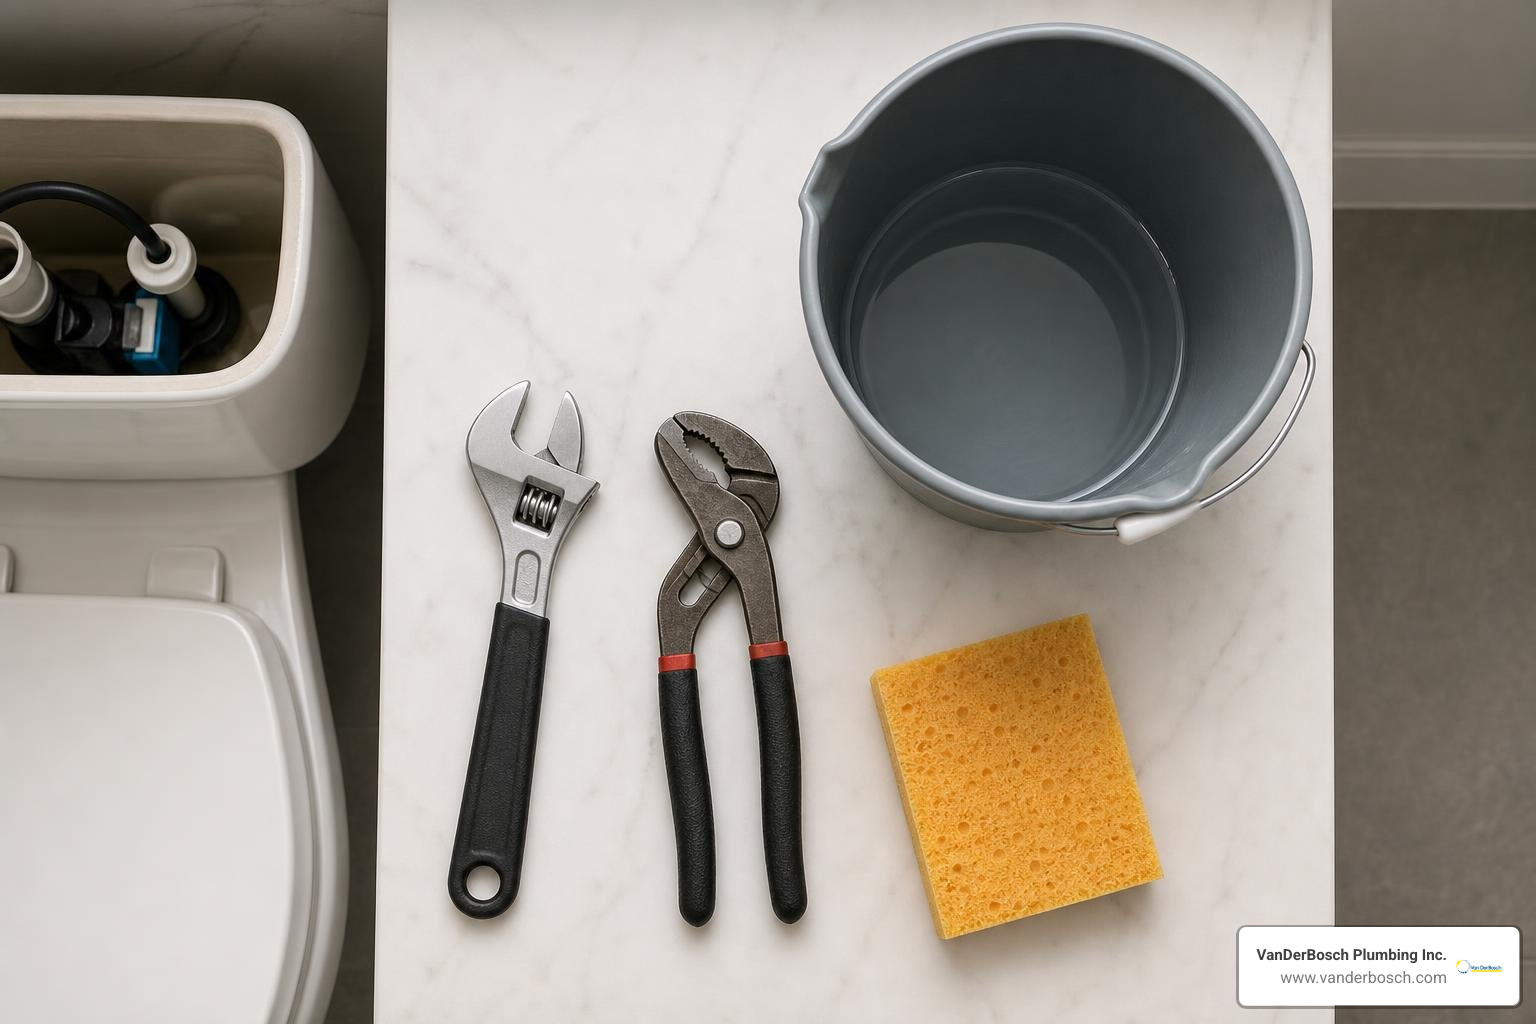
The DIY Plumbing Toolkit
To get started, make sure you have the following items on hand:
- Adjustable wrench (spanner): Essential for loosening and tightening supply lines or cistern mounting bolts.
- Tongue-and-groove pliers (channel locks): Helpful for gripping plastic locknuts under the tank.
- Sponge and a small bucket: You will need these to bail out the residual water left at the bottom of the tank after draining.
- Old towels: Keep these on the bathroom floor to catch any accidental drips or spills.
- White vinegar: A fantastic, non-chemical descaling agent to dissolve stubborn Chicagoland mineral deposits.
- PTFE thread seal tape (Teflon tape): To ensure watertight seals on threaded connections.
- Replacement parts: Depending on your diagnosis, this could be a new flapper, a fill valve diaphragm washer, or a complete canister flush valve seal.
Safety First: Shutting Off the Water Supply
Never begin any work on your toilet’s internal components while the water supply is live. Doing so is a recipe for an accidental indoor pool.
Locate the isolation valve (also known as the shut-off valve) on the wall behind or underneath your toilet. This is typically a small chrome valve connected to a flexible metal or plastic supply line. Turn this valve clockwise until it stops. If the valve is old and feels stiff, do not force it! Shearing an old valve can trigger an immediate plumbing emergency. If it won’t budge, you may need to shut off the main water valve for your entire home.
Once the valve is closed, flush the toilet and hold the handle down to empty the tank completely. Use your sponge and bucket to soak up the remaining inch of water at the bottom of the tank so you have a dry, clean workspace.
How to Access and Troubleshoot Concealed Cisterns
Modern minimalism has brought the beauty of concealed cisterns into many homes, particularly in remodeled bathrooms across Winnetka, Sauganash, and high-rise apartments in the Ukrainian Village. These systems hide the bulky water tank behind a wall panel or within a vanity unit, leaving only the toilet bowl and a sleek flush plate visible.
While they look incredibly stylish, many homeowners worry that fixing toilet cistern mechanisms hidden behind drywall will require tearing down their beautiful bathroom tiles. Fortunately, this is a myth. These systems are cleverly engineered so that all internal maintenance can be performed directly through the flush plate opening.
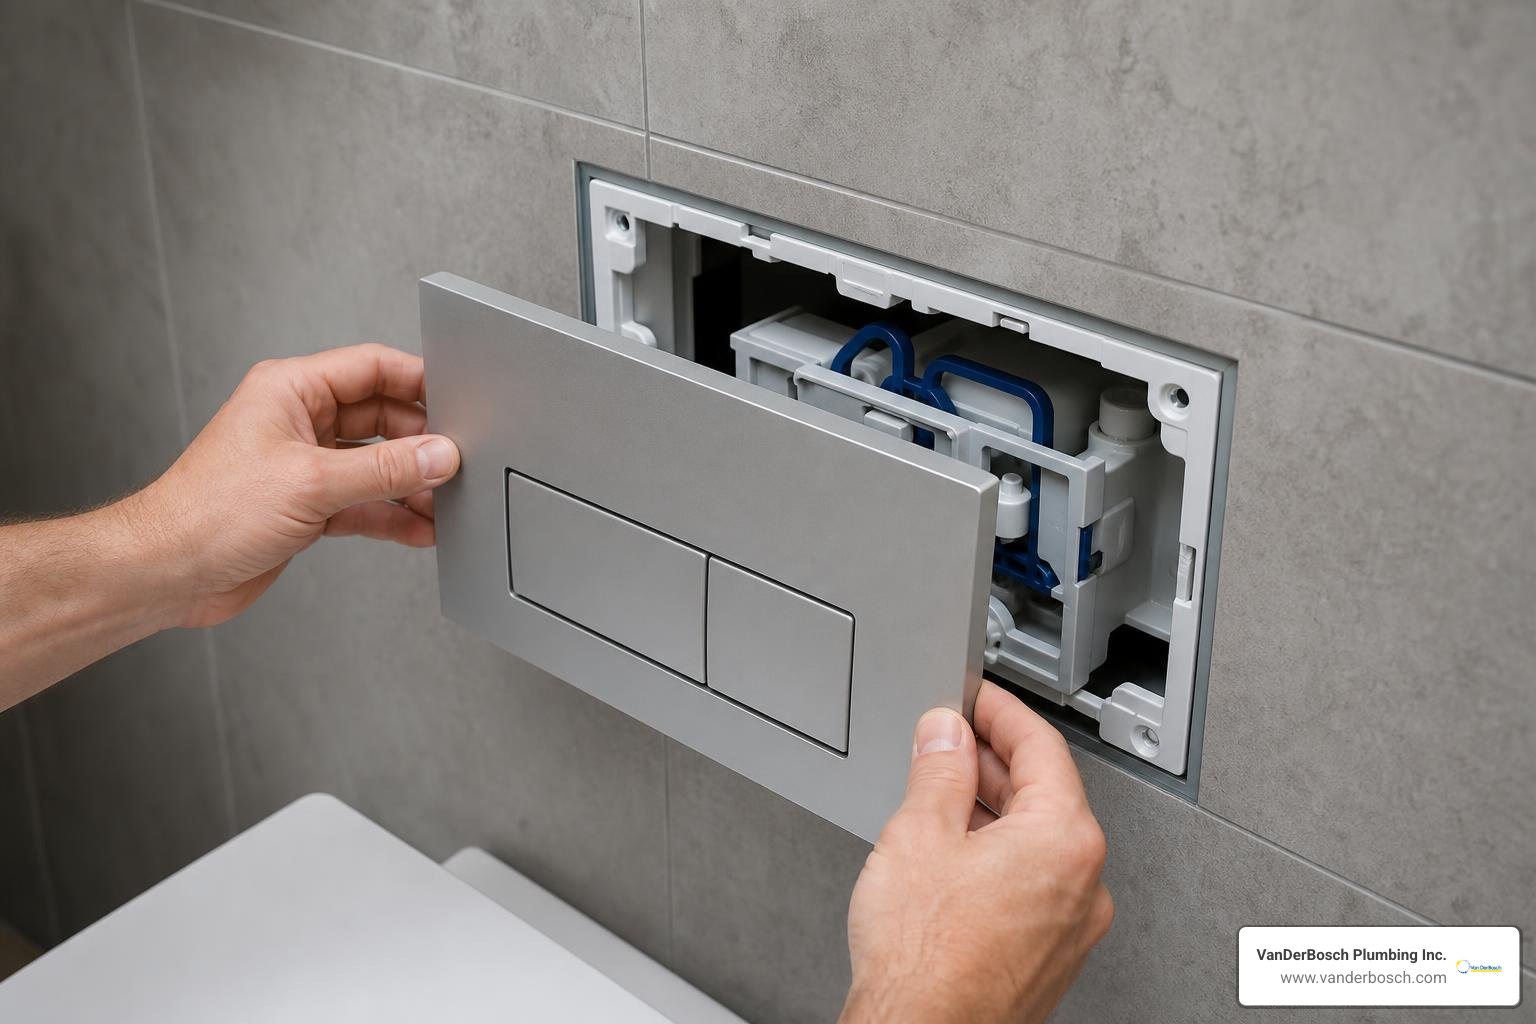
Accessing the Tank Without Damaging Tiles
To access the hidden components of a concealed cistern safely, follow these steps:
- Remove the flush plate: Most modern flush plates use a simple clip-on or push-to-release mechanism. Gently press upward or slide the plate to one side, then pull the top edge toward you to unclip it from the wall bracket.
- Remove the mounting frame and debris panel: Behind the decorative plate, you will see a plastic mounting frame secured by a couple of screws. Back these screws out and remove the frame. Next, remove the plastic debris panel. If there are threaded flush rods securing it, turn them counterclockwise to release them.
- Take a reference photo: Before you touch any clips, levers, or valves, grab your smartphone and take a clear, well-lit photo of the internal assembly. This visual guide will be invaluable when you are trying to piece everything back together later.
Diagnosing Hidden Leaks
Because the tank is hidden, a leak in a concealed cistern can go unnoticed for weeks, slowly damaging your wall framing or dripping down to the ceiling below.
To check for a silent leak, we recommend performing a simple food coloring “dye test”. Add about 10 to 15 drops of dark food coloring (blue, red, or green) directly into the water inside the concealed cistern. Do not flush the toilet. Wait quietly for 30 minutes. If you see colored water trickling down into the toilet bowl, you have an active leak, usually caused by a degraded flush valve seal.
If you suspect a more severe issue or notice dampness along the drywall base, you may need to call in a professional to prevent structural water damage. You can read more about our local services on our Services / Clogged Toilet Repair page.
Step-by-Step DIY Fixes for a Running Toilet
A running toilet is more than just an annoying background noise at 2 AM; it is a massive waste of resources. Depending on the severity of the leak, a single running toilet can waste up to 400 liters of water daily, adding hundreds of dollars to your annual utility bill.
To determine the best path forward, we need to identify which valve is causing the issue. Use this simple diagnostic sequence:
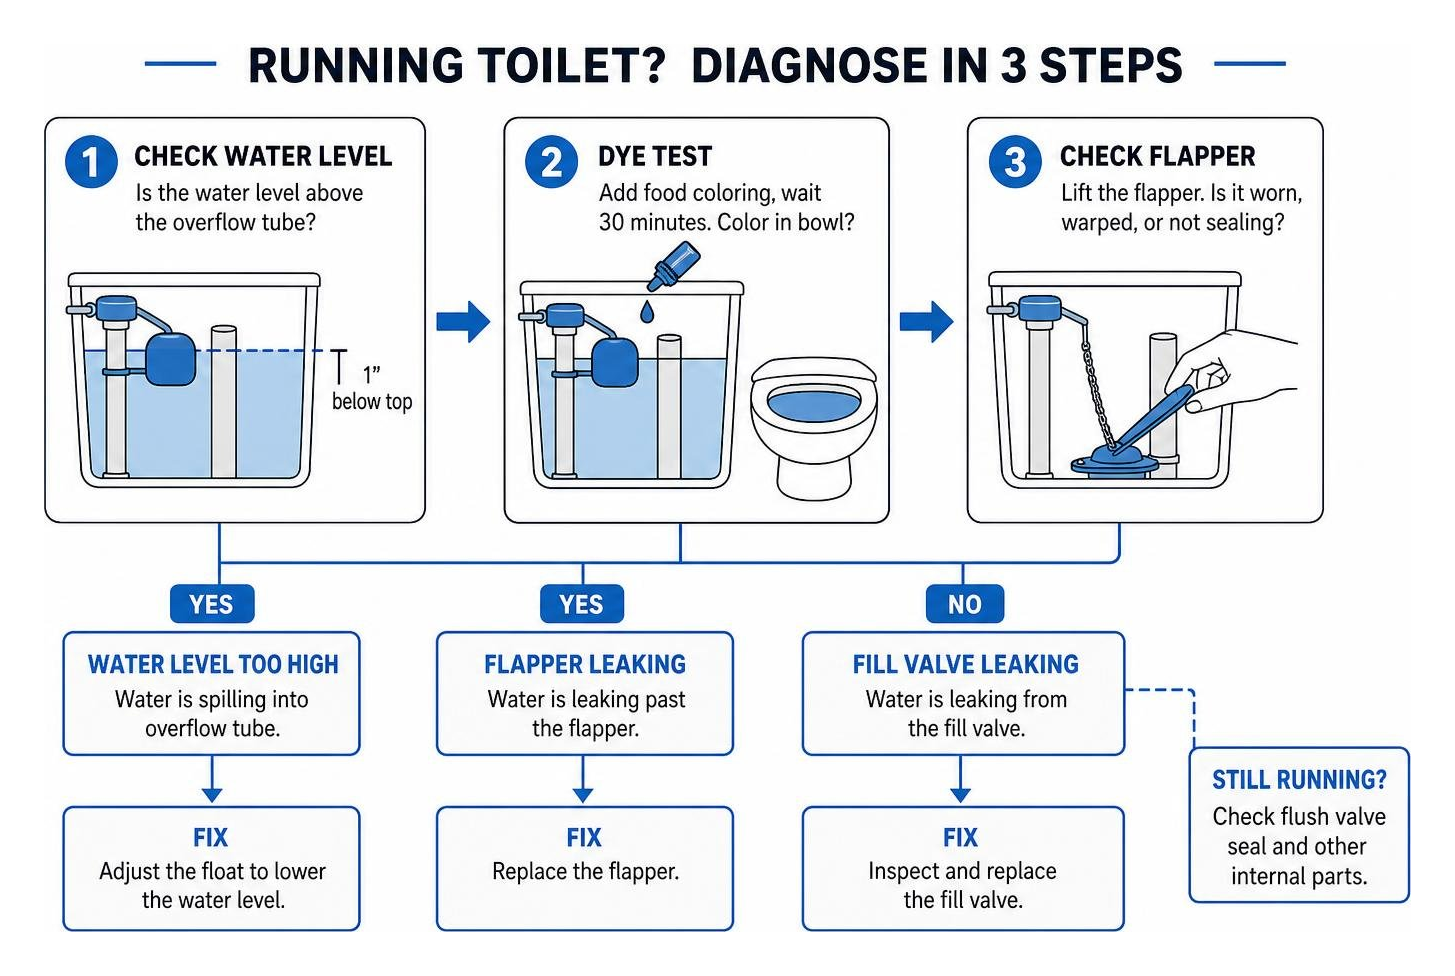
Adjusting the Float for Fixing Toilet Cistern Water Levels
If the water level inside your tank is too high, it will continuously spill over the top of the open overflow tube and run down into the bowl. This is almost always a float adjustment issue. The ideal water level should sit approximately 2.5cm (or 1 inch) below the top of the overflow pipe.
- For traditional ballcock floats: If your toilet has a hollow float ball on the end of a metal rod, gently bend the brass rod downward in the middle. This forces the float to sit lower in the water, shutting off the fill valve sooner.
- For modern cylinder floats: Most modern toilets use a plastic cylinder float that slides vertically up and down the body of the fill valve. To adjust this, locate the long plastic adjustment screw next to the float. Use a screwdriver or turn the plastic dial by hand to lower the float cup height.
Once adjusted, flush the toilet and watch it refill to verify that the water shuts off at the correct level below the overflow tube.
Replacing the Flapper or Flush Valve Seal for Fixing Toilet Cistern Leaks
If the water level in the tank is correct but water is still trickling into the bowl, the culprit is a failed flush valve seal. In traditional toilets, this is the rubber flapper valve at the bottom of the tank. Over a lifespan of 5 to 7 years, the rubber in these flappers hardens, warps, or becomes slimy from mineral deposits, losing its ability to create a watertight seal.
To replace a traditional flapper:
- Turn off the water supply and drain the tank.
- Unhook the flapper’s chain from the flush lever arm.
- Slide the flapper’s rubber ears off the plastic pegs on the overflow tube and lift the old flapper out.
- Clean the plastic rim (the valve seat) underneath the flapper with a soft sponge to remove any built-up slime or mineral scale.
- Install a matching new flapper by clipping its ears onto the pegs and attaching the chain. Ensure there is about a half-inch of slack in the chain; if it is too tight, the flapper won’t seal, and if it is too loose, the handle won’t lift it high enough to flush.
If you have a modern dual-flush toilet, you won’t find a rubber flapper. Instead, your toilet features a central canister-style flush tower. To fix this, twist the entire tower a quarter-turn counterclockwise and lift it straight up. At the bottom of the tower, you will find a thick silicone or rubber gasket. Pop this gasket off, clean the plastic seat, slide a brand-new matching silicone gasket on, and twist the tower back into its locking tabs.
How to Fix a Weak Flush and Base Leaks
A weak, sluggish flush that requires multiple attempts to clear the bowl is incredibly frustrating. While many homeowners assume they need to replace the entire toilet, the issue is often caused by simple mineral buildup blocking the flow of water.
Restoring Flush Power
Chicagoland municipal water can carry high mineral content. Over time, calcium and limescale build up inside the tiny rim jets — the holes located under the inside rim of your toilet bowl where water enters from the cistern.
To clear these blockages and restore your flush power:
- Pour two cups of warm white vinegar directly down the open overflow tube inside your cistern. This allows the vinegar to flow directly into the internal rim channels.
- Let the vinegar sit undisturbed for at least an hour to dissolve the limescale.
- Use an old toothbrush or a bent piece of wire coat hanger to gently scrub and clear out each individual rim jet under the bowl rim.
- Flush the toilet to clear out the loosened debris.
If your toilet still won’t flush properly after clearing the jets, there may be a deeper blockage in the trapway or drain line. If you suspect a stubborn clog, check out our guide on Why My Toilet Won’t Flush | Clogged Toilet Fix in Roselle for expert tips. You can also learn how to clear severe blockages yourself by reading our step-by-step article on How to Unclog a Toilet in 5 Easy Steps.
Repairing Leaks at the Toilet Base
If you notice water pooling on the bathroom floor around the base of your toilet, you must act quickly to prevent rot in your subfloor.
First, determine if the water is simple condensation (often called “toilet sweating” due to humid summer air in Illinois) or an active leak. Wipe the toilet completely dry with a towel and watch to see where moisture reappears.
If water is seeping out from under the porcelain base every time you flush, your wax ring has failed. The wax ring creates a gas-tight and watertight seal between the toilet horn and the sewer flange. Over time, floor movement or loose closet bolts can cause the toilet to wobble, breaking this wax seal.
While replacing a wax ring is a straightforward process, it requires physically lifting the toilet bowl, which can weigh anywhere from 70 to 125 pounds. If you are comfortable with heavy lifting, you can unbolt the toilet, scrape away the old wax, install a new wax ring, and reinstall the toilet. However, be extremely careful when tightening the closet bolts at the base; overtightening plastic or brass nuts against brittle porcelain can easily crack your toilet bowl, turning a simple repair into an expensive replacement.
Frequently Asked Questions about Toilet Cistern Repair
Maintaining a healthy plumbing system starts with understanding how your fixtures work. For more broad answers about household plumbing, explore our Frequently Asked Questions page. Below, we have answered the most common questions specific to fixing toilet cistern systems.
When should I replace internal components instead of repairing them?
While cleaning mineral deposits can solve many issues, you should opt for a full replacement of internal components when:
- The rubber is physically degraded: If the flapper or seal feels slimy, leaves black residue on your fingers, or is visibly warped, it is past its prime and must be replaced.
- The plastic is brittle or cracked: Over time, constant exposure to water and municipal treatment chemicals makes internal plastic components brittle. If you notice hairline cracks in your fill valve body or flush tower, replace them immediately.
- The fill valve makes a loud hissing or squealing sound: This indicates the internal diaphragm washer has failed. While you can sometimes replace just the diaphragm, installing a complete new, universal fill valve is highly affordable and ensures long-term reliability.
What are the signs that I need to replace the entire cistern?
Most of the time, replacing the cheap plastic and rubber parts inside the tank is all it takes to get your toilet working perfectly. However, you will need to replace the entire ceramic cistern if:
- The porcelain is cracked: A hairline crack in the ceramic tank is a ticking time bomb. It can give way at any moment, causing catastrophic flooding in your home.
- The tank-to-bowl connection is severely corroded: In older close-coupled toilets, the bolts connecting the tank to the bowl can rust solid. If these bolts cannot be removed without risking cracking the porcelain, replacing the entire unit is safer.
- You want to upgrade to a water-saving model: If your toilet was installed before the mid-1990s, it could be using up to 13 liters of water per flush. Upgrading to a modern dual-flush cistern can reduce your water consumption by 50% to 70%, saving a family of four up to $150 per year on water bills.
Why should I avoid using bleach in my toilet cistern?
It is incredibly tempting to drop a chlorine bleach tablet into your toilet tank to keep the bowl smelling fresh and looking clean. However, professional plumbers strongly advise against this.
Concentrated bleach is highly corrosive. When left sitting in the cistern water for hours between flushes, it chemically attacks and degrades the rubber and silicone seals, washers, and flappers inside your toilet. Within a few months, these components will warp and crumble, leading to persistent leaks. Furthermore, using bleach-based drop-in tablets inside the tank often voids the manufacturer’s warranty on your toilet’s flushing mechanisms. Instead, stick to cleaning the bowl manually with mild soap or white vinegar.
Conclusion
Fixing a toilet cistern is an empowering and cost-effective DIY project that can save you water, lower your utility bills, and restore peace and quiet to your home. By understanding how the float, fill valve, and flush valve work together, you can easily diagnose and resolve the vast majority of running toilets and minor leaks.
However, plumbing has its limits. If you run into frozen pipes, cracked ceramic porcelain, a stubborn sewer line backup, or if you simply feel uncomfortable handling heavy fixtures like a toilet bowl replacement, it is always best to put the tools down and call a licensed professional. Mistakes in plumbing can quickly lead to hidden water leaks, structural rot, and expensive mold growth.
If you prefer to leave the job to the experts, VanDerBosch Plumbing Inc. is here to help. We provide premier, licensed residential plumbing services across the Chicagoland area, including Cook County, Niles, Melrose Park, Oakbrook Terrace, Hyde Park, Elmhurst, and Mount Prospect.
We stand apart with our unique service model:
- 100% Satisfaction Guarantee on all of our work.
- 24/7 Emergency Availability because plumbing disasters don’t wait for business hours.
- Transparent Pricing with absolutely no hidden service charges.
- Experienced, Background-Checked Technicians who treat your home with the utmost respect.
Don’t let a running toilet wash your hard-earned money down the drain. Contact us today or visit our Professional Plumbing Services page to book an appointment with our friendly team!