
A Safe Garbage Disposal Set Up Starts With the Right Connections
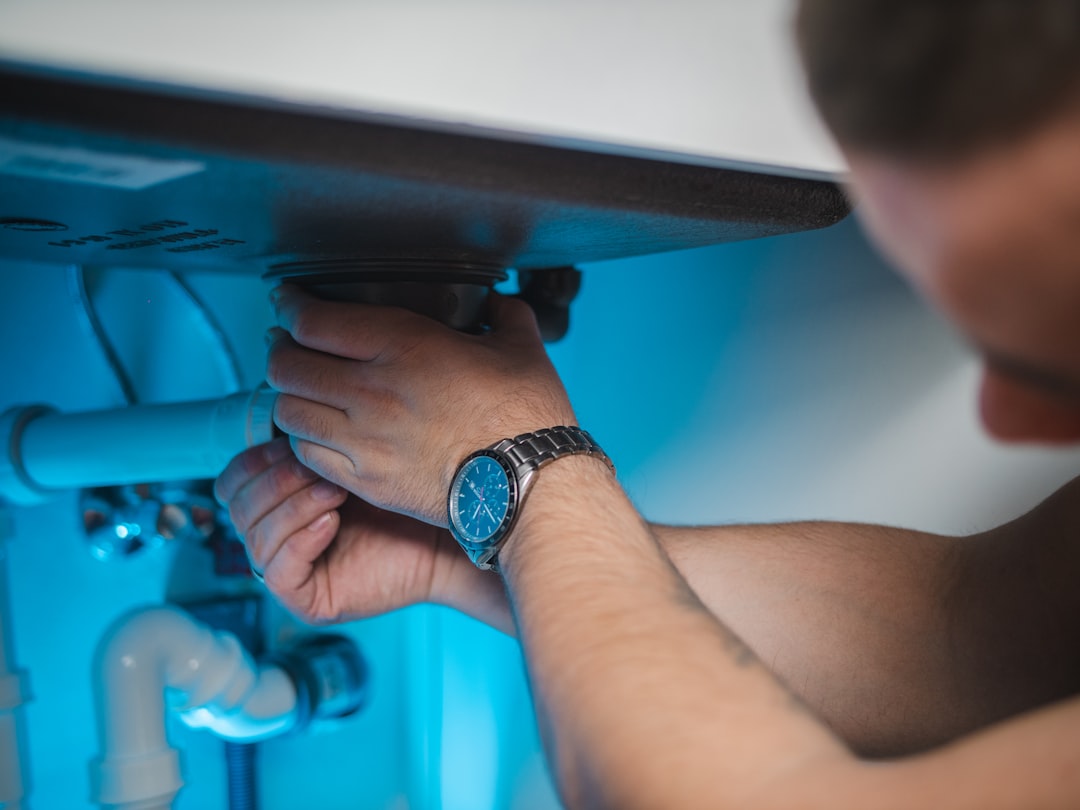
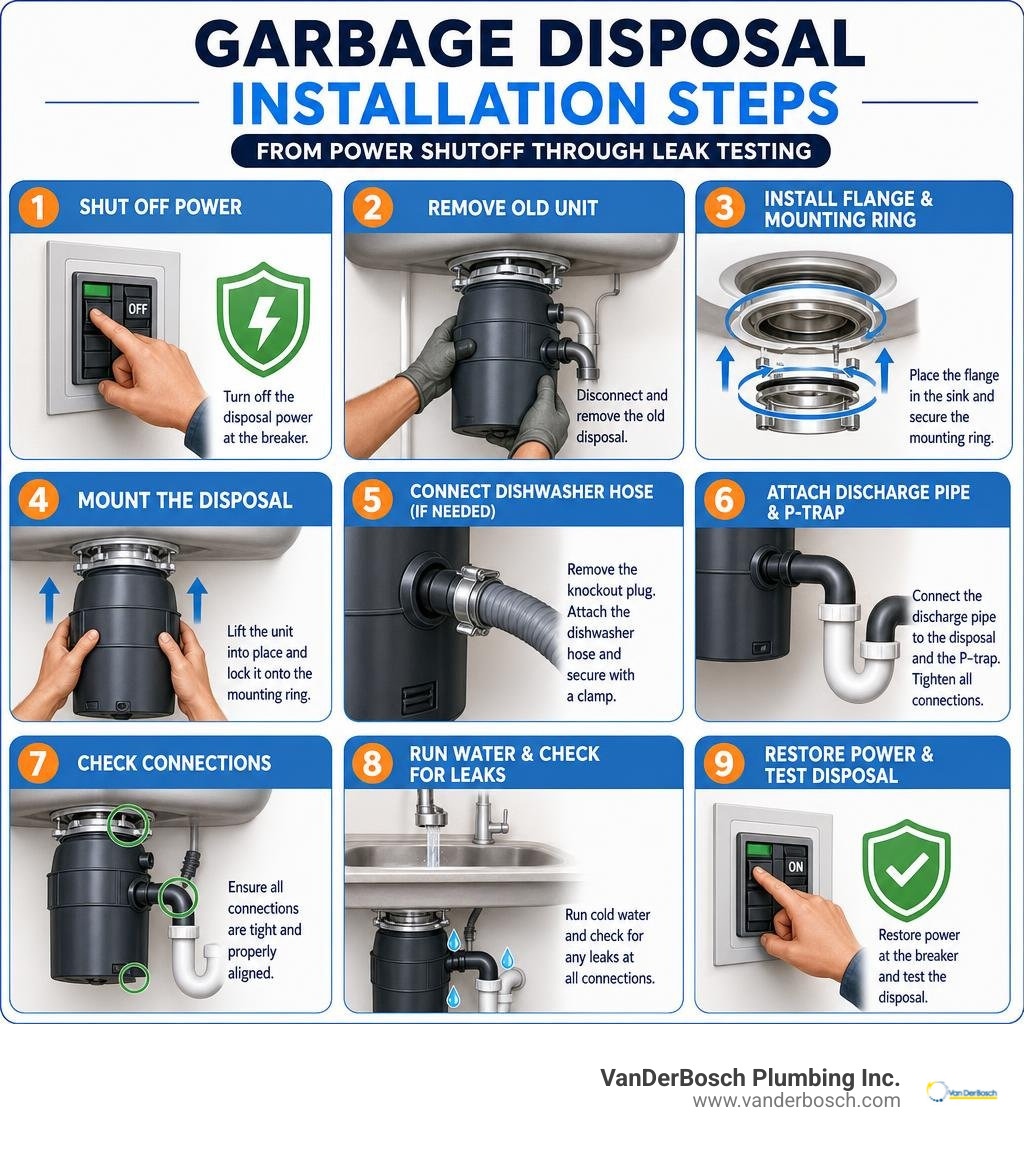
A garbage disposal set up is manageable when you already have a compatible sink drain, a properly grounded power supply, and enough cabinet space. Turn off the breaker, remove the old unit, install the new flange and mounting ring, connect the dishwasher hose if needed, attach the discharge pipe and P-trap, then test for leaks before restoring power.
For most homes, a 1/2 HP disposal handles normal food waste well. A properly installed unit commonly lasts 10 to 15 years, but small errors – such as leaving in the dishwasher knockout plug or forcing misaligned drain pipes – can cause leaks, backups, or early failure.
I am Hugh Hodur, President of VanDerBosch Plumbing Inc., where I lead residential and commercial plumbing service across Chicagoland. Our work with kitchen drains, clogs, and appliance connections informs this practical garbage disposal set up guide, starting with the checks that help prevent a frustrating callback.
More about garbage disposal set up:
- adding garbage disposal to existing sink
- changing out a garbage disposal
- dishwasher to garbage disposal hookup
Preparing for Your Garbage Disposal Set Up: Tools, Types, and Sizing
Before grabbing a wrench, take a close look inside your sink cabinet. A successful project requires verifying your vertical clearance, your electrical setup, and the slope of your waste lines. Modern residential plumbing relies on standard 1.5-inch drain pipes, but the disposal unit’s discharge outlet must sit higher than the drain connection entering the wall. Maintaining a minimum downward slope of 1/4 inch per foot ensures that wastewater flows smoothly by gravity instead of pooling inside the grinding chamber.
You also need to choose the style of machine that suits your kitchen workflow. The two primary designs are continuous feed models and batch feed models.
| Feature | Continuous Feed Disposal | Batch Feed Disposal |
|---|---|---|
| Activation Method | Wall switch, under-sink switch, or countertop air switch | Magnetic cover or stopper inserted into the drain |
| Operation Style | Runs continuously while water runs and switch is on | Runs only in individual batches when stopper is engaged |
| Safety Level | Standard (open drain hole protected by rubber splash guard) | Highest (blades cannot spin unless cover is locked in place) |
| Ideal For | High-volume meal prep, large families, quick cleanups | Homes with small children or sinks lacking a wall switch |
| Typical Cost | Budget-friendly to high-end options | Moderate to premium price points |
Motor sizing is equally important. A standard 1/2 HP motor works for most residential needs, while large households processing fibrous scraps regularly benefit from 3/4 HP or 1 HP units. That older homes throughout Chicago and Cook County may feature narrow plumbing runs, making correct sizing and proper kitchen sink plumbing critical for preventing stubborn clogs.
Essential Tools and Materials for a Garbage Disposal Set Up
Having your tools arranged on a work mat beside you saves time and prevents you from scrambling with an unfastened 15-pound motor in your arms.
- Hand Tools: Tongue-and-groove (channel-lock) pliers, adjustable crescent wrench, flathead screwdriver, Phillips screwdriver, hammer, and a steel punch or wooden dowel.
- Plumbing Supplies: Fresh plumber’s putty (or 100% silicone sealant if you have a granite or composite sink), new 1.5-inch P-trap assembly, discharge elbow tube, and a stainless steel hose clamp.
- Electrical Supplies: Non-contact voltage tester, wire nuts (size 54 or matching gauge), Romex cable clamp/strain relief bushing, and an appliance power cord kit (if your unit is not pre-corded).
- Safety & Clean-Up Gear: Safety glasses, work gloves, flashlight or headlamp, shallow bucket, and old towels.
Removing the Old Unit and Prepping the Drain
Safety comes first: navigate to your main electrical panel and shut off the circuit breaker powering the disposal. Never rely on the wall switch alone, as under-sink receptacles often retain live current. Verify that the power is completely dead at the unit using your non-contact voltage tester. Shut off the under-sink water supply stop valves as an extra safety measure.
Place your shallow bucket directly beneath the P-trap. Loosen the slip nuts holding the trap assembly using channel-lock pliers and drain any trapped water into the bucket. If you have an existing dishwasher connected, loosen the hose clamp and pull the flexible drain hose free from the disposal inlet barb.
Support the weight of the old disposal from underneath with one hand, a car jack, or a small box. Insert a screwdriver or hex wrench into the mounting lug collar and rotate it counterclockwise. The unit will drop free. Once disconnected, detach the electrical wires by removing the bottom cover plate.
Pry off the old snap ring beneath the sink with a flathead screwdriver, remove the mounting flange, and push the sink flange up through the drain opening. Use a putty knife to scrape all old, dried plumber’s putty and grime away until the sink opening is smooth and clean, as detailed in our guide on replacing an existing disposal.
Step-by-Step Guide to Installing the Sink Flange and Mounting Hardware
A watertight seal at the sink base prevents cabinet wood rot and slow floor leaks.
- Apply Sealant: Roll a handful of fresh plumber’s putty between your palms into a consistent rope roughly 1/2 inch thick. Press this rope evenly along the underside rim of the new sink flange.
- Seat the Flange: Press the flange firmly down into the cleaned sink drain hole. To keep the flange seated while you work underneath, place a towel inside the sink bowl and set the heavy new disposal on top of the flange to weigh it down.
- Stack Under-Sink Hardware: Moving beneath the sink, slide the rubber gasket (if provided) and fiber gasket over the exposed flange neck first. Next, slide the metal backup flange into place, followed by the three-bolt mounting ring.
- Snap the Ring: Spread the open ends of the wire snap ring and slide it up into the groove machined around the base of the sink flange neck until it snaps firmly into the channel.
- Tighten the Screws: Thread the three mounting screws through the mounting ring against the backup flange. Tighten each screw a few turns at a time in an alternating rotation. This ensures balanced upward pressure against the sink bottom without pinching the gasket. Clean away any excess plumber’s putty that squeezed out around the drain rim in the sink basin.
Review detailed step-by-step installation instructions if your sink basin has non-standard wall thicknesses.
Removing the Dishwasher Knockout Plug
If you are routing your dishwasher discharge line into the disposal, you must remove the factory-installed knockout plug inside the top lateral inlet. Leaving this plastic plug intact is one of the most frequent DIY errors—it causes wastewater to back up into the dishwasher tub at the end of a wash cycle.
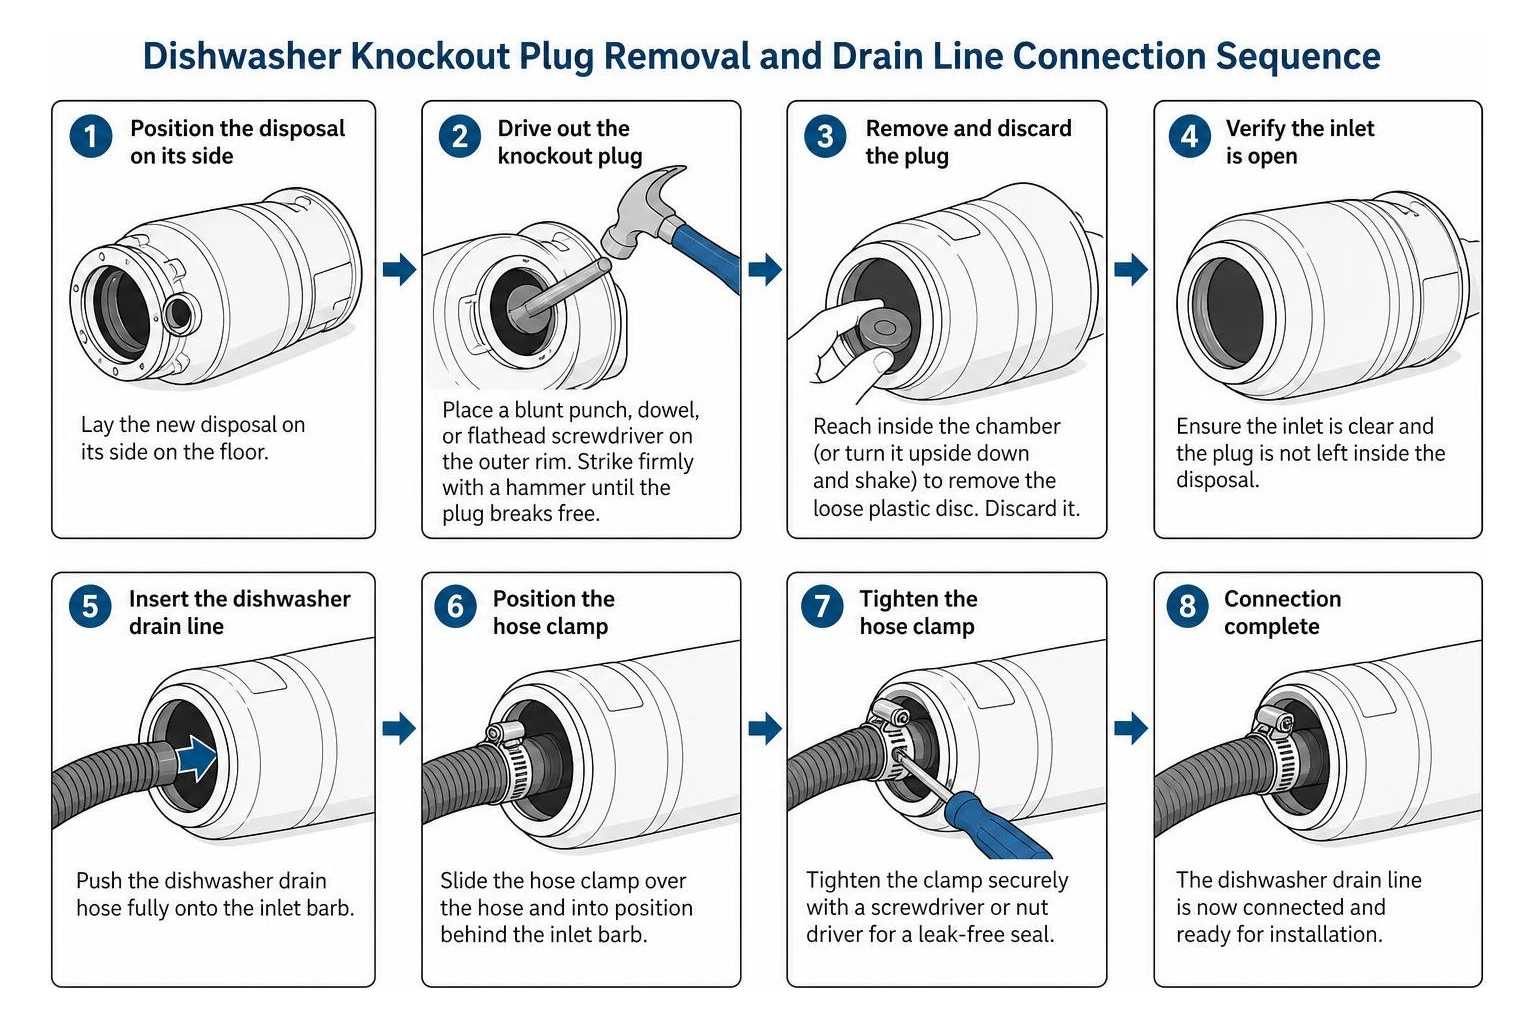
Lay the new disposal on its side on the floor. Place the tip of a blunt steel punch, wooden dowel, or sturdy flathead screwdriver against the outer rim of the plastic plug inside the inlet port. Strike the tool firmly with a hammer until the plug breaks free. Reach inside the disposal chamber (or turn it upside down and shake it) to retrieve the loose plastic disc. Never leave the loose disc inside the grinding chamber, as it will wedge under the impellers and jam the motor upon startup. Connect the dishwasher drain line securely using the steps outlined in our walkthrough for connecting dishwasher drain line.
Wiring, Mounting, and Plumbing Connections
Before hanging the heavy motor under the sink, complete all electrical connections while the unit is resting comfortably on your workspace.
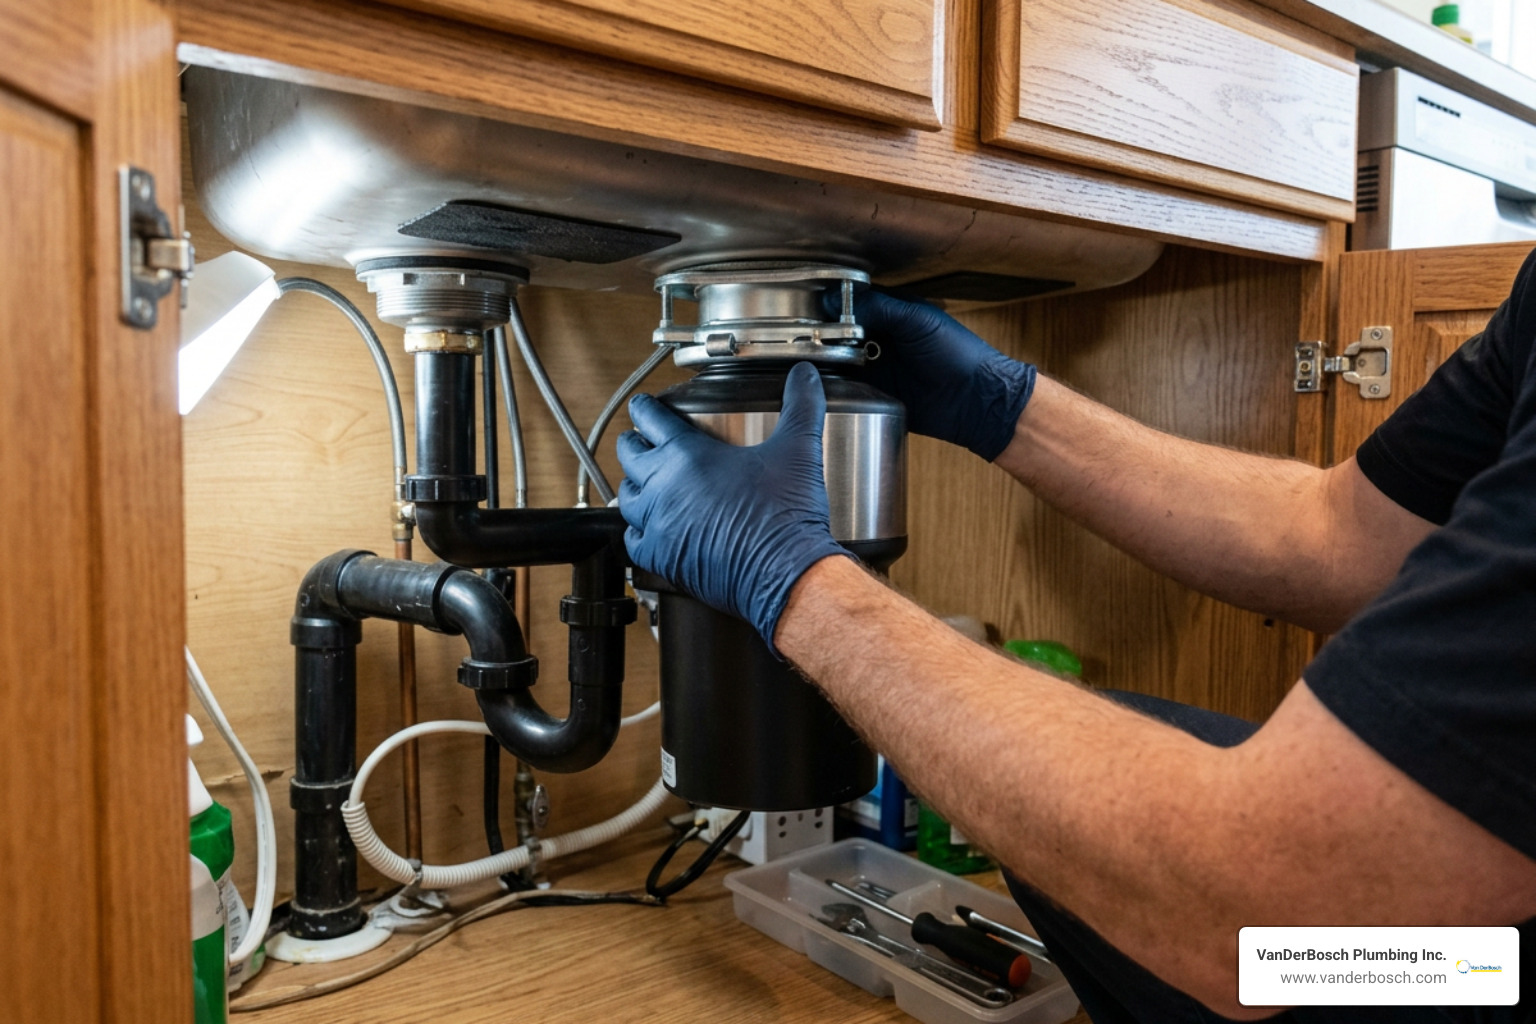
Remove the metal electrical cover plate on the base of the machine. Thread your power supply cable or cord kit through a certified strain-relief connector to protect the wires from sharp metal edges. Connect the matching wires using proper wire nuts: black (hot) to black, white (neutral) to white. Fasten the bare copper or green ground wire securely beneath the green grounding screw. Reinstall the bottom cover plate.
To mount the unit:
- Lift the disposal up to the mounting assembly.
- Align the three mounting ears on the disposal with the ramp tracks on the mounting ring.
- Rotate the lower mounting ring clockwise by hand until the ears engage the mounting tracks.
- Insert your screwdriver or disposal wrenchette into the mounting lug loop and turn firmly until the tabs snap past the locking ridge.
Connecting the Discharge Tube and P-Trap Drainage
Position the rubber gasket onto the disposal’s discharge outlet port, place the metal flange over the discharge elbow tube, and secure it firmly with the supplied bolts.
Rotate the disposal body slightly on its mounting ring to line up the discharge elbow cleanly with your home’s 1.5-inch drain pipe and P-trap. Avoid forcing pipes into alignment at awkward angles, as stressed joints develop leaks over time.
Never use flexible accordion-style drain extensions. The internal ridges in accordion pipes trap grease and food debris, creating foul odors and recurring clogs. Use smooth-walled PVC or ABS slip-joint fittings. Hand-tighten the slip nuts first, then add a quarter-turn with channel-lock pliers.
Testing and Finalizing the Garbage Disposal Set Up
Never turn on the breaker until you have conducted a comprehensive static leak test.
- Static Leak Test: Insert the sink stopper and fill the basin with 3 to 4 inches of cold water. Inspect underneath with a flashlight. Remove the stopper and allow the basin to drain rapidly under full water pressure while checking the sink flange, dishwasher inlet, discharge elbow, and P-trap slip nuts for drips.
- Electrical & Dynamic Test: Once the joints are confirmed dry, switch the circuit breaker back on. Turn on the cold water faucet at full stream, then flip the wall switch or press the countertop air switch. The motor should run smoothly with a clean, low hum.
- Safety Verification: Let the water run for 15 seconds after switching off the motor to ensure ground food particles flush completely past the P-trap.
For additional first-time sink configurations, reference our first-time installation guide.
Common Installation Mistakes and When to Call a Professional
Even seasoned DIYers can encounter hiccups during an appliance installation. Avoiding these common oversights ensures a reliable setup:
- Overtightening the Flange Screws: Cranking the three mounting screws down too hard can squeeze out all the plumber’s putty or warp the backup ring, resulting in an unsealed drain.
- Ignoring Drain Slope: If the wall outlet pipe sits higher than the disposal discharge, water will pool inside the unit, causing corrosion and foul odors.
- Electrical Circuit Overload: Disposals pull substantial startup amperage. They require a dedicated 15-amp or 20-amp, 120-volt grounded circuit. Sharing an ungrounded general-purpose outlet can trip breakers frequently.
- Chemical Cleaners: Never pour caustic chemical drain openers into a newly installed disposal, as harsh chemicals destroy rubber internal seals and mounting components.
Reviewing evaluating installation costs and general DIY setup guidelines can help you decide if tackling the project yourself is the best route. If your kitchen requires installing a brand-new dedicated electrical line, re-routing rough-in drain pipes inside the wall, or adapting complex double-sink configurations in historic homes across Cook County, professional assistance provides peace of mind.
Frequently Asked Questions About Garbage Disposal Installation
What is the difference between batch feed and continuous feed disposals?
Continuous feed disposals run continuously when an electrical switch is flipped, allowing you to feed food waste into the drain as long as the water runs. Batch feed models operate only when you load food scraps into the grind chamber and insert a specialized magnetic stopper lid into the drain neck, making them a safe choice for homes with young children.
Why is my new garbage disposal humming but not spinning?
A humming motor indicates that electrical power is reaching the unit, but the internal impeller plate is mechanically stuck. Turn off the wall switch and breaker. Insert the 1/4-inch hex wrenchette (included with your unit) into the center socket located on the bottom base of the disposal exterior. Rotate the tool back and forth to manually free the jam. If the motor shut down completely due to overheating, wait three minutes for the unit to cool and press the red thermal overload reset button on the bottom.
Can I install a garbage disposal without a dishwasher connected?
Yes. If you do not have an automatic dishwasher, leave the factory-installed dishwasher knockout plug untouched inside the disposal’s lateral inlet port. The factory seal prevents wastewater from leaking out of the disposal into your cabinet.
Conclusion
Installing a kitchen garbage disposal is a rewarding home improvement project that improves meal cleanup and reduces kitchen waste when executed with patience and the right techniques. By carefully preparing your drain layout, ensuring a watertight flange seal, and methodically testing your electrical and plumbing joints, you can achieve a professional-grade installation that performs reliably for over a decade.
If you run into stubborn corroded piping, unexpected electrical hurdles, or simply prefer having an expert handle the heavy lifting, our team at VanDerBosch Plumbing Inc. is here to help. We provide 24/7 licensed, background-checked residential plumbing services with transparent pricing across Chicago, Roselle, Niles, Winnetka, Melrose Park, Oakbrook Terrace, and surrounding Chicagoland communities. Explore our comprehensive professional plumbing services to schedule an inspection or installation today.