
Diagnosing Your Garbage Disposal: Repair vs. Replace
Before spending money on a new unit, it helps to confirm that changing out a garbage disposal is actually required. Most kitchen disposals have an average lifespan of 10 to 12 years. As they age, internal components wear down, and you will eventually face a decision between fixing a quick glitch or replacing the appliance entirely.
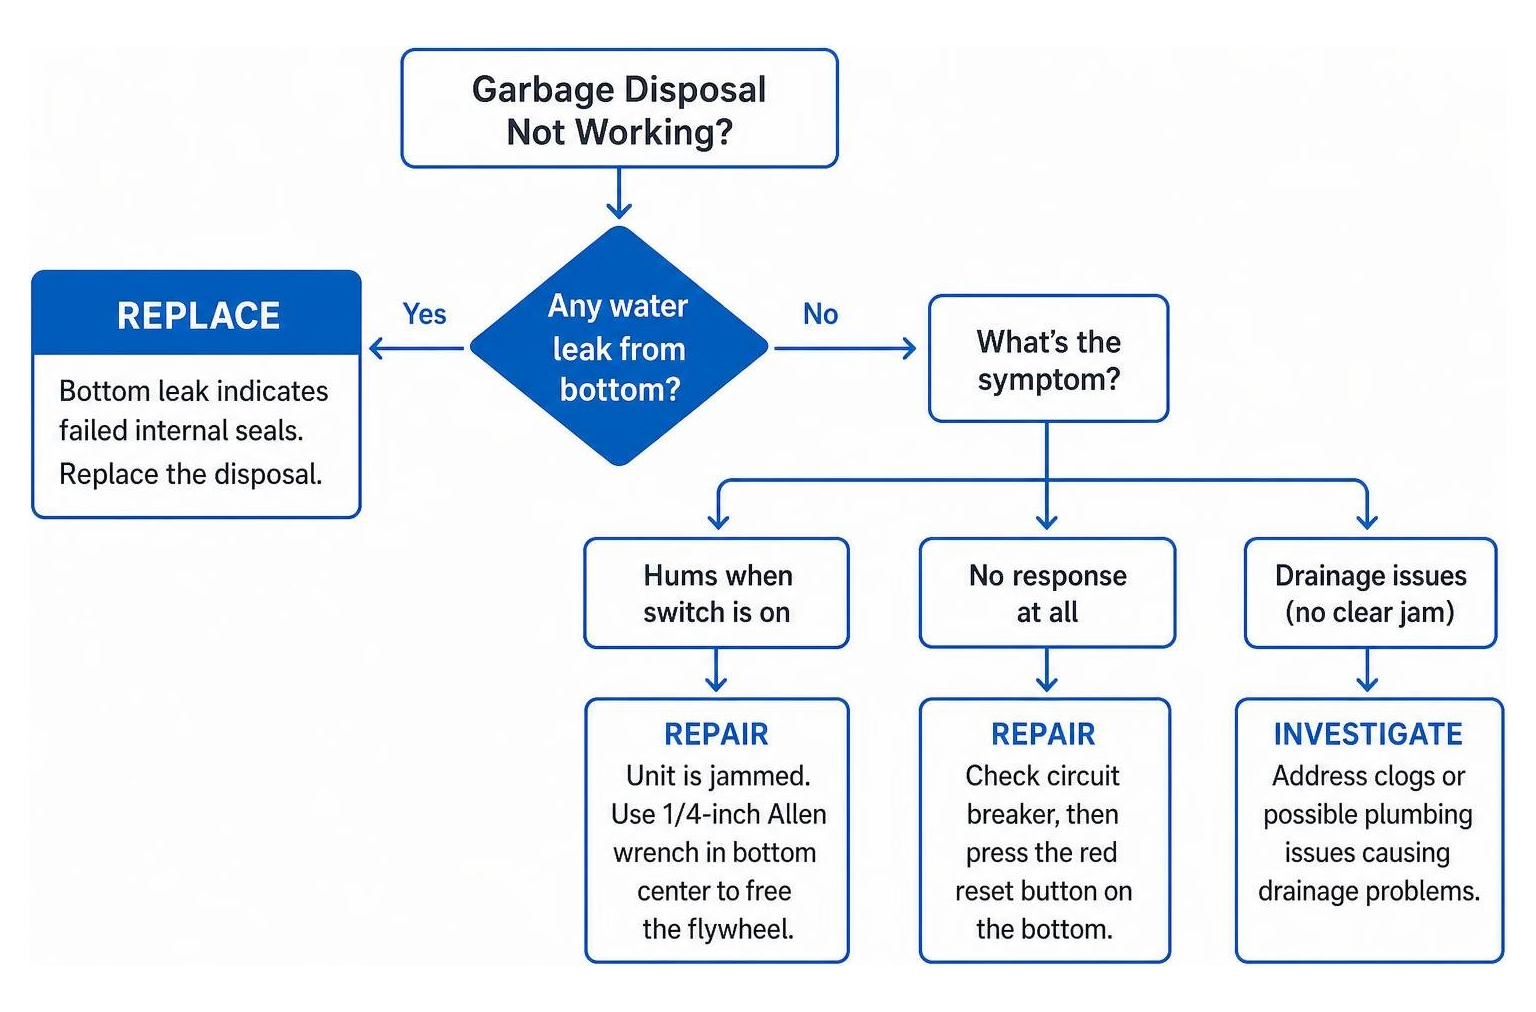
A key sign that you need a complete replacement is water leaking directly from the bottom housing of the unit. This usually indicates that the internal shaft seals have failed. Because these internal seals cannot be individually replaced, a bottom leak means water is passing through the electrical motor housing, creating an immediate hazard and signaling the end of the unit’s lifespan.
On the other hand, if your unit simply hums when you flip the switch, the motor is receiving power but the flywheel is mechanically jammed. You can often fix this without buying a new disposal by inserting a 1/4-inch Allen wrench into the manual breaker socket at the bottom center of the unit and twisting back and forth to clear the debris. If the disposal does not react at all, press the red reset button on the bottom housing after checking your main circuit breaker.
For persistent drainage issues without a clear mechanical fault, reviewing a clogged garbage disposal fix in chicago without the mess can help clear the line. However, if water is pooling inside your cabinet, utilizing services/water leak detection will help rule out hidden pipe cracks.
| Symptom | Probable Cause | Recommended Action |
|---|---|---|
| Drip from bottom housing | Failed internal motor seal | Replace disposal |
| Motor hums, no spinning | Foreign object jam | Clear with Allen wrench |
| No sound, no power | Tripped internal breaker | Push red reset button |
| Water leaking from top ring | Dried plumber’s putty | Reseal sink flange |
| Metal grinding noises | Broken shredder impeller | Replace disposal |
Required Tools and Sizing Selection
Choosing the Right Horsepower for Your Household
Selecting the proper motor size ensures your disposal can handle your daily food waste volume without frequent jams:
- 1/3 Horsepower: Entry-level units suited for single occupants or light usage. They struggle with tough items and lack robust sound insulation.
- 1/2 Horsepower: Ideal for 1- to 2-person households. This is the minimum size recommended if you have a dishwasher draining into the disposal.
- 3/4 Horsepower: The sweet spot for an average family of 3 to 4. These feature stainless steel grinding components, better sound proofing, and handle tough food scraps effortlessly.
- 1 Horsepower: Built for large families, heavy home cooking, or handling tough fibrous waste like corn husks and celery.
You will also choose between continuous feed (operates via a wall switch while water runs) and batch feed (operates only when a magnetic stopper is inserted into the drain). Continuous feed represents over 95% of residential installs due to its convenience.
Key Tools and Materials Needed
Having all necessary tools gathered beneath the sink before you start prevents frustrating delays mid-project.
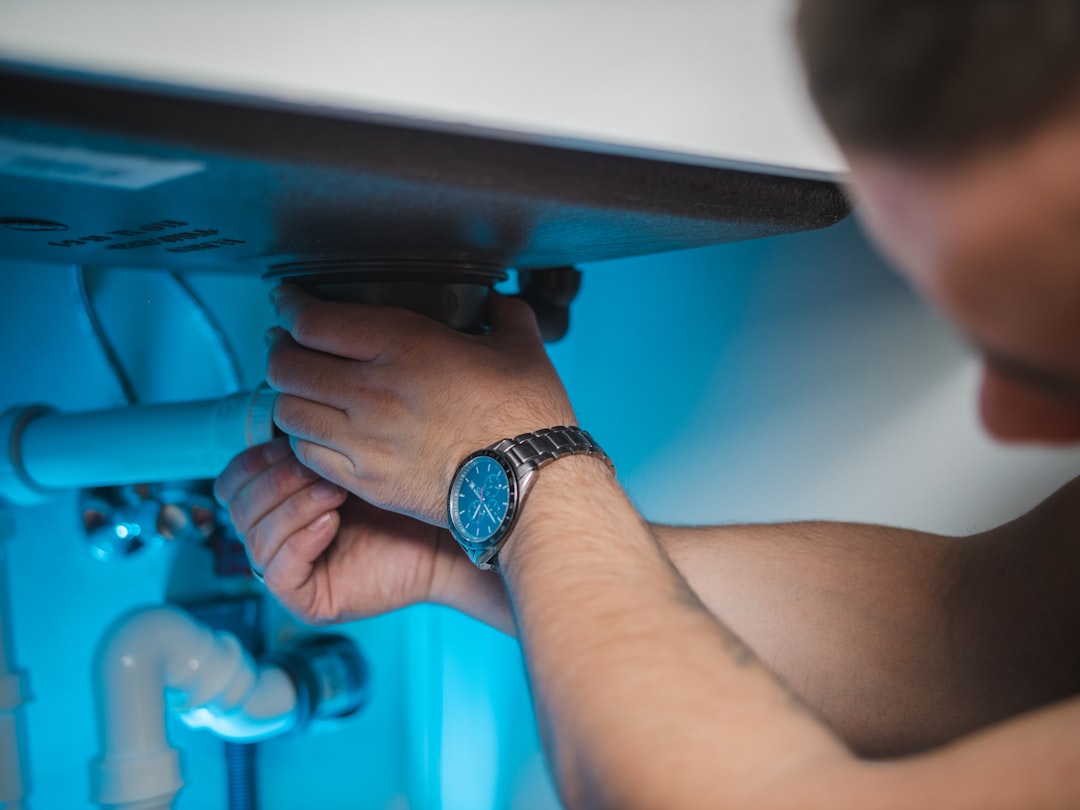
Assemble these essential items:
- Adjustable slip-joint pliers (Channel-lock style)
- Flathead and Phillips screwdrivers
- 1/4-inch Allen wrench (or the wrenchette included with the new unit)
- Plumber’s putty (0.1 kg or a small tub)
- Wire connectors (wire nuts) and strain relief clamp
- Non-contact voltage tester
- Catch bucket and several old towels
Step-by-Step Guide to Changing Out a Garbage Disposal
Preparing Your Workspace Before Changing Out a Garbage Disposal
Safety must always come first when handling under-sink electrical appliances. Start by switching off the electrical circuit breaker that powers your garbage disposal at the main electrical panel. Do not rely solely on the under-sink wall switch. After flipping the breaker, test the wall switch to verify the motor does not activate, and use a non-contact electrical voltage tester on the wiring under the sink to confirm zero current.
Next, clear out all cleaning supplies, sponges, and storage bins from under the sink. Lay down old towels and position a wide catch bucket directly beneath the P-trap to capture any standing waste water. Reviewing kitchen sink plumbing 101 navigating the pipes below can provide a quick refresher on pipe layouts before you disconnect any fittings.
Removing the Old Unit When Changing Out a Garbage Disposal
With the bucket positioned underneath, use your adjustable slip-joint pliers to loosen the slip nuts on the PVC or brass P-trap and disconnect the drain pipe from the disposal’s discharge elbow. Unscrew the hose clamp securing the dishwasher drain hose to the upper side inlet, if applicable, and pull the hose free.
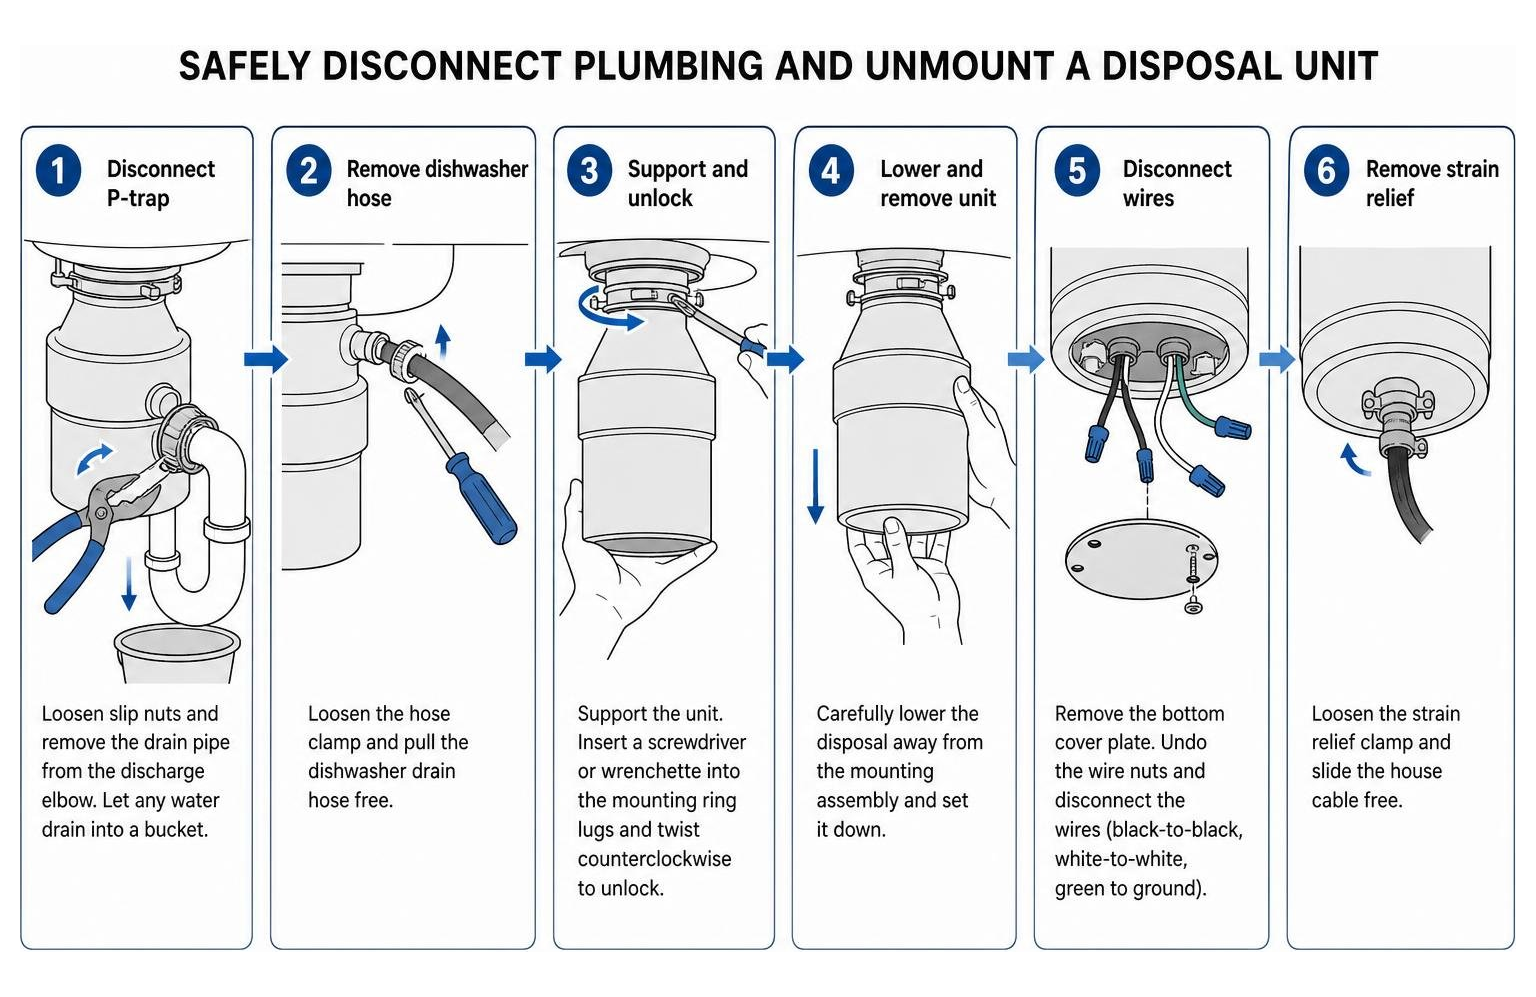
A typical residential disposal weighs between 8 and 15 pounds. Support the bottom of the unit with one hand, or stack scrap wood or a sturdy box underneath it to catch its weight. Insert a screwdriver or wrenchette into the lower mounting ring lugs at the top of the unit. Twist the ring counterclockwise to unlock the disposal tabs from the mounting assembly. Carefully lower the unit away from the sink drain.
Once down, flip the old disposal over to access the metal electrical cover plate on the bottom. Remove the retaining screw, pull off the cover plate, and disconnect the wire nuts connecting the house wires to the disposal leads (typically hot black-to-black, neutral white-to-white, and green ground to the grounding screw). Loosen the strain relief clamp and slide the house cable free.
Installing the New Sink Flange and Mounting Hardware
If your new disposal is from the same manufacturer and uses an identical mounting system (such as the standard 3-bolt Quick Lock ring), you can leave the existing sink flange intact and save roughly 30 minutes. However, if you are changing brands or if the old flange is corroded or leaking, you must replace it.
To replace the flange:
- Unscrew the three mounting bolts on the old upper ring beneath the sink evenly.
- Pry off the snap ring at the bottom of the flange neck using a flathead screwdriver.
- Slide off the backup flange, fiber gasket, and mounting ring, then push the old sink flange up through the drain hole.
- Thoroughly scrape away all old plumber’s putty from around the sink drain opening using a plastic putty knife, and clean the rim with rubbing alcohol.
- Roll a 1/2-inch thick rope of fresh plumber’s putty about 10 inches long. Wrap this rope tightly around the underside shoulder of the new sink flange.
- Drop the new flange firmly into the sink opening from above. Place a towel inside the flange basin and set your new, unmounted disposal unit on top of it to act as a weight, holding the flange tight against the sink deck.
- From underneath the sink, slide the fiber gasket, metal backup flange, and mounting ring onto the protruding flange neck.
- Snap the spring retention ring into the groove on the flange neck to lock the pieces in place.
- Tighten the three mounting bolts evenly in a circular sequence until the assembly is firmly clamped. Putty will squeeze out around the top drain flange inside the sink; wipe away this excess putty with your fingers.
Wiring and Preparing the New Garbage Disposal
Lay the new disposal on its side on a workbench or flat floor space. Remove the bottom electrical plate. If your unit uses a standard plug-in wall cord kit, attach the cord kit using the included wire connectors (black-to-black, white-to-white, green ground wire fastened securely to the green grounding screw). Tighten the strain relief clamp where the wire enters the housing to prevent accidental tugs from pulling the wires loose.
If your home utilizes a direct hardwired connection, perform these same connections with your existing house cable once the unit is placed under the cabinet.
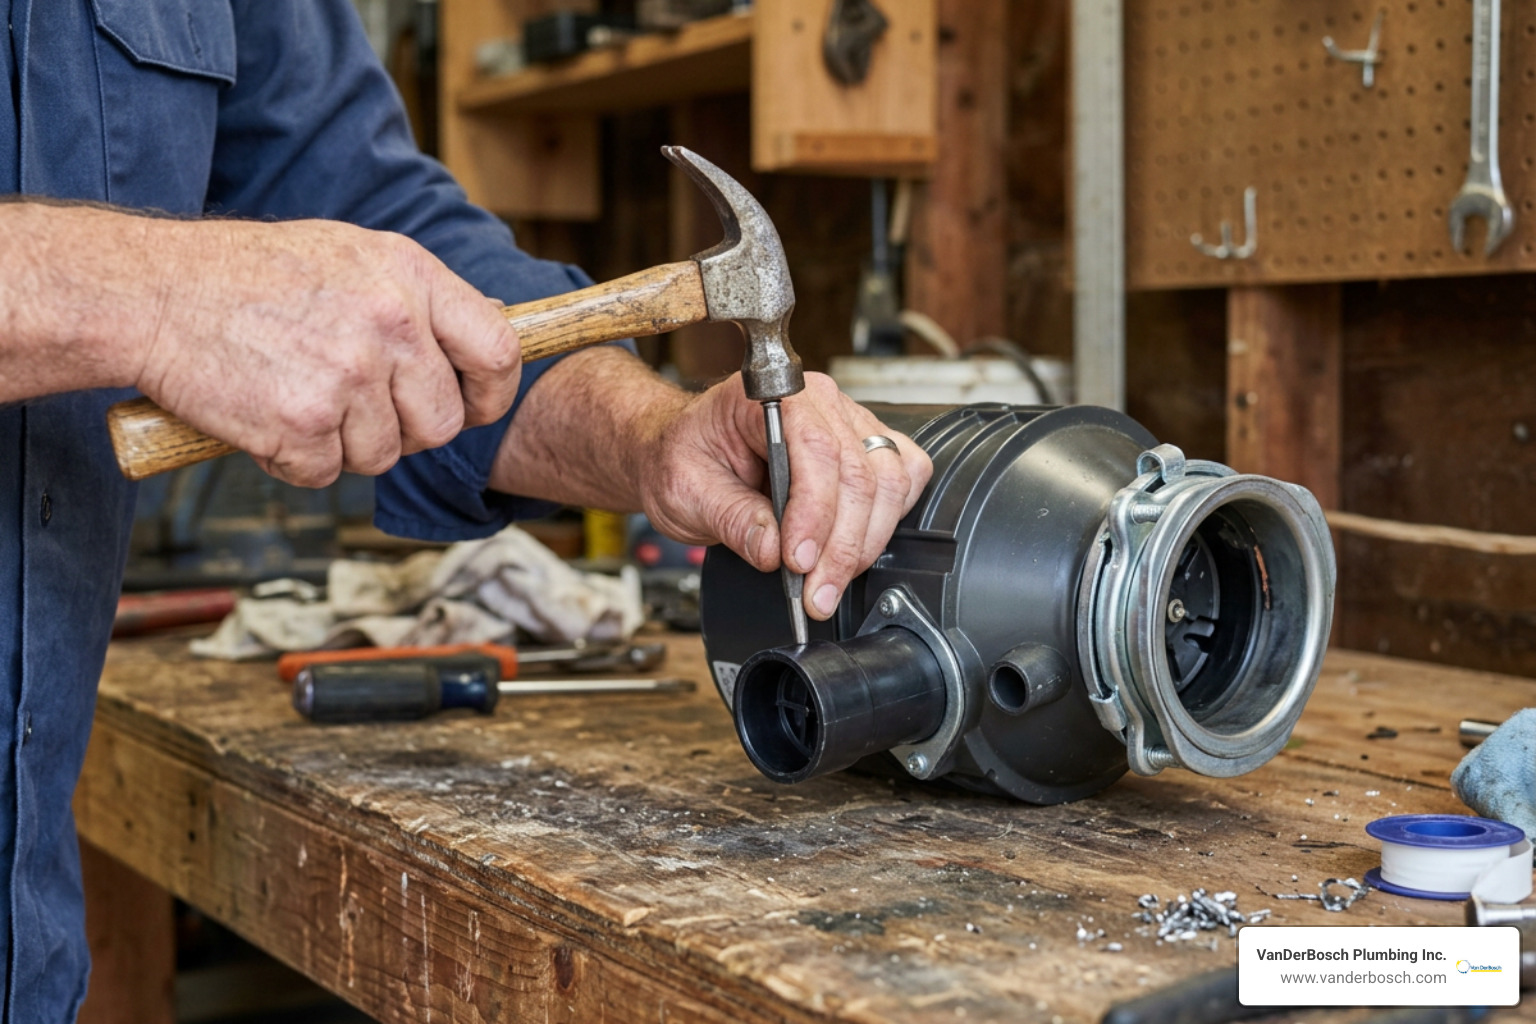
CRITICAL STEP: If you have a dishwasher connected to your disposal, you must remove the internal plastic knockout plug inside the small top inlet nipple. Insert a screwdriver or steel punch into the dishwasher drain nipple and tap it firmly with a hammer until the plastic plug breaks free into the grinding chamber. Reach inside the disposal chamber (or flip the unit upside down) and retrieve the loose plastic disc. For detail on proper hose routing, see how to connect your dishwasher drain to a garbage disposer.
Mounting, Plumbing Hookup, and Leak Testing
Lift the prepared disposal up to the mounting assembly under the sink. Align the three mounting tabs on the disposal’s upper collar with the slide-up ramps on the mounting ring.
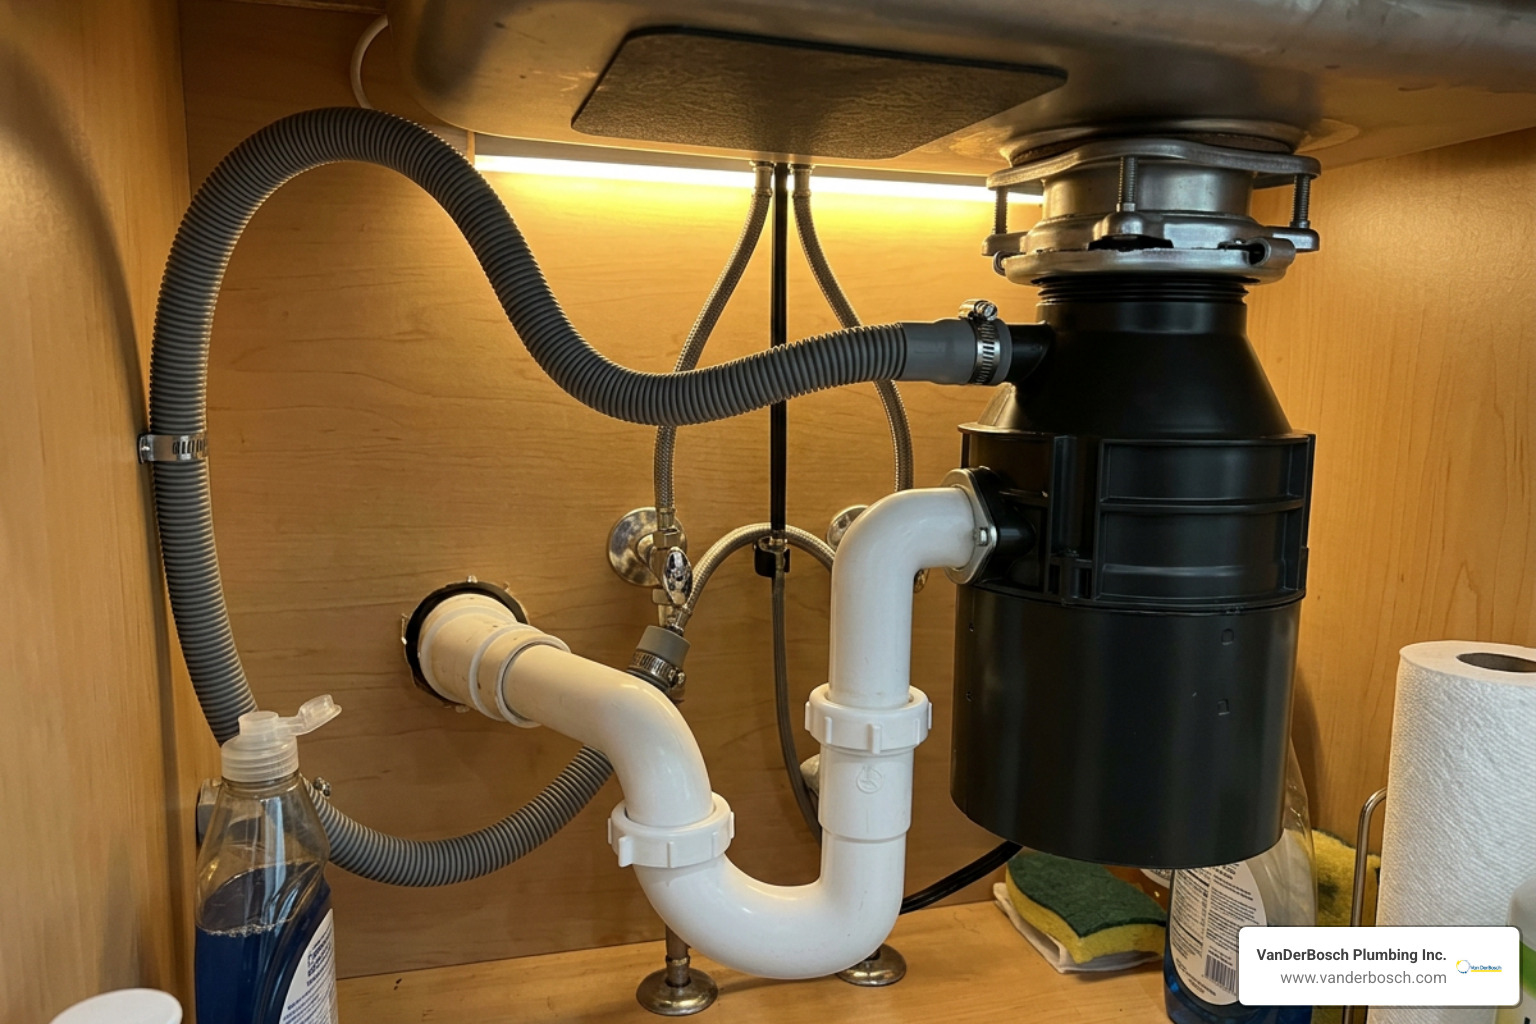
Rotate the lower mounting ring clockwise until the tabs engage with the ramps. Insert your screwdriver or wrenchette into one of the ring lugs and turn firmly until the tabs lock over the ridge stops with an audible click.
Attach the rubber gasket and plastic discharge elbow to the side outlet of the disposal using its metal flange plate and bolts. Reattach your P-trap, adjusting slip nuts by hand and completing a quarter-turn with pliers. Reconnect the dishwasher hose using a worm-drive hose clamp, ensuring the hose forms a high loop under the countertop to prevent dirty sink water from siphoning into your dishwasher.
Before turning the circuit breaker back on, test for leaks:
- Place a dry paper towel under all fittings.
- Insert the sink stopper, fill the sink basin with 3 to 4 inches of cold water, then pull the plug.
- Observe all joints—the sink flange rim, dishwasher nipple, side discharge elbow, and P-trap—for any signs of water droplets.
- Once verified watertight, restore power at the main circuit breaker panel, run cold water down the drain, and switch on the unit to test motor operation.
Frequently Asked Questions About Disposal Replacement
How long does replacing a garbage disposal take?
A same-mount direct replacement (where you keep the existing sink flange and mounting assembly) typically takes 30 to 90 minutes for a DIY homeowner. If you are switching brands and must remove the old flange, scrape off old putty, and rebuild the mounting ring assembly, expect the project to take between 1.5 and 2 hours.
What are the most common mistakes to avoid during installation?
- Forgetting the dishwasher knockout plug: Leaving this plug inside the nipple causes dishwasher backup and sink flooding the first time your dishwasher drains.
- Insufficient plumber’s putty: Using too little putty or applying it to a dirty drain rim creates persistent flange leaks into your under-sink cabinet.
- Overtightening PVC slip nuts: Excess force cracks plastic drain nuts or distorts rubber washers, creating slow leaks.
- Failing to turn off power at the main breaker: Relying solely on the wall switch leaves you exposed to electrical hazard if someone flips the switch while you work.
How do I properly dispose of the old garbage disposal?
Old disposals consist largely of recyclable metals (copper wiring and steel/iron housing) alongside plastic components. Do not throw the old unit directly into your residential trash bin without checking local rules. Review guidelines such as Refuse & Recycling | Winnetka, IL or your municipal waste division instructions for electronic scrap recycling options.
Conclusion
Changing out a garbage disposal is a rewarding DIY task that can save you significant money in labor costs while keeping your kitchen sink running smoothly. By taking your time to prepare the workspace, verifying power shutoff, sealing the sink flange correctly, and removing the dishwasher knockout plug, you can achieve a clean, leak-free installation in an afternoon.
However, if your under-sink area features corroded drain lines, if you need new electrical circuits installed, or if you simply prefer professional hands to guarantee the job, don’t hesitate to reach out. Our team at VanDerBosch Plumbing Inc. provides licensed residential plumbing services throughout Cook County and the surrounding Chicagoland communities. We offer 24/7 availability, background-checked technicians, transparent pricing, and a 100% satisfaction guarantee. Feel free to explore our professional plumbing services whenever you need expert support.