Why Water Heater Installation Is More Complex Than It Looks
Water heater installation is the process of removing your old unit and connecting a new one to your home’s water, gas, or electrical systems — safely and up to code. Here’s a quick overview of what it involves:
- Choose the right unit — gas, electric, heat pump, or tankless
- Shut off utilities — water supply, gas valve, or circuit breaker
- Drain and remove the old tank
- Position and connect the new unit — water lines, fuel source, venting
- Test for leaks and proper operation
- Get required permits and inspections (often mandatory in Illinois)
Most homeowners don’t think about their water heater until something goes wrong. Then suddenly — no hot water, a puddle on the floor, or worse — and you need answers fast.
Water heaters typically last 10 to 15 years. When yours fails, replacing it quickly and correctly matters. A bad installation can mean gas leaks, electrical hazards, water damage, or a voided warranty.
For Chicagoland homeowners and business owners, the stakes are especially real. Local codes, permit requirements, and older home infrastructure can all turn a “simple swap” into a complicated job.
I’m Hugh Hodur, President of VanDerBosch Plumbing, and I’ve overseen hundreds of water heater installation projects across the Chicagoland area — from straightforward tank replacements to complex tankless conversions. In this guide, I’ll walk you through everything you need to know to get it done right.

Choosing the Right System for Your Water Heater Installation
Before we ever pick up a pipe wrench, we have to make sure you have the right “engine” for your home’s hot water needs. Selecting the wrong unit for a water heater installation can lead to cold showers during the morning rush or skyrocketing utility bills.
In the Chicagoland area—from the historic homes of Hyde Park to the newer builds in Mount Prospect—we see three primary fuel sources: gas, electric, and heat pump. We also help homeowners decide between traditional tanks and modern tankless systems.
- Gas Water Heaters: These are incredibly common in Chicago and suburbs like Niles and Winnetka. They use a burner to heat the water and require a vent to exhaust combustion gases.
- Electric Water Heaters: These use internal heating elements. They are often simpler to install because they don’t require venting, but they can be more expensive to operate depending on local electricity rates.
- Tankless Water Heaters: These units heat water on demand. While they have a higher upfront cost, they offer an endless supply of hot water and take up much less space. You can learn more in our guide to Tankless Water Heaters 101.
- Heat Pump (Hybrid) Water Heaters: These are the “Teslas” of the water heater world. They pull heat from the surrounding air to warm the water.
When Choosing the Right Type of Water Heater for Installation, capacity is key. A household of two or three people usually needs a 30- to 40-gallon tank, while a family of four or more should look at 50 gallons or higher.
It is also important to note that units manufactured after 2015 are physically larger than older models due to increased insulation requirements. If your old 40-gallon tank was a tight fit in a Melrose Park crawlspace, a new one of the same capacity might not fit in the exact same spot!
| Feature | Gas Tank | Electric Tank | Heat Pump (Hybrid) | Tankless (Gas) |
|---|---|---|---|---|
| Upfront Cost | Moderate | Lower | Higher | Highest |
| Efficiency | Moderate | High | Ultra-High | High |
| Installation Complexity | High (Venting/Gas) | Moderate (Wiring) | Moderate | Very High |
| Life Expectancy | 10-15 Years | 10-15 Years | 10-15 Years | 20+ Years |
Understanding Heat Pump Water Heater Installation
If you’re looking to slash your carbon footprint and your bills, a heat pump water heater is a fantastic choice. These units can reduce energy costs by up to 60%. However, the water heater installation process for these is unique.
Because they pull heat from the air, they need room to breathe. Industry standards recommend at least 450 cubic feet of air space—roughly the size of a small utility room. If you’re tucking it into a tight closet in a West Ridge condo, we may need to install louvered doors to ensure proper airflow.
We also pay close attention to the operational modes (Economy, Heat Pump Only, or High Demand) and often install a thermostatic mixing valve. By heating the water to 140°F (which kills bacteria like Legionella) and then mixing it with cold water at the outlet to reach a safe 120°F, we can effectively increase your hot water capacity by 10 to 15 gallons without needing a larger tank.
The Step-by-Step Water Heater Installation Process

A successful water heater installation starts with a clean exit for the old unit. We don’t just “rip and replace.” We follow a disciplined process to protect your home.
Step 1: Utility Shut-Off
Safety is our first priority. We shut off the gas valve or flip the dedicated 30A/40A circuit breaker. We also close the cold water supply valve to the tank.
Step 2: Drainage
We attach a high-grade garden hose to the drain valve at the bottom of the tank. If there is heavy sediment buildup—common in older Chicago plumbing—the tank might not drain easily. We sometimes have to “pulse” the water pressure to break up the gunk. Draining usually takes 20 to 40 minutes.
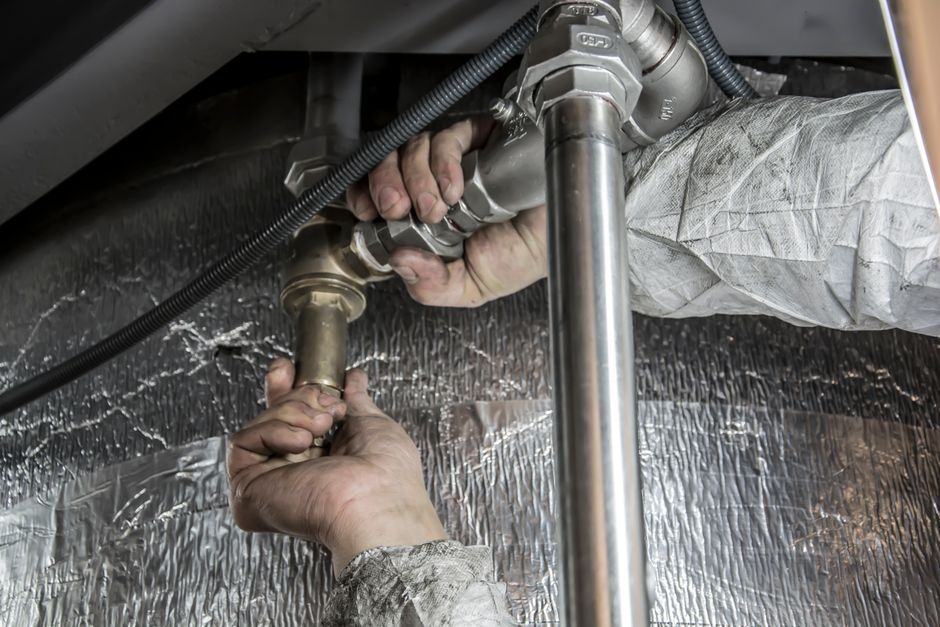
Step 3: Disconnection
Once empty, we disconnect the water lines, gas lines (using two wrenches to avoid stressing the valve), and the exhaust vent.
Step 4: Positioning and Leveling
We slide the new unit into a sturdy drain pan. This is vital; if the tank ever leaks, the pan catches the water and directs it to a floor drain, preventing structural damage. We use shims to ensure the tank is perfectly level. For more details on these early phases, check out this Water Heater Installation Basics: A Step-By-Step Guide.
Essential Steps for Gas Water Heater Installation
Installing a gas unit in places like Roselle or Elmhurst requires a sharp eye for ventilation. If the exhaust isn’t perfect, carbon monoxide can backdraft into your living space.
- Venting: We ensure the vent pipe is securely attached to the draft hood with sheet metal screws. The vent should slope upward at least 1/4 inch per foot.
- Gas Line Connection: We use fresh pipe joint compound or gas-rated Teflon tape.
- Leak Testing: This is a non-negotiable step. We apply a soapy water solution to every joint. If we see bubbles, there’s a leak that needs immediate fixing.
- Pilot Ignition: Once we’re certain the tank is full of water (never dry-fire a heater!), we light the pilot or engage the electronic ignition and check the “draft” using a smoke test to ensure exhaust is moving up the chimney correctly.
Our team at VanDerBosch Plumbing provides comprehensive Water Heater Services to ensure these gas connections meet every local safety code.
Key Requirements for Electric Water Heater Installation
Electric water heater installation might seem simpler because there’s no fire involved, but the electrical load is significant.
- Wiring: Most residential units require a dedicated 240-volt circuit with a 30-amp or 40-amp breaker. We verify that the wiring gauge is sufficient for the unit’s draw.
- Dry-Fire Prevention: This is the most common DIY mistake. If you turn the power on before the tank is 100% full of water, the upper heating element will burn out in seconds. We always run the hot water faucets in the house until the air stops sputtering before we flip the breaker.
- Voltage Testing: We use non-contact voltage testers to ensure the unit is properly grounded and receiving the correct power.
If you’re noticing your current unit is struggling, it might be time to look for Signs Your Water Heater May Need Repair or Replacement.
Safety Standards and Common Installation Mistakes
In our years of service in Chicagoland, we’ve seen some “creative” DIY attempts that were frankly dangerous. To keep your home safe, we strictly adhere to modern plumbing standards.
The Role of the T&P Valve
The Temperature and Pressure (T&P) relief valve is your tank’s “emergency exit.” If pressure builds too high, this valve opens to prevent a tank explosion. We always install a discharge pipe that ends 1 to 6 inches above the floor drain.
Why You Need an Expansion Tank
Many homes in Cook County have “closed” plumbing systems (meaning there’s a backflow preventer or pressure-reducing valve). When water heats up, it expands. Without an expansion tank, that pressure has nowhere to go and can cause your tank to fail prematurely or your faucets to drip. If you’re wondering, “Why is my water heater leaking?“, a lack of an expansion tank is often the culprit.
Preventing Galvanic Corrosion
When you connect a copper pipe directly to a steel tank, a chemical reaction called galvanic corrosion occurs. This can eat through your pipes in just 2-3 years. We always use dielectric unions or plastic-lined nipples to keep these metals separated and your system rust-free.
Professional vs. DIY: Costs and Considerations
We get it—saving money is great. But water heater installation is an intermediate-to-advanced project that carries real risks.
- DIY Costs: You might spend $100–$300 on materials (connectors, valves, venting) plus the cost of the unit itself. It typically takes a DIYer a full day to complete.
- Professional Costs: A professional installation generally ranges from $800–$2,500 including labor, materials, and the unit. While higher, this includes the peace of mind that comes with a warranty and code compliance.
In many jurisdictions, like Chicago and Oakbrook Terrace, gas water heater installations require a permit and an inspection. A professional plumber handles the paperwork and ensures the job passes the city inspector’s scrutiny. Furthermore, many manufacturers will void your warranty if the unit isn’t installed by a licensed pro.
Deciding whether to fix or swap? Our guide on When Should Homeowners Break Up With Their Water Heaters? can help you weigh the costs.
Frequently Asked Questions about Water Heater Installation
How long does a typical installation take?
For a standard tank-to-tank replacement where the fuel source stays the same, a professional team can usually finish the job in 2 to 4 hours. Conversions (like moving from a tank to a tankless system) can take a full day because we have to upsize gas lines and reroute venting.
Do I need a permit for a new water heater in Illinois?
Yes, in most Chicagoland municipalities, a permit is required for gas water heaters. This ensures that the venting and gas lines are safe for your family. We handle the permitting process for our customers to make the experience as stress-free as possible.
Why is an expansion tank necessary for my home?
As we mentioned earlier, water expands when heated. If your plumbing system is “closed,” that extra volume creates immense pressure. An expansion tank acts as a shock absorber, protecting your heater and your pipes from stress and leaks.
Conclusion
At VanDerBosch Plumbing Inc., we believe that a water heater installation shouldn’t be a source of stress. Whether you’re in the heart of Ukrainian Village, the quiet streets of Sauganash, or out in Melrose Park, you deserve reliable hot water and a safe home.
We offer:
- 100% Satisfaction Guarantee: We aren’t happy until you are.
- 24/7 Availability: Because water heaters never break at a “convenient” time.
- Transparent Pricing: No hidden service charges or “gotcha” fees.
- Expert Technicians: Our team is background-checked and highly experienced in the specific needs of Chicagoland homes.
If you’re ready for a worry-free experience, contact us for Professional Water Heater Installation Services. We’ll make sure your new system is sized perfectly, installed safely, and ready to provide years of comfort for you and your family.