
When a Pipe Bursts, Every Second Counts
Knowing how to fix burst pipes quickly can mean the difference between a $500 repair and a $20,000 restoration. A half-inch supply line at normal household pressure can dump 400–600 gallons of water into your home per hour. That’s enough to saturate drywall, warp hardwood floors, and create mold conditions — all before a plumber arrives.
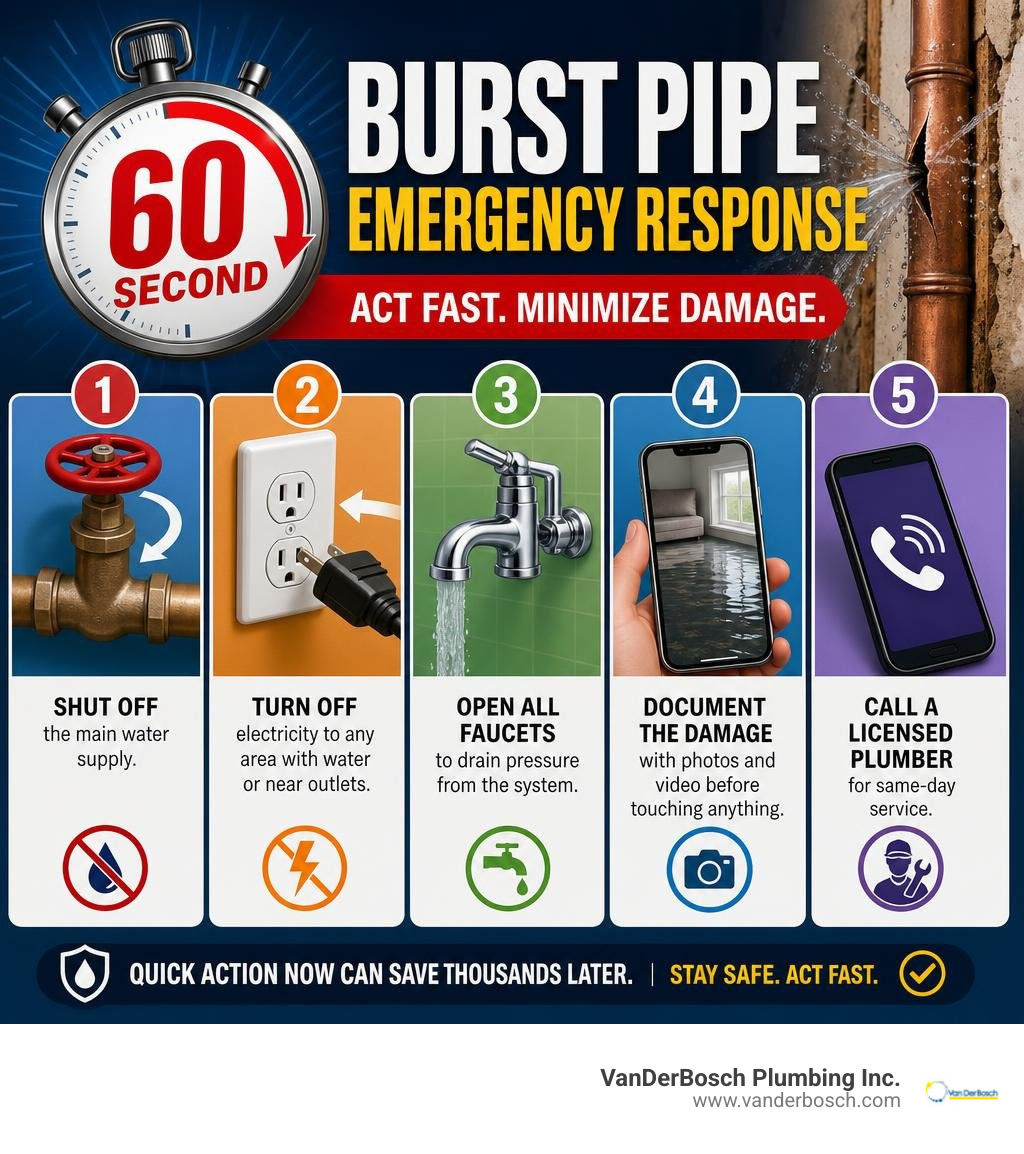
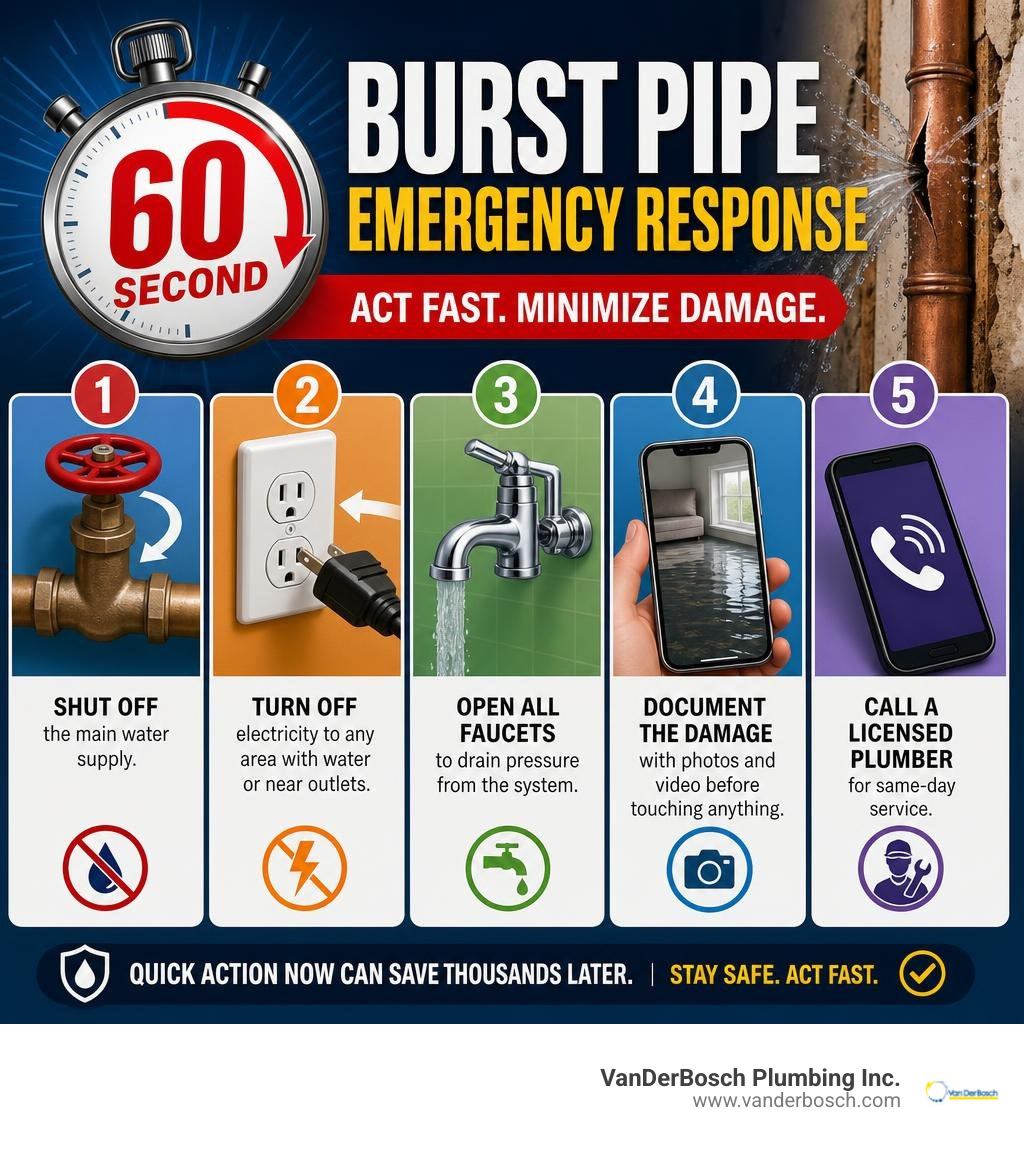
Here’s what to do right now if a pipe just burst:
- Shut off the main water supply — turn the valve clockwise until it stops
- Turn off electricity to any area where water is present or near outlets
- Open all faucets to drain pressure from the system
- Document the damage with photos and video before touching anything
- Call a licensed plumber for same-day service
If you can do those five things in the first few minutes, you’ll dramatically limit the damage.
This guide walks you through every step — from that first panicked moment to a permanent repair you can trust.
I’m Hugh Hodur, President of VanDerBosch Plumbing Inc., and I’ve led our team through hundreds of burst pipe emergencies across the Chicagoland area — from frozen pipe splits in January to corroded line failures in older homes. From that hands-on experience with fix burst pipes situations of every type, I’ll show you exactly what works, what doesn’t, and when to call for backup.
Key terms for fixing burst pipes:
Emergency Response: What to Do the Moment a Pipe Bursts
When water is actively cascading through your ceiling or pooling across your basement floor, panic is your worst enemy. A systematic, rapid response is your shield. By taking immediate control of the situation, you can protect your property and set up a smoother cleanup and repair process.
For residents in our local service areas, staying informed about municipal resources like the Cook County Leak Repair program can also provide guidance on broader water system issues. However, when the leak is inside your home, the responsibility to act falls squarely on you.
Safely Shutting Off Water and Electricity
The single most critical action is to stop the flow of water.
Locate your home’s main water shut-off valve. In most Chicagoland homes — whether you are in a bungalow in Sauganash or a historic home in Hyde Park — this valve is located in the basement, utility room, or crawlspace, typically near the water meter where the main line enters the house.
- Gate Valves: If you have an older gate valve (which looks like a round wheel), turn it clockwise (to the right) until it stops. Be gentle; older gate valves can seize or snap if forced too hard. We recommend exercising these valves once a year to prevent sticking.
- Ball Valves: If you have a modern ball valve, turn the lever handle 90 degrees so it runs perpendicular to the pipe. This instantly shuts off the flow.
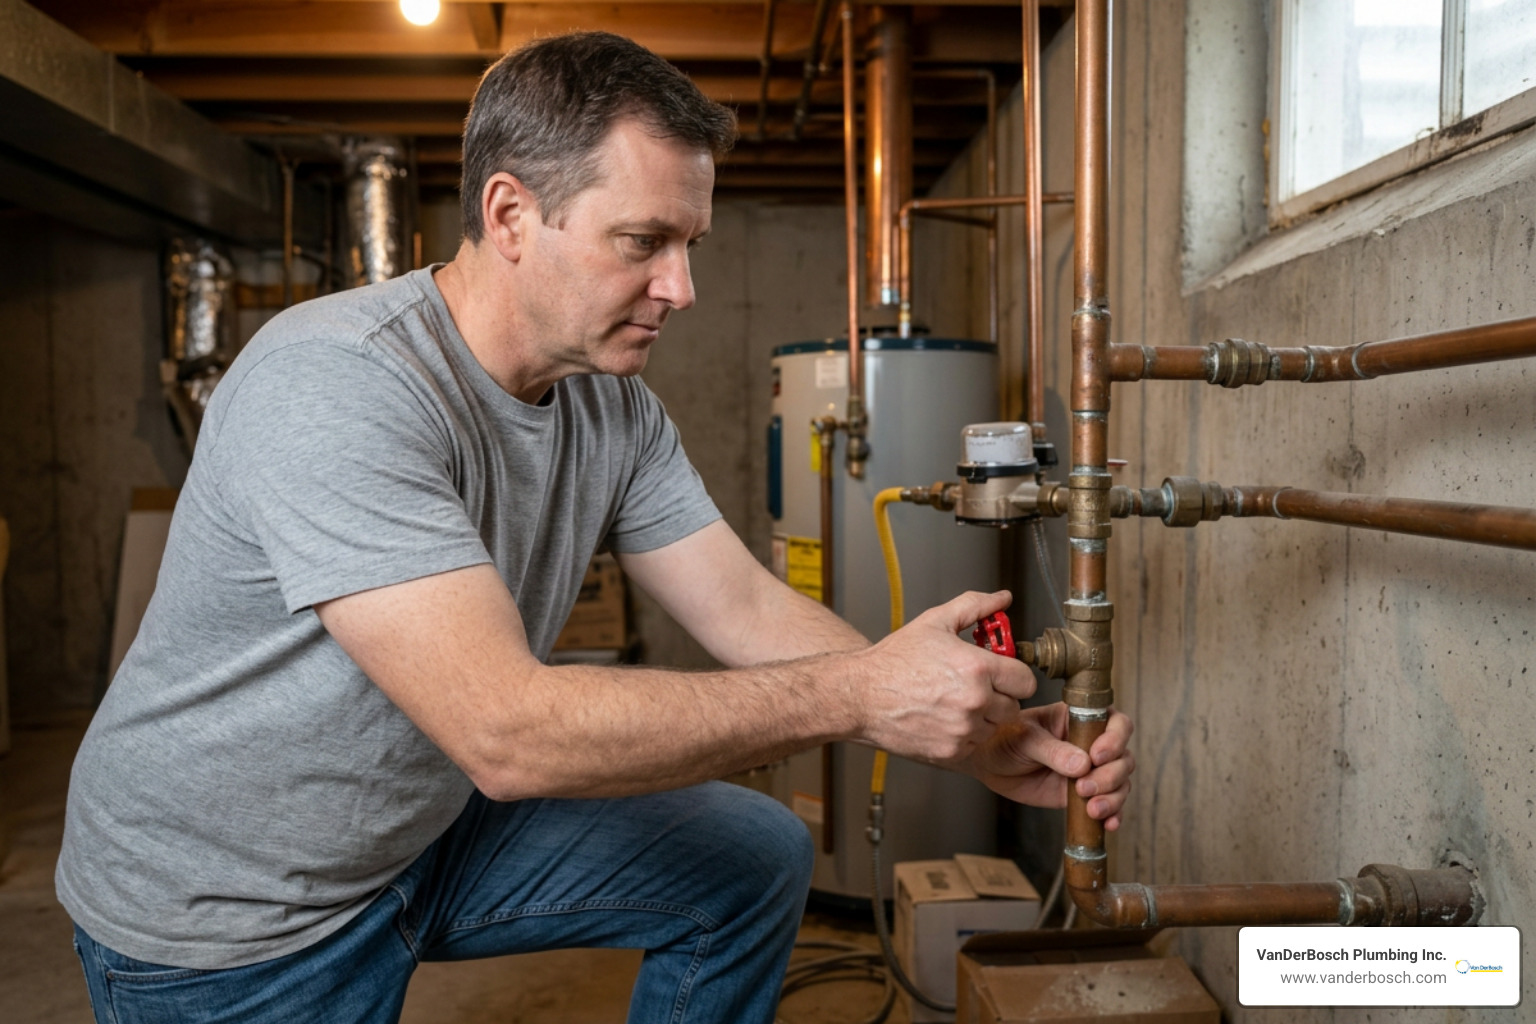
Crucial Safety Warning: Water and electricity are a deadly combination. If water is leaking near outlets, light fixtures, appliances, or your electrical panel, do not step into the water or touch any switches. Go directly to your main electrical panel (breaker box) and shut off the circuits to the affected areas. If you cannot safely reach the breaker box without walking through standing water, do not risk it. Evacuate the home and call for emergency assistance immediately.
Draining the System to Relieve Pressure
Once the main water supply is shut off, there are still 5 to 15 gallons of pressurized water sitting inside your home’s pipes. If you do not drain this water, it will continue to leak out of the burst section.
To relieve this pressure, start at the highest point of your home (such as a second-floor bathroom) and open the faucets completely. Then, go to the lowest level (usually a basement utility sink or laundry tub) and open those faucets as well. Finally, flush all the toilets in the house.
This process lets gravity pull the remaining water safely out of your faucets rather than pushing it out of the rupture in your wall or ceiling.
Why Pipes Burst: Common Causes and Prevention
Pipes do not burst without a reason. Understanding the physics behind plumbing failures is the key to preventing them from happening again. To dive deeper into the science of plumbing failures, you can read our comprehensive guide on Why Do Pipes Burst?.
How to Prevent Frozen Pipes in Cold Weather
In our region, sub-zero winter temperatures are the primary cause of burst pipes. When water freezes, it expands by approximately 9.05% in volume. This expansion doesn’t actually pop the pipe at the point of freezing; rather, the ice block acts as a solid plug. As the ice expands, it pushes liquid water down the line against closed valves or bends, creating internal pressures ranging from 2,000 to 30,000 PSI. The pipe eventually ruptures at its weakest point, which is often a joint or an un-insulated bend downstream.
To protect your home during cold snaps, read our guide on Frozen Pipes in Chicago IL: What Homeowners Need to Know.
Here are the most effective preventive habits:
- Keep the Heat Up: Never set your thermostat lower than 55°F, even when traveling. In poorly insulated properties, we recommend keeping it at 60°F or higher during extreme cold snaps.
- Open Cabinet Doors: Open kitchen and bathroom cabinet doors on exterior walls to let warm room air circulate around the pipes.
- Let Faucets Drip: Allow a slow, steady trickle of water to run from faucets connected to vulnerable exterior-wall pipes. Moving water is much harder to freeze.
- Insulate Exposed Lines: Wrap foam pipe insulation (which costs about $0.50 to $3.00 per linear foot) around pipes in unheated crawlspaces, attics, and basements.
Identifying Vulnerable Pipe Materials
Different pipe materials react uniquely to environmental stressors, age, and pressure. Knowing what kind of pipes run through your walls helps you anticipate failures.

| Pipe Material | Common Era | Lifespan | Freeze Tolerance | Primary Failure Mode |
|---|---|---|---|---|
| Copper | 1960s–Present | 50–70 Years | Low (Rigid, splits easily) | Pinhole leaks from corrosion; joint failure; freeze splits |
| PEX (Cross-linked Polyethylene) | 1990s–Present | 40–50 Years | High (Expands up to 8% before breaking) | Fitting connection failures; UV degradation |
| CPVC (Chlorinated PVC) | 1980s–2000s | 50–75 Years | Very Low (Becomes brittle with age) | Cracking at elbows and joints under thermal stress |
| Galvanized Steel | Pre-1970 | 40–50 Years | Low (Rigid and prone to clogging) | Internal rust, scale buildup, and seam splitting |
If your home has original galvanized steel or aging CPVC, we strongly recommend a proactive plumbing assessment. You can also monitor your consumption patterns to spot hidden issues early by learning Simple Ways to Save on Water Bills.
How to Fix Burst Pipes: A Step-by-Step DIY Guide
If you are comfortable with basic tools and have clear access to the damaged pipe, you can often perform a repair yourself. Doing a burst pipe repair on your own can save up to 80% compared to hiring a professional immediately, especially during emergency after-hours windows.
For a deeper look at handling these situations correctly, check out our guide on How to Repair Frozen Pipes the Right Way.

Temporary Fixes to Buy You Time
If you need to restore water to the rest of your house but aren’t ready to perform a permanent cut-and-replace repair, you can use these temporary methods. Note: These should only be used on accessible, exposed pipes and never sealed inside walls.
- Self-Fusing Silicone Tape: This specialized tape doesn’t rely on adhesive; instead, it chemically fuses to itself when wrapped tightly under tension. Clean and dry the pipe, then wrap the tape tightly over the leak, extending at least two inches past the split on both sides.
- Pipe Repair Clamps: A metal sleeve lined with a rubber gasket that clamps directly over the leak using screws. This is highly effective for small pinholes or cracks in straight sections of rigid pipe.
- Rubber Patch and Hose Clamps: In a pinch, you can wrap a piece of heavy rubber (like a section of old garden hose) over the leak and secure it tightly with multiple stainless steel worm-gear hose clamps.
How to Fix Burst Pipes Permanently with Push-Fit Fittings
For copper or CPVC pipes, push-to-connect fittings (commonly known by the brand name SharkBite) offer a fast, reliable, and permanent repair method without the safety risks of open-flame soldering in tight spaces.
Step 1: Gather Your Tools
- Pipe cutter (tubing cutter)
- Deburring and depth gauge tool
- Emery cloth or fine sandpaper
- A section of matching pipe (PEX or copper)
- Two push-fit straight couplings (or one slip coupling)
Step 2: Cut Out the Damaged Section
Using your tubing cutter, cut out the ruptured section of the pipe. Make your cuts square and even, at least 1 inch beyond the visible damage on either side. Ensure the pipe remains perfectly round.
Step 3: Clean and Deburr
Use your deburring tool to remove any sharp burrs from the inside and outside of the cut pipe ends. Use emery cloth to sand the outside of the pipe until it is smooth, clean, and free of corrosion, paint, or old solder.
Step 4: Mark the Insertion Depth
Using a depth gauge or a tape measure, mark the correct insertion depth on the pipe ends. For standard 1/2-inch pipe, the insertion depth is typically 1 inch; for 3/4-inch pipe, it is 1-1/4 inches. This mark ensures you push the fitting completely onto the pipe.
Step 5: Install the Fitting
Push the fitting firmly onto the pipe until the edge of the fitting aligns perfectly with your depth mark. You should feel it seat securely.
Step 6: Test the Repair
Slowly turn your main water valve back on. Have a helper watch the repair site for any signs of weeping or dripping. Let the system run under full pressure for at least 10 minutes to verify the seal.
DIY vs. Professional Help: When to Call a Plumber
While a DIY patch can save the day, plumbing systems are complex networks. Knowing your limits can prevent a minor leak from turning into a major structural disaster.
When to Call a Professional Plumber to Fix Burst Pipes
Some scenarios demand specialized diagnostic equipment, heavy machinery, and years of licensing expertise. You should call a professional immediately if:
- The Burst is Inaccessible: If the pipe is buried behind drywall, under hardwood flooring, or deep inside a ceiling cavity, locating and exposing the leak requires thermal imaging and precise demolition. For help identifying hidden issues before they burst, see our Services: Water Leak Detection page.
- You Have a Slab Leak: If the leak is beneath your home’s concrete foundation, it can erode the soil underneath and compromise your home’s structural integrity. Read our guide, Don’t Let Your Foundation Cry: A Guide to Concrete Slab Leaks, to understand the risks.
- It Involves Sewer or Drain Lines: Main sewer line bursts are unsanitary and highly complex. These repairs typically range from $1,300 to $4,700 and require professional excavation or trenchless lining.
- The Pipes are Galvanized Steel: Threaded metal pipes cannot be easily repaired with push-fit fittings. They require specialized threading tools or a strategic transition to modern PEX piping.
If you are located in our northern suburbs, you can read more about local leak responses on our Water Leak Detection in Skokie IL page.
Understanding Repair Costs and Insurance Coverage
Let’s look at the numbers. On average, hiring a professional to repair a burst pipe costs about $500, with most homeowners spending between $200 and $3,000 depending on the location and severity of the break.
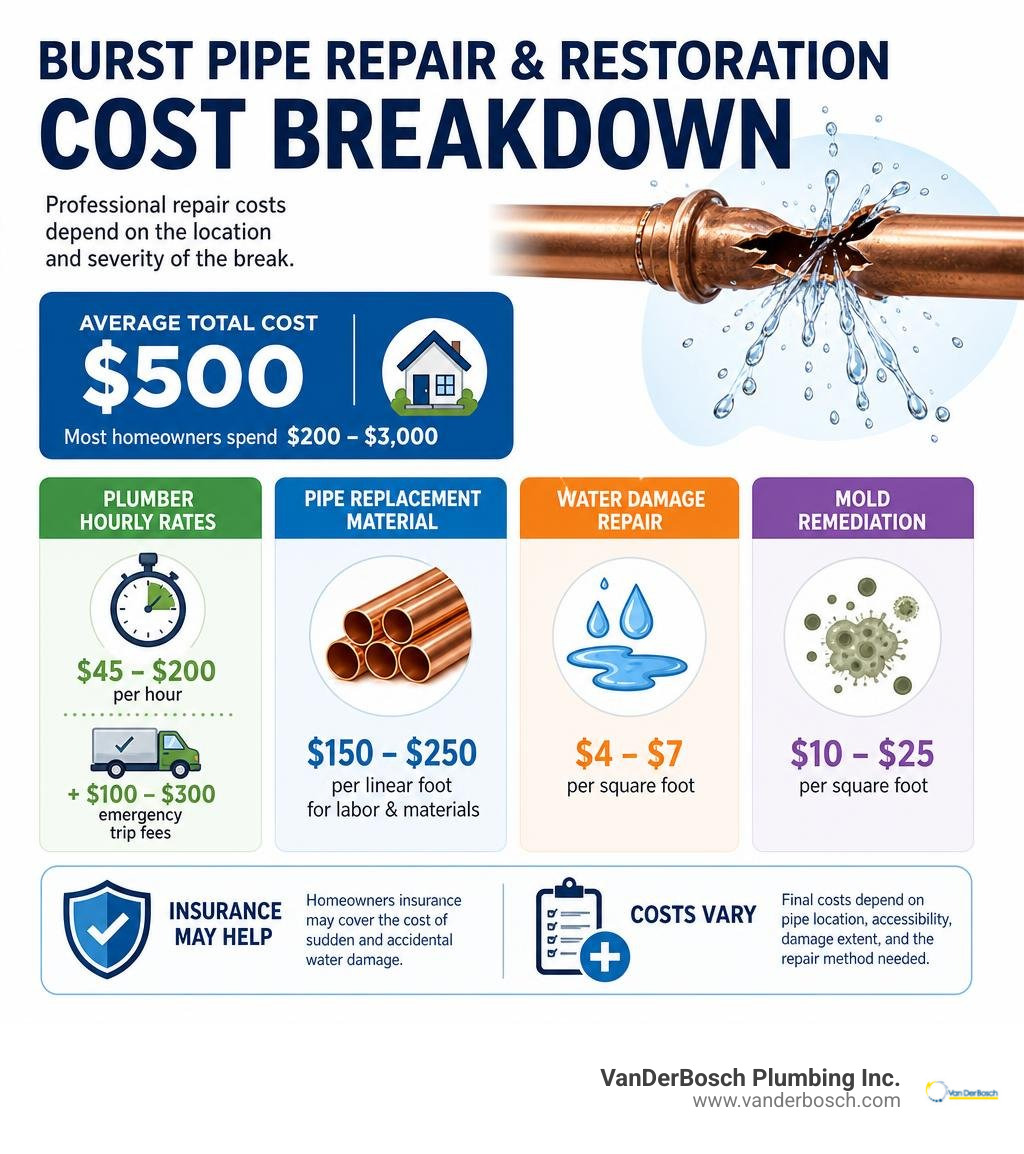
Here is a typical cost breakdown:
- Plumber Hourly Rates: $45 to $200 per hour, plus emergency trip fees ranging from $100 to $300.
- Pipe Replacement Material: $150 to $250 per linear foot for labor and materials.
- Water Damage Repair: $4 to $7 per square foot.
- Mold Remediation: $10 to $25 per square foot.
Most standard homeowners insurance policies cover the water damage caused by a sudden, accidental pipe burst. However, they typically do not cover the cost of repairing the pipe itself, nor will they cover damage if they determine the burst was caused by neglect (such as leaving a home unheated during a Chicago winter).
For professional, licensed assistance with repairs, visit our dedicated Services: Frozen Pipes Repair page to schedule service.
Frequently Asked Questions about Burst Pipes
How long does it take for mold to grow after a pipe bursts?
Mold spores can begin to germinate and colonize wet surfaces within 24 to 48 hours of exposure to moisture. To prevent mold growth:
- Extract standing water immediately using wet/dry vacuums.
- Set up high-velocity air movers and professional-grade dehumidifiers.
- Cut away saturated drywall at least 24 inches above the highest visible water mark.
- Apply an EPA-registered antimicrobial treatment to all exposed framing.
What is the difference between repairing supply pipes and drain pipes?
Supply pipes operate under constant, high water pressure (typically 40 to 80 PSI) and carry clean, pressurized water. Any repair on a supply line must be strong enough to hold back this pressure.
Drain pipes, on the other hand, rely on gravity to carry wastewater away. They are not pressurized but carry contaminated water (gray or black water) that poses biological health hazards. Repairing drain lines requires maintaining a proper slope and ensuring watertight seals to prevent toxic sewer gases from escaping into your home.
Does homeowners insurance cover water damage from a burst pipe?
Yes, standard homeowners insurance policies generally cover the water damage resulting from a sudden and accidental pipe burst. This includes drying services, drywall replacement, flooring repairs, and restoring damaged personal property.
However, coverage is often denied if the insurance adjuster finds evidence of long-term, unresolved slow leaks, or if the homeowner failed to maintain adequate heat in the property during freezing weather. Always document the damage thoroughly with photos and video before starting your cleanup to support your claim.
Conclusion
A burst pipe is a stressful emergency, but reacting quickly and methodically can save your home from devastating water damage. By knowing how to locate your main shut-off valve, relieve system pressure, and apply temporary or permanent push-fit repairs, you can confidently handle many plumbing crises.
When the job requires professional expertise, specialized equipment, or heavy-duty reconstruction, the team at VanDerBosch Plumbing Inc. is here for you. We provide licensed residential and light commercial plumbing services throughout Chicagoland — including Chicago, Roselle, Niles, Winnetka, Melrose Park, Oakbrook Terrace, Hyde Park, Sauganash, West Ridge, Ukrainian Village, Elmhurst, and Mount Prospect.
With our 100% satisfaction guarantee, 24/7 emergency availability, transparent pricing with no service charges, and experienced, background-checked technicians, we will get your home dry, safe, and flowing smoothly again.
If you are dealing with a plumbing emergency or want to secure your home against the next winter freeze, contact us today at Services: Frozen Pipes Repair — we are ready to help when seconds count.