
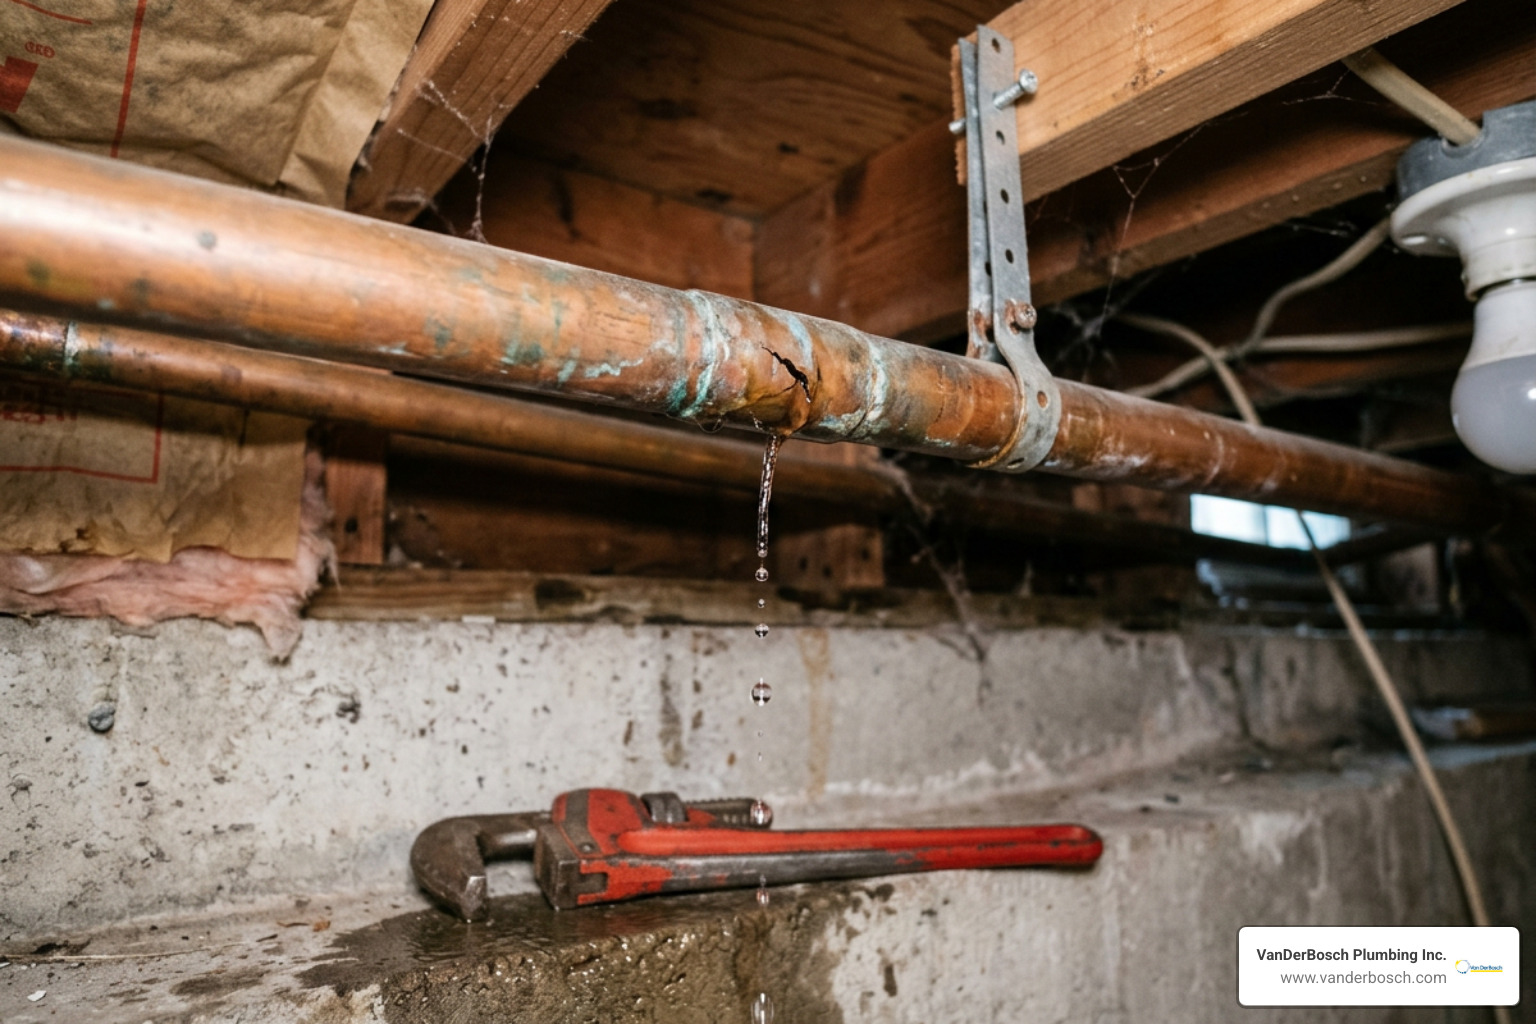
The Root Causes of a Copper Pipe Leaking
Copper pipe leaking in your home? Here’s what to do right now:
- Shut off the main water supply valve immediately to stop further water damage.
- Open the lowest faucet in your home to drain remaining water from the lines.
- Apply a temporary fix — epoxy putty, a pipe repair clamp, or self-fusing silicone tape — to buy yourself time.
- Locate the source by looking for green or blue staining, moisture, or listening for dripping sounds.
- Decide on a permanent repair — either a solder-free push-fit fitting (like SharkBite) or soldering — or call a licensed plumber if the leak is hidden, recurring, or near your main line.
Copper is the most common pipe material in American homes — and at some point, most homeowners will face a leak. It might look like a single, deceptive bead of sweat on the pipe surface. But even a small pinhole leak can silently soak into your walls, insulation, and framing for weeks before you ever notice a puddle. The average U.S. household already wastes 10,000 gallons of water per year from leaks alone — and that number climbs fast when a copper pipe is involved.
The good news? Many copper pipe leaks are fixable without a plumbing degree — or even a soldering torch.
This guide walks you through everything: what causes leaks, how to spot them, and how to fix them yourself — safely and permanently.
I’m Hugh Hodur, President of VanDerBosch Plumbing Inc., serving the Chicagoland area with residential and commercial plumbing services including burst pipe repair and copper pipe leaking emergencies. Over the years, I’ve seen how a slow drip — left unchecked — turns into thousands of dollars in water and mold damage. Let’s make sure that doesn’t happen to you.
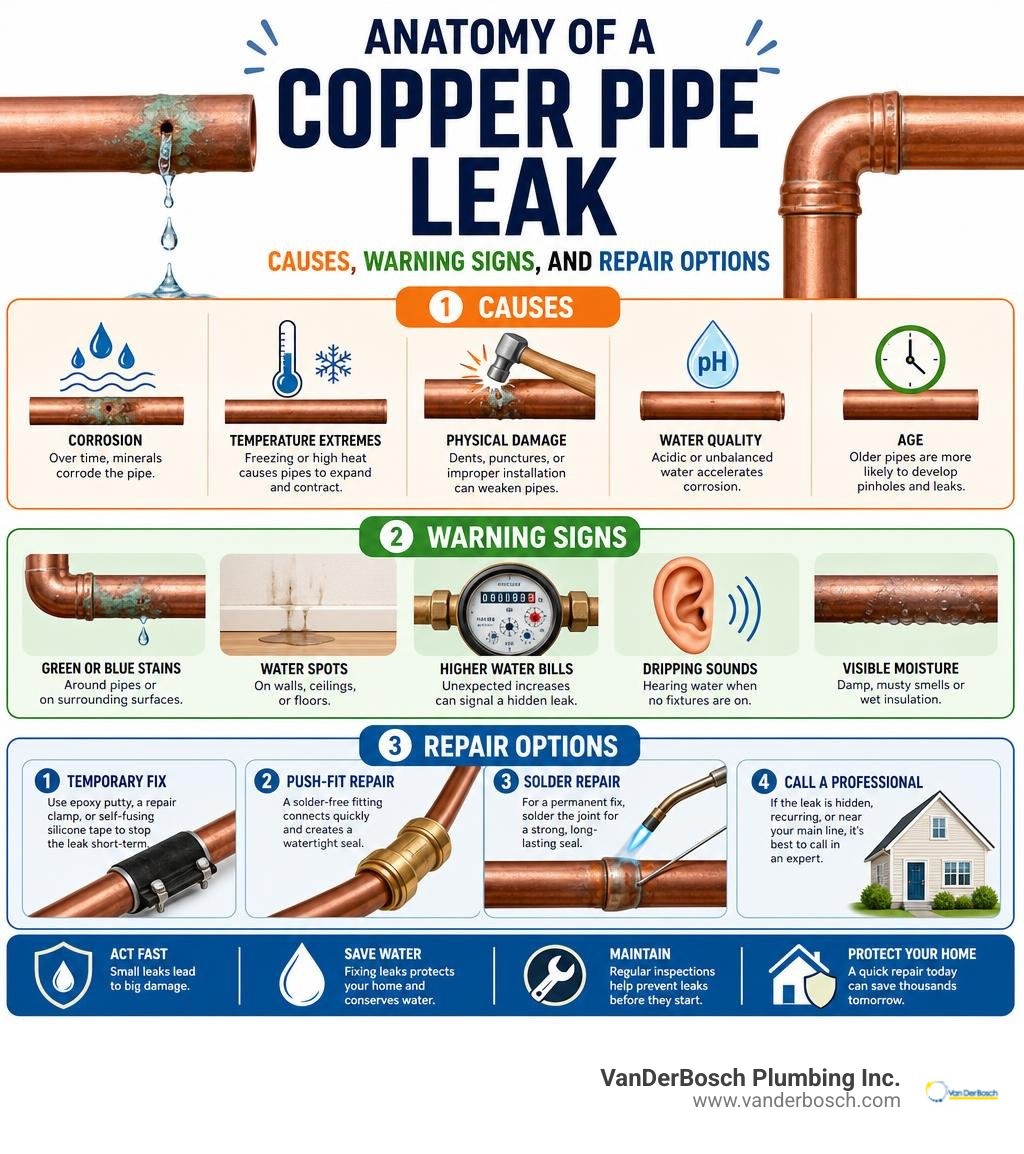
Key copper pipe leaking vocabulary:
To stop a copper pipe leaking in your home, it helps to understand why the metal failed in the first place. While copper is incredibly durable, it is not invincible. Several chemical and physical processes can degrade copper walls from the inside out.
1. Pitting Corrosion (Pinhole Leaks)
Pitting corrosion is a localized attack on the inside surface of a copper pipe. Unlike uniform corrosion, which thins the entire pipe evenly, pitting focuses on tiny, microscopic spots. It creates small craters that slowly eat through the copper wall until they break through the exterior as a pinhole leak. This is often accelerated by changes in municipal water chemistry, such as the use of chloramines for disinfection.
2. Water Velocity and High Pressure
Water in a residential supply line typically travels at around 50 to 70 PSI. If your home’s water pressure exceeds 80 PSI, or if the water velocity is too high, it physically “scrubs” the protective inner lining of the copper. This mechanical wear is especially severe at elbows, bends, and T-joints where water rapidly changes direction. Over time, this friction thins the metal, leading to a sudden failure.
3. Acidic Water and Water Chemistry
If your water supply has a pH level below 7.0, it is considered acidic. Acidic water is highly corrosive to copper, gradually dissolving the metal. Hard water containing heavy minerals like calcium and magnesium can also leave abrasive sediment. As these particles travel through the system, they scratch the pipe’s interior, creating starting points for corrosion.
4. Galvanic and Electrolytic Corrosion
Galvanic reaction occurs when copper comes into direct contact with a dissimilar metal, such as galvanized steel or iron, without a proper dielectric union. The electrical potential difference between the metals causes the copper or steel to corrode rapidly.
Similarly, electrolysis occurs when a home’s electrical system is improperly grounded to the copper water pipes. Stray electrical currents traveling through the pipes strip copper ions away, leaving behind clusters of pinhole leaks.
5. Frozen and Burst Pipes
During harsh Chicagoland winters, uninsulated copper lines in unheated crawlspaces, attics, or outer walls are highly vulnerable. When water freezes, it expands, exerting immense pressure on the metal walls. This can split the pipe wide open. To learn more about how extreme cold impacts your plumbing, check out our guide on Why Do Pipes Burst?.
How to Stop a Copper Pipe Leaking Temporarily
When you discover a leaking pipe at 2:00 AM, you do not need a permanent fix immediately; you need to protect your home. Once you have shut off the water supply and drained the system, you can apply one of these temporary methods to hold the line until you can execute a permanent repair.

Method A: Epoxy Putty
Epoxy putty is a two-part compound that cures into a rock-hard seal. It is a fantastic tool for sealing pinholes or small cracks on straight sections of pipe.
- How to apply: Clean the pipe surface thoroughly with sandpaper or emery cloth to ensure a strong bond. Cut off a small piece of putty and knead it in your hands until the two colors blend completely. Press the putty firmly over the leak, extending it at least an inch beyond the hole. Let it cure for about 30 to 60 minutes before restoring water pressure.
- Limitation: It should not be used on highly pressurized lines permanently, nor on joints or fittings where the putty cannot form a uniform seal.
Method B: Pipe Repair Clamps and Gaskets
A metal pipe sleeve clamp paired with a rubber gasket is one of the most reliable temporary fixes available.
- How to apply: Position a piece of heavy gasket rubber directly over the pinhole. Place the two-part metal clamp over the rubber patch, and tighten the bolts evenly in a crisscross pattern using a wrench.
- Limitation: While a high-quality clamp can hold for months, temperature fluctuations cause copper pipes to expand and contract, which will eventually loosen the clamp.
Method C: Self-Fusing Silicone Tape
Silicone tape does not rely on adhesive; instead, it chemically bonds to itself when stretched and wrapped.
- How to apply: Anchor the tape an inch before the leak. Pull the tape tightly — stretching it to roughly 300% of its original length — and wrap it around the pipe, overlapping each layer by 50%.
- Limitation: It is highly effective for minor weeps but cannot withstand extreme water pressure over long periods.
For a deeper look at temporary fixes for various pipe materials, read our breakdown on What’s the Best Quick Fix for a Damaged Drain Pipe?.
Identifying a Hidden Leak
Not all copper pipe leaks announce themselves with a spraying geyser. Slow, hidden leaks behind drywall, under floors, or beneath concrete slabs can quietly destroy your home. Watch for these sneaky warning signs:
- Verdigris (Blue-Green Staining): If you see a crusty, greenish-blue powder forming on your exposed copper pipes, you have a slow, “weeping” leak. The water is escaping so slowly that it evaporates before dripping, leaving behind concentrated mineral deposits.
- Water Stains and Soft Drywall: Dark, circular stains on ceilings or soft, bubbling paint on walls indicate an active leak directly behind the surface.
- Musty Odors: Water trapped in wall cavities quickly breeds mold and mildew. If a specific room or cabinet smells persistently damp, a slow leak is likely the culprit.
- The Water Meter Test: Turn off every faucet and water-using appliance in your home. Go look at your water meter. If the low-flow indicator dial is spinning, water is escaping somewhere in your system.
If you suspect a leak but cannot find its origin, do not start tearing down your drywall at random. Professional leak detection services use acoustic equipment and thermal imaging to pinpoint the exact location of hidden drips. If you are in Cook County or Chicago, you can learn more about our non-invasive Water Leak Detection services to locate the issue quickly.
Permanent Solder-Free Repair Methods
If you want a permanent fix but do not feel comfortable operating a propane torch near your wooden wall studs, you are in luck. Modern plumbing technology offers highly reliable, code-approved, solder-free options.
Using push-to-connect fittings (like SharkBite) or compression fittings is an excellent way to repair a copper pipe leaking without soldering.
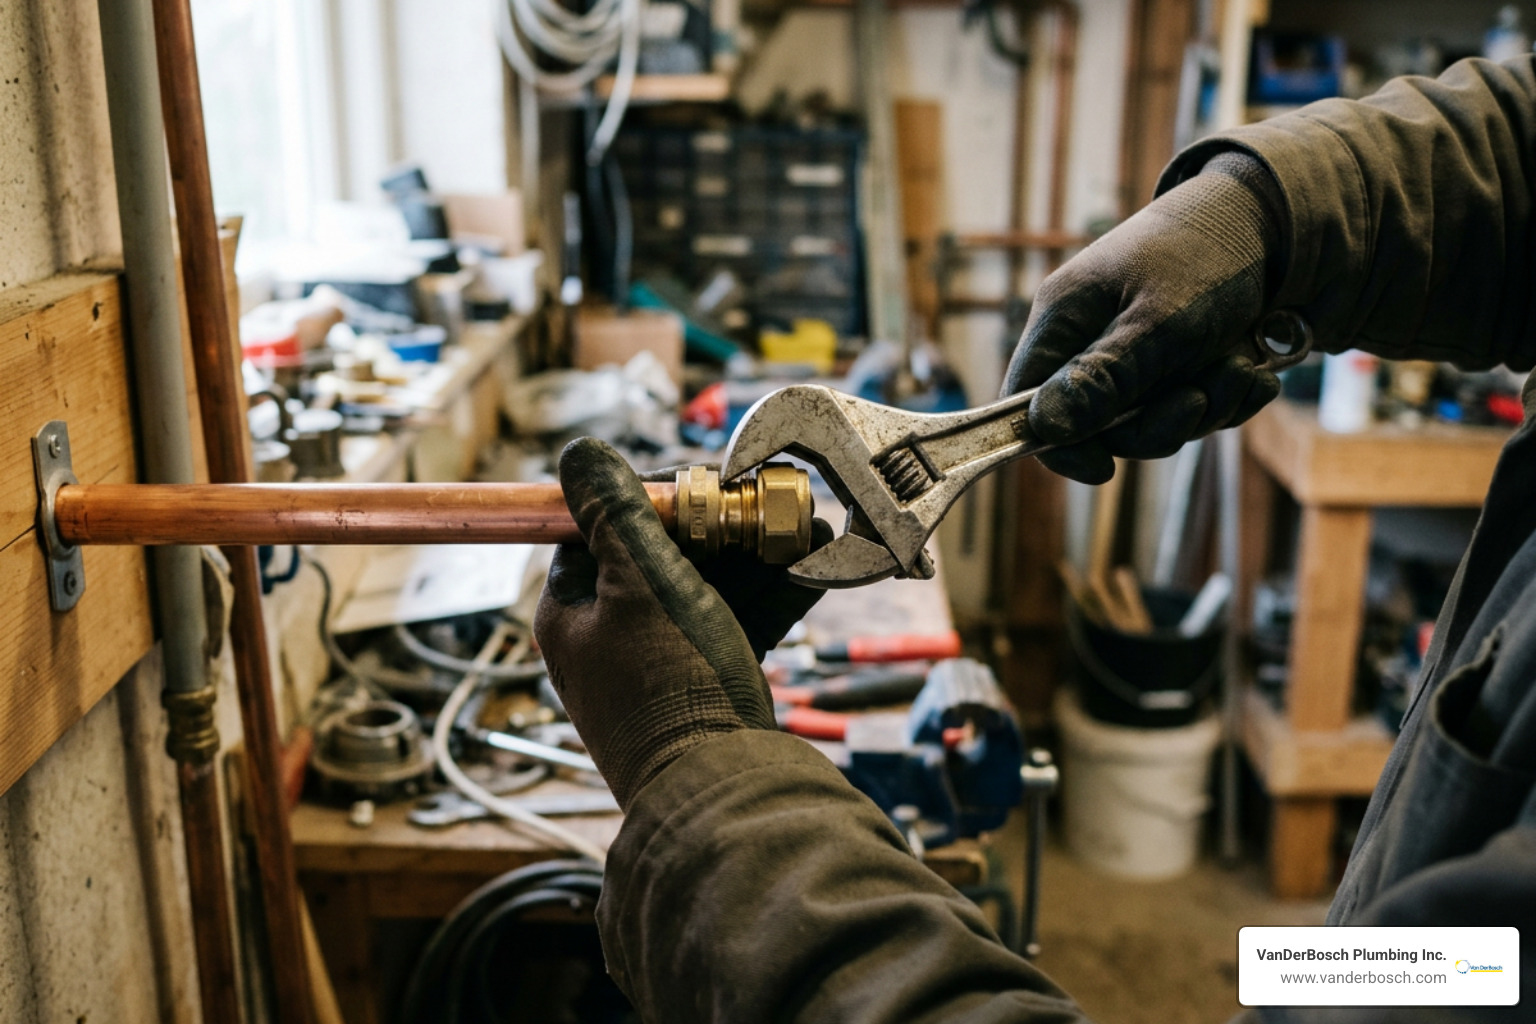
Before choosing your fitting, you must gather the correct tools:
- A dedicated copper tubing cutter (do not use a hacksaw, which leaves jagged, uneven edges).
- An inner/outer deburring tool to smooth the cut edges.
- A depth marker tool or ruler.
- Emery cloth or fine sandpaper.
Fixing a Copper Pipe Leaking with Push-Fit Fittings
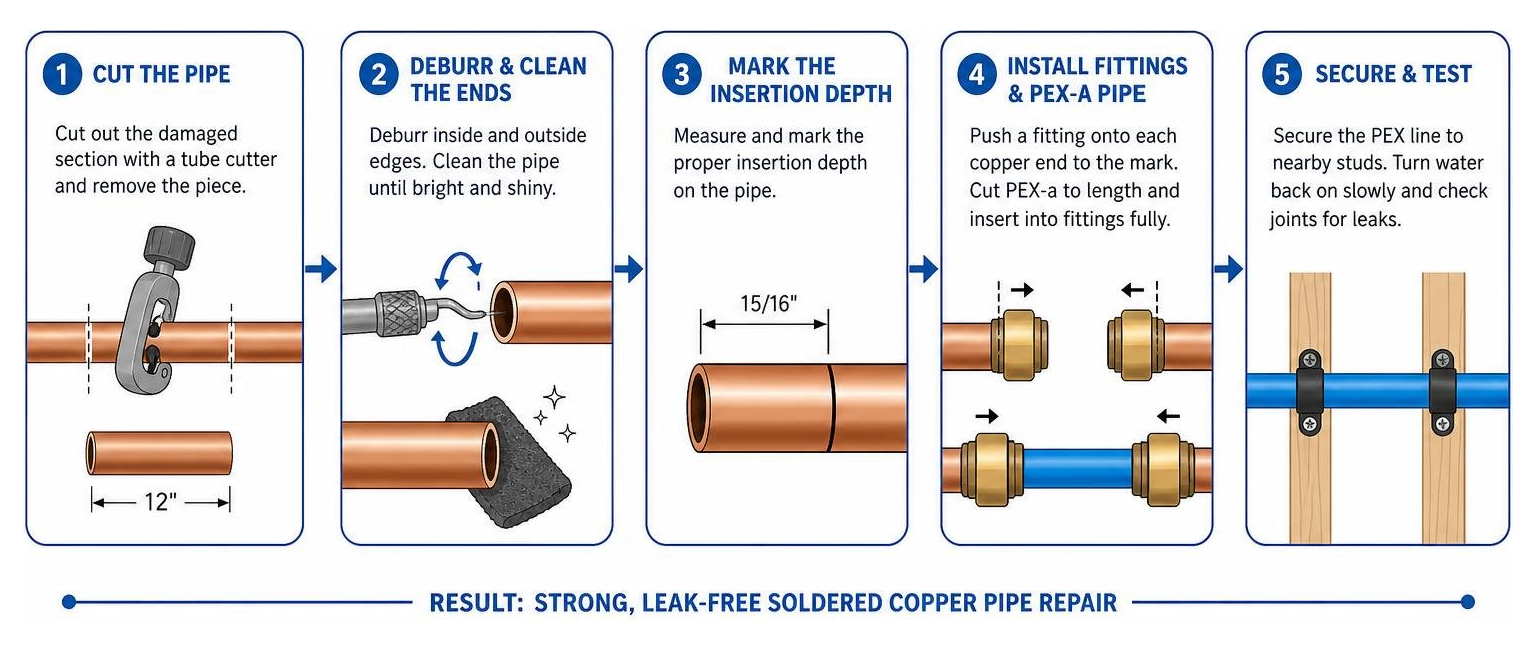
Push-to-connect fittings utilize a grab ring with stainless steel teeth to grip the pipe tightly, while an EPDM O-ring creates a watertight seal. Here is how to transition a damaged copper line to a durable PEX-a line using push-fit fittings.
Step 1: Cut Out the Damaged Section
Place your copper tube cutter approximately 6 inches on either side of the leak. Tighten the cutter slightly, rotate it around the pipe, tighten again, and repeat until the pipe is cleanly cut through. Remove the damaged 12-inch section.
Step 2: Deburr and Clean the Pipe Ends
Use your deburring tool to smooth the inside and outside edges of the cut copper pipes. Any remaining metal burrs can slice the rubber O-ring inside the push-fit fitting, causing an immediate leak. Wipe the outside of the pipe clean with emery cloth until the metal is bright and shiny.
Step 3: Mark the Insertion Depth
Using a depth gauge or ruler, mark the proper insertion depth on the copper pipe. For a standard 1/2-inch fitting, the insertion depth is typically 15/16 of an inch. This mark acts as a visual guide to ensure the fitting is pushed completely onto the pipe.
Step 4: Install the Push-Fit Fittings and PEX-a Pipe
Push a push-fit fitting onto each of the cut copper pipe ends until the edge of the fitting aligns perfectly with your depth mark. Measure the gap between the two fittings, cut a piece of flexible PEX-a pipe to the exact length, and push the PEX pipe into the opposite ends of the fittings until it bottoms out.
Step 5: Secure and Test
Secure the newly installed PEX line to nearby studs using pipe clamps to prevent movement. Turn the water supply back on slowly, bleed the air from your faucets, and inspect the joints for any signs of moisture.
Step-by-Step Guide to Soldering a Copper Pipe Repair
While push-fit fittings are highly convenient, traditional soldering (often called “sweating”) remains the undisputed gold standard for copper pipe repairs. It creates a seamless, incredibly strong metallic bond that will last for decades.
If you are replacing a longer section of damaged pipe, you can use a custom-cut “sweat coupling” sleeve.
Tools and Materials Needed:
- Propane torch and spark igniter
- Lead-free solder and lead-free flux paste (acid brush included)
- Emery cloth and a wire fitting brush
- Copper tube cutter and deburring tool
- Fire-resistant cloth or heat shield
- Safety glasses and heavy leather work gloves
Step 1: Prep and Dry the Pipes
Shut off the water and drain the system completely. Crucial rule: The inside of the copper pipes must be completely dry. If there is sitting water near the joint, the water will absorb the heat from your torch, preventing the copper from reaching the melting temperature of the solder.
- Plumbing Tip: Stuff a clean cotton rag or a piece of white bread down the pipe ends to absorb lingering drips. The bread will safely dissolve and flush out when you turn the water back on.
Step 2: Clean and Flux Mating Surfaces
Clean the outside of the copper pipe ends with emery cloth until they shine. Use your wire fitting brush to clean the inside of your copper repair couplings. Apply a thin, even layer of flux paste to both the outside of the pipes and the inside of the couplings. The flux prevents oxidation when the metal is heated, allowing the molten solder to flow smoothly into the joint.
Step 3: Assemble the Joint
Slide the repair coupling onto the pipe ends, ensuring the pipes are fully seated inside the fitting. Wipe away any excess flux that squeezes out of the joint.
Step 4: Apply Heat and Solder
Position your fire-resistant shield behind the joint to protect nearby wooden framing. Ignite your propane torch and adjust the flame to a bright blue cone. Focus the tip of the inner blue flame directly onto the middle of the fitting, not the pipe itself.
After 10 to 15 seconds of heating, touch the solder wire to the opposite side of the joint (away from the flame). When the copper reaches the correct temperature, the solder will melt instantly and be drawn into the joint by capillary action. Once a silver ring of solder forms around the entire joint interface, remove the heat.
Step 5: Cool and Inspect
Allow the joint to cool naturally. Do not spray it with water or wipe it with a wet rag to speed up cooling, as rapid temperature drops can crack the solder and create a weak “cold joint.” Once cool, wipe away any remaining flux residue with a damp cloth to prevent long-term external corrosion.
Repair vs. Whole-Home Repiping: Making the Right Choice
If you are dealing with a single pinhole leak in a relatively new home, a simple spot repair is the logical choice. However, if your home was built in the 1980s or earlier, a single leak is often a warning sign of systemic corrosion.
| Feature | Spot Repair (Solder or Push-Fit) | Whole-Home Repiping (PEX or New Copper) |
|---|---|---|
| Average Cost | $150 to $700 (typically around $500) | $4,500 to $15,000 |
| Time to Complete | 1 to 3 hours | 1 to 3 days |
| When to Choose | Single leak; healthy surrounding pipes; localized physical damage. | Multiple recurring leaks; pipes older than 40 years; low water pressure throughout the home. |
| Long-Term Outlook | High risk of future leaks if corrosion is systemic (“Whack-a-Mole”). | Permanent peace of mind; increases home value; improves water flow. |
Repeatedly patching an aging plumbing system is a temporary strategy. If you are experiencing frequent drops in pressure or rust-colored water, it is time to evaluate your system. To help you decide, read our expert advice on Do You Need Repiping and learn about the Signs Repiping Services May Be Needed. If you are ready to upgrade your home’s infrastructure, explore our professional Whole Home Repipe services.
Frequently Asked Questions About Copper Pipe Leaks
How urgent is it to fix a small pinhole leak?
It is extremely urgent. Even a tiny pinhole leak leaking just 1 cup of water per week can cause structural rot, ruin drywall, and trigger toxic mold growth within 24 to 48 hours in enclosed wall cavities. Additionally, on heating or boiler lines, escaping water is constantly replaced by fresh, oxygen-rich water, which introduces new oxygen and accelerates internal corrosion throughout your entire heating system. For local water conservation guidelines, visit the Water Leaks | Roselle, IL – Official Website.
How long do residential copper pipes typically last?
Residential copper pipes typically last between 20 and 50 years. Under ideal conditions with balanced water pH and stable water pressure, they can last up to 70 years. However, in areas with highly acidic water, high mineral content, or elevated water pressure, copper pipes can fail in as little as a few years. For assistance with municipal water concerns, check the Cook County Leak Repair resources.
What are the signs that a leak requires a professional plumber?
You should call a professional plumber if the leak is located behind finished walls, beneath a concrete slab foundation (a slab leak), or near electrical wiring or gas lines. Additionally, if you are uncomfortable operating a propane torch or if you are dealing with systemic, recurring leaks, hiring a licensed technician is the safest choice. For tips on choosing the right help, read our 5 Smart Strategies for Hiring a Plumber for Ceiling Leak and review these critical Questions to Ask Before Hiring a Plumbing Contractor in Chicago.
Conclusion
A leaking copper pipe can be stressful, but with the right tools, materials, and steps, you can successfully manage the situation. Whether you choose a quick, temporary clamp, a modern push-fit fitting, or a traditional soldered joint, taking immediate action is key to protecting your home from water damage.
When a plumbing issue goes beyond a simple DIY project, or if you want the peace of mind that comes with professional installation, we are here to help. VanDerBosch Plumbing Inc. offers licensed, background-checked, and highly experienced residential and light commercial plumbing services across Chicagoland — including Chicago, Roselle, Niles, Winnetka, Melrose Park, Elmhurst, and Mount Prospect.
We provide transparent pricing with no service charges, 24/7 availability for emergencies, and a 100% satisfaction guarantee. Don’t let a small drip turn into a major disaster. Visit our Water Line Repair service page or call us today to get your plumbing back in perfect shape!