5 Smart Strategies for Hiring a Plumber for Ceiling Leak

water stained ceiling with dripping water - plumber for ceiling leak

Why Finding the Right Plumber for a Ceiling Leak Matters


A plumber for ceiling leak emergencies is critical to call immediately because water damage spreads fast, mold can grow within 48 hours, and a gallon of water weighs 8.5 pounds—meaning your ceiling could collapse if water pools unchecked.

Quick Answer: What to Do Right Now

  1. Contain the water – Place buckets under drips and move furniture to safety
  2. Turn off your main water supply – If the leak is plumbing-related (not from rain)
  3. Call a licensed plumber immediately – For leaks below bathrooms, kitchens, or on lower floors
  4. Call a roofer instead – If the leak is on your top floor and appeared after rain
  5. Document everything – Take photos for insurance claims

When water leaks through your ceiling, every minute counts. The average cost to repair water damage is $3,600, and ceiling repairs run $45 to $55 per square foot. This doesn’t include fixing the leak source, which can add another $200 to $1,550.

Hiring the right professional quickly can save you thousands and prevent structural problems or mold. The challenge is knowing who to call—a plumber or a roofer—and finding a trustworthy pro who will diagnose the issue accurately and charge a fair price.

This guide offers five strategies to hire the right plumber for ceiling leak issues, understand the repair process, and prevent future disasters. You’ll know exactly what to do, from slow drips to active emergencies.

infographic showing emergency ceiling leak response steps: 1. Place buckets under active drips and protect furniture with tarps, 2. Shut off main water valve if leak is plumbing-related, 3. Safely puncture bulging ceiling to drain pooled water, 4. Call licensed plumber for lower-floor leaks or leaks below bathrooms, 5. Document damage with photos for insurance, 6. Never ignore even small stains as mold grows within 48 hours - plumber for ceiling leak infographic

Strategy 1: Act Fast & Identify the Telltale Signs

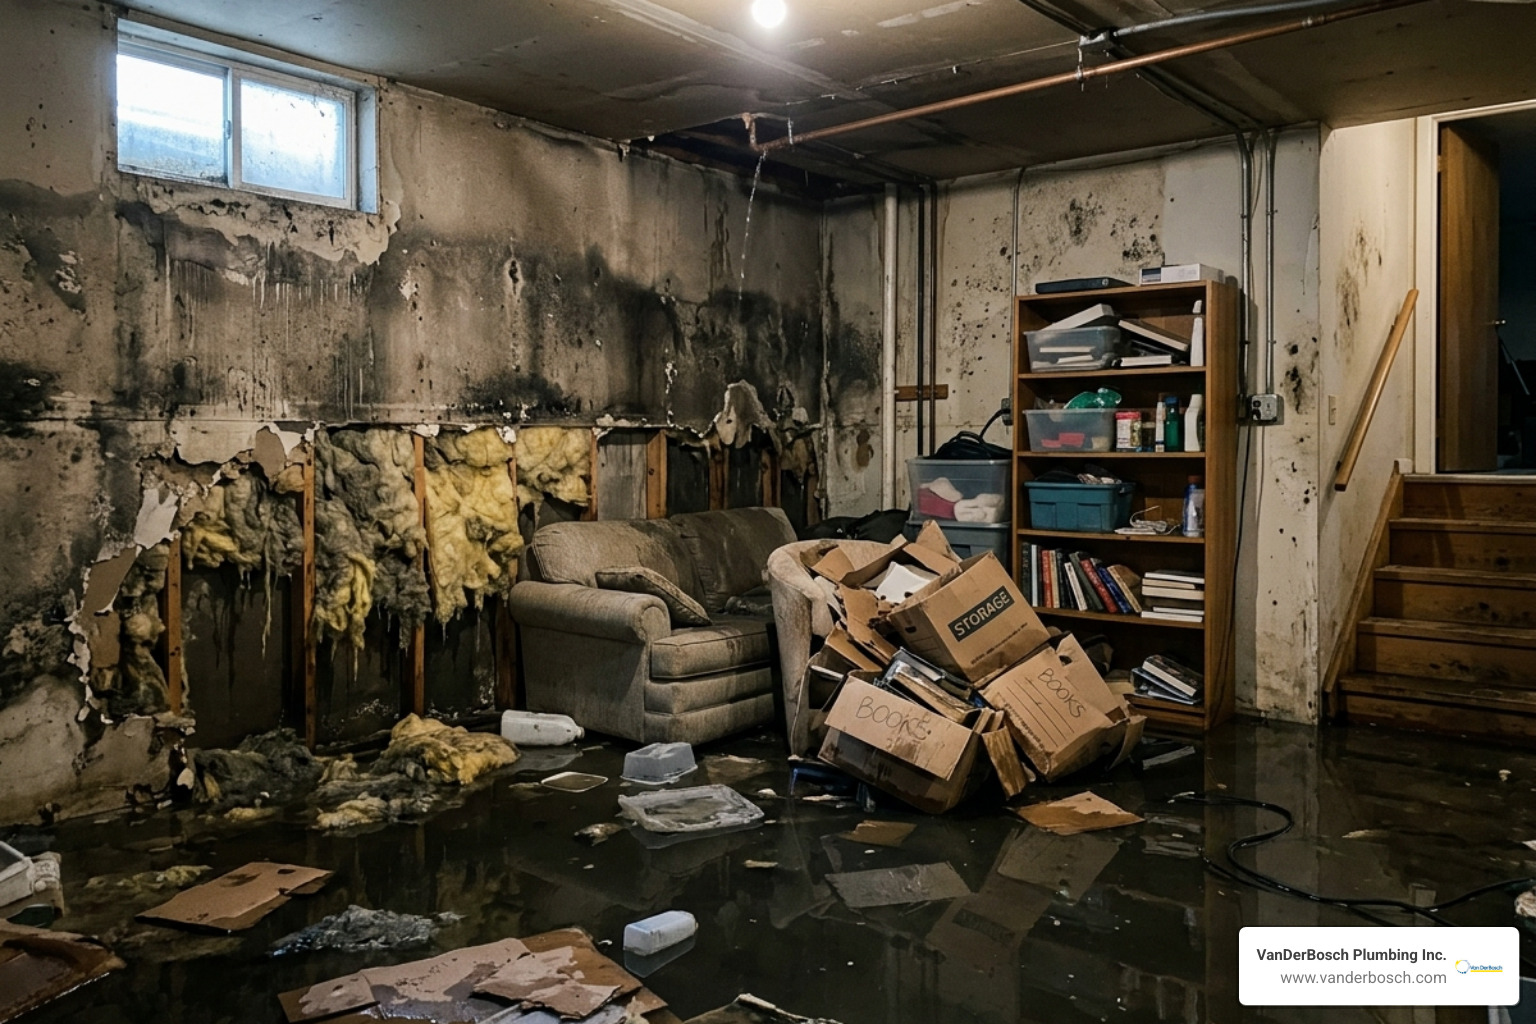
When water appears on your ceiling, urgency is a necessity. Water damage spreads rapidly, and mold can grow within 48 hours, compromising your home’s structure. There’s also a risk of ceiling collapse. A gallon of water weighs 8.5 pounds, and a small amount can overwhelm your ceiling’s structure. This weight pooling above your head is a serious threat that demands immediate action.

So, what immediate steps should you take?

  • Contain the Leak: Grab buckets or large bowls and place them directly under the drip. Use old towels or plastic sheeting to protect flooring and furniture.
  • Protect Your Valuables: Move furniture, electronics, and other belongings away from the affected area.
  • Turn Off Your Main Water Supply: If you suspect a plumbing-related leak (not from rain), locate and turn off your home’s main water shut-off valve. This can drastically reduce water damage until a professional arrives.
  • Safely Drain a Bulging Ceiling: A bulging ceiling indicates pooled water that could burst. Carefully puncture a small hole in the center of the bulge with a sharp object, placing a bucket underneath to catch the water. This relieves pressure and prevents a more destructive collapse.

a homeowner placing a bucket under a ceiling leak - plumber for ceiling leak

Taking these immediate steps can significantly limit the damage while you wait for professional help.

Knowing the signs of a plumbing-related leak is crucial for knowing when to call a plumber for ceiling leak repair. Here’s what to look for:

  • Water Stains: Look for discolored patches (yellow, brown, or rust-colored) that grow over time. Ring-shaped stains around light fixtures are also common.
  • Peeling or Bubbling Paint/Wallpaper: Moisture causes paint to blister, peel, or crack. Wallpaper may bubble or separate from the wall.
  • Musty Odors: A persistent musty smell indicates hidden moisture and potential mold, even without visible water. It’s a strong sign of a leak inside walls or ceilings.
  • Dripping Sounds: Hearing water dripping when no faucets are on is a clear sign of a leak.
  • Bulging or Sagging Drywall: Water-logged drywall becomes heavy and sags, bulges, or feels soft. This is a critical sign that a collapse could be imminent.
  • Unusually High Water Bills: A sudden spike in your water bill without a change in usage could point to a hidden plumbing leak.

For a deeper dive into identifying these issues, you can find more information on our professional water leak detection services.

Strategy 2: Know Who to Call – Plumber vs. Roofer

When your ceiling leaks, you must determine if it’s a plumbing or roofing issue. Calling the wrong pro wastes time and money, leading to more damage. Knowing whether to call a plumber for ceiling leak issues or a roofer is the first critical step.

Here’s a quick comparison to help you understand their roles:

Feature Plumber for Ceiling Leak Roofer for Ceiling Leak
Primary Role Fixes leaks originating from internal water systems Repairs leaks originating from the roof’s exterior
Typical Causes Leaky pipes, faulty fixtures (toilets, showers, sinks), appliance hoses, water heaters, clogged drain lines Damaged shingles, flashing, ice dams, inadequate roof slope, clogged gutters
Common Tools Moisture meters, thermal cameras, pressure gauges, pipe wrenches, drain snakes, video inspection cameras Ladders, roofing tools, sealants, shingle removers, safety harnesses
Area of Focus Water supply lines, drain pipes, water heaters, fixtures, appliance connections Roof surface, flashing, skylights, chimneys, gutters, attic

When to Call a Plumber for a Ceiling Leak

Your first call should be to a licensed plumber for ceiling leak repair, like our team at VanDerBosch Plumbing Inc., if you notice the following:

  • Leak on Lower Floors: A leak on a lower level of your home almost certainly points to a plumbing issue from an upstairs bathroom, kitchen, or laundry room.
  • Leak Below a Bathroom or Kitchen: Dripping below these areas suggests a problem with pipes, fixtures, or appliances, such as a leaking toilet seal, faulty shower pan, or sink drain issue.
  • No Recent Rain: If the leak appears during a dry spell, it’s highly unlikely that your roof is the cause.
  • Leak Occurs When Using Fixtures: If the leak only appears or worsens when someone showers, flushes a toilet, or uses a sink, a fixture or its plumbing is the source.
  • Stains are Consistent: Localized stains that don’t change with weather conditions often indicate a consistent internal source.

We are experts in diagnosing and fixing these types of plumbing-related ceiling leaks throughout Chicagoland, including areas like Roselle, Niles, and Elmhurst.

When to Call a Roofer

Conversely, a roofer is the specialist you need if:

  • Leak on the Top Floor: If your ceiling leak is on the topmost floor, the roof is a primary suspect.
  • Appears After Rain or Snow: Leaks that appear or worsen after rain, snow, or severe weather indicate roof damage.
  • Visible Roof Damage: Missing shingles, cracked tiles, or damaged flashing are strong signs a roofer is needed.
  • Dampness in the Attic: Wet insulation or water spots on the roof decking in your attic are clear signs of a roof compromise.

For a helpful guide on diagnosing leak sources, you can refer to this external resource: Helpful guide on diagnosing leak sources. Getting the right professional on the job from the start saves you time and stress.

Strategy 3: Understand the Professional Diagnostic & Repair Process

A professional plumber for ceiling leak repair does more than patch a hole. They use a systematic process to find the true source of the leak, which is often far from the visible water spot. This expert assessment is crucial for a lasting repair. We aim to make the process clear and stress-free for our customers across Chicago, Evanston, and beyond.

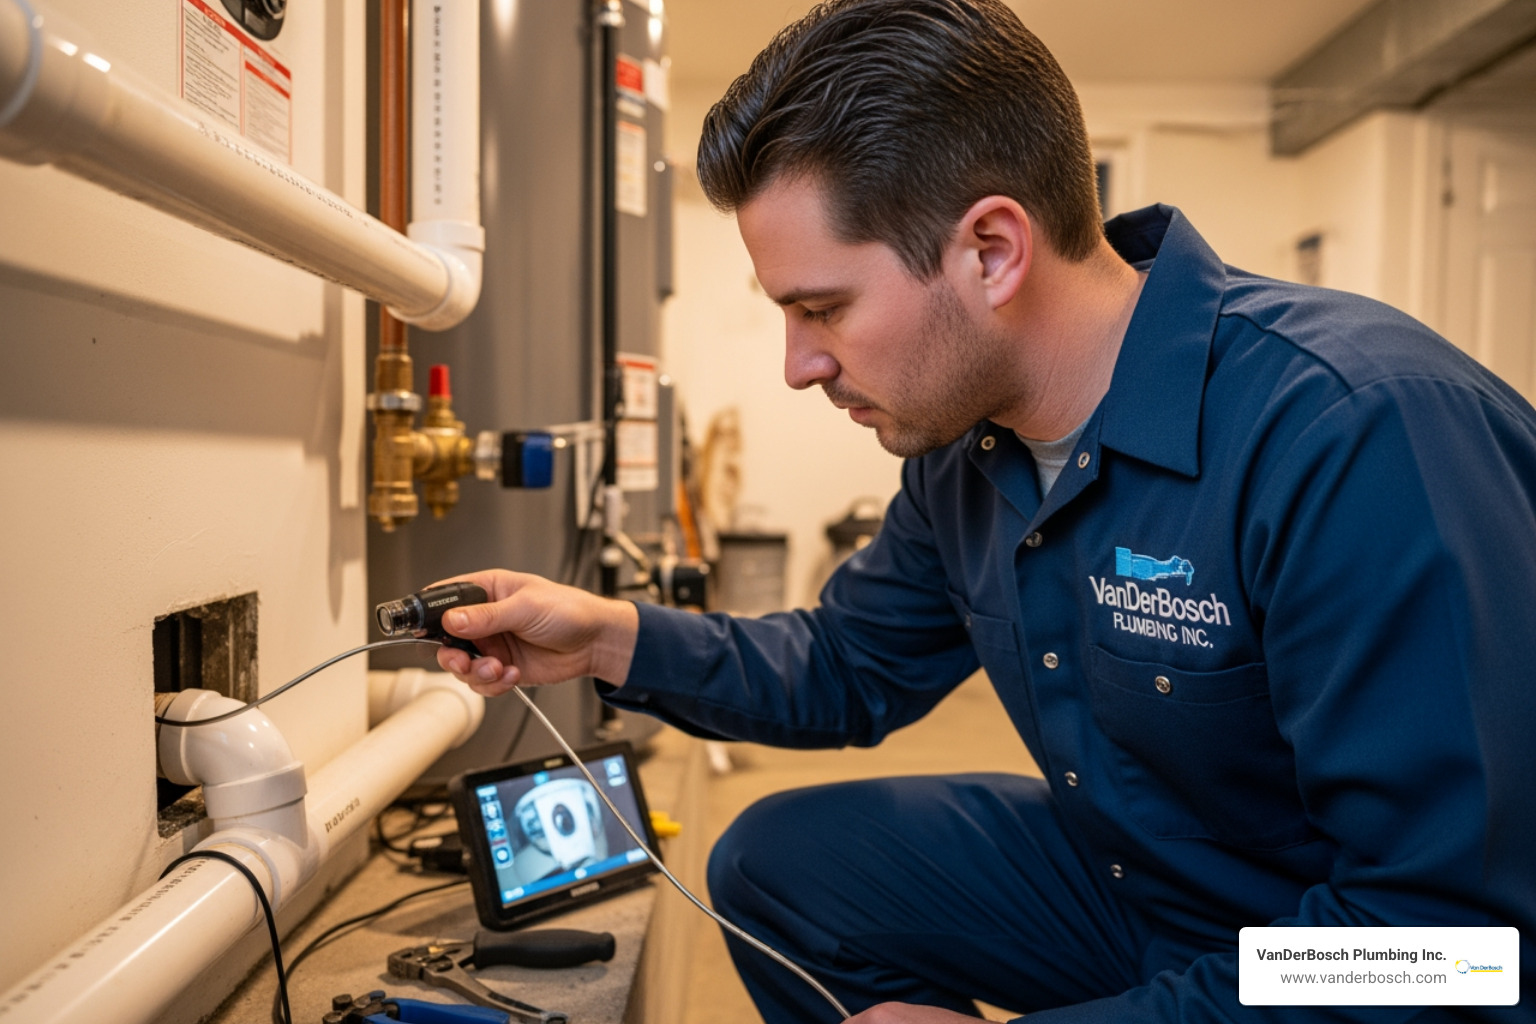
plumber using a thermal imaging camera to find a hidden leak in a ceiling - plumber for ceiling leak

How a Plumber Diagnoses the Leak Source

Our licensed plumbers use specialized tools and techniques to pinpoint hidden leaks with minimal disruption:

  • Visual Inspection: The process begins with a thorough visual inspection of the area around the leak and any accessible plumbing fixtures directly above it.
  • Moisture Meters: These devices detect hidden moisture in walls, ceilings, and floors, helping trace the water’s path to the source.
  • Pressure Testing: For hidden supply line leaks, plumbers can perform pressure tests on isolated sections of your pipes to identify if and where a leak exists.
  • Thermal Imaging Cameras: This advanced, non-invasive method detects temperature differences caused by leaking water. It allows us to see leaks through walls and ceilings with precision, often avoiding demolition.
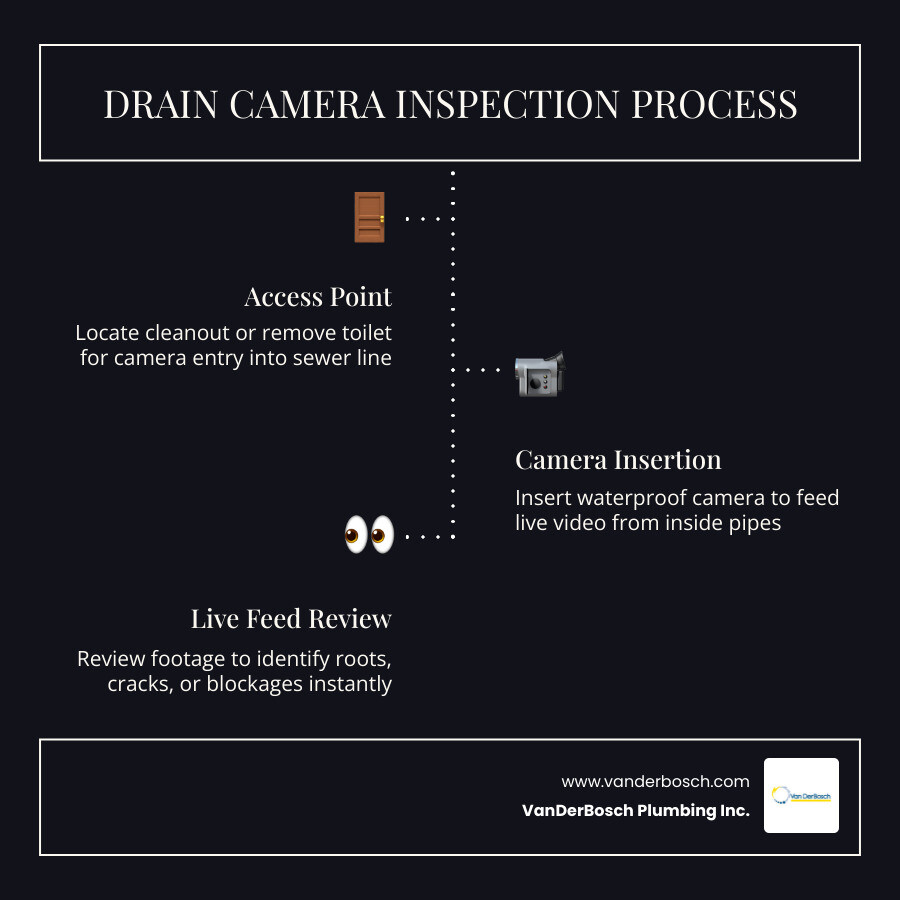
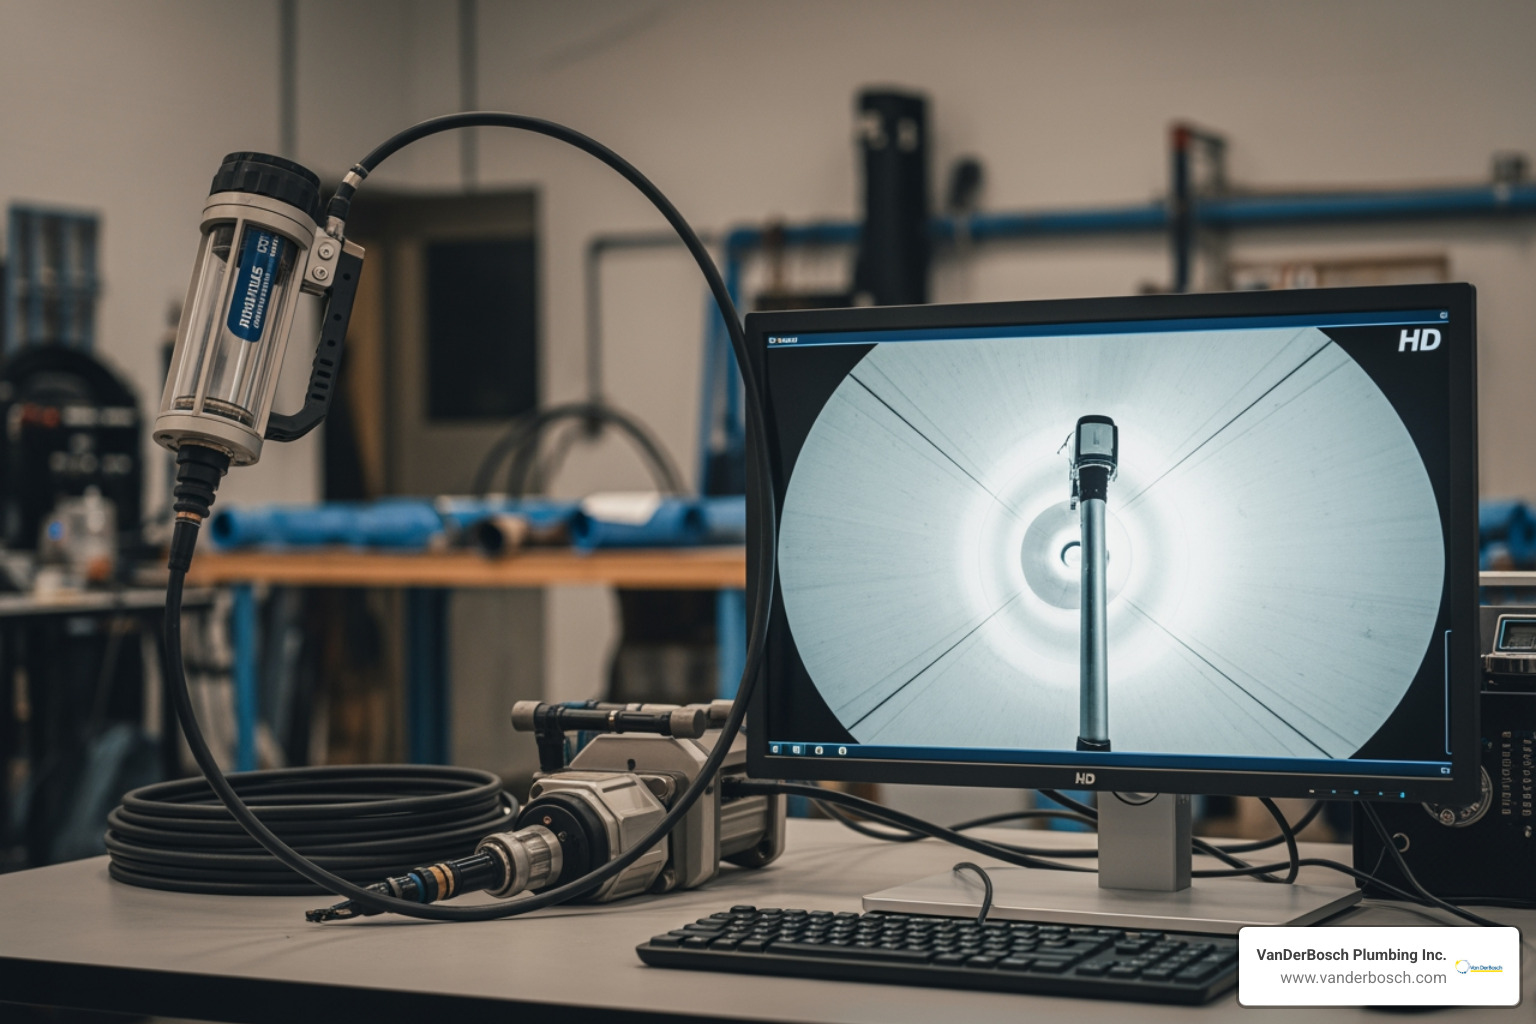
  • Sewer Video Inspection: If a drain line is the suspected cause, a small camera is inserted into the pipes to visually inspect for cracks, blockages, or other damage. Learn more with our guide to Sewer video inspection.

Once the source is located, our plumbers will explain the necessary repairs and provide an upfront, transparent estimate.

Common Plumbing Issues That Cause Ceiling Leaks

Most plumbing-related ceiling leaks stem from a few common culprits:

  • Leaky Supply Lines: Pipes bringing fresh water to fixtures can develop pinhole leaks or cracks from age, corrosion, or high water pressure. This affects PEX, copper, and galvanized steel pipes.
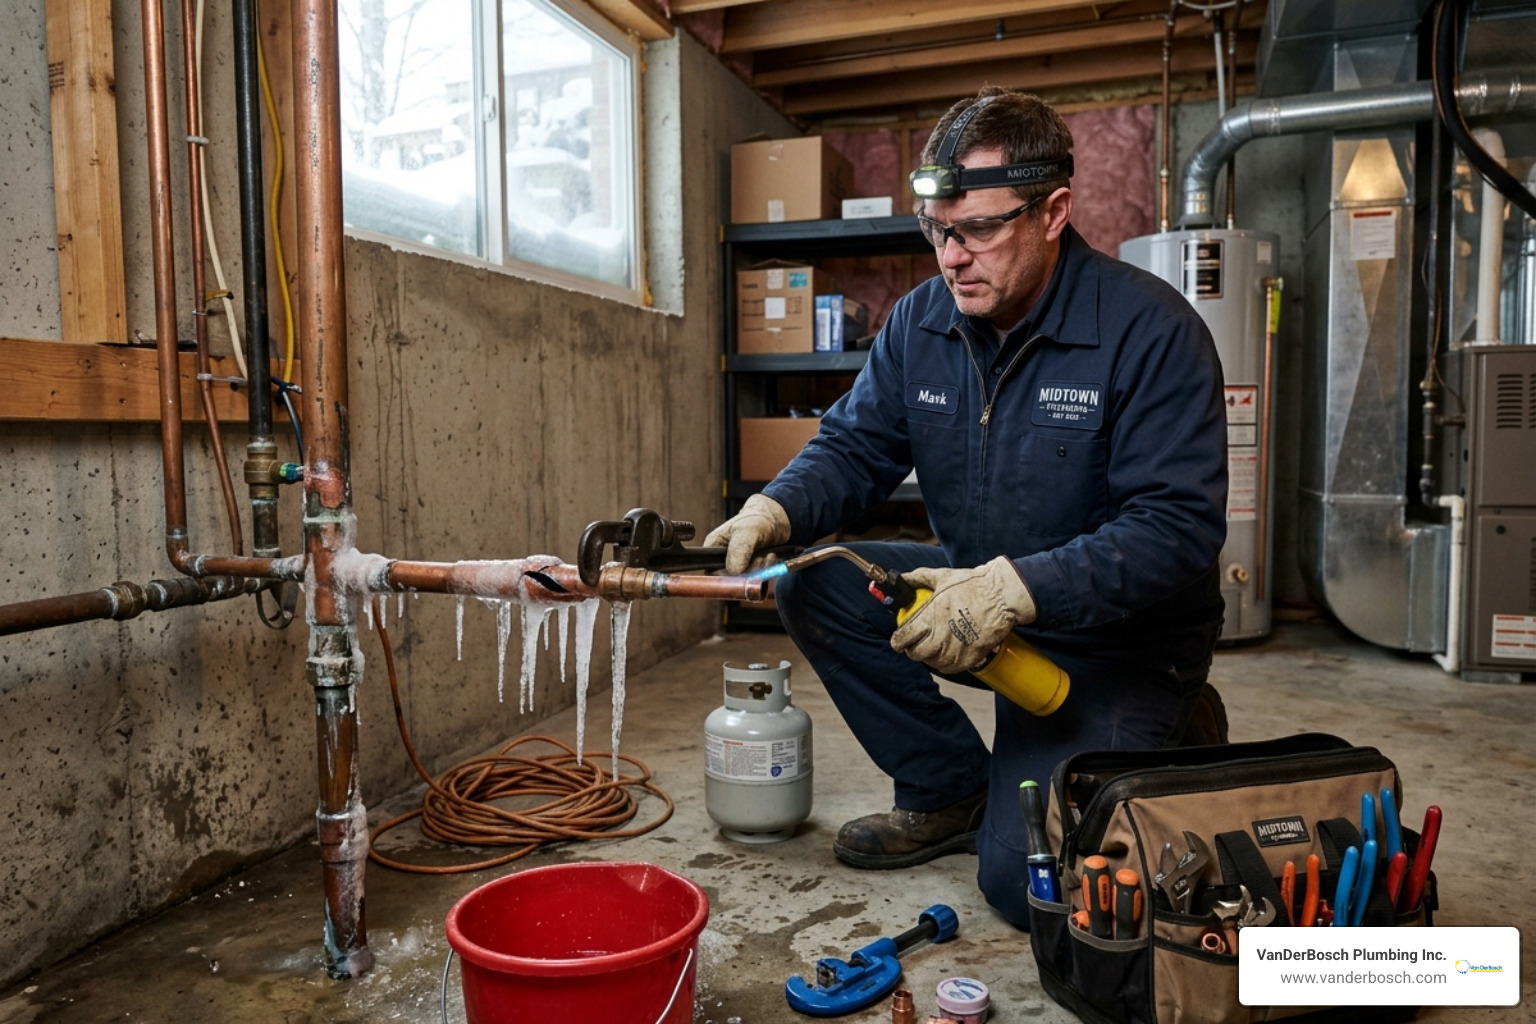
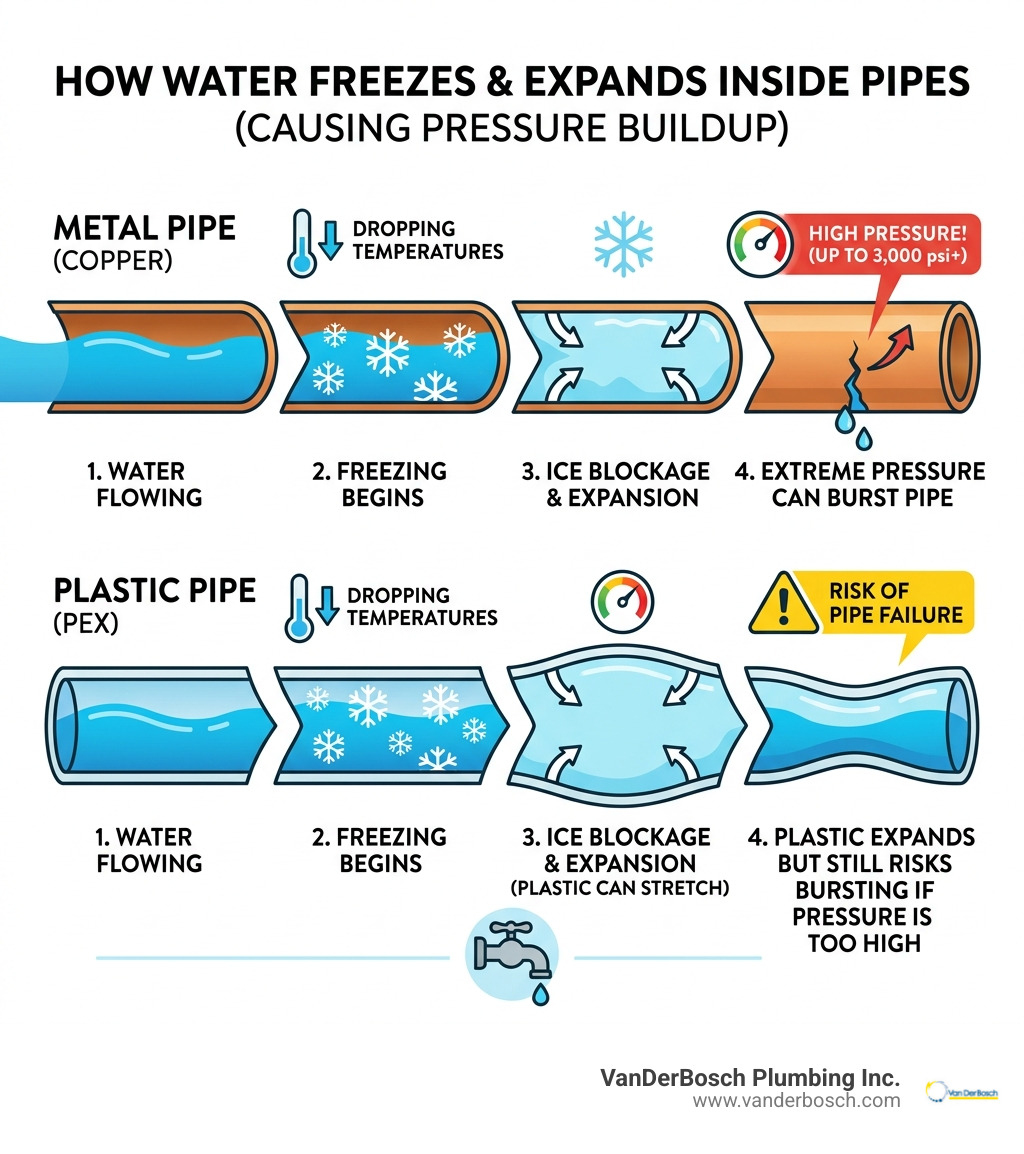
  • Burst Pipes: A sudden cause of major leaks, burst pipes often occur in winter when water freezes and expands. We offer specialized frozen pipes repair services. Learn more in our article on Why do pipes burst?.
  • Clogged Drain Lines: When an upstairs drain line clogs, wastewater can back up and overflow, leaking through the ceiling below. This is common with sinks, showers, and toilets.
  • Faulty Appliance Hoses: Hoses for washing machines, dishwashers, and refrigerators can degrade, crack, or burst, leading to significant leaks.
  • Leaking Water Heaters: A water heater in an attic or upper-level closet can cause ceiling damage if the tank or its connections leak. Find out more about Why is my water heater leaking?.
  • Worn Toilet Seals: A degraded wax ring at the toilet’s base can allow wastewater to seep into the subfloor and ceiling below, often causing musty odors. Loose toilet bolts or a cracked bowl can also cause leaks.

Our experienced plumbers are adept at handling all these issues, providing expert repair and preventative measures.

Strategy 4: Ask the Right Questions Before You Hire a Plumber for a Ceiling Leak

For a critical issue like a ceiling leak, you need the right professional, not just the first one available. Vetting your plumber for ceiling leak repair ensures quality service, transparent pricing, and peace of mind. Before you commit, ask these key questions to assess their expertise and professionalism, which aligns with our values at VanDerBosch Plumbing Inc.

Key Questions to Ask a Plumber for a Ceiling Leak

When you’re speaking with a plumbing company, don’t hesitate to ask these important questions:

  • Are you licensed and insured in Illinois? This is non-negotiable. Licensing proves skill, and insurance protects you from liability during repairs. Our team is fully licensed and insured to work across Chicagoland, including areas like Skokie, Glenview, and Arlington Heights.
  • Do you offer a warranty on your work? A reputable plumber stands behind their repairs with a warranty, assuring you that if the same issue recurs, they will fix it without additional charge.
  • Can you provide an upfront, itemized estimate? Transparent pricing is key. Get a detailed breakdown of costs before work begins to avoid hidden fees. We pride ourselves on providing clear, upfront pricing with no hidden service charges.
  • What is your experience with hidden leaks like mine? Ask about their experience with leak detection technologies like thermal imaging or moisture meters.
  • How will you access the leak and minimize damage? A skilled plumber will discuss their plan for accessing the leak, aiming to minimize damage to your property.
  • Is cleanup included in your service? Confirm if they include basic cleanup of the work area in their service.
  • Can you provide references or show examples of similar work? A company with a strong track record should be able to provide testimonials or references.
  • Do you charge a flat rate or by the hour? Understanding their pricing structure helps manage expectations. Our pricing is job-based, not hourly, ensuring you know the cost before we start.

Asking these questions empowers you to choose a plumber for ceiling leak repair who is competent, reliable, and trustworthy.

Strategy 5: Plan for Costs, Aftermath, and Prevention

Fixing a ceiling leak is the first step. The job isn’t over until you address the water damage and take steps to prevent future incidents. Understanding the total scope, cost, and roles of different professionals is crucial for a complete resolution.

Estimating the Cost of Repair

The total cost of dealing with a ceiling leak varies based on the leak’s source and the extent of the damage. Here’s a breakdown:

  • Leak Source Repair Costs: Fixing the plumbing issue typically ranges from $200 to $1,550. This covers repairs like pipe patching or fixture replacement.
  • Water Damage Repair Costs: The average cost to repair water damage to a ceiling is around $3,600. This includes drying the area and assessing structural integrity.
  • Ceiling Repair Costs: Expect to pay $45 to $55 per square foot to repair or replace damaged drywall, insulation, and repaint.

These figures highlight why acting quickly is essential to minimize overall costs.

Dealing with Water Damage & Aftermath

After our plumber for ceiling leak repair fixes the source, the next step is addressing the water damage. It’s important to understand who does what:

  • Plumber’s Role vs. Restoration Company: Our plumbers find and fix the leak’s source. For the subsequent water damage, you’ll need a restoration company or a general contractor. They specialize in drying affected areas, removing damaged materials, and preventing mold.
  • Drying Time: A ceiling can take days or weeks to dry fully, depending on the leak’s severity. Proper ventilation, fans, and dehumidifiers are often needed to ensure thorough drying and prevent more damage.
  • Mold Remediation: Since mold can grow within 48 hours, prompt drying is critical. If mold is detected, a restoration company will safely remove it and treat the area.
  • Structural and Aesthetic Repairs: This involves replacing damaged drywall, insulation, and possibly structural wood. A handyman or painter can then repair and repaint the ceiling. If old pipes are the issue, consider a more extensive solution. Read our guide on the Signs you may need whole home repiping to see if this is a long-term solution.

How to Prevent Future Plumbing Leaks

An ounce of prevention is worth a pound of cure. Here are proactive steps to safeguard your home:

  • Regular Plumbing Inspections: Schedule periodic inspections to identify early signs of wear or corrosion before they become major leaks.
  • Insulate Pipes: In cold Chicago winters, insulating pipes in unheated areas like basements and attics can prevent them from freezing and bursting.
  • Prevent Frozen Pipes in Chicago: Beyond insulation, keep cabinet doors open to allow warm air to reach pipes and let faucets drip during extreme cold. Find more tips in our article on Frozen Pipes in Chicago, IL: What Homeowners Need to Know.
  • Know Your Main Shut-Off Valve Location: Ensure everyone in your household knows where the main water shut-off valve is and how to use it.
  • Address Minor Leaks Immediately: Don’t ignore small drips. Fix them promptly to prevent significant water damage over time.
  • Consider Water Leak Detection Devices: Smart home devices can provide an early warning by alerting you to leaks before they become visible.

By being proactive, you can significantly reduce the risk of needing a plumber for ceiling leak repair in the future.

Frequently Asked Questions about Ceiling Leaks

We often hear similar questions from homeowners dealing with ceiling leaks. Here are answers to some of the most common ones:

Is a ceiling leak an emergency?

Yes. An active drip or bulging ceiling is an emergency. It can cause structural damage, mold growth, and even collapse. Even a small stain needs prompt investigation to prevent the problem from worsening. Call a professional immediately.

Can a plumber fix the water damage to my ceiling?

Generally, no. A plumber’s expertise is finding and fixing the leak’s source (pipes, fixtures, etc.). For water damage restoration—drying, mold remediation, and repairing drywall—you will need a restoration company or a general contractor. Our plumbers can recommend trusted partners for these services.

Does homeowners insurance cover ceiling leaks?

It often depends on the cause. Insurance typically covers damage from “sudden and accidental” events like a burst pipe, but not gradual leaks from poor maintenance. Flood damage is also usually excluded. Always review your policy and contact your provider immediately. Documenting the damage with photos is crucial for any claim.

Conclusion: Your Next Steps for a Leak-Free Home

A ceiling leak is stressful, but these five strategies help you manage the situation and minimize damage. Acting fast, identifying the source, understanding the repair process, vetting your plumber, and planning for prevention are your best defenses.

For a reliable, licensed, and experienced plumber for ceiling leak repair in Chicagoland, including areas like Winnetka, Melrose Park, Oakbrook Terrace, and Hyde Park, look no further than VanDerBosch Plumbing Inc. We pride ourselves on our 100% satisfaction guarantee, transparent pricing with no hidden service charges, and experienced, background-checked technicians who are available 24/7 for your emergency needs.

Don’t let a drip turn into a disaster. For expert water leak detection and repair, schedule an appointment with our team today. We’re here to help you restore peace of mind and keep your home safe and dry.

Budgeting for No-Dig: Understanding Trenchless Sewer Replacement Costs

trenchless sewer replacement - trenchless sewer replacement cost

Why Understanding Trenchless Sewer Replacement Cost Matters


Trenchless sewer replacement cost typically ranges from $80 to $250 per linear foot, with most Chicagoland homeowners paying between $3,200 and $10,000 for a complete 40-foot replacement. Here’s what you need to know:

Quick Cost Breakdown:

  • CIPP Lining: $90–$250 per foot (total: $3,000–$8,000)
  • Pipe Bursting: $150–$275 per foot (total: $4,000–$12,000)
  • Additional Costs: Camera inspection ($175–$500), permits ($200–$1,000), minor excavation for access points

Key Cost Factors:

  • Pipe length and diameter
  • Level of damage (cracks vs. collapse)
  • Depth and accessibility
  • Soil conditions and obstacles
  • Local permit requirements

When you notice slow drains, gurgling sounds from toilets, foul odors, or soggy patches in your lawn, your sewer line is likely failing. The traditional fix meant tearing up your entire yard, driveway, or landscaping—turning your property into a construction zone for weeks.

Trenchless technology changed everything.

This no-dig approach requires only one or two small access points instead of a massive trench. Your lawn stays intact. Your driveway remains untouched. And the project wraps up in 1-2 days instead of weeks.

But here’s what most homeowners want to know: What will it actually cost?

The answer isn’t simple. While trenchless methods may cost 20-40% less overall than traditional excavation (when you factor in restoration expenses), the upfront price depends on your specific situation—pipe condition, length, depth, method used, and local labor rates.

This guide breaks down exactly what influences your total cost, compares the two main trenchless methods, and shows you how to get an accurate quote for your property.

Infographic showing the key cost components of a trenchless sewer repair project, including camera inspection ($175-$500), labor and materials ($80-$250 per linear foot), permits ($200-$1,000), access point excavation, restoration costs, and total project ranges for CIPP lining ($3,000-$8,000) versus pipe bursting ($4,000-$12,000) for a typical 40-foot residential sewer line - trenchless sewer replacement cost infographic infographic-line-5-steps-elegant_beige

Understanding the Main Trenchless Methods and Their Costs

When your sewer line signals trouble, the thought of extensive excavation can be daunting. Thankfully, trenchless technology offers a modern, less invasive solution. We’re talking about “no-dig” repair methods that address your sewer line issues without turning your beautiful Chicagoland property into a construction site. This innovative approach preserves your landscaping, saves time, and often reduces overall costs compared to traditional dig-and-replace methods.

At VanDerBosch Plumbing Inc., we specialize in advanced Sewer Line Repair Services that minimize disruption while maximizing efficiency and durability. The core of trenchless repair lies in two primary methods: Cured-in-Place Pipe (CIPP) Lining and Pipe Bursting. Each has its unique strengths and applications, influencing the overall trenchless sewer replacement cost.

Cured-in-Place Pipe (CIPP) Lining

flexible epoxy liner being inserted into an old pipe - trenchless sewer replacement cost

CIPP lining is like giving your old pipe a brand-new, seamless interior. This method is incredibly effective for pipes that have cracks, leaks, or minor damage but are still structurally sound enough to maintain their shape.

The Process: We insert a flexible, resin-saturated liner into your existing damaged pipe. Once in place, the liner is inflated and cured (often with heat or steam), forming a new, rigid pipe within the old one. This new pipe is corrosion-resistant and prevents future tree root intrusion, often outperforming the original pipe.

Best For: Pipes with minor cracks, root intrusion, offset joints, or small holes. It’s an excellent choice for preserving the existing pipe’s path and diameter.

Cost Insight: For CIPP lining, you can expect an average trenchless sewer replacement cost of $90–$250 per linear foot. A typical project for a standard 25–40 ft sewer lateral in Chicagoland might range from $3,000–$8,000 in total. This method is often slightly less expensive for straight runs due to its streamlined installation.

Pipe Bursting

bursting head pulling a new pipe through an old one - trenchless sewer replacement cost

Pipe bursting is the go-to solution when your existing sewer line is severely compromised—think collapsed sections, major offsets, or when you need to upgrade to a larger diameter pipe. It’s a robust method that replaces the old pipe entirely.

The Process: This technique involves pulling a new, high-density polyethylene (HDPE) pipe through the path of the old one. As the new pipe is pulled, a cone-shaped bursting head simultaneously fractures and pushes the old pipe material outward into the surrounding soil. The result is a brand-new, durable pipe in the exact location of the old one, and sometimes even an upsizing for better flow.

Best For: Fully collapsed lines, severely broken pipes, or when upsizing the pipe diameter is necessary for improved flow. It’s also ideal for pipes that are too damaged for CIPP lining.

Cost Insight: Pipe bursting typically has an average trenchless sewer replacement cost of $150–$275 per linear foot. For a standard 25–40 ft sewer lateral replacement in Chicagoland, the total project cost might fall between $4,000–$12,000. While it can be more upfront than CIPP lining, it offers a complete pipe replacement and is perfect for more severe damage.

What Factors Influence the Trenchless Sewer Replacement Cost?

Understanding the base costs for CIPP lining and pipe bursting is a great start, but several variables can influence your final trenchless sewer replacement cost. Think of it like buying a car: the base model has a price, but the trim, features, and any necessary upgrades will adjust the final sticker price. Our goal is always to provide transparent pricing with no hidden costs, ensuring you know exactly what to expect.

Pipe Condition, Length, and Accessibility

The specific characteristics of your damaged sewer line are primary drivers of cost:

  • Level of Damage: A minor crack that can be fixed with a spot repair or CIPP lining will naturally cost less than a fully collapsed section requiring pipe bursting. Severely damaged or collapsed pipes require more intensive work, increasing labor and material needs.
  • Pipe Length: The longer the section of pipe requiring repair or replacement, the higher the overall cost. Trenchless repairs are typically priced per linear foot, so more feet mean a higher bill. However, sometimes shorter, very localized repairs might have a higher per-foot cost due to fixed setup fees.
  • Pipe Diameter: Most homes use 4-inch diameter pipe, but larger diameters (e.g., 6-inch for some main lines) will require more material and specialized equipment, leading to higher costs.
  • Pipe Depth: Deeper sewer lines (over 8 feet deep) require more effort and time to create access points, which can increase hourly labor costs. Shallower lines are generally easier and therefore less expensive to access.
  • Soil Conditions: Hard, rocky soil or areas with a high water table can make excavation for access points more challenging and time-consuming, adding to the labor cost.
  • Obstacles: If your sewer line runs under significant obstacles like large tree roots, existing utility lines, or concrete slabs, it can complicate the process. While trenchless methods minimize excavation, removing severe root intrusion or navigating complex underground structures might require additional labor and specialized tools.

Additional Factors That Influence the Trenchless Sewer Replacement Cost

Beyond the pipe itself, several other components contribute to the total investment:

  • Camera Inspection Fees: Before any work begins, a professional sewer line camera inspection is crucial. This helps us accurately diagnose the problem, pinpoint its exact location, and determine the best trenchless method. In Chicagoland, these inspections typically cost between $175 and $500. It’s money well spent, as it prevents unnecessary work and provides a precise roadmap for the repair.
  • Municipal Permits: Most sewer line replacements, even trenchless ones, require permits from your local municipality (e.g., in Chicago, Roselle, Elmhurst, etc.). These permits ensure the work complies with local building codes and regulations. Permit costs can vary widely by location, often ranging from $200 to $1,000. We handle all the necessary paperwork, but it’s an unavoidable part of the trenchless sewer replacement cost.
  • Excavation for Access Points: While “trenchless” means no long trenches, we still need one or two small access points (pits) at either end of the damaged section to insert the lining or bursting equipment. If these points are under concrete, asphalt, or dense landscaping, minor excavation and restoration will be necessary. Additional labor for excavation can cost anywhere from $60 to $250 per hour.
  • Tie-Ins for Connecting Lines: If your sewer system is complex or requires connecting multiple lines to the main sewer, “tie-ins” might be needed. These connections can add $60 to $250 per linear foot, plus any necessary excavation for access.
  • Backwater Valve Installation: In some areas of Chicagoland, or simply for added protection, you might consider installing a backwater preventer. This device stops sewage from flowing back into your home during heavy rains or municipal sewer backups. Installation costs for a backwater preventer range from $150 to $1,150, including parts and labor.
  • Contractor Experience and Reputation: The skill and reputation of your plumbing contractor play a significant role. Experienced, licensed, and insured professionals like us might have a slightly higher hourly rate, but our expertise ensures the job is done right the first time. This can save you money in the long run by avoiding costly callbacks or premature failures. We offer a 100% satisfaction guarantee, giving you peace of mind.

Trenchless vs. Traditional Repair: A True Cost Comparison

When facing a sewer line issue, homeowners often weigh the trenchless sewer replacement cost against traditional dig-and-replace methods. While the upfront per-foot cost for trenchless might sometimes seem comparable or even slightly higher than traditional excavation alone, the true cost savings become apparent when you consider the bigger picture.

Let’s break down the comparison:

Feature Trenchless Sewer Repair (CIPP Lining & Pipe Bursting) Traditional Dig & Replace Method
Upfront Cost (per linear foot) $80–$250 (sometimes up to $275 for bursting) $50–$200 (for excavation and pipe replacement)
Total Project Cost (typical 40 ft) $3,200–$12,000 (including minor access excavation) $2,000–$8,000 (before restoration)
Restoration Costs Minimal to none (small access points only) High (landscaping, driveway, patio, concrete)
Total Overall Cost (with restoration) Often 20-40% less than traditional Can be significantly higher due to restoration
Time to Complete 1-2 days 3 days to 2 weeks
Property Disruption Minimal (two small access points) Extensive (long trench across yard, driveway)
Lifespan of Repair 50-100+ years (HDPE/CIPP liners) 50-100+ years (new PVC pipe)
Environmental Impact Low (minimal soil disturbance, lower carbon footprint) High (significant soil disturbance, heavy machinery)

Upfront Cost vs. Total Cost: The initial per-foot rate for traditional excavation might appear lower. However, this often doesn’t include the significant expenses of repairing your property afterward. Imagine the cost of re-landscaping a dug-up yard, repaving a driveway, or replacing a patio. These restoration costs can quickly inflate the total bill for traditional methods, potentially adding thousands or even tens of thousands of dollars to the final price.

  • Landscaping Repair: Restoring a damaged lawn can range from $4.50–$12 per square foot. For a sizable trench, this adds up fast!
  • Driveway/Patio Repair: If your sewer line runs under a concrete driveway or patio, the cost to break it up and restore it can be substantial, ranging from $1,500–$5,000+. Repairing a concrete slab alone can cost $300–$350 per linear foot.

Time Savings: Trenchless projects are remarkably efficient. Most residential repairs are completed within 1-2 days. Traditional excavation, on the other hand, can take anywhere from 3 days to 2 weeks, depending on the length of the trench, soil conditions, and restoration work. This means less disruption to your daily life and faster return to normalcy.

Environmental Benefits: Beyond cost and time, trenchless methods are also kinder to the environment. By avoiding major excavation and the use of heavy machinery, trenchless repair has a significantly smaller environmental impact and a lower carbon footprint, a benefit noted by the Environmental Protection Agency (EPA). We minimize soil disturbance, protect existing landscaping and tree roots, and reduce the amount of waste generated.

When all these factors are considered, trenchless sewer replacement often emerges as the more economical and practical choice for Chicagoland homeowners.

How to Get the Most Accurate Quote

Getting an accurate estimate for trenchless sewer replacement cost is crucial for proper budgeting and peace of mind. We believe in transparent pricing and empowering our customers with all the information they need. Here’s how you can ensure you get the most precise quote for your property:

Start with a Professional Sewer Video Inspection

The first and most critical step in getting an accurate quote is a professional sewer video inspection. Trying to guess the problem or estimate costs without seeing inside the pipe is like trying to diagnose a patient without an X-ray!

Importance of Diagnosis: A high-definition camera inspection allows us to:

  • Identify the Exact Problem: Is it a crack, a collapse, root intrusion, or an offset joint?
  • Pinpoint the Location: We can determine the precise spot and depth of the damage.
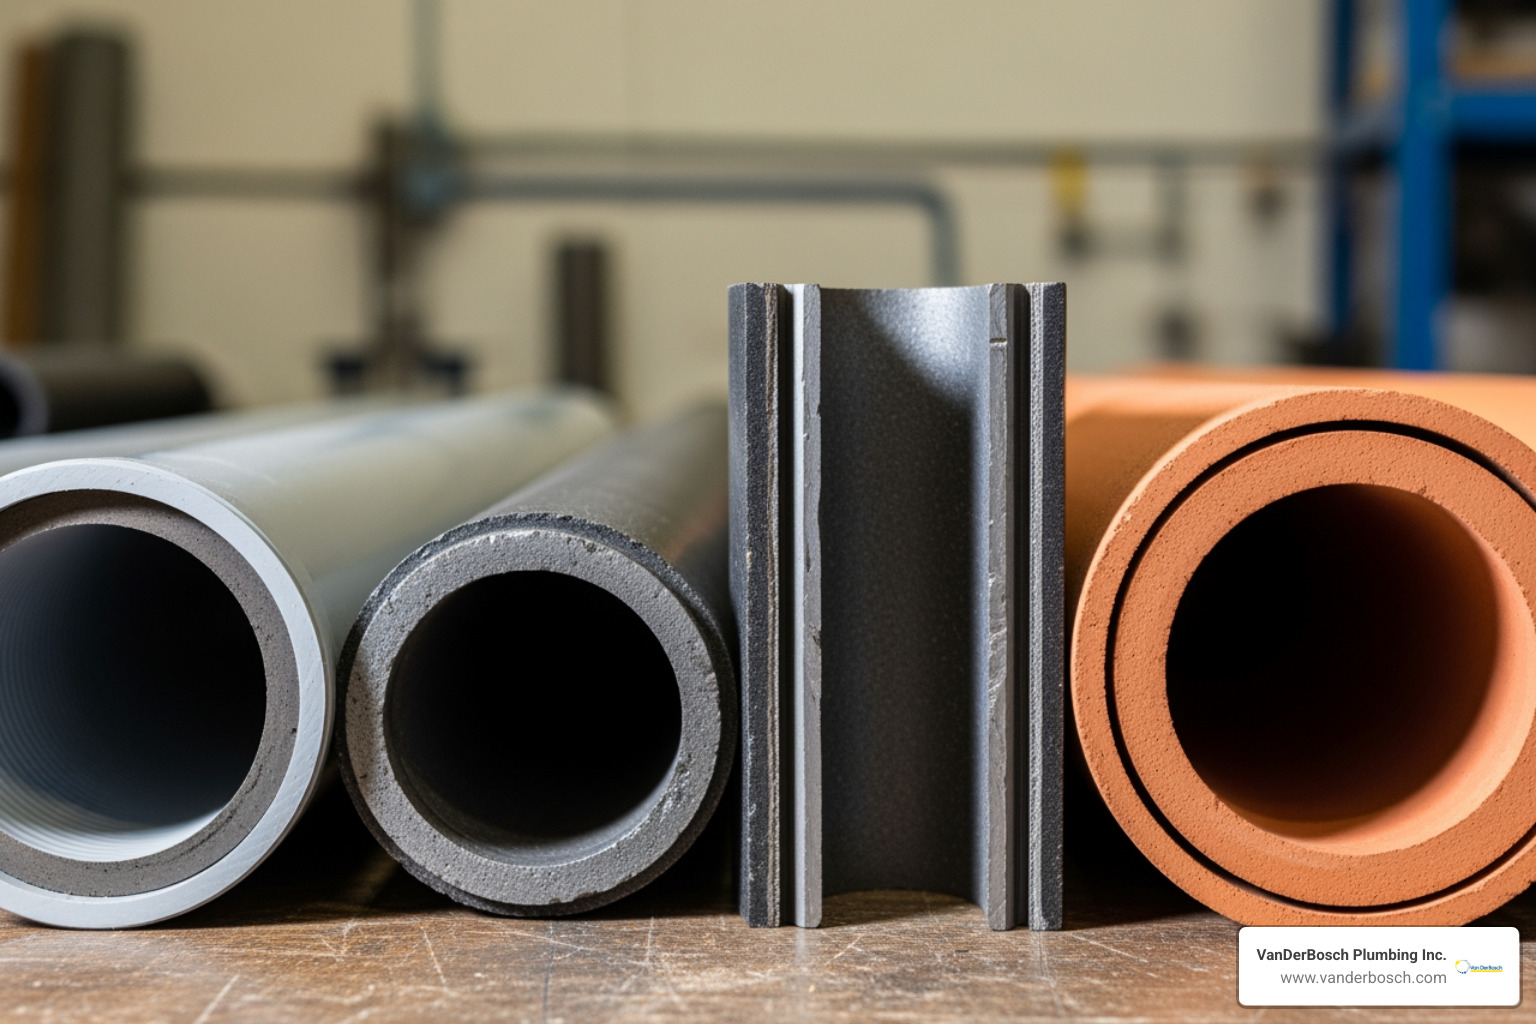
  • Assess Pipe Condition: We’ll know the material, diameter, and overall integrity of your existing pipe, which is vital for choosing the right trenchless method.
  • Measure Length: The camera helps us accurately measure the length of the section needing repair or replacement.

This inspection is invaluable. It helps us avoid guesswork and provides you with an honest, precise assessment of the work needed. For Chicagoland homeowners, a sewer line camera inspection typically costs between $175 and $500. It’s an investment that can save you thousands by ensuring the correct solution is applied. Learn more about The Basics of Sewer Video Inspection Explained.

What to Look for in a Trenchless Sewer Replacement Cost Estimate

Once the inspection is complete, we’ll provide you with a detailed estimate. Here’s what a comprehensive and transparent quote should include:

  • Itemized Breakdown: The estimate should clearly list all services and materials. No vague lump sums!
  • Labor Costs: This should detail the estimated hours or flat rate for our skilled technicians.
  • Material Costs: A breakdown of the pipe materials (e.g., CIPP liner, HDPE pipe) and any other necessary components.
  • Permit Fees: All required municipal permit costs should be included or clearly stated as an additional item. We handle the paperwork, but the cost is part of the project.
  • Excavation for Access Points: Any necessary minor excavation for entry and exit points, including any restoration of disturbed areas, should be outlined.
  • Cleanup and Restoration: A good quote will include details about site cleanup after the work is done. We always leave your property as clean, if not cleaner, than we found it.
  • Warranty Details: We stand by our work! Ensure the estimate specifies any warranties offered on the repair or replacement. We offer a 100% satisfaction guarantee.
  • Comparing Multiple Quotes: We always recommend getting at least three quotes from different licensed and insured plumbing professionals in Chicagoland. This helps you compare services, pricing, and ensure you’re getting a fair deal. However, the cheapest option isn’t always the best. Look for a balance of fair pricing, clear communication, comprehensive services, and strong guarantees.

Frequently Asked Questions about Trenchless Repair Costs

We understand that investing in sewer line repair can bring up many questions. Here are some of the most common inquiries we receive regarding trenchless sewer replacement cost and the long-term value of these solutions:

How long does a trenchless sewer repair last?

This is a fantastic question, and the answer highlights one of the major benefits of trenchless technology: durability. When properly installed by experienced professionals like us, trenchless sewer repairs are designed to be a permanent solution.

  • Material Lifespan: The materials used in trenchless methods, such as CIPP liners and HDPE pipes, are incredibly robust and resistant to corrosion, tree root intrusion, and general wear and tear. These materials are engineered to last for decades.
  • Expected Lifespan: You can realistically expect a trenchless sewer repair to last 50 years or more. In fact, many manufacturers boast lifespans of 100 years or even longer for their high-quality products.
  • Warranties: To back up this claim, we offer a 25-year warranty for all trenchless drain repairs. This gives you peace of mind knowing your investment is protected for the long haul. This longevity means you won’t be dealing with recurring sewer problems or the associated costs anytime soon.

Is trenchless repair always the best option?

While we’re huge fans of trenchless technology for its efficiency and minimal disruption, it’s important to be honest: it’s not always the perfect fit for every single situation.

  • Limitations: Trenchless methods may not be suitable if your pipe has:

    • Severe Bellies or Sags: If a section of your pipe has significantly sagged, creating a “belly” where waste can collect, trenchless lining or bursting might not fully correct the improper grade. In such cases, traditional excavation might be necessary to re-establish the proper slope for gravity flow.
    • Complete Collapse in Multiple Sections: While pipe bursting can handle a collapsed pipe, if there are multiple, extensive collapses or the pipe material has disintegrated, a full traditional replacement might be more practical.
    • Major Obstructions: While we can clean out most obstructions, very large, immovable objects within the pipe could prevent the successful deployment of a liner or bursting head.
  • When Traditional Excavation is Necessary: If our initial inspection reveals these more severe issues, we’ll clearly explain why traditional excavation might be the better, more permanent solution for your specific problem. Our priority is always to recommend the most effective and long-lasting repair, even if it means more digging. For a more detailed breakdown of when trenchless is and isn’t suitable, check out our guide on Trenchless Pipe Repairs Explained.

Are there financing options available for sewer replacement?

We understand that a sewer line replacement, even with the cost savings of trenchless methods, is a significant home investment. Unexpected plumbing emergencies can hit your budget hard, which is why we want to help make the process as manageable as possible.

  • Managing Expenses: We believe that necessary home repairs shouldn’t be delayed due to financial constraints.
  • Payment Plans and Financing Programs: At VanDerBosch Plumbing Inc., we offer various financing options to help our Chicagoland customers manage the trenchless sewer replacement cost. These options can include flexible payment plans or financing programs with approved credit, allowing you to spread out the expense over time.
  • Asking Your Contractor: Don’t hesitate to ask us about our available financing solutions during your consultation. We’re here to work with you and find an option that fits your budget, ensuring you can get your sewer line repaired quickly and efficiently without undue financial stress.

Secure Your Peace of Mind with a No-Dig Solution

Navigating sewer line problems can be a stressful experience, but understanding the options and their associated costs can transform that stress into confidence. The modern marvel of trenchless sewer replacement offers Chicagoland homeowners a compelling alternative to the messy, disruptive, and often more expensive traditional methods.

With trenchless technology, you benefit from:

  • Minimal Disruption: Your cherished lawn, pristine landscaping, and valuable hardscaping remain virtually untouched.
  • Cost-Effectiveness: When you factor in the avoided restoration costs, trenchless repair often proves to be the more affordable long-term investment.
  • Long-Lasting Solution: Our high-quality materials and expert installation ensure your new or relined sewer pipe will serve your home reliably for 50 years or more, backed by our robust warranties.
  • Time Efficiency: What used to take weeks can now be completed in a matter of days, getting your home back to normal faster.

At VanDerBosch Plumbing Inc., we pride ourselves on delivering exceptional service throughout Chicagoland. Our commitment to you includes a 100% satisfaction guarantee, transparent pricing with no hidden service charges, and a team of experienced, background-checked technicians ready to provide 24/7 service. We leverage advanced technology and expertise to provide the best solutions for your home’s plumbing needs, from Chicago to Roselle, Niles, Winnetka, and beyond.

Don’t let a failing sewer line turn your property into a construction zone or drain your savings. For an expert evaluation and a detailed, transparent quote for your property, explore our trenchless pipe repair services. We’re here to provide a reliable, no-dig solution that secures your peace of mind.

Fix Your Flow: A Comprehensive Guide to Navien 3-Way Valve Replacement

navien 3 way valve replacement

Why Your Navien’s Hot Water Issues Often Point to the 3-Way Valve

A Navien 3 way valve replacement is a common repair for combi-boiler owners with hot water issues. If you have low flow, inconsistent, or scalding hot water, the 3-way diverter valve is the likely culprit.

Quick Answer: What You Need to Know

  • The Problem: The 3-way valve directs water for heating and hot water. When it fails (often by sticking partially open), it causes low flow and incorrect water temperatures.
  • The Challenge: Replacing this valve is complex, requiring removal of the PCB, control panel, piping, and circulator pump.
  • DIY or Pro?: This is an advanced job. Most homeowners should hire a professional due to the difficulty and risk of damage.
  • Cost: The valve costs $40-$80, but professional labor runs $300-$600 due to the extensive disassembly.
  • Time Required: 2-4 hours for a pro; longer for a first-time DIYer.

Frustratingly, this valve is known to fail often, yet it’s buried deep inside the boiler. As one technician noted, “Nearly half the boiler must be removed to replace a part that is known to fail more than most other parts on the unit.”

While the valve swap itself is simple, accessing it requires patience and the right tools. Whether you’re a DIYer or want to understand the job, this guide covers the entire process, from diagnosis to testing.

Infographic showing the Navien 3-way valve replacement process: 1) Shut off power, water, and gas supplies 2) Remove front panel and disconnect PCB 3) Remove circulator pump and access valve housing 4) Pull locking pin and extract old cartridge 5) Clean housing and install new cartridge 6) Reassemble all components and test system. Includes estimated time of 2-4 hours and difficulty rating of advanced. - navien 3 way valve replacement infographic

What is a Navien 3-Way Valve and Why Does It Fail?

The Navien 3-way diverter valve is a critical component in your combi-boiler. It acts like a traffic cop for water, directing it to provide either space heating or on-demand domestic hot water (DHW). When you open a hot water tap, the valve prioritizes DHW by diverting heated water to a flat plate heat exchanger. Once the tap is closed, it returns to its idle state, ready to provide space heating. This efficient flow diversion is key to a combi-boiler’s performance.

Common Failure Modes

Unfortunately, the Navien 3-way valve is known to fail. Its piston-type design is susceptible to getting stuck in a partially open position, meaning it doesn’t fully switch between heating and DHW functions. The primary cause is mineral scaling from the water supply, which builds up inside the housing and on the piston, preventing smooth movement. As one user noted, “Minor scaling inside the housing has been suggested as a possible cause for the Navien 3-way valve not sliding out smoothly.” This leads to the frustrating symptoms below.

new Navien 3-way valve cartridge next to a corroded old one - navien 3 way valve replacement

If you suspect your valve is failing, it’s important to diagnose it correctly, much like understanding the Signs Your Water Heater May Need Repair or Replacement.

Common Symptoms of a Failing Navien 3-Way Valve

When the valve malfunctions, it sends clear signals related to its inability to direct water flow. Here are the tell-tale signs that a navien 3 way valve replacement may be needed:

  • Lukewarm or No Domestic Hot Water: If the valve is stuck favoring the heating system, not enough hot water reaches your taps.
  • Low Water Flow at Hot Water Faucets: A partially obstructed valve restricts water flow, reducing pressure from your hot water taps.
  • Higher Than Desired Temperatures: A stuck valve can also cause scalding water by improperly mixing superheated water or failing to regulate flow. Research confirms a common failure mode is a partially open valve, “leading to low flow and higher than desired temperatures at the domestic hot water faucet.”
  • Inconsistent Heating Performance: While DHW is primarily affected, a faulty valve can also divert heat away from your radiators, causing them to heat up slowly or not at all.

If you’re experiencing these issues, your 3-way valve is the likely culprit. For more on how these systems work, see our guide on Tankless Water Heaters 101.

Preparing for Your Navien 3-Way Valve Replacement

A Navien 3 way valve replacement is a major repair requiring careful preparation. Because the valve is so inaccessible, the process involves disassembling much of the boiler and can be very time-consuming. You’ll need the right tools, genuine parts, and a clear plan.

Essential Tools and Parts

Gather all necessary equipment before you begin to save time and frustration.

  • Screwdrivers: Phillips and flathead.
  • Pliers: Needle-nose or channel-lock.
  • Wrenches: Adjustable or open-end.
  • Bucket and Towels: To catch residual water.
  • New Navien 3-Way Valve Cartridge: Ensure you have the correct model for your unit.
  • O-rings and Locking Pin: These often come with the new valve.
  • Pipe Thread Sealant: Teflon tape or pipe dope for reassembly.

We recommend using genuine Navien factory OEM parts for a lasting repair. You can find a NAVIEN 3 WAY VALVE or other Navien Parts & Accessories from specialized suppliers. Always verify the part number is compatible with your specific Navien model.

necessary tools laid out (screwdrivers, pliers, bucket, towels, new valve) - navien 3 way valve replacement

DIY vs. Hiring a Professional: Making the Right Choice

Deciding whether to DIY this repair or call a pro is a crucial decision. While saving on labor is tempting, you must weigh the difficulty, time, and risks.

Feature DIY Replacement Professional Replacement (VanDerBosch Plumbing Inc.)
Difficulty Level Advanced. Requires significant mechanical aptitude and patience. Expert. Handled by licensed, experienced technicians.
Time Commitment 4-8+ hours, especially for first-timers. Can be very time-consuming. 2-4 hours for an experienced technician.
Component Access Requires removing nearly half the boiler (PCB, control panel, piping, circulator pump). Technicians are familiar with the boiler’s layout and access points.
Risk of Damage High. Risk of damaging sensitive electronic components, breaking stuck parts, or causing leaks. Low. Professionals have specialized tools and expertise to minimize risks.
Warranty Concerns DIY repairs can potentially void your Navien warranty. Repairs performed by licensed professionals typically maintain warranty validity.
Building Codes Homeowners may not be aware of or adhere to local plumbing codes. Professionals ensure all work complies with local building and fire codes in Chicagoland.
Tools Required Must purchase or rent specialized tools. Technicians arrive with all necessary tools and genuine parts.
Peace of Mind Can be stressful, especially if unexpected issues arise. Guaranteed satisfaction, expert advice, and emergency support.

This is a challenging task due to the intricate disassembly and potential for stuck parts. One user noted they had to replace the entire assembly because “the old valve could not be removed from the housing without breaking it.”

For most homeowners in Chicagoland, hiring a licensed professional is the safest choice. Our team at VanDerBosch Plumbing Inc. specializes in these repairs, offering transparent pricing and a 100% satisfaction guarantee. If you need professional help, Contact Us.

Step-by-Step Guide to the Replacement Process

If you’re attempting the Navien 3 way valve replacement yourself, this guide outlines the process. Safety is paramount.

Step 1: Safety and Preparation

Prioritize safety by shutting off all utilities to the boiler before you begin.

  1. Shut Off Power: Turn off the circuit breaker for the boiler and unplug the unit.
  2. Turn Off Water: Shut off the main water supply to your house and close any isolation valves leading to the boiler.
  3. Turn Off Gas: Turn the gas shut-off valve on the line leading to the boiler to the “OFF” position.
  4. Depressurize: Open a hot water faucet to release pressure from the lines.
  5. Drain the Boiler: Connect a hose to the boiler’s drain valve and route it to a floor drain. Open the valve to drain the unit completely to prevent spills.

Step 2: Gaining Access to the Valve

This step is complex, as the valve is buried deep within the unit, requiring careful disassembly.

  1. Remove Front Cover: Unscrew and remove the boiler’s front panel.
  2. Disconnect Control Panel (PCB): Take photos of the wiring for reference. Carefully disconnect all harnesses from the PCB, remove it, and set it in a safe place.
  3. Remove Internal Piping: Disconnect the necessary water lines to create access. Have a bucket and towels ready for residual water.
  4. Remove Circulator Pump: Disconnect the pump’s electrical connection and unbolt it from its housing. This often obstructs the valve assembly.
  5. Locate Valve Assembly: With the components removed, you should now see the 3-way valve assembly, which is typically secured with a locking pin.

Step 3: Performing the navien 3 way valve replacement

This is the core of the repair. Be patient, as the old valve may be stuck.

  1. Remove Locking Pin: Use needle-nose pliers to pull the small locking pin straight out.
  2. Extract Old Cartridge: Gently try to pull the old valve cartridge from its housing. If it’s stuck (a common issue), refer to our troubleshooting tips below. Avoid using excessive force, which can damage the housing.
  3. Clean the Housing: Once the old valve is out, use a soft brush or cloth to thoroughly clean the inside of the housing, removing all scale and debris.
  4. Insert New Cartridge: Lightly lubricate the O-rings on the new Navien 3 way valve replacement cartridge with silicone grease. Align the new valve and push it straight in until fully seated.
  5. Secure with Locking Pin: Reinsert the locking pin to secure the new cartridge.

For a visual guide, you might find it helpful to Watch a video of the replacement process.

Step 4: Reassembly and Testing

With the new valve installed, carefully reverse the disassembly process.

  1. Reinstall Components: Reattach the circulator pump, internal piping, and the PCB. Double-check that all wiring harnesses are securely reconnected.
  2. Replace Front Cover: Secure the front panel.
  3. Repressurize the System: Close the drain valve. Slowly turn the water supply back on and listen for the system to fill. Check for any leaks around your work area.
  4. Check for Leaks: Carefully inspect all connections. Tighten any fittings that drip.
  5. Restore Power and Gas: Once you are certain there are no leaks, turn the gas supply back on. Then, restore power at the circuit breaker.
  6. Test System: Turn on a hot water faucet to test for consistent flow and temperature. Then, set your thermostat to call for heat and ensure the heating system functions correctly.

Potential Challenges and Professional Tips

The Navien 3 way valve replacement can be complicated by a few common issues, especially a stuck valve.

Troubleshooting a Stuck Valve Cartridge

The most common challenge is a stuck valve cartridge. Many users report being unable to remove it after pulling the locking pin. This is usually caused by physical damage to the valve’s internal plastic parts or by mineral scaling that glues it in place.

What to Do:

  • Gentle Persuasion: Try gently wiggling and twisting the valve while pulling. Avoid brute force, which can break the housing and lead to a much more expensive repair.
  • Inspect for Debris: Use a flashlight to check for broken plastic or heavy scale in any visible gap.
  • Use Firm Force (with Caution): If the valve is only slightly stuck, a firm, steady pull might work. Proceed with extreme caution to avoid breaking components.
  • Replace the Entire Assembly: As a last resort, if the cartridge is fused or broken inside the housing, you may need to replace the entire 3-way valve assembly. This is more costly but prevents catastrophic damage to the boiler.

This job can get complicated quickly. For a real-world look, you can Read a technician’s perspective on the job.

Preventative Maintenance for Your Navien 3-Way Valve

To extend the valve’s lifespan and avoid a premature Navien 3 way valve replacement, consider these preventative steps:

  • Annual System Flush: An annual flush removes sediment and scale buildup, which are major causes of valve failure.
  • Water Softener: In areas with hard water like Chicagoland, a water softener significantly reduces mineral buildup in your boiler and plumbing system.
  • Install a Thermostatic Mixing Valve (TMV): A TMV on the DHW outlet delivers a consistent, safe water temperature, reducing stress on the 3-way valve. One expert suggests to “spec and install a thermostatic mixing valve on the domestic side outlet when dealing with Navien combi-boilers.”
  • Regular Professional Inspections: Annual service by a qualified plumber can catch potential issues like scaling or valve stiffness early.

These measures can save you hassle and expense. For more on maintaining your water heater in Roselle, visit our Roselle Services: Water Heater page.

Frequently Asked Questions about navien 3 way valve replacement

Here are answers to common questions about Navien 3 way valve replacement.

How much does a Navien 3-way valve replacement cost?

The total cost includes the part and labor.

  • Part Cost: The valve cartridge typically costs $40 to $80.
  • Labor Cost: Because the job is time-consuming (2-4 hours for a pro), labor costs in the Chicagoland area usually range from $300 to $600.
  • Total Cost: Expect a professional replacement to cost between $350 and $700. The final price depends on the complexity of the repair.

For an accurate quote, it’s best to Schedule Appointment with a professional.

How do I know for sure the 3-way valve is the problem?

While symptoms like low DHW flow and inconsistent temperatures are strong indicators, a professional diagnosis is the best way to be certain. The valve is a likely culprit if:

  • The symptoms are consistent across all hot water taps.
  • The boiler is not showing other error codes.
  • The space heating system works correctly.

A qualified technician can perform tests to confirm the diagnosis. Since the 3-way valve is a “common failure point” on Navien units, it’s a primary suspect for experienced plumbers.

Can I just replace the motor on the 3-way valve?

It depends on what has failed. The assembly has two main parts: the motorized actuator and the valve cartridge (with the piston). Most often, the piston inside the cartridge gets stuck from scaling or wear, not the motor itself. If the motor runs but water flow doesn’t change, the cartridge is the problem. If the motor is humming or not turning, the motor may be the issue. However, given the difficult labor involved, most professionals recommend replacing the entire cartridge to ensure a reliable, long-lasting repair.

When to Call a Professional for Your Water Heater Needs

While this guide is comprehensive, a Navien 3 way valve replacement is a complex, time-consuming, and potentially risky job best left to professionals.

At VanDerBosch Plumbing Inc., we provide licensed plumbing services throughout Chicagoland, including Roselle, Niles, Winnetka, Elmhurst, and Mount Prospect. We understand how frustrating a malfunctioning Navien boiler can be.

Why trust us with your Navien 3 way valve replacement?

  • Safety and Expertise: Our experienced, background-checked technicians handle gas, electric, and water systems safely and are experts on Navien units.
  • Efficiency: We can complete this complex job in 2-4 hours, saving you time and hassle.
  • Guaranteed Quality: We use genuine OEM parts to protect your warranty and back our work with a 100% satisfaction guarantee.
  • Reliable Service: We offer transparent, upfront pricing and 24/7 availability for emergencies.

Don’t let a faulty valve leave you in the cold. For complex jobs like this, trust our experts for all your water heater service needs. We’re ready to get your Navien running smoothly again. Book a Time with us today!

Don’t Get Steamed: Finding the Best Boiler Repair in Oak Park

cozy, warm living room in an Oak Park-style home with a classic radiator - Boiler repair Oak Park

Why Boiler Repair Oak Park Matters for Your Home’s Comfort

Boiler repair Oak Park is essential for keeping your home warm and safe during Illinois’s brutal winter months. When your boiler fails at 2 AM on a freezing January night, you need fast, reliable help—and you need to know who to call.

Quick Answer: Top Boiler Repair Services in Oak Park

If you need immediate boiler repair in Oak Park, here’s what to look for:

  • 24/7 Emergency Service – Boiler failures don’t wait for business hours
  • Licensed & Certified Technicians – Proper training ensures safe repairs
  • Transparent Pricing – No surprise charges during emergencies
  • Same-Day Response – Fast arrival times for urgent issues
  • All Boiler Types Serviced – Steam, hot water, gas, electric, and oil systems

Common boiler problems requiring immediate repair include:

  • No heat or hot water
  • Water leaking from the unit
  • Strange noises (banging, kettling, gurgling)
  • Pilot light won’t stay lit
  • Low pressure readings

Winters in Illinois can be harsh. When temperatures drop below freezing, a functioning boiler isn’t just about comfort—it’s about safety. A malfunctioning boiler can leave you and your family in the cold, or worse, expose you to dangerous carbon monoxide.

Since 1955, Oak Park homeowners have relied on professional boiler services to keep their heating systems running smoothly. Whether you have radiators, baseboard heaters, or radiant floor heating, understanding when your boiler needs professional attention can save you from costly damage and uncomfortable nights.

This guide will walk you through everything you need to know about boiler repair in Oak Park—from identifying common problems to understanding when to call for emergency service.

infographic showing 5 critical signs your boiler needs repair: 1. No heat production when thermostat is on, 2. Water leaking from boiler unit or pipes, 3. Strange noises like banging or kettling sounds, 4. Pilot light repeatedly goes out, 5. Low pressure gauge reading below normal range - Boiler repair Oak Park infographic infographic-line-5-steps-elegant_beige

Understanding Your Home’s Boiler System

Boilers are a foundational heating system for many homes in Oak Park and the wider Chicagoland area, especially in older, charming properties that define our neighborhoods. Unlike modern forced-air systems, boilers provide a unique, comfortable type of warmth known as radiant heat. This heat rises from the ground upward, spreading more evenly and comfortably throughout your home. Understanding the basics of how your boiler works, what differentiates it from a furnace, and how to identify it, is the first step in ensuring its longevity and efficiency.

modern boiler system with key parts labeled - Boiler repair Oak Park

How Do Boilers Work?

At its core, a boiler’s job is to heat water and circulate it throughout your home to provide warmth. This process is surprisingly neat and efficient, especially in the cold Illinois winters.

The heating process typically involves a six-step cycle:

  1. Filling the Tank: The boiler’s tank is initially filled with room temperature or cold water.
  2. Heating the Water: Gas, oil, or electricity is used to heat the water within the tank. For steam boilers, the water is heated past the point of boiling to create steam.
  3. Circulation Begins: Once the water reaches the desired temperature (or turns into steam), it’s pushed throughout your home.
  4. Heat Distribution: The hot water (or steam) travels through a network of pipes to radiators, baseboard heaters, or radiant floor systems. These components then dissipate the heat into your living spaces.
  5. Return to Boiler: As the water or steam releases its heat, it cools down and returns to the boiler via a return pipe.
  6. Cycle Repeats: Steps 1-5 are repeated continuously until your home reaches the desired temperature set on your thermostat.

This closed-loop system is highly effective, providing consistent warmth without the drafts associated with forced-air systems.

The Key Differences Between a Boiler and a Furnace

While both boilers and furnaces are designed to keep your home warm, they achieve this in fundamentally different ways, leading to distinct advantages and disadvantages.

Feature Boiler (Hydronic System) Furnace (Forced-Air System)
Heat Type Radiant heat (hot water or steam) Convective heat (hot air)
Components Boiler unit, pipes, radiators/baseboard heaters Furnace unit, ductwork, vents
Air Quality Doesn’t circulate dust/allergens; adds no humidity Circulates dust/allergens; can dry out air
Lifespan Often 15-30+ years with proper maintenance Typically 15-20 years
Efficiency High, as water heats more readily than air; less heat loss Varies, heat loss can occur through leaky ductwork
Fuel Sources Oil, natural gas, electricity, wood pellets Natural gas, propane, electricity, oil
Installation Cost Generally higher; more complex installation Generally lower; simpler installation
Risks Carbon monoxide, leaks (water damage) Carbon monoxide

Boilers offer radiant heat that rises from the ground upward, allowing it to spread more easily and provide a consistent, comfortable warmth. Because they don’t blow air, they don’t circulate dust and allergens, making the air more allergy-friendly. Furnaces, on the other hand, rely on hot air and ductwork, which can lead to uneven heating and dry air. While furnaces are less likely to freeze in cold environments, boilers, especially hot water systems, are known for their long lifespan and superior energy efficiency because water heats more readily than air.

How to Tell If You Have a Boiler System

Identifying your home’s heating system is straightforward. If you’re unsure whether you have a boiler or a furnace in your Oak Park home, here’s how to check:

  • Look for Radiators or Baseboard Heaters: The most obvious sign of a boiler system is the presence of cast-iron radiators or long, low baseboard heaters along the walls in your rooms.
  • Check for Small Pipes: Go to where your home’s heating system is located (often in the basement or a utility closet). If you see several small pipes entering and exiting the main unit, you likely have a boiler.
  • Absence of Large Ductwork: Furnaces are connected to large metal ductwork that distributes hot air through floor or wall vents. If you don’t see this extensive duct system, it’s a strong indicator you have a boiler.

A boiler primarily relies on these radiators or baseboard heaters to spread its warmth, circulating hot water or steam rather than air.

More info about our Boiler services.

Common Boiler Problems and When to Call for Repair

Even the most robust boiler systems in Oak Park can encounter problems. Recognizing the warning signs early can save you from a complete breakdown and costly emergency repairs. While some issues might seem minor, they can quickly escalate, affecting your comfort and safety. Knowing when to troubleshoot a small issue and when to call for professional boiler repair Oak Park is crucial.

leaking boiler with a puddle on the floor - Boiler repair Oak Park

Top Signs You Need Boiler Repair in Oak Park

Your boiler often gives subtle hints before a major malfunction. Ignoring these signs can lead to more significant problems down the line. Here are the top indicators that your boiler needs professional attention:

  • No Heat or Hot Water: This is the most obvious sign. If your thermostat is set correctly but your home isn’t warming up, or you’re getting cold water when you expect hot, it’s a clear signal. This could be due to a faulty thermostat, a pilot light issue, or a problem with the heating elements.
  • Leaking Water: Any water leaking from your boiler unit or its pipes is a serious concern. Leaks can stem from damaged valves, seals, pumps, or even a cracked heat exchanger. This not only indicates a problem with the boiler itself but can also lead to significant water damage to your property.
  • Strange Noises: Boilers are generally quiet, so unusual sounds are a red flag.
    • Kettling: A rumbling or whistling sound, often indicating a buildup of limescale or sediment inside the heat exchanger.
    • Gurgling: Can suggest air trapped in the system or low water pressure.
    • Banging: Might be caused by water boiling too rapidly or loose components.
  • Low Boiler Pressure: Your boiler’s pressure gauge should typically be within a specific range (often 1-1.5 bar for hot water systems). If it consistently drops, it could indicate a leak in the system or a problem with the expansion tank.
  • Pilot Light Out (for gas boilers): If your pilot light frequently goes out, it could be a sign of a faulty thermocouple, a draft, or a more serious gas supply issue. A damaged, broken, or switched-off pilot light will prevent the boiler from igniting.

If you notice any of these issues, it’s important to have a professional technician inspect your system promptly. Early detection can prevent minor issues from becoming major, expensive repairs.

Top Signs You Need Boiler Repair in Chicago Before Winter Hits.

Common Issues with Water and Steam Boilers

While all boilers share a common goal, the specific problems they encounter can differ based on whether they are water (hydronic) or steam systems.

Common Problems with Water Boilers:

  • Leaking: This is a frequent issue, often due to a damaged or broken valve, seal, or pump. These leaks can lead to pressure drops and water damage.
  • Low Boiling Pressure: A faulty component, such as a pressure relief valve or a blockage, can cause the system to lose pressure, leading to inefficient heating or complete shutdown.
  • Failure to Turn On: When your thermostat calls for heat, and the boiler doesn’t respond, it could be due to electrical issues, thermostat malfunctions, or a problem with the ignition system.
  • Circulator Pump Failure: The circulator pump is vital for moving hot water through your home. If it fails, heat won’t be distributed, leaving your home cold.
  • Broken-Down Boiler: Sometimes, a boiler simply reaches the end of its lifespan due to old age or poor maintenance, requiring replacement rather than repair.

Common Problems with Steam Boilers: Steam boilers, though less common in modern residential settings, are often found in older Oak Park homes and can present unique challenges:

  • Lack of Water or Excessive Water: Maintaining the correct water level is critical for steam boilers. Too little water can damage the boiler, while too much can lead to “priming” or “surging,” where water enters the steam lines.
  • Inappropriate Mixture of Water and Steam: This can reduce heating efficiency and cause water hammer (banging pipes).
  • Combustion and Internal Damages: Issues within the combustion chamber or internal components can lead to inefficient operation or dangerous conditions.
  • Leak in the Safety Valve: The safety valve releases excess pressure. If it leaks, it indicates a pressure problem and needs immediate attention to prevent dangerous pressure buildup.
  • Abrupt Flameouts: The burner flame unexpectedly going out can be a sign of fuel supply issues, faulty ignition, or sensor problems.

Regardless of the type of boiler, any significant malfunction should be addressed immediately by a qualified professional.

Your Guide to Professional Boiler Repair Oak Park

When your boiler acts up, especially during the chilly Illinois months, prompt and professional boiler repair Oak Park is paramount. Attempting complex repairs yourself can be dangerous and may void warranties. We emphasize safety first and always recommend contacting experienced, licensed technicians for any boiler issues beyond basic visual checks.

What to Do If Your Boiler Starts Leaking

A leaking boiler is a serious issue that demands immediate attention. Don’t panic, but act swiftly to limit damage and ensure safety. Here are the steps you should take:

  1. Turn Off the Boiler’s Power: Locate the emergency shut-off switch for your boiler (often a red switch near the unit or on a wall) and turn it off. For gas boilers, also turn off the gas supply using the valve on the gas line connected to the boiler.
  2. Shut Off the Main Water Valve: Find your home’s main water supply valve and turn it off to prevent more water from entering the system and exacerbating the leak.
  3. Contain the Leak: Mop up any standing water and lay down towels, buckets, or other absorbent materials to soak up the water and prevent further damage to your floors or belongings. Try to identify the source of the leak—it typically comes from the boiler tank, discharge tube, or drain valve.
  4. Call for Emergency Service: Once you’ve secured the situation, contact a professional for emergency boiler repair Oak Park. We offer 24/7 service to address urgent plumbing and boiler concerns in Oak Park and the wider Chicagoland area.

Contact Us for immediate assistance.

Comprehensive Boiler Services Available

We understand that boiler needs extend beyond just emergency repairs. That’s why we offer a full spectrum of services to ensure your boiler system operates efficiently, reliably, and safely year-round in your Oak Park home. Our comprehensive boiler services include:

  • Boiler Repair: From minor fixes like replacing a faulty thermocouple to major component overhauls, our experienced, background-checked technicians can diagnose and repair all types of water and steam boilers. We handle issues such as leaks, pressure problems, strange noises, and ignition failures.
  • Boiler Installation: Whether you’re replacing an old, inefficient unit or installing a new boiler system, our experts provide meticulous installation services. We ensure proper sizing, connection, and testing for optimal performance and energy efficiency, helping you choose the best system for your home’s needs.
  • Boiler Maintenance: Regular maintenance is key to preventing breakdowns and extending your boiler’s lifespan. Our annual tune-ups include inspections, cleaning, and adjustments to keep your system running smoothly and efficiently.
  • Boiler Inspection: We offer thorough inspections to identify potential issues before they become major problems, ensuring your boiler meets safety standards and operates effectively.
  • 24/7 Emergency Service: Boiler emergencies don’t adhere to a schedule. That’s why we provide round-the-clock emergency services for all urgent boiler repair needs in Oak Park and surrounding areas like Chicago, Niles, Winnetka, and Elmhurst.

Services.

Critical Safety Considerations for Boilers

Boilers are powerful heating appliances that, while generally safe, require respect and proper maintenance. Several critical safety considerations must always be kept in mind, especially in older homes common in Oak Park.

  • Carbon Monoxide Risk: All fuel-burning boilers (gas, oil) produce carbon monoxide (CO), an odorless, colorless, and deadly gas. A cracked heat exchanger, blocked flue, or improper combustion can lead to CO leaks. Ensure you have working carbon monoxide detectors on every level of your home. Professional annual servicing includes checks for proper ventilation and combustion to mitigate this risk.
  • Gas Leaks: For natural gas boilers, a gas leak can be extremely dangerous, posing a risk of explosion. If you smell gas, immediately evacuate your home, call your gas company, and then call us for emergency service. Do not operate any electrical switches or appliances.
  • Pressure Buildup: Boilers operate under pressure. A malfunctioning safety valve or an issue with the expansion tank can lead to dangerous pressure buildup, which could result in an explosion if not addressed. Regular checks of the safety valve are a crucial part of professional maintenance.
  • Electrical Hazards: Boilers have electrical components. Faulty wiring or water leaks near electrical parts can create shock hazards.
  • Burns from Radiators: While a benefit of radiant heat, hot radiators can cause burns, especially for children and pets. Consider radiator covers for safety.

The importance of professional service for safety cannot be overstated. A licensed HVAC professional is better able to identify potential repairs early, often eliminating the need for early system replacement and ensuring safe operation.

Boiler Maintenance, Lifespan, and Advanced Features

Just like any essential home appliance, your boiler benefits immensely from regular care. Proactive maintenance not only ensures your comfort but also plays a significant role in extending its life and maximizing its efficiency. For homeowners in Oak Park, where winters demand reliable heating, understanding maintenance routines and modern boiler advancements can lead to substantial savings and peace of mind.

The Benefits of Regular Boiler Maintenance

Investing in regular boiler maintenance is one of the smartest decisions you can make for your Oak Park home. The benefits far outweigh the modest annual cost:

  • Improved Safety: This is paramount. Annual maintenance includes checks for carbon monoxide leaks, proper pressure, and functional safety valves, significantly reducing the risk of dangerous malfunctions.
  • Lower Heating Costs: A well-maintained boiler operates more efficiently. Our research indicates that annual boiler maintenance can save customers 10 percent or more on their annual heating bills. By ensuring all components are clean and working optimally, your boiler won’t have to work as hard, consuming less fuel.
  • Extended Lifespan: Boilers are a significant investment, often lasting 15 to 30 years. Regular maintenance helps to catch small issues before they become major problems, preventing premature wear and tear and extending your unit’s operational life by months or even years.
  • Fewer Repairs: Consistent tune-ups help identify and address minor issues, such as a loose bolt or a buildup of sediment, before they escalate into costly breakdowns. This proactive approach means fewer unexpected repair calls and less disruption to your comfort.
  • Increased Efficiency: A clean, properly adjusted boiler heats your home more effectively. Components like burners and heat exchangers can become fouled over time, reducing efficiency. Maintenance restores them to peak condition.
  • Peace of Mind: Knowing your boiler has been professionally inspected and serviced provides confidence that it will perform reliably throughout the coldest months.

DIY vs. Professional Boiler Service

While some minor tasks can be performed by homeowners, most boiler maintenance and all repairs require the expertise of a licensed professional.

DIY Tasks for Boiler Maintenance:

  • Checking Pressure: Regularly monitor your boiler’s pressure gauge to ensure it stays within the recommended range.
  • Bleeding Radiators: If your radiators are cold at the top but warm at the bottom, they likely have trapped air that needs to be released.
  • Visual Leak Inspection: Weekly, inspect your boiler and associated pipes for any signs of leaks or corrosion.
  • Checking Pilot Light (if applicable): For older gas boilers, ensure the pilot light is consistently lit.
  • Periodic Tank Flushes: For hot water boilers, periodically flushing the tank can help remove sediment buildup, which improves efficiency and reduces noise.

Professional Service is Always Required for:

  • Annual Tune-Up: A once-yearly tune-up by a licensed HVAC professional is ordinarily adequate and strongly recommended. This comprehensive service includes:
    • Flue and fresh air checks
    • Detailed pressure checks
    • Vigorous cleaning of components (e.g., condensate trap, anode rod, spark probe)
    • Leak tests and visual inspections
    • Verification of control systems and safety devices
    • Inspection and cleaning of burners, flame sensors, and ignitors
  • Internal Cleaning and Adjustments: Professionals have the tools and knowledge to safely clean internal components, adjust settings for optimal efficiency, and ensure all parts are functioning correctly.
  • Safety Checks: Only a professional can thoroughly check for carbon monoxide leaks, gas leaks, and proper operation of safety valves. For safety and efficiency reasons, it’s best to leave this part of boiler ownership to a licensed HVAC professional.

Modern Boiler Technology for Oak Park Homes

Boiler technology has come a long way, offering homeowners in Oak Park more efficient and comfortable heating options.

  • Condensing Boilers: These are a significant advancement. Unlike standard boilers that vent produced water vapor through the chimney, condensing boilers capture the heat from this steam to pre-heat return water, making them significantly more energy-efficient. This can lead to substantial savings on heating bills.
  • Zoning for Individual Rooms: Yes, boilers can be zoned for individual room temperature control! This feature allows you to create individual heating areas in your home, each controlled by a separate thermostat. This improves comfort by eliminating hot and cold spots and can lead to energy savings by only heating occupied areas. While it requires a technician with both plumbing and zoning experience, it’s a worthwhile investment for personalized comfort. You can expect to pay a minimum of $1500 for your first boiler zone.
  • Typical Boiler Lifespan: With proper annual maintenance, a boiler can last a remarkable 15 to 30 years, and sometimes even longer. It’s not uncommon for a well-maintained boiler to deliver 30 years of consistent operation. This long service life makes boilers a durable and reliable heating solution.

Frequently Asked Questions about Boilers

What is the difference between a condensing boiler and a standard one?

A condensing boiler differs significantly from a standard one in its efficiency. A standard boiler vents the produced water vapor and its latent heat directly through the chimney. In contrast, a condensing boiler is designed with efficiency in mind. It recaptures the heat from this water vapor before it leaves the chimney, using it to pre-heat the cooler water returning to the boiler. This process allows condensing boilers to extract more heat from the fuel, making them much more energy-efficient and reducing heating costs.

Can boilers be zoned for individual room temperature control?

Yes, hydronic (hot water) boiler systems can indeed be zoned for individual room temperature control. This means you can have multiple thermostats throughout your home, each controlling the temperature in a specific area or “zone.” This allows for personalized comfort, eliminates hot and cold spots, and can lead to energy savings by heating only the rooms you are using. Implementing zoning requires a technician with specialized plumbing and zoning experience.

What is the typical lifespan of a boiler?

With diligent and proper annual maintenance, a boiler can boast an impressive lifespan, typically ranging between 15 and 30 years. Many homeowners in Oak Park find their boilers provide consistent operation for three decades or even more. This longevity often exceeds that of forced-air furnaces, making boilers a durable and long-term heating investment.

Your Trusted Partner for Boiler Services in Oak Park

Understanding your boiler system, recognizing the signs of trouble, and knowing when to call for professional help are crucial for maintaining a warm, safe, and efficient home in Oak Park. Boilers are complex systems that demand expert attention for installation, repair, and maintenance. We believe in providing transparent, reliable service that brings you peace of mind.

For reliable and expert boiler repair in Oak Park and across Chicagoland, it’s crucial to have a trusted team on your side. We pride ourselves on our 100% satisfaction guarantee, offering 24/7 availability for emergencies, transparent pricing with no hidden service charges, and a team of experienced, background-checked technicians ready to serve your residential and light commercial plumbing needs. We’re dedicated to ensuring your boiler system operates safely and efficiently through every Illinois winter.

Schedule your appointment with an Oak Park Plumber today!

Is Your Boiler on the Fritz? A Homeowner’s Guide to Hot Water Boiler Repair

hot water boiler - Hot water boiler repair

Why Boiler Health is Key to Home Comfort

Hot water boiler repair becomes a critical concern when the cold season arrives and your heating system suddenly fails. Coming home to a chilly house or finding water pooling beneath your boiler can quickly turn from a minor inconvenience into a homeowner’s nightmare.

Quick Answer: What You Need to Know About Hot Water Boiler Repair

  • Common warning signs: Unusual noises (banging, whistling, gurgling), leaking water, inconsistent heating, foul odors, and rising energy bills
  • Most frequent problems: Pressure relief valve failures, thermostat malfunctions, pump issues, heat exchanger limescale buildup, and pilot light problems
  • DIY maintenance tasks: Checking pressure (ideal: 1-1.5 bars), bleeding radiators, visual leak inspections, and monitoring the pilot light
  • When to call a professional: Gas leaks, carbon monoxide concerns, persistent leaks, complex component failures, or when repairs exceed the cost-effectiveness of your aging system
  • Replacement consideration: Boilers over 10-15 years old requiring frequent repairs often warrant replacement instead of continued fixes

Boilers are reliable pieces of equipment that can last a long time, but it’s normal for them to need repairs from time to time. Hot water heating systems have few mechanical parts and usually perform reliably for many years—though the most common problems arise with the expansion tank or circulator rather than the boiler itself.

Often, boilers tend to malfunction as soon as the cold season arrives, the moment when you need heat the most. That’s why understanding the warning signs and knowing when to act can save you from costly emergency repairs and uncomfortable nights.

This guide will help you identify when your boiler needs attention, understand what might be going wrong, and make informed decisions about repair versus replacement.

infographic showing top 5 boiler warning signs: unusual noises like banging or kettling, visible water leaks or drips, inconsistent heating across rooms, foul odors such as rotten egg smell, and unexplained increases in energy bills - Hot water boiler repair infographic

Decoding the Distress Signals: 7 Signs Your Boiler Needs Repair

No one wants to wake up to a cold home, especially in the depths of a Chicagoland winter. Your hot water boiler usually gives off a few subtle hints before it decides to throw in the towel completely. Learning to recognize these common signs can help you address issues promptly and avoid more significant, more expensive hot water boiler repair down the line.

Here are the most common signs that your hot water boiler needs attention:

  1. Unusual Noises: Is your boiler suddenly sounding like a symphony of bangs, gurgles, or whistles? These aren’t new sound effects for your home entertainment system; they’re distress signals from your boiler.

    • Banging (Kettling): This often sounds like a kettle boiling and is usually caused by limescale or mineral deposits building up around the heat exchanger. These deposits restrict water flow and cause water to overheat, leading to those alarming banging sounds.
    • Gurgling: This noise often indicates trapped air in the system or low water pressure.
    • Whistling: Similar to gurgling, whistling can also point to air in the system or sometimes a faulty pump.
    • While some noises can be fixed by bleeding radiators or adjusting the pressure, persistent or loud noises should be checked by a technician to avoid more serious problems.
  2. Inconsistent Heating or Cold Radiators: If some of your radiators are toasty warm while others remain stubbornly cold, or if your home isn’t heating evenly, your boiler might be struggling. This could be due to trapped air in the radiators, which prevents hot water from circulating effectively, or a problem with the circulator pump or thermostat. If your boiler isn’t generating heat at all, first check if the thermostat is set correctly and if the circuit breaker for the boiler is tripped. If these aren’t the issues, there might be a problem with the pilot light or the gas supply.

  3. Leaking or Dripping Water: Any visible leaks or drips around your boiler should be addressed immediately. Even a small leak can lead to significant damage over time and reduced efficiency. Common causes include a faulty pressure relief valve, a corroded pipe, or a damaged seal. A leaking boiler is a serious issue requiring immediate attention. It’s crucial to shut off the boiler and contact a professional technician to inspect and fix the leak.

pressure gauge on a boiler showing low pressure - Hot water boiler repair

  1. Low Boiler Pressure: Your boiler relies on the right amount of pressure to work efficiently. Most boilers have a pressure gauge on the front panel, and the ideal pressure level is typically between 1 and 1.5 bars. If the pressure is too low or too high, it can cause the system to underperform or even shut down. If the pressure keeps dropping, it might indicate a leak, which requires professional attention.

  2. Pilot Light Problems: For older gas boilers, a flickering, yellow, or extinguished pilot light is a clear sign of trouble. The flame should burn a bright, consistent blue. If it’s not, it may indicate an issue with the gas supply, a faulty thermocouple, or dirty burners. A pilot light that keeps going out can also be due to drafts.

  3. Foul Odors: This is a sign that demands immediate professional attention.

    • Sulfur or Rotten Egg Smell: This almost certainly indicates a gas leak, which is extremely dangerous. Evacuate your home and call the gas company and emergency services immediately.
    • Burning Odor: A burning smell might suggest overheating or electrical issues, both of which are serious hazards.
  4. Unexplained Increase in Energy Bills: If your utility bills are suddenly skyrocketing, and you haven’t changed your heating habits, your boiler might be working harder than it should. An inefficient boiler struggles to heat your home or water, using more energy to compensate. This could be due to a lack of maintenance, limescale buildup, or a component malfunction.

Any of these signs could mean your boiler is “on the fritz.” Addressing them quickly can prevent a minor issue from becoming a costly emergency. For more detailed information on what to do in case of a leak, you can refer to resources like What to do if your boiler is leaking water | Boiler help and advice | Domestic & General.

Understanding Your Boiler: Key Components and Common Failures

To truly understand hot water boiler repair, it helps to know a little about how these systems work and what makes them tick (or, sometimes, bang!). While they might seem complex, the basic principle is quite straightforward.

How Your Boiler System Works

A hot water heating system, often simply called a boiler system, is designed to efficiently heat your home and provide hot water. It consists of several key components that work in harmony:

  • Boiler Unit: This is the heart of the system, where water is heated. It can be powered by natural gas or oil.
  • Heat Exchanger: Located within the boiler, this component transfers heat from the burning fuel to the water circulating through the system.
  • Circulator Pump: This pump is responsible for moving the hot water from the boiler, through the network of pipes, and to your radiators or radiant floor heating system.
  • Expansion Tank: As water heats up, it expands. The expansion tank provides a space for this excess water, preventing pressure from building up to dangerous levels. Newer systems often have the expansion tank on the basement ceiling near the boiler, while older systems might have it in the attic. This tank is charged with air to prevent the water from boiling.
  • Pressure Relief Valve: A crucial safety device, this valve automatically releases excess pressure from the system if it becomes too high, preventing damage to the boiler and pipes.
  • Thermostat: Your home’s thermostat acts as the brain, regulating the temperature by signaling the boiler when to turn on and off.
  • Aquastat: This control sets the maximum water temperature for the boiler.

technician inspecting a boiler's internal components - Hot water boiler repair

The process is simple: the boiler heats water, the circulator pump moves it through pipes to radiators (or other heat emitters), and the heat radiates into your rooms. The cooler water then returns to the boiler to be reheated, completing the cycle. Because they have few mechanical parts, hot-water heating systems usually perform reliably for many years.

Common Causes of Hot Water Boiler Leaks and Other Failures

Even with their inherent reliability, hot water boilers can develop problems. Understanding the typical culprits behind breakdowns can shed light on why your system might be acting up, and why professional hot water boiler repair is often necessary.

Beyond general malfunctions, here are some of the most frequent problems and causes of leaks:

  • Corroded Tank or Pipes: This is a major cause of leaks, especially if you see water pooling at the bottom of the boiler. Over time, rust can develop inside the boiler tank or in the connecting pipes, leading to pinholes or larger breaches. Rusty water in a leak is a strong indicator of corrosion.
  • Faulty Pressure Relief Valve: If water is spurting from this valve, it indicates too much water and not enough air in the expansion tank, or the valve itself might be faulty or damaged. A malfunctioning valve can either cause leaks or fail to relieve pressure, leading to system malfunctions. Replacing it is a relatively straightforward repair.
  • Worn-Out Pump Seals: The circulator pump, which moves hot water throughout your home, contains seals that can deteriorate over time. If these seals fail, they can cause leaks. Pump repairs typically involve cleaning, lubricating, or replacing the pump entirely.
  • Cracked Heat Exchanger: A cracked heat exchanger is a serious issue, more common in older or overworked systems. This can lead to leaks and is often a sign that a new boiler might be needed, as repairs can be costly or ineffective.
  • Limescale Buildup: This is a common issue in areas with hard water, like parts of Chicagoland. Mineral deposits can accumulate on the heat exchanger, reducing the boiler’s ability to heat water efficiently and causing that tell-tale “kettling” noise. This often requires a system flush to remove the buildup.
  • Thermostat Malfunction: If your boiler’s thermostat is acting up, it can cause inconsistent heating, prevent the system from turning on, or lead to “short cycling” (the boiler turning on and off too frequently).
  • Pilot Light Issues: For gas boilers, a pilot light that frequently goes out can be due to a faulty thermocouple, dirty burners, or even drafts.
  • Expansion Tank Problems: Often, the most common problems are with the expansion tank or a circulator rather than the boiler itself. If the expansion tank isn’t properly charged with air or is filled with water, it can lead to pressure issues and inefficient operation.

When these issues arise, it’s crucial to call a professional. For more details on warning signs, you can check resources like Signs Your Boiler Needs Repair.

The Homeowner’s Toolkit: DIY Maintenance vs. Professional Hot Water Boiler Repair

Just like your car, your boiler needs tuning and maintenance. Regular boiler maintenance is essential to avoid costly repairs and ensure your system operates efficiently. It helps catch problems early, reduces the risk of system failure, prolongs the lifespan of your boiler, and increases energy efficiency, saving you money on energy costs. A well-maintained boiler can last for many years, while neglecting it may lead to costly repairs or even early replacement.

Essential DIY Maintenance to Prevent Problems

While complex hot water boiler repair should always be left to the professionals, there are several simple, essential DIY maintenance tasks you, as a homeowner in Chicagoland, can perform to keep your boiler purring and prevent minor issues from escalating. These tasks are often quick and can be done without specialized tools.

Here’s what you can do:

  1. Check the Pressure Gauge: Most boilers have a pressure gauge on the front panel. The ideal pressure level is typically between 1 and 1.5 bars. If the pressure is too low, you may need to top up the water using the filling loop, following your manufacturer’s instructions. If the pressure keeps dropping after topping up, it might indicate a leak, which requires professional attention.
  2. Bleed Your Radiators: If you notice cold spots on some radiators or that they aren’t heating up as they should, it’s time to bleed them. Trapped air in the system can cause uneven heating. Turn off your boiler, use a radiator key to open the vent on each cool radiator (starting with the lowest ones), and let the air escape until water starts to come out. Be sure to check the boiler pressure afterward, as bleeding radiators can sometimes cause the pressure to drop.
  3. Inspect for Leaks: Take a moment to visually inspect your boiler and the surrounding area for any signs of leaks or drips. Early detection can prevent significant water damage and corrosion.
  4. Monitor the Pilot Light: For older gas boilers, keeping an eye on the pilot light is important. The flame should burn a bright, consistent blue. If it’s flickering, yellow, or has gone out completely, it may indicate an issue with the gas supply or the boiler itself.
  5. Listen for Unusual Noises: As we mentioned, boilers can sometimes make strange noises like banging, whistling, or gurgling. While some can be fixed by bleeding radiators or adjusting pressure, persistent or loud noises should be checked by a technician to avoid more serious problems.

Performing these simple checks can go a long way in maintaining your boiler’s health. For more on how to identify boiler issues, you can visit resources like Boiler Repair in Chicago.

When to Call the Pros: The Risks of DIY Hot Water Boiler Repair

While basic maintenance is helpful, there’s a clear line where DIY ends and professional hot water boiler repair begins. Attempting complex repairs yourself, especially with a system as critical and potentially dangerous as a boiler, comes with significant risks. We strongly advise against tackling anything beyond the most basic troubleshooting.

Here’s why you should always call in the experts for anything serious:

  • Safety Risks are Paramount: Your boiler system contains gallons of scalding hot water, and if it’s a gas-fired unit, it’s connected to natural gas lines. There’s also electrical wiring, pressure-controlled tanks, and the potential for carbon monoxide leaks. Making a mistake with any of these components can lead to:
    • Serious Injury: Burns from scalding water, electric shock, or even explosions from gas leaks.
    • Carbon Monoxide Poisoning: Gas and oil boilers can produce carbon monoxide during combustion. Improper repairs can lead to dangerous, odorless, and colorless carbon monoxide leaks, which can be fatal.
    • Property Damage: Incorrect repairs can cause water damage, fires, or further damage to your expensive heating system.
  • Complex Repairs Require Expertise and Tools: Boiler systems are intricate. Diagnosing problems like a faulty heat exchanger, a malfunctioning circulator, or internal component failure requires specialized knowledge, diagnostic tools, and experience. It’s not a simple “fix-it” job.
  • Building Codes and Permits: In Chicagoland, like many areas, boiler installations and significant repairs must adhere to specific building and plumbing codes. DIY repairs might miss these crucial safety guidelines, and you might even fail to obtain necessary permits, leading to legal and safety issues down the road.
  • Warranty Issues: Many boiler manufacturers and professional installers offer warranties on their equipment and work. Attempting DIY repairs can void these warranties, leaving you on the hook for future costs.
  • Professional Maintenance Benefits: When you call us for professional boiler maintenance, you can expect a comprehensive visit that goes far beyond what a homeowner can safely do:
    • Thorough Cleaning: Technicians will clean internal components like the heat exchanger and burner components, removing dust, debris, and limescale buildup to improve efficiency and ensure safe operation.
    • Component Inspection and Testing: We’ll inspect and test all key system components, including the thermostat, pressure valves, seals, and safety controls. Electrical connections are checked for loose or damaged wires.
    • Flue and Ventilation Checks: Proper ventilation is essential for safe operation. We inspect the flue to ensure it’s clear of blockages and vents harmful combustion gases safely outside, also checking for corrosion.
    • Carbon Monoxide Testing: We test for carbon monoxide emissions to ensure your system is burning fuel safely and efficiently, pinpointing leaks if present.
    • Lubrication of Moving Parts: Fan bearings and pump components need lubrication to move smoothly and prevent excessive wear.
    • Efficiency Testing: We’ll test the overall efficiency of your boiler system, checking the burner and combustion processes to ensure optimal fuel-to-heat conversion and making adjustments as needed.

When it comes to your boiler, it’s always better to be safe than sorry. Leave the heavy lifting and complex diagnostics to our experienced, licensed professionals.

The Big Decision: Repair or Replace Your Boiler?

At some point, every homeowner with a boiler faces the inevitable question: Is it time for a hot water boiler repair or a complete replacement? It’s a significant decision, balancing immediate costs against long-term savings and comfort.

Here’s how to weigh your options:

  • Boiler Age: This is often the first and most critical factor. Boilers are reliable, but they don’t last forever. If your boiler is over 10-15 years old, replacement may be the smarter long-term solution. While a newer boiler might be a candidate for a lower-cost routine maintenance service, an older boiler with a serious problem might warrant a complete replacement.
  • Frequency of Repairs: Are you calling us every year for a new repair? If your boiler requires frequent repairs, the cumulative cost can quickly add up, making replacement more economical in the long run. Constant breakdowns also mean more inconvenience and cold spells.
  • System Efficiency and Rising Utility Costs: Older boilers are simply not as energy-efficient as modern units. If you’ve noticed your energy bills steadily climbing without a change in usage, your boiler might be struggling to keep up. A new, energy-efficient boiler can significantly lower your utility bills, offsetting the initial replacement cost over time.
  • Cost of Repair vs. Replacement: A good rule of thumb is to consider the “50% rule.” If the cost of the repair is 50% or more of the cost of a new boiler, replacement is usually the more sensible option. For severe issues like a corroded tank or a cracked heat exchanger, repairs can be so extensive and costly that replacement becomes the only practical solution.
  • Long-Term Solution and Peace of Mind: Investing in a new boiler provides peace of mind, knowing you have a reliable, efficient heating system that won’t leave you in the cold. Modern boilers come with improved technology, better safety features, and often, new warranties.

While a repair might fix the immediate problem, it doesn’t address the underlying inefficiency or aging components that will likely lead to more issues down the road. If your boiler is showing its age and demanding frequent attention, a replacement often proves to be the more cost-effective and comfortable solution in the long term.

Your Trusted Partner for Chicagoland Boiler Services

When your hot water boiler needs attention, whether it’s routine maintenance or an emergency hot water boiler repair, choosing the right professionals is paramount. You need a team that understands the unique heating needs of Chicagoland homes and businesses, offering reliable, timely service you can count on.

At VanDerBosch Plumbing Inc., we pride ourselves on being your trusted partner for all boiler services across Illinois, including Cook County, Chicago, Roselle, Niles, Winnetka, Melrose Park, Oakbrook Terrace, Hyde Park, Sauganash, West Ridge, Ukrainian Village, Elmhurst, and Mount Prospect. We know that homeowners need options, and we’re here to provide them.

We understand that a boiler emergency can happen at any time, especially when you need heat the most. That’s why we offer 24/7 availability for emergency boiler repair services. You won’t be left in the cold when you call us.

What sets us apart?

  • Experienced, Background-Checked Technicians: Our team consists of licensed, highly trained, and experienced experts in all things heating equipment. We are committed to ongoing education to ensure we stay up to date with our skills, working on any make or model of boiler or heating system.
  • Transparent Pricing: We believe in honest, upfront pricing with no hidden fees or service charges. You’ll know what to expect before we start any work.
  • 100% Satisfaction Guarantee: Your comfort and peace of mind are our top priorities. We guarantee 100% satisfaction on all our boiler repair and installation services.
  • Comprehensive Services: From inspection and tune-ups to complex repairs and new installations, we offer a full range of boiler services. Regular maintenance with us can help catch problems early, reduce the risk of system failure, prolong your boiler’s lifespan, and increase energy efficiency.

Don’t let a “fritzing” boiler disrupt your comfort. We have the knowledge and tools to diagnose and repair issues promptly, delivering reliable, efficient services to restore comfort to your home. For any of your boiler needs, reach out to us. We’re ready to provide you with expert service. Learn more about our comprehensive boiler solutions on our Boiler Services page.

Don’t Let Your Foundation Cry: A Guide to Concrete Slab Leaks

concrete slab foundation - Concrete slab leak

When Water Hides Beneath Your Home

Concrete slab leaks are plumbing leaks that occur in the water or sewer pipes running beneath your home’s concrete foundation. These hidden leaks can cause significant damage to your foundation, lead to costly repairs, and create health hazards if left unaddressed.

Quick Answer: What You Need to Know

  • What it is: A leak in pipes buried under your home’s concrete slab foundation
  • Common causes: Pipe corrosion, shifting soil, high water pressure, poor installation
  • Warning signs: Unexplained high water bills, warm spots on floors, sound of running water when taps are off, foundation cracks
  • Who fixes it: Licensed professional plumbers with specialized detection equipment
  • Typical cost: $1,200 to $10,000+ depending on location and repair method
  • Insurance: May cover sudden pipe bursts but often excludes gradual damage

Imagine waking up to damp floors, an unexplained spike in your water bill, or the sound of running water when no taps are on. For Chicagoland homeowners, these aren’t just minor inconveniences—they’re warning signs of a slab leak lurking beneath your foundation.

Unlike a dripping faucet you can see and fix, slab leaks hide in plain sight. Your home’s plumbing runs through or beneath the concrete foundation, and when these pipes fail, water seeps into places it shouldn’t be. The result? Structural damage, sky-high water bills, and potential mold growth that threatens both your home’s integrity and your family’s health.

The good news is that understanding the signs early can save you thousands of dollars and prevent serious foundation damage. In this guide, we’ll walk you through everything you need to know about concrete slab leaks—from what causes them to how professionals detect and repair them.

Infographic showing a cross-section of a home with a concrete slab foundation, highlighting a leaking pipe beneath the slab, water seeping into the soil, warning signs like increased water bills and floor damage, and the detection and repair process - Concrete slab leak infographic pillar-5-steps

Understanding the “Why”: Causes and Foundation Types

Many homes in Chicagoland and across the country are built on concrete slab foundations. This construction method is often chosen for its practicality, cost-effectiveness, and durability. In fact, a significant percentage of newly constructed single-family homes, 63.2 percent in 2019, use slab foundations. You can learn more about these Characteristics of New Housing.

While slab foundations offer many benefits, they also present a unique challenge when plumbing issues arise. When pipes are embedded within or beneath the concrete, a leak can become a hidden menace, slowly eroding the soil, undermining the foundation’s stability, and causing damage that goes unnoticed until it’s severe.

Several factors contribute to the occurrence of a concrete slab leak, including the movement of the very ground your home rests on, the type of plumbing materials used, and even the chemistry of your water.

What is a Concrete Slab Leak and Why Does it Happen?

A concrete slab leak occurs when a water line or sewer pipe housed within or directly beneath your home’s concrete foundation becomes damaged and begins to leak. Because these pipes are out of sight, they often go undetected for extended periods, allowing significant damage to accumulate. But why do these leaks happen in the first place?

Here are the primary causes we commonly see in Chicagoland homes:

  • Pipe Corrosion: Over time, plumbing pipes can corrode, especially older ones made of copper or galvanized steel. This corrosion can be exacerbated by the chemical composition of your water (whether it’s acidic or alkaline) or by the pipes reacting with minerals and other elements in the surrounding soil. This internal or external deterioration weakens the pipe walls, eventually leading to pinhole leaks or larger ruptures.
  • High Water Pressure: While a certain amount of water pressure is necessary for your home’s plumbing to function, excessively high pressure can put undue stress on pipes. Most home plumbing systems are designed to operate efficiently between 40-60 PSI. When pressure consistently exceeds this, it can contribute to pipes bursting or developing leaks, as we’ve explored in our guide on Why pipes burst.
  • Abrasion: Pipes are not always perfectly still. They can expand and contract with temperature changes, vibrate due to water flow, or shift slightly with ground movement. If a pipe is installed too close to a rough surface like gravel, rebar, or even another pipe, this constant rubbing or “abrasion” can wear down its exterior, creating weak spots where leaks can form.
  • Poor Installation: Unfortunately, some slab leaks can be traced back to the initial construction of your home. Pipes that were bent, dented, or improperly connected during installation are inherently weaker and more prone to failure. Even newer homes can experience slab leaks due to improper installation practices or the use of inferior materials.
  • Shifting Soil: The soil beneath your home is not static. In regions like Chicagoland, which can experience varied soil types and significant weather fluctuations (from freezing winters to hot, dry summers), the ground can expand and contract. This “expansive soil” movement can exert immense pressure on your foundation and the pipes embedded within it, causing them to crack, bend, or disconnect. It’s a significant concern, as approximately 25% of homes experience damage due to expansive soils, leading to an estimated $2.3 billion in annual costs. This is why addressing expansive soils damage is so crucial.

The Role of Plumbing Materials

The type of plumbing materials used in your home plays a significant role in the likelihood and nature of slab leaks. Different materials have varying lifespans and susceptibilities to the causes mentioned above.

different pipe materials - Concrete slab leak

  • Copper Pipes: Once a popular choice for its durability and corrosion resistance, copper can still be vulnerable to slab leaks. It’s particularly susceptible to corrosion when it comes into contact with certain minerals in the soil or if the water chemistry is overly aggressive (e.g., highly acidic). Constant vibration or abrasion can also wear down copper.
  • Galvanized Steel: Commonly found in older homes, galvanized steel pipes are steel pipes coated with zinc. Over time, this zinc coating can wear away, exposing the steel to corrosion. This leads to rust buildup, reduced water flow, and eventually, leaks.
  • Cast Iron Pipes: Homes built before the 1960s often feature cast iron pipes, especially for sewer lines. While robust, cast iron is prone to rust and can become brittle with age. It’s also highly susceptible to root intrusion, where tree roots seek out moisture and can crack or infiltrate the pipe, causing blockages and leaks.
  • Plastic Pipes (ABS, PVC, CPVC, PEX): Modern homes frequently use plastic piping like PVC, CPVC, and PEX. These materials are generally corrosion-resistant and more flexible, making them less prone to issues caused by water chemistry or minor ground shifts. However, even plastic pipes can fail due to poor installation, excessive water pressure, or physical damage from external forces like heavy construction or tree roots. PEX, in particular, is known for its flexibility and ability to withstand freezing, making it an excellent choice for many modern plumbing systems.

Understanding your home’s plumbing materials can give you insights into its potential vulnerabilities and help us recommend the most effective preventative measures and repair strategies.

Telltale Signs: How to Spot a Potential Slab Leak

Because concrete slab leaks are hidden, they don’t announce themselves with a visible drip. Instead, they often present subtle, yet persistent, clues that savvy homeowners can learn to recognize. Ignoring these signs can lead to escalating damage and repair costs. Did you know that house leaks waste more than 1 trillion gallons of water nationwide each year? That’s the equivalent of the yearly household water use of over 11 million homes! Even a small leak can waste up to 90 gallons or more daily in 10% of houses.

Here’s what to watch out for:

  • Unexplained High Water Bills: This is often the first and most obvious sign. If your water bill suddenly spikes without any change in your water usage habits, a hidden leak is a strong suspect. We recommend checking your water meter for a leak indicator.
  • Sound of Running Water: Do you hear the faint sound of water running, dripping, or hissing when all your faucets are off and appliances (like dishwashers or washing machines) are not in use? That mysterious sound could be water escaping from a pipe beneath your slab.
  • Low Water Pressure: A sudden and unexplained drop in water pressure throughout your home can indicate that water is escaping from your plumbing system before it reaches your faucets and showers.
  • Mold and Mildew: Persistent moisture from a slab leak creates the perfect breeding ground for mold and mildew. You might notice a musty odor, especially near the floor, or even visible mold growth on baseboards, carpets, or walls. Mold can begin to grow after just 24 to 48 hours of water exposure.
  • Foundation Cracks: A long-term slab leak can erode the soil supporting your foundation, leading to uneven settling and cracks in the concrete slab itself, as well as in interior walls or flooring.

water meter leak indicator - Concrete slab leak

7 Key Symptoms to Watch For

Let’s dive a little deeper into the specific indicators that signal a potential concrete slab leak:

  1. Sudden Spike in Water Bill: This is often the canary in the coal mine. Keep an eye on your monthly statements. An unexpected increase, especially if it’s a significant jump (homeowners can experience a 25-percent jump from a constant drip), without any change in your daily routine, should prompt immediate investigation.
  2. Sound of Running Water: In the quiet moments of your home, listen closely. A persistent trickling, dripping, or rushing sound from beneath the floorboards or within the walls, even when all water sources are off, is a classic sign of a hidden leak.
  3. Hot Spots on the Floor: If you have a hot water line leak under your slab, the heat from the escaping water can transfer through the concrete. You might notice unusually warm areas on your floor, especially when walking barefoot. Some homeowners even report that their pets seem drawn to these warm spots!
  4. Damp Carpets or Warped Flooring: Water seeping up through the slab can cause carpets to feel damp, wood floors to warp or buckle, and even luxury vinyl planks to pop up. This moisture might be subtle at first, becoming more noticeable over time.
  5. Musty Odors: A persistent, earthy, or stale smell in certain areas of your home can indicate hidden moisture and the growth of mold or mildew. This odor often intensifies near the floor or in damp, poorly ventilated areas.
  6. Visible Mold Growth: If the leak has been active for a while, you might start to see visible mold or mildew growth on baseboards, lower walls, or even behind furniture. This is a serious health concern and a clear sign of excessive moisture.
  7. Water Pooling Around Foundation: While sometimes caused by rain or irrigation, if you notice puddles of water around the exterior of your home’s foundation during dry spells, it could be water escaping from an underground pipe and making its way to the surface. This continuous moisture can erode the soil, leading to significant structural issues.

From Detection to Repair: Your Action Plan for a Concrete Slab Leak

If you suspect a concrete slab leak based on any of the signs above, prompt action is crucial. Delaying can lead to exponentially higher costs and more extensive damage to your Chicagoland home.

Immediate Homeowner Steps:

  1. Confirm the Leak (If Possible): Turn off all water-using appliances and fixtures in your home. Locate your water meter (often near the street or in your basement). Check if the small red triangle on the meter is moving or if the numbers are increasing. If so, you have a leak somewhere in your system.
  2. Shut Off Main Water Supply: If you’ve confirmed a leak or have significant signs, locate your home’s main water shut-off valve and turn it off. This will prevent further water damage while you wait for professional help.
  3. Call a Professional: Concrete slab leaks are not DIY projects. They require specialized knowledge and equipment to accurately locate and repair. Contact licensed plumbing professionals immediately. Our team at VanDerBosch Plumbing Inc. is available 24/7 for emergencies in Chicagoland.

How Professionals Detect Hidden Leaks

Since these leaks are out of sight, we rely on advanced, non-invasive techniques to pinpoint their exact location without tearing up your home. Our goal is to minimize disruption while maximizing accuracy.

Here’s how we detect hidden leaks:

  • Electronic Listening Devices: These highly sensitive microphones can detect the faint sound of water escaping from a pipe, even through concrete and soil. Our experienced technicians use these devices to listen along your foundation, zeroing in on the precise spot of the leak.
  • Infrared Cameras: Leaks, especially hot water leaks, create temperature differentials. Infrared cameras can detect these subtle changes in surface temperature on your floors, helping us visualize where warmer (or sometimes cooler) water is pooling beneath the slab.
  • Sewer Video Camera Inspection: For suspected sewer line leaks under the slab, we can perform a Sewer video camera inspection. A flexible camera is inserted into the pipe, allowing us to visually inspect its interior for cracks, blockages, or breaks.
  • Pressure Testing: We can isolate sections of your plumbing system and apply controlled pressure to determine if there’s a drop, indicating a leak, and help narrow down the affected area.
  • Non-Invasive Methods: The beauty of these techniques is that they allow us to locate the leak with minimal or no destruction to your property. This saves you time, money, and a lot of headaches.

Repair Options for a Concrete Slab Leak

Once the leak is precisely located, we’ll discuss the best repair strategy for your specific situation. The choice depends on the leak’s severity, location, the condition of your existing plumbing, and your budget.

  • Spot Repair (Breaking the Slab): This involves carefully breaking through the concrete slab directly above the leak to access and repair the damaged section of pipe. While it sounds invasive, it’s often the most straightforward and cost-effective solution for a single, isolated leak. We ensure the area is properly restored after the repair.
  • Pipe Rerouting: For pipes that are difficult to access, or if the existing pipe is old and prone to future leaks, we might recommend rerouting the line. This involves bypassing the damaged section entirely by installing a new pipe through the attic, walls, or along the exterior of your home, effectively running around the slab. This can often be the cheapest and least disruptive fix in the long run.
  • Trenchless Pipe Repair: In some cases, we can use trenchless methods that minimize excavation. This includes techniques like pipe lining (inserting a new, epoxy-coated liner inside the existing pipe) or pipe bursting (pulling a new pipe through the old one, breaking it apart in the process). These methods are excellent for repairing sewer lines and can often be done with only one or two access points. Learn more about our Trenchless pipe repair services.
  • Whole-Home Repiping: If your home’s plumbing system is old, made of problematic materials (like galvanized steel or old cast iron), and experiencing multiple leaks, a Whole-home repiping might be the most economical and long-lasting solution. This involves replacing all the old, deteriorated pipes with new, modern materials, giving you peace of mind for decades to come.

The Aftermath: Costs, Insurance, and Prevention

A concrete slab leak can have far-reaching consequences if not addressed quickly. Beyond the immediate water damage, the long-term impacts can be severe:

  • Structural Damage: Continuous water seepage can erode the soil beneath your foundation, leading to uneven settling, cracks in the slab, and even instability that affects the entire structure of your home.
  • Wasted Water: Even a small drip can waste thousands of gallons of water over time, leading to unnecessarily high water bills and environmental impact.
  • Foundation Instability: As expansive soils in Chicagoland shift, the constant presence of water from a leak can accelerate soil erosion, further compromising your home’s foundation.
  • Health Risks from Mold: Hidden moisture creates a breeding ground for mold and mildew, which can cause respiratory issues, allergic reactions, and a persistent musty odor, impacting your family’s health and comfort.

Understanding Costs and Insurance Coverage

The cost of addressing a concrete slab leak can vary widely based on the leak’s location, severity, the chosen repair method, and how long it went undetected.

  • Homeowners’ Insurance Policies: Does homeowners’ insurance cover concrete slab leak repairs? The answer is often “it depends.” Most policies distinguish between sudden and accidental damage versus gradual damage.
    • Coverage May Apply If: The leak was sudden and catastrophic, like a pipe bursting. Some policies might cover the cost of accessing the leak (e.g., breaking concrete) and repairing the pipe itself.
    • Coverage May Be Excluded If: The leak developed gradually over time due to neglect or wear and tear, as this is often considered a maintenance issue. Damage caused by mold or foundation issues resulting from a slow leak might also be excluded or have sub-limits. It’s vital to contact your insurer early in the process to understand your specific policy and what is covered. Allstate recommends you Contact your insurance company to understand your coverage. We can provide documentation and work with your insurance adjuster to facilitate your claim.

Comparing Slab Leak Repair Methods

Repair Method Cost Range Disruption Level (Inside Home) Durability Considerations
Spot Repair (Breaking the Slab) $1,500 – $3,500 High (localized) Repairs specific leak; rest of pipe remains
Pipe Rerouting $1,200 – $5,000 Moderate (new lines installed) New, often more durable pipe material; bypasses old system
Tunneling (Repair from Under Slab) $2,500 – $10,000 Low (minimal inside) Repairs specific leak; rest of pipe remains; less interior mess
Trenchless Pipe Repair (Lining/Bursting) $2,000 – $8,000 Low New pipe/liner within old pipe; extends lifespan
Whole-Home Repiping $7,000+ High (extensive) Complete overhaul; long-term solution with new materials

Proactive Steps to Prevent Future Leaks

While we can’t completely eliminate the risk of a concrete slab leak, there are several preventative measures Chicagoland homeowners can take to minimize the chances and catch issues early:

  • Annual Plumbing Inspections: Regular check-ups by licensed professionals can identify potential problems before they escalate. We can assess pipe condition, water pressure, and look for early signs of stress.
  • Water Pressure Regulation: Ensure your home’s water pressure is within the optimal range (40-60 PSI). If it’s too high, a pressure regulator can be installed or adjusted to protect your pipes from excessive strain.
  • Water Quality Testing: Understanding your water’s pH and mineral content can help determine if it’s contributing to pipe corrosion. Water softening systems can mitigate the effects of hard water on your plumbing.
  • Maintaining Soil Moisture: For homes built on expansive clay soils, maintaining consistent moisture levels around your foundation can help prevent extreme soil expansion and contraction, which puts stress on underground pipes.
  • Knowing Your Home’s Plumbing: Understand the age of your home and the materials used in its plumbing. Older homes with original cast iron or galvanized pipes are at higher risk.

Frequently Asked Questions about Slab Leaks

How long does it take to fix a slab leak?

The time it takes to fix a concrete slab leak can vary significantly, ranging from a few hours to several days. A simple spot repair directly beneath the slab might be completed in a day, especially if the leak is easily accessible. However, more complex repairs like extensive pipe rerouting or trenchless solutions could take two to three days, or even longer for a whole-home repiping project. The timeline largely depends on the chosen repair method, the severity of the damage, and the ease of access to the affected pipes.

Can I fix a slab leak myself?

We strongly advise against attempting to fix a concrete slab leak yourself. These are not typical plumbing fixes. Accurately locating the leak requires specialized equipment (like electronic listening devices or infrared cameras) and expertise that most homeowners don’t possess. Attempting a DIY repair without proper knowledge can lead to further damage to your plumbing system, your foundation, and potentially create more costly problems down the line. It’s truly a job best left to licensed professionals.

Are slab leaks more common in older or newer homes?

Concrete slab leaks can occur in both older and newer homes, though for different reasons:

  • Older Homes: Slab leaks are often more common in older homes (especially those built before the 1970s) due to material degradation. Pipes made of galvanized steel or cast iron are prone to corrosion, rust, and brittleness over decades of use, making them highly susceptible to leaks.
  • Newer Homes: While modern plumbing materials like PEX are more durable, newer homes can still experience slab leaks due to poor installation practices or construction defects. Pipes might be bent, crimped, or improperly connected during the building process, creating weak points that fail prematurely. Regardless of your home’s age, vigilance for the warning signs is key.

Conclusion: Protect Your Home’s Foundation

Concrete slab leaks are a serious threat to any Chicagoland homeowner, capable of turning a small drip into a costly disaster. But by understanding the causes, recognizing the telltale signs, and acting swiftly, you can protect your home’s foundation and your peace of mind.

Early detection is your best defense against extensive damage and expensive repairs. If you notice any of the symptoms we’ve discussed—from a mysteriously rising water bill to damp spots on your floor—don’t hesitate.

At VanDerBosch Plumbing Inc., we specialize in comprehensive concrete slab leak detection and repair. Our experienced, background-checked technicians are equipped with state-of-the-art tools to accurately locate leaks with minimal disruption to your home. We’re proud to offer a 100% satisfaction guarantee, transparent pricing with no service charges, and 24/7 availability for all your plumbing needs in Chicago, Roselle, Niles, Winnetka, Elmhurst, Mount Prospect, and across the Chicagoland area.

Don’t let a hidden leak undermine your home. Take action today. Schedule professional water leak detection with VanDerBosch Plumbing Inc. and let us help you keep your foundation solid and dry.

Pipe Dreams to Reality Finding the Best Commercial Plumbing Contractors in Chicago

commercial plumbing contractors chicago

Why Commercial Plumbing Contractors Matter for Chicago Businesses

Commercial plumbing contractors in Chicago are specialized professionals who install, repair, and maintain plumbing systems in businesses, institutions, and multi-unit properties across the Chicagoland area. When a toilet overflows in your retail store or a pipe bursts in your restaurant kitchen, every minute of downtime counts.

Unlike residential plumbing, commercial systems handle higher volumes, operate under stricter codes, and serve customers or employees who depend on functioning facilities. The stakes are real. A backed-up drain can shut down a restaurant for the day. A failing water heater can leave hotel guests without hot water. A sewer line issue can close an office building. That’s why choosing the right commercial plumbing contractor isn’t just about fixing problems—it’s about protecting your business.

When looking for a contractor, key qualifications include:

  • Illinois state and City of Chicago plumbing licenses
  • 24/7 emergency availability
  • Transparent, upfront pricing
  • Experience with your facility type (restaurant, office, healthcare, etc.)
  • Proper certifications, such as for backflow prevention

This guide walks you through everything you need to know about finding, vetting, and working with commercial plumbing contractors in Chicago. We’ll cover the core services they provide, the qualifications that matter, how to choose the right partner for your business, and why preventative maintenance beats emergency repairs every time.

Infographic showing key differences between residential and commercial plumbing: Commercial systems use larger pipes (2-6 inches vs. 1-2 inches), handle higher usage volumes, require specialized fixtures like grease traps and backflow preventers, must meet stricter building codes and ADA compliance, serve multi-story buildings with complex drainage systems, and need licensed specialists rather than general plumbers - commercial plumbing contractors chicago infographic

Understanding the Scope: What Commercial Plumbers in Chicago Do

When it comes to the complex world of commercial plumbing, the services offered by commercial plumbing contractors in Chicago go far beyond simply fixing a leaky faucet. These professionals are the backbone of any well-functioning commercial enterprise, ensuring that everything from the smallest retail shop to a multi-unit apartment building operates smoothly. Our team understands that every business in Chicagoland has unique plumbing demands, and we are equipped to meet them with precision and expertise.

The primary services offered by commercial plumbing contractors in Chicago encompass a wide array of specialized tasks. This includes comprehensive installation for new construction, diligent repair work that minimizes downtime, and proactive maintenance to prevent future headaches. Whether you’re opening a new restaurant, renovating an office, or simply need routine checks, these contractors are essential.

Our services include the design and installation of water distribution and waste management systems, routine service, and system retrofitting to improve efficiency. For businesses undergoing expansion, tenant build-outs are a common need, ensuring new spaces have plumbing customized to their specific use.

You can learn more about our comprehensive offerings by visiting our Commercial Plumbing Services in Chicago page.

Plumber working on a large commercial water heater system - commercial plumbing contractors chicago

Core Services for Chicago Businesses

The diversity of Chicago’s business landscape means that commercial plumbing needs are incredibly varied. Our team serves a broad spectrum of businesses, each with unique requirements for their plumbing systems.

  • Restaurants and Hotels: These establishments have high-volume usage, strict health codes, and critical needs for hot water and waste disposal. Grease trap cleaning and maintenance are paramount for restaurants. Hotels require robust, high-capacity water heaters to ensure guest comfort.
  • Office Buildings and Retail Stores: These facilities face high usage in restrooms and common areas. Maintaining functional and aesthetically pleasing fixtures is important for employee and customer satisfaction.
  • Schools and Institutional Buildings: Public and private institutions require durable, water-efficient plumbing systems that can withstand high usage and ensure the health and safety of students and staff.
  • Property Management Firms: For multi-unit residential or commercial properties, consistent maintenance and quick emergency response are crucial to keep tenants happy and avoid costly repairs.

Regardless of the type of business, the goal remains the same: to ensure plumbing systems are efficient, reliable, and compliant with all local regulations. We are proud to contribute to a legacy of trusted service across Chicago, Roselle, Elmhurst, and our other service areas.

Common Problems and Advanced Solutions

Commercial plumbing systems in Chicago are constantly put to the test. High usage volumes and the complexity of multi-story buildings mean that problems can arise quickly.

Common issues we frequently encounter include:

  • Drain Clogs: From kitchen grease in restaurants to debris in high-traffic restrooms, commercial drains are prone to severe blockages. We address these with powerful hydro-jetting, which uses high-pressure water to scour pipe interiors.
  • Leaks: Even small leaks can escalate into significant water damage and mold growth. Our technicians use advanced leak detection methods to pinpoint hidden leaks and provide precise repairs.
  • Water Heater Problems: A commercial water heater failing can cripple a business. We offer comprehensive services for commercial water heaters, including installation, repair, and maintenance.
  • Backflow Issues: This is a critical concern where contaminated water could flow back into the clean water supply. We specialize in backflow prevention device installation, testing, and certification.
  • Sewer Line Repair: Damaged sewer lines can lead to backups and property damage. We use sewer camera inspections to accurately diagnose the problem and offer efficient repair solutions, including pipe lining.
  • Grease Trap Cleaning: For food service businesses, we provide routine cleaning and maintenance to keep these systems functioning optimally and in compliance with local codes.

The proactive approach of commercial plumbing contractors in Chicago means we don’t just react to problems; we use technology to identify potential issues before they become emergencies. This dedication to advanced solutions ensures your business can continue operating smoothly.

The Stakes are Higher: Residential vs. Commercial Plumbing

It’s tempting to think that plumbing is plumbing, regardless of the setting. However, the differences between residential and commercial plumbing are vast, and understanding them is crucial for any business owner in Chicago. The stakes are undeniably higher in a commercial environment, where a plumbing issue can halt operations, impact public health, and incur significant financial losses.

Let’s break down the key distinctions:

  • System Complexity: Commercial plumbing systems are inherently more complex. They often serve multiple floors, numerous fixtures, and specialized equipment found in commercial kitchens or multi-unit buildings.
  • Pipe Size and Grade: Commercial buildings typically use larger diameter pipes and more durable materials to handle higher volumes and pressures of water and waste.
  • Drainage Demands: The sheer volume of waste generated by a commercial property is exponentially higher than a residence. Commercial drainage systems must be robust, often incorporating specialized components like grease traps.
  • Strict Building Codes: Commercial plumbing is subject to a far more stringent set of building codes, regulations, and inspections. These codes cover public health, safety, and accessibility (ADA compliance). Navigating these complex compliance requirements is a critical part of commercial plumbing.
  • Equipment Scale: Commercial water heaters, boilers, and pumps are significantly larger and more powerful than their residential counterparts, designed for continuous, high-capacity use.
  • High Usage Volume: A single commercial restroom might see hundreds of flushes a day. This constant usage puts immense stress on fixtures and piping, necessitating more durable installations and frequent maintenance.
Feature Residential Plumbing Commercial Plumbing
Pipe Size Generally 1-2 inches Typically 2-6 inches or larger
Usage Low volume, intermittent High volume, continuous
Codes Less stringent, basic health/safety Highly stringent, public health, ADA, industry-specific
Drainage Basic waste removal Complex, specialized systems (grease traps, etc.)
Complexity Simple, few fixtures Highly complex, multi-story, specialized equipment
Equipment Standard water heaters, smaller pumps High-capacity water heaters, boilers, booster pumps
Impact Personal inconvenience Business disruption, public health risk, financial loss

Why Your Business Needs a Specialist

Considering these stark differences, it becomes clear why your business needs a specialist. A general plumber might handle a residential leak with ease, but a commercial system demands expertise that goes beyond basic repairs.

  • Durability Requirements: Commercial environments demand plumbing installations that can withstand constant, heavy use. Specialists understand the best materials and installation techniques to ensure longevity.
  • Multi-Story Buildings: Chicago is filled with multi-story commercial properties. These buildings have complex vertical piping systems and unique drainage challenges that require specialized knowledge.
  • Public Health Regulations: Businesses, especially in food service and hospitality, must adhere to strict public health regulations. Specialists are well-versed in these codes, including the critical importance of backflow prevention.
  • ADA Compliance: Commercial restrooms and facilities must be accessible to all. Commercial plumbing contractors are knowledgeable about ADA (Americans with Disabilities Act) requirements for fixtures.
  • Water Safety: Protecting the potable water supply from contamination is paramount. Commercial plumbers are certified in backflow prevention and testing, crucial for safeguarding your business and the community.

Choosing a specialized commercial plumbing contractors in Chicago means partnering with professionals who understand the unique demands of your business, ensuring compliance, minimizing risks, and providing peace of mind. Our team, serving Chicagoland areas like Roselle and Elmhurst, brings this specialized expertise to every project.

Vetting Your Options: How to Choose the Right Commercial Plumbing Contractors in Chicago

Selecting the right commercial plumbing contractors in Chicago is one of the most critical decisions you’ll make for your business’s operational health. It’s not just about who offers the lowest price; it’s about reliability, expertise, and long-term partnership. Careful vetting is essential to protect your investment and ensure your plumbing systems are in capable hands.

Team of professional plumbers reviewing blueprints on a construction site - commercial plumbing contractors chicago

Essential Qualifications for a Chicago Commercial Plumber

Before you even consider their project portfolio, ensure your potential commercial plumbing contractor possesses these fundamental qualifications:

  • Illinois Plumbing License: This is non-negotiable. All plumbers working in Illinois must hold a valid state license, demonstrating they’ve met minimum competency standards.
  • City of Chicago License: For work within the City of Chicago, additional local licensing may be required to ensure compliance with municipal codes.
  • Backflow Prevention Certification: Backflow is a serious health concern. Any commercial plumber you hire should be certified to install, test, and repair backflow prevention devices.
  • Insurance and Bonding: A reputable contractor must be fully insured and bonded to protect your business from liability in case of accidents or property damage.
  • OSHA Safety Training: Commercial repair environments can be hazardous. Plumbers should be trained in OSHA safety protocols to protect their team and your property.

Key Factors for Selecting Your Commercial Plumbing Contractors in Chicago

Once you’ve confirmed the basic qualifications, dig into these practical factors to choose the best fit for your business:

  • Years of Experience: Longevity in the business often translates to expertise. Look for contractors with a proven track record of serving the Chicagoland area.
  • Customer Reviews and Reputation: What are other businesses saying? Look for consistent themes of professionalism, punctuality, quality workmanship, and responsiveness in online reviews and testimonials.
  • Project Portfolio: Does the contractor have experience with projects similar in scope to yours? If you run a restaurant, look for experience with grease traps and commercial kitchens.
  • Emergency Response Protocol: Plumbing emergencies don’t keep business hours. A reliable contractor should offer 24/7 emergency services with live dispatching, ensuring a rapid response to minimize downtime.
  • Upfront Pricing Models: Transparency in pricing is crucial. You should receive a detailed quote with no hidden fees. Some contractors also offer financing options to help manage costs.
  • Service Guarantees: A contractor confident in their work will offer guarantees. We, for instance, stand by our work with a 100% satisfaction guarantee, ensuring peace of mind for our clients.

Here are some key questions to ask a potential contractor:

  1. “Can you provide proof of your Illinois and City of Chicago plumbing licenses, as well as insurance and bonding?”
  2. “What is your typical response time for commercial plumbing emergencies?”
  3. “Do you offer upfront, transparent pricing, and are there any hidden fees?”
  4. “Can you provide references from other commercial clients in the Chicagoland area?”
  5. “What is your experience with the specific type of plumbing system in my business?”
  6. “Do your plumbers have backflow prevention certification and OSHA training?”
  7. “What kind of service guarantee or warranty do you offer on your work?”
  8. “Do you offer preventative maintenance plans for commercial properties?”

By thoroughly vetting your options, you can form a reliable partnership with a commercial plumbing contractors in Chicago that will support your business for years to come.

The Proactive Approach: Maintenance, Technology, and Emergency Preparedness

In the business environment of Chicago, a reactive approach to plumbing is a recipe for disaster. Waiting for a pipe to burst or a drain to clog can lead to significant operational downtime and costly emergency repairs. This is why a proactive approach, emphasizing preventative maintenance, leveraging modern technology, and ensuring robust emergency preparedness, is paramount.

The benefits of preventative maintenance are extensive. It reduces the likelihood of unexpected failures, extends the lifespan of your plumbing equipment, and ensures continuous compliance with local codes. Preventative maintenance is the backbone of prolonging system lifespan and reducing unexpected failures. Our team offers dedicated Commercial Plumbing services focused on these proactive solutions.

When emergencies do strike, however, rapid response is crucial. Reputable commercial plumbing contractors in Chicago offer 24/7 emergency services to ensure that expert help is on its way as quickly as possible, helping businesses like yours recover swiftly.

The Value of a Preventative Maintenance Plan

Think of a preventative maintenance plan as an insurance policy for your plumbing system. It’s an investment that pays dividends by averting major crises. Our comprehensive plans for businesses in Chicago, Roselle, Elmhurst, and other service areas include:

  • Scheduled Inspections: Regular, thorough inspections allow us to identify minor issues before they escalate.
  • Drain Cleaning: Proactive drain cleaning, often using hydro-jetting, keeps pipes clear of grease, debris, and sediment.
  • Water Heater Tune-ups: Regular servicing ensures commercial water heaters operate efficiently and prolongs their life.
  • Proactive Leak Detection: Using advanced tools, we can detect subtle leaks that might otherwise go unnoticed, saving you from water damage and high utility bills.
  • Compliance Checks: We ensure your systems, especially backflow preventers and grease traps, are regularly inspected and certified to meet all local health and safety regulations.
  • Long-Term Partnerships: A preventative maintenance plan is the foundation of a long-term partnership with your plumbing contractor, built on trust and a shared goal of operational excellence.

A proactive approach minimizes downtime and safeguards against disruptions, embodying a commitment to reliability and service excellence.

Technology in Modern Commercial Plumbing

The plumbing industry has come a long way from just wrenches and pipes. Technology now plays a pivotal role in diagnostics and repair, making commercial plumbing services more efficient and less disruptive. For commercial plumbing contractors in Chicago, embracing these innovations means better service for our clients.

  • Sewer Video Inspection: This non-invasive diagnostic tool involves inserting a waterproof camera into pipes to visually inspect their interior. It allows us to pinpoint blockages, cracks, or other damage accurately, eliminating guesswork and minimizing disruptive excavation.
  • Hydro-Jetting Technology: As mentioned, hydro-jetting uses high-pressure water to clean pipes thoroughly. Modern equipment is powerful and efficient, blasting away debris, sludge, grease, and even tree roots.
  • Smart Monitoring Systems: Emerging technologies include smart sensors that can detect leaks, changes in water pressure, or other anomalies in real-time. This allows for immediate alerts and proactive intervention, preventing minor issues from becoming major disasters.

By integrating these technological advancements, commercial plumbing contractors in Chicago can offer superior service and more effective solutions for businesses throughout the Chicagoland area, from Melrose Park to Oakbrook Terrace.

Frequently Asked Questions about Chicago Commercial Plumbing

We understand that commercial plumbing can be a complex topic, and you likely have questions. Here are answers to some of the most common inquiries we receive from businesses in the Chicago area.

What’s the difference between a commercial and an industrial plumber?

While there’s overlap, the distinction often lies in the scope of work and the specific environment.

  • Commercial Plumbers typically focus on plumbing systems in businesses that serve the public or house employees. This includes restaurants, hotels, office buildings, retail stores, and schools. Their work involves high-volume usage, complex drainage, public health codes, and fixtures like commercial water heaters and multi-fixture restrooms.
  • Industrial Plumbers often work in manufacturing plants and other heavy industry sites. Their work can involve process piping and specialized equipment unique to industrial processes.

Essentially, industrial plumbing deals with the specific needs of industrial processes, while commercial plumbing focuses on the functional needs of public-facing or large-scale business operations. Our team primarily focuses on licensed residential and light commercial plumbing services, covering the needs of most businesses in our Chicagoland service areas.

How much do commercial plumbing services cost in Chicago?

The cost of commercial plumbing services in Chicago can vary widely based on several factors:

  • Project Complexity: A simple repair will cost far less than a full plumbing system installation or a complex renovation.
  • Labor Rates: The cost of labor reflects the high skill and training of professional plumbers.
  • Material Costs: The type and quality of materials used will impact the overall cost.
  • Emergency Fees: Emergency services outside of standard business hours typically incur higher rates.

It’s crucial for businesses to receive upfront, detailed quotes from their chosen contractor. Reputable companies emphasize providing transparent pricing with no hidden fees. We also believe in clear communication regarding costs. Additionally, many contractors offer financing options to help businesses manage larger expenses.

How quickly can I expect a response for a plumbing emergency?

For businesses, every minute of plumbing downtime can mean lost revenue. Therefore, a rapid response for a plumbing emergency is non-negotiable.

Reputable commercial plumbing contractors in Chicago understand this urgency and prioritize quick response times, with many advertising 24/7 emergency services. This means you can expect assistance regardless of the time of day or night.

  • Live Dispatching: Many contractors offer live dispatching around the clock, ensuring that your call is answered by a person who can quickly assess the situation and dispatch a technician.
  • Minimizing Business Downtime: The primary goal of a fast emergency response is to mitigate damage and restore operations as quickly as possible. Technicians often arrive in stocked service vehicles, prepared to handle common emergency repairs immediately.

When an emergency strikes in Hyde Park, Sauganash, or any of our Chicagoland service areas, you need a partner who can respond promptly and effectively to minimize disruption to your business.

Conclusion

Navigating the complexities of commercial plumbing in Chicago demands a proactive approach and a trusted partnership. From ensuring your restaurant’s grease traps are compliant to maintaining the intricate systems of a multi-story office building, the right commercial plumbing contractors are indispensable for your business’s success.

We’ve explored the extensive range of services, from new construction installations and system retrofitting to addressing common issues with advanced solutions like hydro-jetting and sewer camera inspections. We’ve highlighted the crucial differences between residential and commercial plumbing, emphasizing the higher stakes, stricter codes, and specialized expertise required for commercial environments. Most importantly, we’ve outlined how to vet your options, focusing on essential qualifications like licensing, certifications, experience, and transparent pricing, along with the critical need for 24/7 emergency response and proactive maintenance plans.

Protecting your investment and ensuring business continuity means making informed choices. By taking a proactive stance on maintenance and choosing a reliable, experienced partner, you can safeguard your operations against unexpected plumbing disasters.

At VanDerBosch Plumbing Inc., we are committed to being that reliable partner for businesses across Chicagoland, including Roselle, Niles, Winnetka, Elmhurst, Mount Prospect, and all of Cook County. We pride ourselves on our 100% satisfaction guarantee, 24/7 availability for emergencies, transparent pricing with no hidden service charges, and a team of experienced, background-checked technicians ready to serve your light commercial plumbing needs.

Don’t let pipe dreams turn into plumbing nightmares. Choose a contractor who understands the unique demands of your business.

Explore our full range of plumbing solutions today and let us help you keep your business flowing smoothly.

Don’t Get Drained: Expert Ejector Pump Repair in Chicago

ejector pump repair chicago

Protecting Your Chicago Basement from Wastewater Woes

Ejector pump repair Chicago services are essential for homeowners and business owners with below-grade plumbing fixtures. If your ejector pump fails, sewage and wastewater can quickly back up into your basement, creating a messy, smelly, and potentially hazardous situation.

Need ejector pump repair in Chicago right now? Here’s what to do:

  1. Stop using all basement plumbing fixtures immediately (toilets, sinks, showers, washing machines)
  2. Check your circuit breaker to ensure the pump has power
  3. Call a licensed plumber for emergency service – most reputable companies offer same-day response
  4. Expect completion in under 90 minutes for most standard repairs
  5. Get upfront pricing before work begins – standard maintenance calls typically start around $79

Chicago’s unique infrastructure challenges make ejector pumps critical for thousands of homes. Heavy rain, aging plumbing systems, and the city’s topography mean that many basements sit below the main sewer line. When you install a bathroom, laundry room, or utility sink in your basement, gravity can’t do the work anymore. That’s where your ejector pump comes in.

This sealed system collects wastewater from your below-grade fixtures in a basin. When the water level rises, a float switch activates the pump, which grinds up solid waste and pushes everything up to your main sewer line. Without a functioning ejector pump, you’re one toilet flush away from a sewage backup.

The risks of a malfunctioning ejector pump go beyond inconvenience. Sewage backups expose your family to harmful bacteria, can trigger mold growth, and cause thousands of dollars in property damage to flooring, drywall, and personal belongings. Ejector pumps typically last seven to ten years, but pumps over a decade old become increasingly unreliable and prone to unexpected failure.

Infographic showing the flow of wastewater from a basement toilet and sink into a sealed ejector pump basin, then being pumped upward through a discharge pipe with a check valve to connect with the main sewer line at ground level, with labels for key components including the float switch, grinder, vent pipe, and sealed lid - ejector pump repair chicago infographic

Understanding Your Ejector Pump: Function, Failures, and Risks

For homes across Chicago and its suburbs like Roselle, Niles, and Elmhurst, especially those with finished basements, an ejector pump is a silent hero. It’s easy to forget about this crucial piece of equipment until it stops working, but understanding its function is key to appreciating its importance.

What is an Ejector Pump and How Does it Work?

An ejector pump, also known as a sewage ejector pump or sewage pump, is specifically designed to handle wastewater from plumbing fixtures located below the main sewer or septic line. Unlike typical plumbing that relies on gravity, ejector pumps actively push wastewater upwards to the main sewer line. This system typically consists of:

  • A sealed basin (or pit): This is where wastewater from your basement toilet, shower, sink, or laundry collects.
  • A float switch: As the wastewater level in the basin rises, the float switch lifts, triggering the pump.
  • The pump: Once activated, the pump, often equipped with a grinder, breaks down solid waste and propels the wastewater through a discharge pipe.
  • A vent pipe: Required for installation, this equalizes pressure and allows sewer gases to escape, usually venting through the roof or connecting to an existing soil stack.

This process ensures that all waste, both gray water (from sinks, washing machines, showers) and black water (from toilets), is safely moved out of your home. It’s a non-negotiable component if you have any plumbing fixtures in your basement.

cutaway view of an ejector pump system in its sealed basin - ejector pump repair chicago

Ejector Pump vs. Sump Pump: A Crucial Distinction

It’s common for homeowners to confuse ejector pumps with sump pumps, but they serve entirely different purposes. While both are critical for protecting your basement, here’s a clear breakdown:

Feature Sump Pump Ejector Pump
Purpose Removes groundwater from beneath the foundation Pumps wastewater (sewage) from basement plumbing fixtures
Water Type Clear water, groundwater Black water, gray water (wastewater, solids)
Pit/Basin Unsealed pit, allows water in Sealed lid and basin, contains sewage and odors
Solids Handling No solids handling Designed to handle and grind solids
Discharge Directs water safely away from the home (e.g., storm drain) Pumps wastewater up to the main sewer line
Ventilation Typically no vent pipe required Requires a vent pipe for pressure equalization and gas escape

Essentially, a sump pump protects your basement from external water (like heavy rainfall or rising groundwater), while an ejector pump protects it from internal wastewater generated by your basement plumbing. For more information on preventing basement water problems, visit our page on Basement Water Problems: A Reliable Sump Pump is Your First Line of Defense.

Common Causes of Ejector Pump Failure

Ejector pumps are robust, but they’re not immune to issues. Recognizing the common culprits behind a failing pump can help you act quickly:

  • Clogs: This is a major one. Flushing items like “flushable” wipes, paper towels, feminine hygiene products, or dumping grease down basement drains can quickly lead to blockages. The grinder can also get overwhelmed by foreign objects.
  • Float Switch Issues: The float switch is the pump’s brain. If it gets stuck (in the ‘on’ or ‘off’ position), or if it malfunctions, the pump won’t activate or won’t stop running. This is a frequent cause of continuous running or complete inactivity.
  • Motor Failure: Like any motor, an ejector pump’s motor can wear out over time due to continuous use, overheating, or electrical issues. A humming sound without pumping action often indicates a motor problem.
  • Power Outages: Without electricity, your ejector pump cannot operate. This is particularly problematic during heavy storms when you need it most.
  • Age-Related Wear and Tear: Ejector pumps have a lifespan. Components like seals, bearings, and impellers degrade over time, leading to reduced efficiency and eventual breakdown. Pumps over 10 years old are significantly more prone to unexpected failures.
  • Improper Sizing or Installation: An ejector pump that is too small for your home’s needs, or one that was incorrectly installed, can lead to premature failure and frequent issues.

The Alarming Health and Safety Risks

A malfunctioning ejector pump isn’t just an inconvenience; it’s a serious health and safety hazard.

  • Sewage Backup: The most immediate and horrifying consequence is a sewage backup into your basement. This means raw sewage, including human waste, can flood your living space.
  • Bacteria and Viruses: Raw sewage is teeming with harmful bacteria, viruses, and pathogens. Exposure can lead to severe gastrointestinal illnesses, skin infections, and other health problems.
  • Mold Growth: Even after cleanup, moisture from a sewage backup can lead to rapid mold growth within 24-48 hours. Mold can cause respiratory issues, allergic reactions, and further property damage.
  • Property Damage: Beyond the unsanitary conditions, a sewage backup can cause extensive and costly property damage. This includes ruined flooring (carpeting, hardwood, laminate), damaged drywall, destroyed furniture, and compromised structural elements. The cleanup and restoration costs can quickly skyrocket into thousands of dollars.
  • Unpleasant Odors: Even without a full backup, a failing ejector pump can lead to foul, persistent odors emanating from your drains, signaling a problem with waste containment.

Ignoring a problem with your ejector pump is akin to ignoring a ticking time bomb in your basement. Prompt action is crucial to protect your home and your family’s health.

Your Guide to Ejector Pump Repair in Chicago

When your ejector pump shows signs of trouble, it’s natural to feel a sense of dread. But with the right approach and a reliable partner for ejector pump repair in Chicago, you can mitigate the damage and restore peace of mind.

professional plumber inspecting an ejector pump pit - ejector pump repair chicago

What to Do If Your Ejector Pump Fails

If you suspect your ejector pump has failed, here are the immediate steps to take:

  1. Stop Using Basement Plumbing: Immediately cease using all plumbing fixtures in your basement. This includes toilets, sinks, showers, and washing machines. Any further use will only add to the wastewater in the basin, increasing the risk of overflow and backup.
  2. Check the Circuit Breaker: Sometimes, the simplest solution is the right one. Head to your electrical panel and check if the circuit breaker for your ejector pump has tripped. If it has, reset it. If it trips again immediately, do not attempt to reset it repeatedly, as this indicates a more serious electrical or pump issue.
  3. Call a Professional Immediately: Do not attempt complex repairs yourself. Dealing with raw sewage involves significant health risks and requires specialized knowledge and tools. Contact a licensed and insured plumbing professional for emergency service. We offer 24/7 availability for such critical situations across Chicago and its service areas like Roselle, Winnetka, and Mount Prospect.

Repair vs. Replacement: Making the Right Choice

When your ejector pump malfunctions, the big question is often whether to repair it or replace it entirely. This decision usually comes down to age, the severity of the issue, and cost-effectiveness.

  • Typical Lifespan: Ejector pumps typically last between seven to ten years, depending on usage and maintenance. Some sources suggest a range of 5-7 years, while others indicate they can last 10 years or longer with proper care.
  • Inefficiency of Older Pumps: If your ejector pump is over 10 years old, it’s likely less efficient and more prone to unexpected breakdowns. At this point, even a seemingly minor repair might be a temporary fix for a pump that’s nearing the end of its functional life.
  • Cost-Benefit Analysis:
    • Repair: If your pump is relatively new and the issue is minor (like a stuck float switch or a simple clog), a repair is often the most economical solution.
    • Replacement: For older pumps, those with significant motor issues, or pumps that are frequently breaking down, replacement is usually the more cost-effective long-term solution. Investing in a new, more efficient model can prevent future headaches and costly emergency calls. Our experts can help you assess the situation, providing clear options and upfront pricing so you can make an informed decision.

For homeowners considering adding new plumbing to their basement, understanding the role of pumps is crucial. Explore the Reasons to Add a Sump Pump to the Home for related insights.

Common Signs You Need Ejector Pump Repair in Chicago

Being aware of the warning signs can help you catch a problem early, potentially preventing a full-blown emergency. Don’t ignore these indicators:

  • Strange Noises: Any unusual sounds like grinding, rattling, clunking, or humming coming from the pump pit are red flags. Grinding might indicate debris in the impeller, while a persistent hum could mean the motor is trying to run but can’t.
  • Foul Odors from Drains: If you notice unpleasant, sewage-like smells emanating from your basement drains, it’s a strong sign that wastewater isn’t being properly ejected, or that the sealed system has been compromised.
  • Slow Drainage in Basement Fixtures: If your basement toilet, sink, or shower is draining slowly, it suggests that the ejector pump is struggling to move the wastewater efficiently.
  • Pump Won’t Start: This is an obvious sign. If the pump doesn’t activate when water levels rise, you’re heading for a backup.
  • Pump Runs Constantly (Short-Cycling): If your ejector pump turns on and off frequently, or runs non-stop, it often points to a malfunctioning float switch. This constant operation wastes energy and can quickly burn out the motor.

Here are the Top 5 Ejector Pump Warning Signs:

  1. Strange or loud noises from the pump.
  2. Foul odors in your basement.
  3. Slow draining basement fixtures.
  4. The pump fails to turn on.
  5. The pump runs continuously or cycles frequently.

The Process for Emergency Ejector Pump Repair in Chicago

When your ejector pump fails, you need fast, reliable service. We understand the urgency, especially in a busy city like Chicago and its surrounding communities. Our process is designed for speed and efficiency:

  • 24/7 Availability: Plumbing emergencies don’t stick to business hours, and neither do we. Our team is available around the clock, every day of the week, to respond to your urgent needs.
  • Same-Day Service & Rapid Dispatch: We pride ourselves on rapid response. Most ejector pump calls are completed with same-day service. When you call, our expert team is dispatched quickly to your location.
  • Initial Assessment: Upon arrival, our licensed and background-checked technician will conduct a thorough assessment of your ejector pump system to accurately diagnose the problem.
  • Transparent, Upfront Quote: Before any work begins, you’ll receive a clear, upfront quote for the necessary repairs or replacement. We believe in transparent pricing with no hidden fees or service charges. For instance, our standard maintenance call is only $79.
  • Repair Execution: Our skilled technicians arrive fully equipped to handle most ejector pump issues on the spot. They work diligently to resolve the problem efficiently.
  • System Testing: After the repair or replacement, we rigorously test the entire system to ensure it’s functioning correctly, the float switch is operating optimally, and there are no leaks or further issues.
  • Job Completion in Under 90 Minutes: For most standard ejector pump calls, our expert team typically gets the job done in less than an hour and a half, minimizing disruption to your home.

Why Professional Service is Non-Negotiable

When it comes to something as critical as your home’s wastewater management system, cutting corners or attempting DIY fixes can lead to far greater problems. Professional ejector pump repair in Chicago isn’t just convenient; it’s essential.

The Risks of a DIY Approach

  • Health Hazards: Dealing with raw sewage exposes you to dangerous bacteria, viruses, and other pathogens. Without proper protective equipment and sanitation protocols, you risk serious illness.
  • Complex Electrical and Plumbing Connections: Ejector pumps involve both electrical wiring and intricate plumbing connections. A mistake in either can lead to electrical shock, leaks, or further damage to your plumbing system.
  • Code Compliance: Plumbing work in Chicago and its suburbs must adhere to strict local building codes. Improper installation or repair can lead to code violations, which may require costly re-work and fines.
  • Lack of Specialized Tools and Knowledge: Ejector pump repair and installation require specialized tools and expert knowledge to diagnose problems accurately and perform lasting repairs. Attempting it yourself can easily lead to more significant, more expensive issues down the line.

If you’re wondering about professional installation for other basement water solutions, you might find our article Do You Need a Plumber for Sump Pump Installation? insightful.

The Benefits of Choosing VanDerBosch Plumbing Inc.

Choosing a professional service like ours for your ejector pump repair in Chicago offers unparalleled benefits:

  • Licensed and Insured Technicians: Our team consists of licensed, insured, and bonded plumbing experts. This ensures that the work is performed to the highest standards and that you are protected against any unforeseen issues.
  • Warranties and Guarantees: We stand by our work. We offer a 100% satisfaction guarantee, meaning you can trust that the job will be done right. Additionally, manufacturers’ warranties on new pumps and our labor warranties provide long-term peace of mind. For more details on our commitments, please review our Terms of Service.
  • Peace of Mind: Knowing that your ejector pump is professionally installed, maintained, or repaired by experienced, background-checked experts gives you confidence in your home’s plumbing system. You won’t have to worry about the next heavy rainfall or basement toilet flush.
  • Preventative Maintenance: Regular maintenance is crucial for extending the life of your ejector pump and preventing unexpected failures. Our services include annual inspections, testing of the motor, inspection of the pit and piping, light cleaning of the pit, testing the pump’s operation by filling the pit, and inspection of the piping, check valve, and switch. This proactive approach helps catch small issues before they become major, costly problems. We recommend maintenance at least once a year.

We’re committed to providing top-tier service across all our locations, including Hyde Park, Sauganash, and West Ridge. For a full list of our offerings, please visit our Services page.

Frequently Asked Questions about Chicago Ejector Pumps

We often get questions from homeowners about their ejector pumps. Here are some of the most common ones:

How much does ejector pump repair or replacement cost in Chicago?

The cost of ejector pump repair in Chicago or replacement can vary significantly depending on several factors:

  • Type of Repair: A simple fix like replacing a float switch will be less expensive than a motor repair or addressing a severe clog.
  • Parts Needed: The cost of replacement parts can vary based on the pump model and manufacturer.
  • Pump Replacement Cost: If a full replacement is necessary, the cost will include the new pump itself (which can range based on horsepower and features) and the labor for installation.
  • Labor: Technician time and expertise are factored into the cost.

While we can’t give a precise figure without an inspection, we always provide a transparent, upfront quote before any work begins. Our goal is to ensure you understand the costs involved and can make an informed decision without any surprises.

How long does an ejector pump last?

Ejector pumps typically last between seven to ten years. However, this lifespan can be influenced by several factors:

  • Usage Frequency: A pump in a heavily used basement bathroom will likely have a shorter lifespan than one in a rarely used guest bathroom.
  • Maintenance Schedule: Regular annual or semi-annual maintenance can significantly extend a pump’s life by addressing minor issues before they escalate and keeping components clean and well-functioning.
  • Water Quality: The type of wastewater handled can affect wear and tear.
  • Installation Quality: A properly installed pump will generally last longer than one with installation flaws.

Ejector pumps over 10 years old are generally less efficient and more prone to unexpected breakdowns. If your pump is approaching or has exceeded this age, it’s wise to consider a proactive replacement to avoid emergency situations. For more general plumbing questions, check out our Frequently Asked Questions.

Can I prevent my ejector pump from failing?

While no mechanical device can be guaranteed to last forever, there are definite steps you can take to prolong the life of your ejector pump and minimize the risk of failure:

  • Proper Disposal Habits: This is paramount. Never flush anything other than human waste and toilet paper down basement toilets. Avoid disposing of grease, “flushable” wipes (they’re not truly flushable!), feminine hygiene products, dental floss, or excessive food waste into basement drains. These are major causes of clogs and pump motor strain.
  • Regular Maintenance Checks: Schedule annual or semi-annual professional inspections. During these checks, our technicians will inspect the pump’s components, test the float switch, clean the pit if necessary, and ensure all connections are secure.
  • Install a Battery Backup System: Power outages are a common cause of ejector pump failure, especially during heavy Chicago storms. A battery backup system can provide crucial emergency power, allowing your pump to continue operating when the main power is out. This is a critical component for flood prevention, similar to how How Sump Pumps Protect Against Flooding during heavy rains.

By being proactive and mindful of what goes down your drains, you can significantly reduce the chances of needing emergency ejector pump repair in Chicago.

Conclusion: Secure Your Home with Reliable Ejector Pump Services

Your ejector pump is a vital component of your Chicago home’s plumbing system, especially if you enjoy the convenience of a finished basement. Neglecting its maintenance or ignoring the warning signs of a malfunction can lead to unsanitary conditions, extensive property damage, and significant health risks.

Don’t wait for a messy and costly disaster to strike. At VanDerBosch Plumbing Inc., we’re committed to providing expert, reliable, and prompt ejector pump repair in Chicago and surrounding areas like Ukrainian Village, Oakbrook Terrace, and Niles. Our licensed, background-checked technicians are equipped with the expertise and tools to diagnose any issue, offer transparent pricing, and ensure your ejector pump is working flawlessly.

Schedule your ejector pump inspection or repair today to protect your property, maintain a healthy home environment, and secure your peace of mind. We’re here to help, 24/7. Contact us for expert sump and ejector pump services and let us be your trusted partner in plumbing.

Cast Iron Pipe Repair Liners Your Ultimate Trenchless Solution for Damaged Pipes

cast iron pipe repair liner

The Hidden Problem with Aging Cast Iron Pipes

A cast iron pipe repair liner is a trenchless solution that creates a new, structural pipe inside your existing damaged cast iron pipe using a resin-saturated felt liner that hardens in place. This process, called Cured-In-Place Pipe (CIPP) lining, repairs corrosion, cracks, and leaks without excavation.

Quick Overview of Cast Iron Pipe Repair Liners:

  • What it is: A resin-impregnated tube installed inside your damaged pipe that cures to form a seamless, structural liner
  • How it works: The liner is inserted, inflated, and cured using heat or UV light to create a “pipe within a pipe”
  • Best for: Pipes with corrosion, cracks, leaks, and root intrusion that still have structural integrity
  • Not suitable for: Completely collapsed pipes or severely deteriorated sections
  • Lifespan: 50+ years with proper installation
  • Cost: Typically 60-70% less than traditional excavation and replacement

If you live in a home built before 1972, there’s a good chance your sewer system includes cast iron pipes. These pipes were the industry standard for decades, but they weren’t built to last forever. Over time, cast iron pipes develop serious problems that can turn into plumbing nightmares.

Common signs your cast iron pipes are failing:

  • Corrosion and rust eating away at the pipe walls from the inside out
  • Scale buildup that narrows the pipe opening and restricts flow
  • Cracks and leaks allowing sewage to seep into your property
  • Tree root intrusion where roots exploit weak spots and grow into the pipe
  • Frequent backups that keep happening no matter how often you clear them

Traditional repair methods meant tearing up your yard, driveway, or basement floor—a messy, expensive, and time-consuming process. But modern technology offers a better way. Cast iron pipe repair liners provide a trenchless solution that fixes these problems from the inside, preserving your property and your peace of mind.

Want to know if your sewer line needs attention? Check out our guide on signs a sewer line may need repair or replacement.

Infographic showing how cast iron pipes degrade over time through corrosion, rust buildup, and cracking, with two repair pathways illustrated: traditional excavation showing torn-up property and heavy equipment versus trenchless CIPP lining showing minimal access points and no property disruption - cast iron pipe repair liner infographic

What is a Cast Iron Pipe Repair Liner? The CIPP Solution Explained

When we talk about a cast iron pipe repair liner, we’re primarily referring to Cured-In-Place Pipe (CIPP) lining. This innovative trenchless technology creates a brand-new pipe right inside your old, failing one. Imagine a seamless, jointless, and structurally sound pipe forming within the existing conduit—that’s the magic of CIPP.

The CIPP process involves using a flexible, felt liner saturated with a special epoxy resin. This isn’t just any resin; it’s engineered to be incredibly durable and to bond perfectly with the existing pipe. Once installed and cured, this resin-saturated liner hardens to form a rigid, impermeable “pipe within a pipe.” It’s a structural material, meaning it effectively takes over the function of the old, deteriorating cast iron pipe. This new inner pipe is completely sealed from end to end, eliminating all the common issues associated with aging cast iron.

The beauty of this “pipe-within-a-pipe” concept is how it directly addresses the problems of corrosion, cracks, and root intrusion. The new liner acts as a barrier, preventing further corrosion of the old cast iron. It seals off all cracks and holes, stopping leaks and restoring the pipe’s integrity. And because it’s a smooth, seamless surface, tree roots can no longer penetrate or exploit weak joints, which is a common culprit for blockages in Chicagoland. For more detailed information on how these trenchless methods work, you can explore our page on Trenchless Pipe Repairs.

This method isn’t just a quick fix; it’s a long-term solution backed by industry standards. The installation and material quality often adhere to rigorous guidelines, such as those outlined in the Standard Practice for CIPP, ensuring a high-quality and reliable repair.

The Benefits of a Cast Iron Pipe Repair Liner

Choosing a cast iron pipe repair liner for your plumbing woes offers a host of compelling advantages, especially when compared to the disruptive nature of traditional excavation.

  1. Durability and Lifespan: One of the most significant benefits is the incredible longevity of a CIPP liner. These liners are designed to last, with an expected lifespan of 50 years or more. Many systems even come with a 50-year materials and labor warranty, giving you peace of mind for decades to come. This means you’re not just patching a problem; you’re investing in a permanent solution.
  2. Prevents Root Intrusion: Tree roots are notorious for finding their way into tiny cracks and loose joints in cast iron pipes, leading to recurring blockages. Since the CIPP liner creates a seamless, jointless interior surface, there are no entry points for roots to penetrate. This effectively puts an end to root intrusion problems in the lined section.
  3. Stops Leaks and Improves Flow: The new, smooth interior surface of the liner seals all existing cracks and holes, stopping leaks dead in their tracks. Furthermore, this smooth surface reduces friction, which can actually improve the flow capacity of your pipe, even with a slight reduction in diameter. It prevents debris from snagging on rough, corroded surfaces, reducing the likelihood of future clogs and backups.
  4. Minimal Disruption: This is often the most appreciated benefit by our clients in Chicagoland. CIPP lining is a trenchless technology, meaning it typically requires little to no excavation. Instead of tearing up your yard, driveway, or interior floors, our technicians can usually access the pipe through existing access points. This saves your landscaping, concrete, and sanity, making it a much cleaner and less intrusive repair method.
  5. Cost-Effective: While the initial cost can vary, CIPP lining is frequently more cost-effective than traditional pipe replacement. By avoiding extensive excavation, property restoration (like re-landscaping or repairing foundations), and lengthy labor, you can often save significantly. Some sources suggest CIPP can be 60-70% less expensive than conventional excavation and replacement, especially in complex situations like pipes under buildings or mature landscapes.

Limitations and Considerations

While a cast iron pipe repair liner is a phenomenal solution for many pipe problems, it’s not a one-size-fits-all miracle. There are specific situations where CIPP may not be the best, or even a viable, option.

  1. Pipe Must Be Structurally Sound (to a degree): CIPP lining works by creating a new pipe within the old one. This means the existing cast iron pipe needs to have enough structural integrity to support the lining process and provide a host for the new liner. If the pipe is severely compromised, collapsed, or has large missing sections, CIPP may not be suitable.
  2. Not for Collapsed Pipes: If a section of your cast iron pipe has completely collapsed, a liner cannot be installed. The pathway is simply too obstructed. In such cases, traditional excavation or pipe bursting (another trenchless method that replaces the pipe entirely) would be necessary.
  3. Diameter Reduction: A CIPP liner does create a “pipe within a pipe,” which inherently means a slight reduction in the internal diameter of the pipe. Typically, this reduction is minimal, often around 1/4 inch. For most residential and light commercial applications, this slight reduction is negligible and often offset by the improved flow characteristics of the new, smooth, seamless surface. However, it’s a factor to consider, particularly in pipes that are already borderline in capacity.
  4. Access Points Required: While CIPP avoids extensive trenching, it does require access points to insert and cure the liner. These could be existing cleanouts, an exposed pipe section, or a small, strategically excavated access pit. Our experienced technicians will assess your specific situation to determine the best approach.
  5. Residential vs. Commercial Applications: CIPP lining is highly versatile and effective for both residential and light commercial properties in areas like Chicago, Roselle, and Elmhurst. However, the complexity and scale can differ. Commercial applications, especially for larger diameter pipes or those with more intricate branching systems, may require specialized equipment or techniques. Our team is equipped to handle both.

The CIPP Installation Process: A Step-by-Step Guide

The installation of a cast iron pipe repair liner in Chicago is a precise process that our skilled technicians perform with meticulous care. It’s a testament to modern plumbing technology, changing a damaged pipe into a robust, new system without the chaos of traditional digging.

technician inserting a CIPP liner into a pipe - cast iron pipe repair liner

Here are the five key steps involved in our CIPP lining process:

  1. Initial Sewer Camera Inspection
  2. Thorough Pipe Cleaning
  3. Liner Insertion and Curing
  4. Reinstating Branch Lines
  5. Final Video Inspection

Let’s explore each step to understand how we bring your pipes back to life.

Step 1: Initial Sewer Camera Inspection

Before any repair work begins, the first and most critical step is a comprehensive sewer camera inspection. Think of it as a plumbing endoscopy! We insert a high-resolution camera into your cast iron pipe to get a real-time, up-close view of its interior condition. This allows us to:

  • Diagnose the problem: We pinpoint the exact nature and extent of the damage—be it corrosion, cracks, root intrusion, scale buildup, or misaligned joints.
  • Locate damage: The camera helps us precisely identify where the issues are, which is crucial for planning the repair.
  • Measure pipe length: We accurately measure the length of the section that needs lining, ensuring the liner is custom-cut to fit perfectly.
  • Assess suitability: This inspection also helps us determine if CIPP lining is indeed the best solution for your specific situation. If the pipe is completely collapsed or has other severe structural issues, we’ll discuss alternative options.

Our detailed Sewer Video Inspection service is an invaluable tool, allowing us to see what’s happening beneath your property without any guesswork. For more insights into this process, check out The Basics of Sewer Video Inspection Explained.

Step 2: Thorough Pipe Cleaning

Once we’ve fully assessed the pipe, the next step is to prepare it for the liner. This is where the “clean slate” really happens! The success of a cast iron pipe repair liner depends heavily on a thoroughly cleaned host pipe. We use advanced techniques to:

  • Remove scale and debris: Aging cast iron pipes often accumulate significant rust, scale, and other debris. We use specialized tools, such as patented carbide chains that rotate at high speeds (up to 600 RPM), to mechanically scrape away stubborn buildup without damaging the pipe wall.
  • Clear out roots: If tree roots have invaded your pipe, we’ll use powerful cutting tools to grind them away, ensuring a clear pathway.
  • Wash out contaminants: After mechanical cleaning, we employ high-pressure water jetting, also known as Hydro Jetting Services, to thoroughly wash out all loose debris, grease, and sludge. This leaves the pipe interior pristine.
  • Prepare the host pipe surface: A clean, smooth surface is essential for the epoxy resin to properly adhere to the existing pipe, creating a strong, long-lasting bond. This ensures the liner performs optimally for decades.

Step 3: Liner Insertion and Curing

This is the core of the CIPP process, where the new pipe is formed. It’s a fascinating display of trenchless technology!

  • Resin saturation: A flexible, felt liner (often made of polyester fabric) is custom-cut to the exact length of the damaged pipe section. This liner is then saturated with a specially formulated, two-part epoxy resin. This “wet-out” process ensures the liner is completely impregnated with the resin, which will eventually harden.
  • Inversion method: One common method involves using air pressure or a hydrostatic head (water pressure) to “invert” or turn the resin-saturated liner inside out as it’s pushed into the existing cast iron pipe. As it inverts, the resin-coated side is pressed firmly against the interior walls of the old pipe. Another technique is the “pull-in-place” method, where the liner is pulled through the pipe and then inflated.
  • Curing with heat or UV light: Once the liner is perfectly positioned and pressed against the host pipe walls, the curing process begins. This typically involves introducing heat (either hot water or steam) or using UV light to activate the epoxy resin. The resin undergoes an exothermic chemical reaction, causing it to harden and solidify. For example, some resins heat up to around 180 degrees Fahrenheit during this phase. This hardening process usually takes a few hours, typically 1-4 hours depending on the resin and conditions.
  • Hardening process: As the resin cures, it forms a rigid, seamless, and jointless new pipe that is incredibly strong and durable. This new liner effectively becomes a structural pipe within your old one, capable of withstanding external pressures and providing an excellent pathway for wastewater.

Step 4: Reinstating Branch Lines

Most sewer systems have branch lines that connect to the main sewer line (e.g., from sinks, toilets, or floor drains). When we install a continuous CIPP liner, these branch connections are temporarily covered by the new liner. But don’t worry, we don’t leave your plumbing disconnected!

  • Precision location: During the initial inspection (Step 1), we carefully map out the exact locations of all branch lines.
  • Robotic cutting tools: After the liner has fully cured and hardened, our technicians use specialized robotic cutting tools, guided by a live camera feed, to precisely cut open the new liner at each branch connection. This re-establishes the flow from your fixtures into the newly lined main pipe. This intricate process ensures that all your plumbing fixtures are fully functional and properly connected to the restored sewer system.

Step 5: Final Video Inspection

The final step is our quality assurance check, ensuring everything is perfect.

  • Verifying successful installation: We conduct another comprehensive video inspection of the newly lined pipe. This allows us to visually confirm that the liner is smooth, seamless, fully cured, and free of any defects. We also verify that all branch lines have been correctly reinstated.
  • Quality assurance: This final inspection is our way of guaranteeing that the repair meets our high standards and will provide you with decades of reliable service.
  • Providing peace of mind: We often provide our customers with a copy of this final video inspection. It’s not just proof of our work; it’s tangible evidence of your newly rehabilitated, high-performing sewer system.

For answers to more common questions about our inspection process, visit Sewer Video Inspection: Answering Customers’ Frequently Asked Questions.

CIPP Lining vs. Traditional Replacement: A Head-to-Head Comparison

When facing issues with aging cast iron pipes, property owners in Chicagoland typically have two main options: traditional pipe replacement or the modern solution of cast iron pipe repair liner (CIPP). The choice between these methods involves weighing several factors, from cost and time to disruption and long-term durability.

comparison of a clean, lined pipe next to an excavated, messy trench - cast iron pipe repair liner

Let’s break down how these two approaches compare:

Feature CIPP Lining (Trenchless) Traditional Replacement (Excavation)
Cost Generally 60-70% less than excavation. Residential: $150-$200/linear foot. Commercial: $175-$225/linear foot. Avoids restoration costs. Significantly higher due to extensive labor, excavation, and property restoration. Residential: $15,000-$25,000 (for 50ft).
Installation Time Hours to a few days. Often completed within a day or two. Minimal operational downtime. Days to weeks (2-4 weeks for complex projects). Includes excavation, pipe laying, and restoration.
Property Disruption Minimal. Access through existing points or small pits. Preserves landscaping, driveways, floors. Extensive. Requires digging trenches, destroying landscaping, concrete, and potentially interior structures.
Lifespan 50+ years for the new liner. New pipes can last up to 100 years, depending on material (e.g., PVC).
Environmental Impact Lower. Less waste to landfills, reduced carbon footprint from heavy machinery. Higher. Generates significant waste (soil, old pipe, concrete) and requires more fuel for heavy equipment.

When is a Cast Iron Pipe Repair Liner Not an Option?

While CIPP lining is an incredibly versatile and effective solution, there are specific scenarios where traditional replacement becomes the only viable option for your cast iron pipes. Understanding these limitations is crucial for making an informed decision.

  1. Completely Collapsed Pipes: If a section of your cast iron pipe has fully collapsed, creating a complete obstruction, a liner cannot be installed. There’s simply no pathway for the liner to pass through or to form against.
  2. Severely Deteriorated Pipes with Large Voids: CIPP relies on the existing pipe structure to provide a host for the new liner. If the original pipe is so severely deteriorated that it has large missing sections or significant portions of its wall are gone, the liner may not have enough support to form properly or achieve the necessary structural integrity.
  3. Offset Joints: While CIPP can handle minor bends and some imperfections, severely offset joints (where one pipe section has shifted significantly out of alignment with the next) can prevent the liner from being properly inserted or from forming a smooth, continuous seal.
  4. Significant Structural Issues Beyond the Pipe: Sometimes, the problem isn’t just the pipe itself, but also the surrounding ground or foundation that has shifted, causing severe deformation of the pipe. In such cases, addressing the external structural issue might necessitate excavation and replacement of the pipe.
  5. When a Whole Home Repipe is Necessary: In some older homes in areas like Winnetka or Oak Park, the entire plumbing system—not just the sewer line—might be at the end of its life. If multiple sections of both drain and supply lines are failing, a comprehensive whole-home repipe might be a more holistic and cost-effective long-term solution than spot repairs.
  6. Code Mandates or Material Upgrades: Occasionally, local plumbing codes might require a complete replacement with a specific new material (like PVC) in certain situations, especially if the existing cast iron is deemed beyond repair or if a full system upgrade is desired.

In these situations, our experienced technicians will conduct a thorough assessment and camera inspection to determine the best course of action, ensuring you receive the most effective and lasting repair for your home or business.

Frequently Asked Questions about Cast Iron Pipe Lining

We understand you might have questions about this advanced plumbing solution. Here are some of the most common inquiries we receive from our Chicagoland clients about cast iron pipe repair liner technology.

How much does a CIPP liner reduce the pipe’s diameter?

This is a common and excellent question! A CIPP liner does create a “pipe within a pipe,” so there is a slight reduction in the internal diameter. However, this reduction is typically minimal—often around 1/4 inch. For example, a 4-inch pipe might become 3.75 inches.

What’s important to remember is that this slight diameter reduction is almost always offset, or even improved upon, by the new liner’s incredibly smooth, seamless, and jointless interior surface. Unlike old cast iron pipes that are rough, corroded, and prone to snagging debris, the new liner allows wastewater to flow much more efficiently. This often results in improved flow characteristics and reduced chances of future clogs, even with the minor change in diameter. It’s a bit like comparing a bumpy dirt road to a freshly paved highway—the highway, even if slightly narrower, allows for much smoother and faster travel!

What maintenance is required for a lined pipe?

One of the great advantages of a CIPP-lined pipe is its low maintenance requirements. Once installed, the new liner is incredibly durable and resistant to the common problems that plagued your old cast iron pipes.

  • Resistant to scale and root intrusion: The smooth, non-porous surface of the liner prevents mineral scale from building up and drastically reduces the chances of tree roots penetrating the pipe.
  • No special care needed: You can continue to use your plumbing system as normal. The liner is built to withstand typical wastewater and household chemicals.
  • Routine Drain Cleaning Services recommended: While the liner itself is robust, it’s always a good practice to maintain healthy drains throughout your home. We still recommend periodic professional drain cleaning for your entire plumbing system to prevent blockages from occurring in other non-lined sections or fixtures. This ensures the longevity and efficiency of your entire system.

Essentially, a lined pipe is designed to be a “set it and forget it” solution for decades!

How long does a cast iron pipe repair liner last?

When properly installed by experienced professionals like us, a cast iron pipe repair liner is a long-term solution designed to stand the test of time. These liners are engineered for exceptional durability and longevity.

  • Expected lifespan of 50 years or more: Most reputable CIPP systems boast an expected lifespan of 50 years or even longer. This is often backed by comprehensive warranties from manufacturers and installers.
  • Meets or exceeds ASTM standards: The materials and installation processes for CIPP lining adhere to stringent industry standards set by organizations like ASTM International. These standards ensure the liners are rigorously tested for strength, chemical resistance, and long-term performance, providing confidence in their durability.
  • Durable epoxy material: The epoxy resin used to saturate the felt liner is a thermoset plastic that, once cured, becomes incredibly hard and resilient. It’s resistant to corrosion, abrasion, and chemicals commonly found in wastewater, ensuring it won’t degrade like the old cast iron.

Investing in a CIPP liner means you’re investing in a solution that will likely outlast your stay in your current home, providing reliable service for generations.

Your Modern Solution for Cast Iron Pipe Problems

Dealing with failing cast iron pipes can be a source of immense stress and financial burden. The thought of tearing up your home or yard for repairs is enough to make anyone cringe. Thankfully, with the advent of cast iron pipe repair liner technology, those days are largely behind us.

The CIPP lining process offers a superior, trenchless solution that effectively addresses the common issues of corrosion, cracks, leaks, and root intrusion in aging cast iron pipes. It’s a method that prioritizes efficiency, minimal disruption, and long-term durability, making it an incredibly smart investment for property owners across Chicagoland, from Roselle to Niles, and Elmhurst to Winnetka.

At VanDerBosch Plumbing Inc., we pride ourselves on providing cutting-edge plumbing solutions that save you time, money, and hassle. Our experienced, background-checked technicians are experts in trenchless technology, dedicated to delivering a 100% satisfaction guarantee on every job. We offer transparent pricing with no hidden service charges, and we’re available 24/7 for your emergencies because we know plumbing problems don’t keep business hours.

Don’t let deteriorating cast iron pipes compromise your property or your peace of mind. Choose the modern, no-dig solution that preserves your landscaping, your budget, and your sanity.

For a professional assessment of your cast iron pipes and guaranteed service, trust the experts at VanDerBosch Plumbing Inc. Schedule an appointment for Trenchless Pipe Repair Services in Chicago today, and let us bring your plumbing system into the 21st century.

The Sump Pump Marathon: Causes and Solutions for Constant Running

sump pump constantly running

Why Your Sump Pump Won’t Stop Running

A sump pump constantly running is not normal and signals a problem that needs immediate attention. When your pump runs non-stop, even during dry weather, it’s working overtime and heading toward premature failure.

Quick Diagnosis Guide:

Symptom Most Likely Cause Urgency
Running 24+ hours, no rain Stuck float switch or faulty check valve High – risk of burnout
Water spraying back into pit Broken check valve or cracked casing High – replace immediately
Runs every few minutes Undersized pump or short cycling Medium – shortens lifespan
Constant low-level running High water table or underground leak Medium – assess water source

The most common culprits include a jammed float switch that can’t signal the pump to turn off, a broken check valve that lets water flow back into the pit, or a discharge pipe clog that prevents proper drainage. Less obvious issues like high groundwater levels, leaking pipes near your foundation, or an incorrectly sized pump can also cause this frustrating problem.

Why this matters: A pump running constantly will overheat and fail—often during the next big storm when you need it most. Most sump pumps last 7-10 years with proper maintenance, but continuous operation can cut that lifespan in half. Plus, you’re wasting electricity and risking a basement flood if the motor burns out.

I’m Hugh Hodur, President of VanDerBosch Plumbing, and I’ve helped countless Chicagoland homeowners diagnose and fix issues with a sump pump constantly running before they turned into basement flooding disasters. Whether it’s a quick float switch adjustment or a full system replacement, identifying the root cause early saves you money and protects your home.

Infographic showing the normal sump pump cycle: water enters pit, float rises and activates pump at set level, pump discharges water through check valve and discharge pipe, float drops and pump shuts off when pit is empty, versus abnormal constant running cycle where pump never shuts off due to mechanical failure or continuous water inflow - sump pump constantly running infographic

Is It Normal for a Sump Pump to Run Constantly?

In short: no. While it might seem like your pump is just being “extra prepared,” a sump pump constantly running is a cry for help. Under normal conditions, a sump pump is a reactive device. It waits for water to reach a certain level in the basin (the “crock”), kicks on to discharge that water, and then shuts off once the level drops.

dry basement after successful sump pump operation - sump pump constantly running

If your pump is humming along for 24 hours straight—especially if it hasn’t rained in days—you are looking at a mechanical or environmental anomaly. According to basement protection guidelines, a healthy system should only operate when necessary. Constant operation leads to motor burnout, which is the last thing you want during a Chicago spring thaw. Furthermore, the energy efficiency of your home takes a hit; those motors draw significant power, and running one 24/7 will reflect unpleasantly on your next ComEd bill.

Understanding how sump pumps protect against flooding is key to realizing why the “off” cycle is just as important as the “on” cycle. The “off” period allows the motor to cool down. Without it, the internal seals can fail, and the lubricant can break down, leading to a seized motor.

Common Reasons Your Sump Pump Constantly Running

When we visit homes in Roselle or Elmhurst to investigate a runaway pump, we usually find the cause falls into one of two categories: mechanical failure or environmental stress.

Cause Category Specific Issues Solution Complexity
Mechanical Stuck float, broken check valve, clogged impeller Low to Medium (DIY possible)
Environmental High water table, underground leaks, poor grading Medium to High (Professional)
Installation Incorrect pump size, shallow pit, poor pipe routing High (Requires Re-installation)

If you are asking yourself, “Do I need a sump pump?” because yours won’t stop making noise, the alternative is a swimming pool in your basement. However, the lifespan of these units is finite. On average, a well-maintained pump lasts 7-10 years. If your pump is in the 5-7 year range and starts running non-stop, it may be nearing the end of its reliable service life.

Stuck Float Switch and Sump Pump Constantly Running

The float switch is the “brain” of the pump. It’s essentially a buoyant ball or cylinder that floats on top of the water. When the water rises, the float rises, flipping a switch to start the motor.

The most common reason for a sump pump constantly running is that this float has become stuck in the “up” position. This often happens because:

  • Vibrations: As the pump runs, it can “wander” or shift in the pit until the float presses against the side of the basin.
  • Debris: Small rocks, dirt, or even trash can get wedged between the float arm and the pump body.
  • Tangle: In some models, the tethered float (which looks like a black balloon on a cord) can get tangled around the discharge pipe or the pump’s power cord.

If you want to see this in action, check out this video of common float issues. We often recommend a vertical float design over a tethered one for our Chicagoland clients, as they are less likely to get snagged on the basin walls.

Faulty Check Valves, Clogged Pipes, and Incorrect Sizing

The check valve is a small but mighty component installed in the discharge pipe. Its job is to act as a one-way valve. When the pump turns off, the check valve prevents the several gallons of water remaining in the vertical pipe from falling back into the pit.

If this valve fails, you get “water recycling.” The pump empties the pit, shuts off, the water in the pipe falls back down, the float rises again, and the pump restarts. This cycle repeats indefinitely, mimicking a sump pump constantly running.

Other mechanical hurdles include:

  • Clogged Discharge Pipes: If the pipe is blocked by debris or ice, the pump will run but the water has nowhere to go. The water level never drops, so the pump never shuts off.
  • Incorrect Sizing: If your pump is too small (low horsepower), it may struggle to keep up with the rate of water entering the pit during a heavy storm, leading to constant operation. Conversely, a pump that is too powerful for a small pit can cause “short cycling,” which is equally damaging. There are many reasons to add a sump pump to the home, but getting the right size is paramount.

High Water Tables and External Water Sources

Sometimes the pump is working perfectly, but the water just keeps coming. This is common in areas like Niles or Mount Prospect where the water table can be high.

Environmental factors include:

  • The Spring Thaw: In Illinois, when the snow melts and the ground is still partially frozen, water can’t soak into the deep soil. It stays near the surface and floods into sump pits.
  • Underground Leaks: A broken water main or a leaking sprinkler system near your foundation can provide a never-ending supply of water to your pit.
  • Landscaping Changes: If a neighbor changes their yard’s grading or you install new flower beds, water might be redirected toward your foundation.

In these cases, basement water problems: a reliable sump pump is your first line of defense, but you might need a higher-capacity system or a secondary “buddy” pump to handle the load.

Troubleshooting, DIY Fixes, and Signs for Replacement

Before you panic and assume you need a brand-new system, there are several troubleshooting steps you can take. While some issues require the “big guns,” many can be solved with a pair of gloves and 20 minutes of your time.

Regular maintenance can actually extend your pump’s life to 8-10 years. This includes cleaning out the pit, as “rusty debris” and small rocks can damage the impeller (the fan that pushes the water). If you find yourself wondering, “Do you need a plumber for sump pump installation?” the answer is usually yes if the discharge lines need to be re-run or if you are dealing with electrical issues. For those who prefer professional help right away, you can find local plumbing pros to take the weight off your shoulders.

Step-by-Step Troubleshooting for a Sump Pump Constantly Running

If your pump is having its own personal marathon, follow these steps:

  1. Check the Power: Ensure the pump is plugged into a dedicated GFI outlet. Sometimes voltage fluctuations (falling below 100V) can cause a motor to hum and run without actually having enough torque to move water.
  2. The Float Test: Reach into the pit and gently wiggle the float. If the pump stops when you move the float down, you’ve found your culprit. Clean away any debris and ensure the pump is centered in the pit so the float doesn’t touch the walls.
  3. Inspect the Check Valve: Look at the arrow on the check valve; it should point away from the pump. If you hear a loud “thud” followed by the sound of rushing water every time the pump stops, the valve is likely failing and needs replacement.
  4. Clear the Discharge Line: Go outside and find where the water exits. Ensure it isn’t blocked by leaves, mulch, or ice. If the line is frozen, you may need to install an anti-freeze attachment.
  5. Clean the Inlet Screen: Unplug the pump, pull it out of the pit, and check the bottom. If the screen is clogged with muck, the pump can’t pull water in, causing it to run dry and overheat.

For residents in our service area, we offer specific Roselle services: sump pumps to handle these diagnostics for you.

Frequently Asked Questions

Can a sump pump burn out from running too much?

Absolutely. Sump pump motors are cooled by the water surrounding them (in submersible models) or by air. If a pump runs constantly, especially if the pit is dry because of a stuck float, the motor will overheat. This leads to internal seal failure and total motor seizure. Replacing a burnt-out pump is much more expensive than a simple maintenance call.

How often should I test my sump pump?

We recommend a “bucket test” at least quarterly. Pour enough water into the pit to raise the float and trigger the pump. This ensures the float isn’t stuck and the check valve is holding. This is a core part of our seasonal services: sump pumps packages.

Why does my pump run when there is no rain?

This is usually due to a high water table or an underground water source. In many parts of Chicagoland, the soil stays saturated long after the rain stops. Other reasons include leaking underground pipes, heavy condensation from HVAC systems draining into the pit, or poor yard drainage that directs groundwater toward your basement.

Conclusion

A sump pump constantly running is more than just a noisy nuisance; it’s a threat to your home’s dry basement and your wallet. Whether it’s a simple fix like untangling a float switch or a more complex issue like a high water table, addressing it now is far better than dealing with a flood later.

At VanDerBosch Plumbing Inc., we’ve been the trusted Chicagoland experts for decades. From Chicago to Roselle and out to Winnetka, we provide licensed, professional service with a 100% satisfaction guarantee. We offer transparent pricing with no hidden service charges and are available 24/7 for those middle-of-the-night emergencies.

Don’t let your sump pump run itself into an early grave. If you’re in Cook County or the surrounding areas and need a professional eye on your system, contact us today for more info about sump pump services. We’ll make sure your basement stays dry and your pump gets the rest it deserves.