
What Does Plumbing Warranty Cover? A 2026 Guide

Table of Contents

Last Updated: September 26, 2026

Plumbing Warranty vs. Home Warranty vs. Insurance: What’s the Difference?

A plumbing warranty is a written promise that a specific product or a specific repair will be free from defects for a set period. It is not the same as a home warranty or a homeowners insurance policy, and mixing them up is one of the most common reasons a claim gets denied.

Here is the difference in plain terms:

  • Manufacturer warranty: Covers the part itself, usually a water heater tank or a fixture.
  • Plumber labor warranty: Covers the workmanship on a repair the plumber performed.
  • Home warranty (service contract): A paid service plan that covers repairs to systems in the home, with a service fee per visit.
  • Homeowners insurance: Covers sudden accidental damage, like a burst pipe soaking a ceiling (Water Damage: What’s Covered, What’s Not). It does not cover the pipe itself.

How Each Type of Coverage Responds to a Plumbing Failure

Picture a water heater tank that splits and floods a basement. Three different coverages may respond, and each one handles a different slice of the problem.

Key TakeawayA plumbing warranty covers a product or a repair. A home warranty covers a system. Insurance covers damage. Knowing which one applies to your problem tells you who to call first.

What a Plumbing Warranty Typically Covers

Coverage depends on who issued the warranty. A manufacturer warranty protects the product. A labor warranty protects the work.

Most manufacturer warranties cover:

  • Plumbing fixtures: faucets, toilets, sinks, and shower valves, usually against defects in materials
  • Water heater tanks: the tank and internal parts, often for several years
  • Parts: cartridges, valves, thermostats, and heating elements

What Plumbing Warranties Usually Exclude

Exclusions are where most claims die. A warranty is a contract with a defined boundary, and the boundary is usually drawn around anything that looks like neglect, misuse, or work the issuer did not control. Read this list before you assume you are covered.

  • Normal wear and tear: a faucet that drips after a decade of use is worn out, not defective. Warranties cover defects in materials and workmanship, not the predictable end of a component’s service life.
  • Pre-existing conditions: a problem that existed before the policy or install date. See the section below on how this is actually determined.
  • Code violations and unpermitted work: if a repair or installation was never inspected or does not meet the code in force at the time, the issuer can deny the claim and require the work to be brought up to standard before paying anything.
  • Improper installation: work done by an unlicensed or DIY installer. This is the single most common reason a manufacturer warranty is voided on a fixture or water heater.
  • Unauthorized repairs: if you or another party opened the equipment, replaced a part with a non-approved component, or altered the installation after the fact, the warranty on that equipment is typically void.
  • Root intrusion and blockages: tree roots in a sewer line are a maintenance issue, not a defect.
  • Corrosion from neglect: pipe corrosion that built up over years of ignored leaks.
  • Improper maintenance: skipped flushing, skipped anode rod service, or a boiler that was never serviced.
  • Acts outside the home: freezing, power surges, water quality, and pressure spikes from the municipal supply are usually excluded.

How Unauthorized DIY Repairs Void a Warranty

This is the exclusion homeowners underestimate most. A manufacturer warranty is conditioned on the product being installed and serviced according to the manufacturer’s instructions, by a qualified installer. Once someone else opens the unit, the issuer has no way to know whether the failure was caused by the part or by the work, and most manufacturers resolve that ambiguity by denying the claim.

The pattern shows up in predictable places:

  • A homeowner replaces a water heater thermocouple or heating element themselves. The tank later fails. The manufacturer points to the unauthorized repair as the cause.
  • A fixture cartridge is swapped with a generic part instead of the manufacturer’s replacement. The finish or valve body fails later, and the claim is denied because a non-approved component was installed.
  • A gas appliance is reconnected after a DIY move or remodel. The gas connection is now unpermitted work, and any warranty tied to that appliance is at risk.
Watch OutGas lines, boilers, and any pressurized or electrical component of a plumbing system should never be opened, reconnected, or altered by anyone other than a licensed professional. Beyond voiding warranties, these are safety issues. If you smell gas, leave the area and call your gas utility or emergency services first, then arrange for a licensed plumber.

How Pre-Existing Condition Clauses Are Actually Determined

Common evidence used to date a problem:

  • The home inspection report. If a home warranty plan was sold to you after an inspection flagged a plumbing issue, that issue is almost certainly excluded. The report is the paper trail.
  • Prior service records. A plumber who noted a slow drain, a corroded fitting, or a water heater at end of life created a dated record. That record can be used against a later claim.
  • Corrosion and mineral patterns. A failed fitting that shows years of buildup is hard to attribute to a recent defect.
  • Permit and inspection history. Unpermitted work is often discovered only when a claim is filed and the issuer pulls the record.
Key TakeawayExclusions are not fine print you can argue your way out of later. The two that void the most claims are unauthorized DIY work and undocumented pre-existing conditions. Both are avoidable with a licensed installer and a maintained paper trail.

If you need a repair done in a way that keeps your manufacturer or labor warranty intact, contact VanDerBosch Plumbing Inc. to schedule a licensed technician.

Manufacturer Warranty for Water Heaters: Parts vs. Labor

The manufacturer warranty for water heaters almost always covers parts only. Labor is on you.

Here is the split you should expect:

Book a Visit →

Warranty Type

Covers

Typically Does Not Cover

Manufacturer (tank)

Tank, internal parts

Labor, haul-away, permits

Manufacturer (parts)

Valves, elements, controls

Labor, diagnosis

Plumber labor

Workmanship on the repair

The part itself

Home warranty

Repair or replacement, minus service fee

Pre-existing issues, code upgrades

Plumber Labor Warranty: What It Covers and Why It Matters

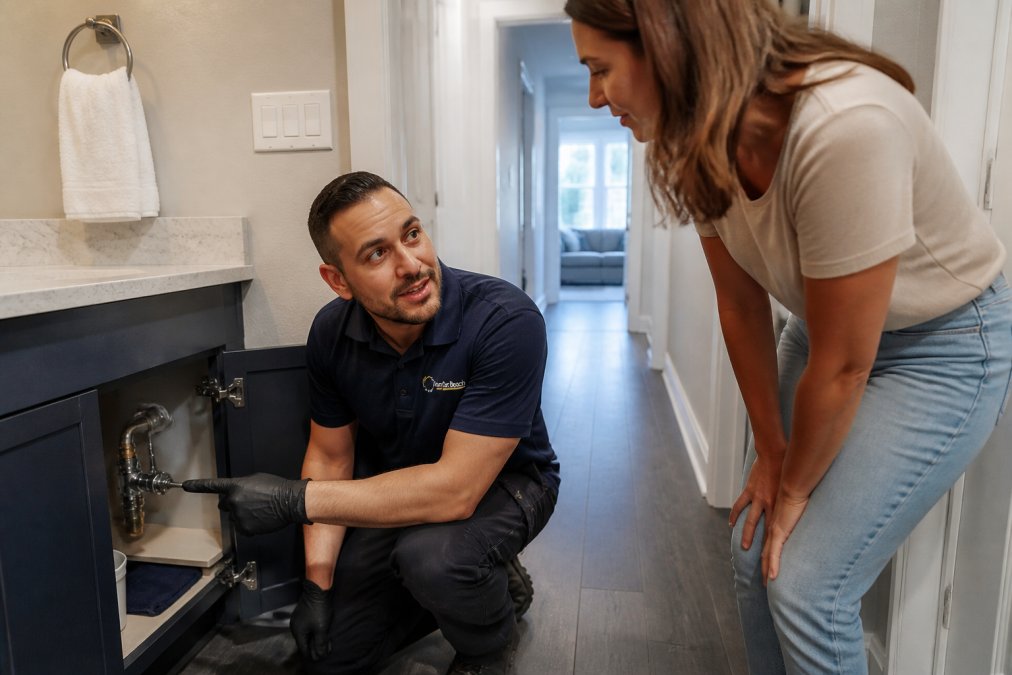
A plumber labor warranty covers the workmanship on a repair, not the part. If a connection fails because of how it was installed, the labor to correct it should be covered.
Article image

Ask two questions before you hire anyone:

  • How long does the labor warranty run?
  • Does it cover a return visit, or just the original repair?

How to File a Plumbing Warranty Claim (and Why Claims Get Denied)

The claim process is simple on paper. In practice, most denials come down to documentation and timing, not to whether the failure was real.

Here is what a typical claim looks like:

  1. Find the original receipt, model number, and install date.
  2. Confirm the failure falls inside the warranty window and is not on the exclusion list.
  3. Call the warranty provider before you authorize any repair. Work done before approval is often not reimbursed.
  4. Get the diagnosis in writing from a licensed plumber, including the cause of failure.
  5. Submit the claim with photos, the service record, and the plumber’s written diagnosis.
  6. Wait for approval before work begins, unless the provider authorizes emergency service in writing.

Claim Denial Checklist: The Reasons Claims Actually Get Rejected

Run through this list before you file. Each item is a documented denial trigger, and each one is fixable in advance.

  • No maintenance records. The issuer asks for proof the system was maintained. You have none.
  • No receipt or model number. Without proof of purchase and install date, the issuer cannot confirm the warranty is active.
  • Work done by an unlicensed installer. The install itself is the denial reason, regardless of the failure.
  • Unauthorized repair before approval. You called a plumber, paid, and then filed. The provider denies reimbursement because prior authorization was required.
  • Pre-existing condition. The inspection report or a prior service note dates the problem before coverage started.
  • Code violation or unpermitted work. The repair cannot be approved until the work is brought up to code, and the upgrade is not covered.
  • Normal wear and tear. The component reached end of life. That is not a defect.
  • Missed filing window. Most warranties require the claim within a set number of days of discovery. Late claims are denied.
  • Failure to mitigate. If a leak was left running and caused secondary damage, the issuer can deny the portion of the claim tied to the neglect.
  • Excluded system. The item is simply not on the covered list. Read the covered-items schedule before you file.

The Maintenance Record Is Your Best Defense

A maintenance record is the single most effective way to protect a future claim. It converts a he-said-she-said dispute about whether a problem was pre-existing into a dated, third-party record of the system’s condition.

What a useful record includes:

  • Date of service and the plumber or company that performed it
  • What was inspected, cleaned, or replaced
  • Any noted condition, even if no repair was made
  • Photos where the condition is visible
Pro TipPhotograph every repair receipt and store it in one folder, digital or physical. When a warranty claim comes up years later, the homeowner with a clean paper trail gets paid.

What to Do If Your Claim Is Denied

A denial is not always final. Ask the provider for the specific exclusion or condition cited in writing. If the denial is based on a pre-existing condition, request the evidence they used to date the problem. If it is based on an unauthorized repair, confirm whether the repair was actually performed by a licensed professional and documented.

Frequently Asked Questions

What does a home warranty cover for plumbing?

A home warranty is a service contract, not insurance. It typically covers repair or replacement of plumbing systems and appliances that fail from normal wear and tear, such as a water heater tank, clogged main drain, or leaking supply line. Most policies require a service fee per visit and exclude pre-existing conditions, code upgrades, and damage caused by neglect. Read the policy exclusions carefully before filing a claim.

Do plumbers warranty their work?

Most licensed plumbers provide a labor warranty on their workmanship, separate from any manufacturer warranty on parts. A plumber labor warranty generally covers defects in the installation or repair itself, such as a leak at a joint that was just replaced. It usually does not cover unrelated failures or damage caused by the homeowner. Ask for the warranty terms in writing before work begins.

Are water leaks and pipe bursts covered under a plumbing warranty?

It depends on the cause. A plumber labor warranty may cover a leak at a fitting the plumber just installed. A manufacturer warranty may cover a defective part, like a failed water heater tank. Neither typically covers pipes that burst from freezing, corrosion, or age. Homeowners insurance may cover resulting water damage, but usually not the pipe repair itself.

How long does a standard plumbing repair warranty last?

Labor warranty periods vary by provider and by the type of work performed. Some plumbers offer a short window on repairs, while others extend coverage on new equipment installations. Manufacturer warranties on water heaters and fixtures often run longer on parts than on labor. Always confirm the specific warranty length in writing, since it is not standardized across the industry.
Signs of Sewer Line Failure: 7 Warning Signs to Know

Table of Contents

Last Updated: September 25, 2026

Warning Signs of Sewer Line Failure Every Homeowner Should Know

A sewer line failure rarely announces itself with a single dramatic event. It usually starts small: one slow drain, one gurgle, one damp spot in the yard. By the time sewage backs up into a basement, the problem has often been developing for months.

Slow-Flowing Drains and Gurgling Noises

One slow drain usually means a local clog. Several slow at once points to the main line.

Watch for these patterns:

  • Multiple sinks and tubs draining slowly at the same time
  • A toilet that gurgles when you run the washing machine
  • Water backing up in a shower when you flush
  • Bubbling sounds from drains after normal use
Watch Out
If you see standing water in more than one fixture at the same time, stop using water in the house. Every flush pushes more wastewater into a line that’s already blocked, and that pressure has to go somewhere, usually your basement floor drain.

Foul Sewer Odors and Wastewater Backups

Sewer gas smells like rotten eggs and should never be noticeable indoors. Odor near a floor drain, basement sink, or laundry tub means wastewater isn’t moving properly, often a dry or failed plumbing vent, a crack in the sewer lateral, or a blockage letting waste sit and decompose.

Recurring Drain Backups: A Red Flag for Main Line Blockage

One clog is an inconvenience. The same clog returning every few months means the underlying problem was never fixed. That cycle usually points to tree roots that regrow, corrosion narrowing the pipe, a belly or sag where waste collects, or scale and grease a cable scrapes but doesn’t remove. Cabling clears a path through the blockage; it doesn’t restore the pipe.

Pro Tip
Keep a simple log of every backup: the date, which fixtures were affected, and what was done. That history helps a plumber spot a repeat pattern fast, and it’s useful if you file an insurance claim later.

Outdoor Clues: Soggy Spots, Lush Patches, and Pest Problems

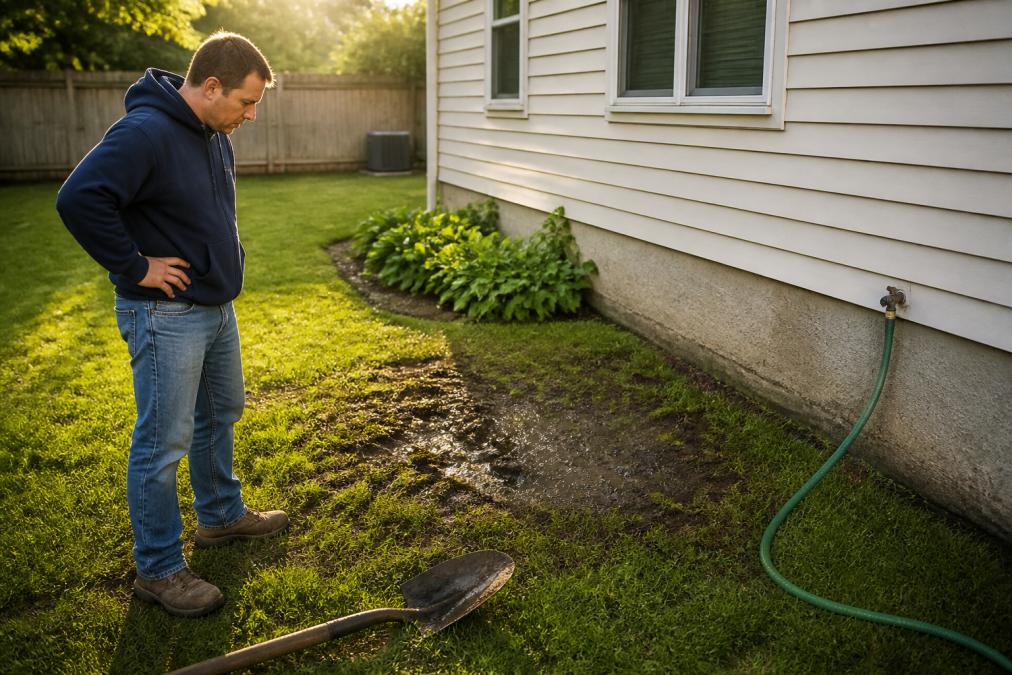
A homeowner standing in a backyard looking down at a noticeably soggy, sunken patch of lawn near the foundation, with a garden hose and shovel nearby, late afternoon light

Look for:

  • A strip of unusually green, fast-growing grass along the sewer path
  • Soggy ground that stays wet when everything else is dry
  • A sunken or dipped area in the lawn
  • Rodents or insects gathering near a specific outdoor spot

Ground Saturation and Foundation Damage

Ground saturation is more than a wet lawn. A continuously leaking sewer line keeps soil around your foundation soaked, which can shift soil, crack a basement floor, and let water seep into the lowest level of the home.

How Sewer Video Inspection Confirms a Failure

A sewer video inspection is the only way to know for certain what’s happening inside the pipe. A small camera travels the line and sends back live footage of the interior.

DIY vs. Professional Diagnostic Tools: What You Can Safely Check

You can check a few things yourself without touching the plumbing. You cannot diagnose a sewer line from above ground.

Safe homeowner checks:

  • Confirm which fixtures are affected and when
  • Note the timing of backups relative to laundry, showers, or dishwasher use
  • Look for outdoor signs like wet spots and green patches
  • Check that floor drains have water in the trap

What you should not do:

  • Pour chemical drain cleaners into a main line
  • Open a cleanout and reach or snake blindly into the pipe
  • Dig up the yard to find the line
  • Attempt repairs on a pressurized or buried sewer line
Key Takeaway
The single most useful thing you can do is document the pattern. When the problem started, which fixtures are involved, and whether it’s getting worse. A plumber can work with that.

The more useful question is what the pipe is made of, because material determines how a line fails and which repair method works. In older neighborhoods with pre-war housing stock, the sewer lateral under the yard is often the original pipe installed when the home was built.

Book a Visit →

How Each Material Fails

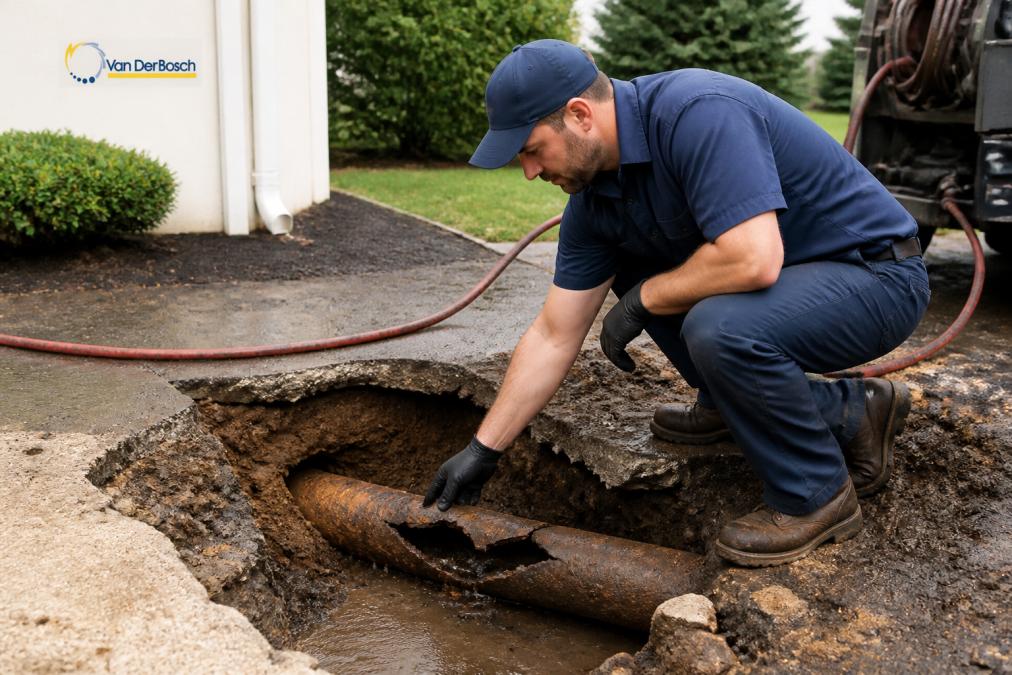
Clay tile. Common on older laterals. Clay is rigid and brittle, installed in short sections with joints every few feet, those joints are the weak points. Ground movement opens them, roots find the gap, and once a root hair enters, it grows into a mat that catches paper, grease, and debris. On camera, clay failure looks like open joints, root masses at the seams, and hairline cracks that widen over time.

Why Material Matters for the Repair Decision

Age alone doesn’t mean a line has failed. A 70-year-old clay lateral with tight joints and no root intrusion may still have years of service left. But age raises the odds, and material tells you what kind of failure to expect:

  • A clay line with root intrusion at joints is often a candidate for clearing followed by lining.
  • A cast iron line with heavy scale and channeling is usually past the point where cleaning restores capacity.
  • Deformed Orangeburg is a replacement, not a repair.
  • A plastic line with a single offset joint may only need a localized repair.

Trenchless Options and When They Fit

When a line is damaged but the pipe still has structural shape, trenchless methods can often restore it without digging a long trench across the yard, driveway, or landscaping:

  • Pipe lining (CIPP). A resin-saturated liner is inserted into the existing pipe and cured in place, creating a new pipe inside the old one. Best for cracked, root-damaged, or scaled lines where the original pipe still holds its shape.
  • Pipe bursting. A bursting head pulls a new pipe through the old one, breaking the old pipe outward into the surrounding soil. Useful when the existing pipe is too deformed for lining but the path is still usable.
  • Hydro-jetting. High-pressure water scours grease, scale, and roots from the pipe wall. This is a cleaning method, not a repair, but it’s often the first step before a camera inspection or lining.
Situation Likely Approach Why
Roots at joints, pipe shape intact Hydro-jetting, then lining Clears roots, seals the line
Cast iron with heavy scale and channeling Lining or replacement Capacity is compromised
Deformed or crushed Orangeburg Pipe bursting or excavation Structure is gone
Offset joint in plastic pipe Localized repair Damage is isolated
Recurring clogs, no damage found Drain cleaning and monitoring Blockage, not failure

Immediate Mitigation Steps and Insurance Coverage

When you suspect a sewer line failure, the first hour matters. Wastewater backing into a basement or crawlspace creates a health hazard, and every fixture you use adds more water to a line that can’t move it.

What to Do Right Now

  1. Stop using water in the home. No flushing, showers, laundry, or dishwasher. Every gallon you send down the drain has to go somewhere, and if the line is blocked, that somewhere is your lowest floor drain.
  2. Keep people and pets out of any backed-up water. Sewage carries bacteria and pathogens. If the water is in a basement, close the door and don’t walk through it.
  3. Shut off water to affected fixtures if you can do so safely. A fixture shutoff valve under a sink or behind a toilet is fine to close. Do not open cleanouts, remove caps, or attempt to snake or rod the line yourself.
  4. Photograph and document everything. Wide shots of the affected area, close-ups of the water line on walls or flooring, and any damaged belongings. This is the evidence your insurance adjuster will ask for.
  5. Call a licensed plumber for diagnosis. A camera inspection confirms what’s actually happening in the line, the information both you and your insurer need.
Watch Out
If sewage is backing up and you cannot stop water use, or if the backup is affecting a finished living space, treat it as an emergency. Do not attempt to clear a main sewer line yourself. The hazards, bacteria, gas, and the risk of releasing a larger volume of waste, are not worth the risk.

What Homeowner’s Insurance Typically Covers, and What It Usually Doesn’t

Standard homeowner’s policies generally treat the sewer line and the damage it causes as two separate things:

  • The buried pipe itself is usually excluded. Most standard policies consider the lateral, the pipe running from your home to the municipal main, the homeowner’s responsibility and outside general coverage. Some policies offer an endorsement or rider that adds sewer line coverage, but you have to ask for it and often pay extra.
  • Sudden damage from a backup is more often covered. If sewage backs up and ruins flooring, drywall, or belongings, that damage may fall under the policy’s water backup or sewer backup provision, but only if you have that coverage. Many standard policies exclude sewer backup entirely unless you’ve added the endorsement.
  • Gradual damage is usually excluded. If a slow leak has been saturating your yard or foundation for months, insurers often treat it as a maintenance issue rather than a sudden loss.
  • Mold remediation is frequently a separate coverage question. Some policies cap or exclude mold coverage unless it resulted from a covered peril. If mold develops after a backup, document it and ask your adjuster directly.

Documentation That Makes a Claim Easier

A claim goes smoother when you can show the timeline. Keep:

  • A log of every backup: date, which fixtures were affected, and what was done
  • Photos of the affected area before cleanup begins
  • The plumber’s camera inspection findings and written report
  • Receipts for any emergency cleanup or water extraction

What Happens Next

Once the line is diagnosed, the repair path depends on what the camera found. A blockage that can be cleared is a drain cleaning or hydro-jetting job. A damaged pipe may be a candidate for trenchless repair or may need excavation. VanDerBosch handles drain cleaning and hydro-jetting for lines that can be cleared, and we diagnose the rest with sewer line camera inspection before recommending anything.

Key Takeaway
The two things you control in the first hour are water use and documentation. Stop the water, photograph everything, and get a camera inspection on record. Those three steps protect your home and your claim.

Frequently Asked Questions

What are the early warning signs of a sewer line collapse?

Early signs include slow drains throughout the house, gurgling toilets, and foul odors from drains. You might also notice unusually green grass patches or soggy spots in the yard. If multiple fixtures back up at once, that points to a main line blockage. A sewer camera inspection can confirm whether the pipe is cracked, collapsed, or blocked by tree roots.

Can a sewer line failure cause foundation damage?

Yes. A leaking or collapsed sewer line can saturate the soil around your foundation, leading to shifting, cracks, and structural damage. Wastewater leaking underground can also create voids that weaken support. If you see foundation cracks along with sewer symptoms, it’s important to have both the plumbing and foundation evaluated promptly.

How do I know if my sewer line is blocked or broken?

A blockage often causes slow drains and recurring backups that may clear temporarily with plunging or drain cleaning. A broken line may lead to constant backups, foul odors, and ground saturation even when no fixtures are in use. A sewer video inspection is the only way to tell the difference and locate the exact problem.

Are sewer line repairs covered by homeowners insurance?

Coverage varies by policy. Many standard homeowners insurance policies exclude sewer line repairs unless the damage is caused by a covered peril like a sudden break. Some insurers offer optional sewer backup endorsements. Check your policy or ask your agent. Home warranties may cover repairs but often have limitations. Knowing your coverage before a failure helps you plan.

Plumbing for Multi-Unit Buildings: A Complete Guide

Table of Contents

Last Updated: September 24, 2026

How Plumbing for Multi-Unit Buildings Differs from Residential

Plumbing for multi unit buildings operates under fundamentally different constraints than single-family homes. Instead of one toilet, shower, and main water line, property managers oversee dozens of fixtures, multiple vertical stacks, and interconnected systems serving dozens or hundreds of residents simultaneously.

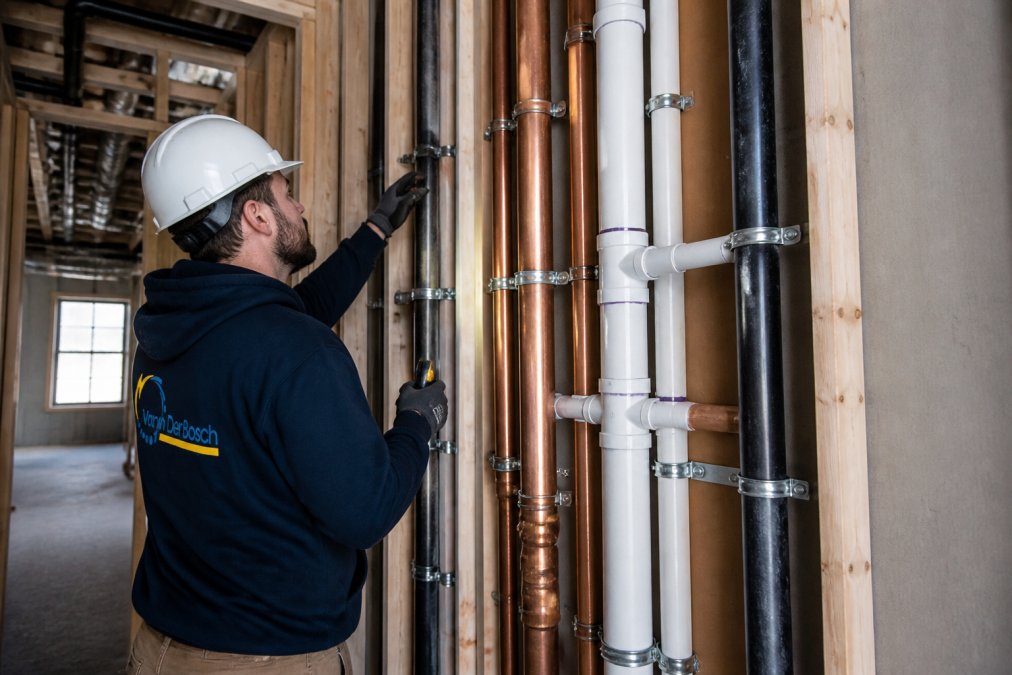
Professional plumber inspecting vertical plumbing stacks running through multiple floors of a multi-unit residential building, with visible copper and PVC pipes secured to interior walls

A clogged main drain in a multi-unit building can back up sewage into multiple apartments at once, whereas a residential clog affects only one household. This is why plumbing for multi unit buildings requires preventative strategies, regular inspections, and professional-grade equipment designed for continuous demand.

Scale, Complexity, and System Design

Multi-unit buildings demand plumbing systems engineered for simultaneous demand. When multiple apartments run showers at peak times, the water pressure and flow rate must accommodate everyone, residential systems aren’t designed for that load.

The piping layout reflects this complexity. Instead of one main water line entering a house, multi-unit buildings typically have:

  • Separate risers (vertical pipes) serving different sections of the building
  • Expansion joints that absorb pressure changes and temperature fluctuations
  • Multiple shut-off valves positioned strategically so repairs don’t interrupt service to the entire building
  • Larger diameter pipes throughout to handle continuous high-volume demand

Building codes require specific pipe sizing based on the number of fixtures and occupants. Multi-unit buildings follow stricter requirements for water pressure regulation, backflow prevention devices, and venting than single-family homes.

Older multi-unit buildings often have outdated plumbing layouts that need retrofitting to meet current building codes, adding complexity to repair and upgrade projects.

Building Codes and Compliance Standards

Multi-unit buildings fall under commercial plumbing codes, which are more restrictive than residential codes and establish requirements that go beyond single-family homes.

Compliance matters because code violations create liability. Licensed professionals who understand these requirements are essential to protect the building and residents.

Common compliance areas include:

  • Backflow prevention to protect the municipal water supply
  • Proper venting of drainage systems to prevent trap seal loss
  • Water heater installation and capacity sizing
  • Gas line safety and pressure regulation
  • Sump pump systems in basements
  • Water quality and filtration requirements

A licensed plumber performing work on multi-unit buildings knows exactly which permits are required, which inspections must occur, and how to document everything properly. This protects both the building and the residents.

Commercial Plumbing Maintenance for Multi-Unit Properties

Preventative maintenance prevents emergencies that affect dozens of households.

Preventative Maintenance Schedules

Regular maintenance schedules prevent emergencies. A professional plumber identifies slow leaks, corroded pipe sections, and drain buildup before they become catastrophic.

Typical maintenance includes:

  • Annual inspection of all accessible plumbing
  • Drain cleaning on common areas and problem drains
  • Water heater flushing and inspection
  • Boiler system checks (for buildings with steam or hot-water heat)
  • Sump pump testing and maintenance
  • Backflow prevention device testing
  • Shut-off valve operation checks

Frequency depends on the building’s age and condition. Older buildings with vintage plumbing systems often benefit from quarterly or semi-annual inspections.

Documentation matters.

Common Issues in Multi-Family Buildings

Certain problems appear repeatedly in multi-unit buildings because of how the systems are designed and used.

Sewer Line Repair for Apartment Buildings

The sewer line is the one component that serves the entire building. A single failure affects everyone.

Shared Sewer Systems and Liability

Most multi-unit buildings share a common sewer line connecting to the municipal system. The building owner is responsible from the building exit to the municipal connection point. If the line fails, the cost and liability fall on the property owner or management company.

When Inspection and Repair Are Necessary

Sewer video inspection uses a camera to examine the line without excavation, diagnosing problems and determining whether repair or replacement is necessary.

Book a Visit →

Signs that sewer line inspection should be scheduled include:

  • Multiple drains backing up simultaneously
  • Sewage smell in the building or around the foundation
  • Unusually slow drains throughout the building
  • Wet patches in the yard or basement
  • Recurring drain clogs despite regular cleaning

Boiler Maintenance for Multi-Family Buildings

Buildings with steam or hot-water boiler systems require specialized maintenance. Many older buildings in the region still use steam heat, which is efficient and durable but requires proper care.

Steam and Hot-Water Systems

Steam boilers heat water to create steam, which travels through pipes to radiators in each unit. Hot-water boilers heat water that circulates through pipes and radiators. Both systems require regular inspection and maintenance to operate safely and efficiently.

Expansion Joints and System Longevity

Expansion joints allow pipes to expand and contract with temperature changes. A failing joint is one of the first signs that a boiler system is aging.

Emergency Plumbing for Property Managers

Emergencies happen. A burst pipe at 2 AM affects multiple units immediately. Property managers need a plan.

Preparation and Response Protocols

Know where the main shut-off valve is located and ensure it works. Test it annually and ensure all staff know its location. Shutting off the main water supply during a major leak minimizes damage.

Knowing When to Call a Licensed Professional

Some plumbing issues in multi-unit buildings are beyond DIY repair. Gas line problems, boiler issues, major water leaks, sewer backups, and electrical components of plumbing systems all require licensed professionals. Attempting these repairs without proper training and licensing creates safety risks and violates building codes.

Water Pressure Regulation and Fixture Units in Large Buildings

Water pressure in multi-unit buildings must be carefully managed. Too much pressure damages fixtures and causes leaks. Too little pressure frustrates residents.

Retrofitting and Capital Planning for Multi-Unit Properties

Older buildings often need plumbing upgrades to meet current codes, improve efficiency, or address aging systems. These projects require careful planning and budgeting.

Repair Versus Replacement Decisions

When a major component fails, property managers face a choice: repair it or replace it. The decision depends on several factors.

Budgeting and Long-Term Infrastructure Planning

Multi-unit buildings benefit from a long-term capital plan that identifies aging systems and schedules replacements before emergencies occur. A sewer line inspection at year 5 of ownership provides valuable information for planning. If the line shows minor issues, the property manager knows to budget for repair within the next 3-5 years. If it’s in good condition, the owner can defer that expense.


Frequently Asked Questions

What are the most common plumbing issues in multi-unit buildings?

Multi-unit buildings frequently experience clogged drains and sewers due to shared drainage systems, water pressure imbalances affecting upper floors, corrosion in older pipe materials, and backflow problems when one unit’s waste affects others. Stack replacements become necessary when vertical plumbing stacks deteriorate. Property managers should monitor for slow drains, reduced water pressure, and sewage backups, which often signal deeper system problems requiring professional sewer video inspection or hydro jetting to restore proper drainage.

How does commercial plumbing maintenance differ from residential plumbing maintenance?

Commercial plumbing maintenance for multi-unit buildings involves larger-scale systems, higher fixture loads, stricter building code compliance, and coordinated service across multiple units. While residential plumbing focuses on individual homes, commercial plumbing maintenance includes preventative schedules for shared components, backflow prevention testing, water pressure regulation across multiple floors, and documentation for liability and HOA compliance. Downtime affects multiple residents, making preventative maintenance more critical to avoid emergency disruptions.

When should a property manager call a professional for multi-unit plumbing?

Call a licensed professional immediately for sewage backups, burst pipes, major water leaks, no water pressure to upper floors, gas line issues, boiler malfunctions, or any situation affecting multiple units. Also schedule professional service for annual preventative maintenance, sewer line inspections every 3-5 years, water heater capacity assessments, and before attempting repairs on pressurized systems or shared infrastructure. Professional diagnosis prevents costly mistakes and ensures compliance with building codes.

What is the importance of regular sewer and drain maintenance in large buildings?

Regular maintenance prevents backups that can affect multiple units simultaneously, reduces emergency repair costs, extends the life of drainage infrastructure, and ensures compliance with building codes and health standards. Preventative drain cleaning and periodic sewer video inspections catch problems early, tree root intrusion, pipe corrosion, or blockages, before they escalate into system failures. For multi-unit buildings, proactive maintenance protects property value, minimizes tenant disruption, and reduces liability for property managers and HOAs.

How is water distributed in a multi-story building?

Water enters through a main line and is distributed vertically through risers (main supply pipes running up the building) and horizontally through branch lines to individual units. Water pressure must be regulated to ensure adequate flow to upper floors while preventing excessive pressure that damages fixtures. Backflow prevention devices protect the municipal water supply from contamination. Fixture units determine the pipe sizing required by code, larger buildings need larger diameter pipes and sometimes pressure-reducing valves to maintain balanced pressure throughout the system.

Is PEX piping allowed in commercial buildings?

PEX (cross-linked polyethylene) is allowed in many commercial and multi-unit applications under the International Plumbing Code, but local building codes vary. Some jurisdictions restrict PEX in certain areas, such as underground installations or high-temperature applications. For multi-unit buildings, code compliance depends on your local authority having jurisdiction. When planning retrofits or repairs, verify with your local building department and always work with licensed professionals who understand current code requirements in your area.

What factors should property managers consider when planning plumbing upgrades?

Consider the age and condition of existing piping, frequency of repairs, compliance with current building codes, water pressure issues, sewer line integrity, boiler capacity and efficiency, and long-term infrastructure longevity. Capital expenditure planning should prioritize urgent repairs (leaks, backups) before elective upgrades. Retrofit projects require professional assessment to determine whether repair or replacement is more cost-effective. Budget for professional sewer video inspection and pressure testing to identify hidden problems before they become emergencies.

Why Is My Boiler Leaking Water? Causes & Next Steps

Table of Contents

Last Updated: September 23, 2026

Why Is My Boiler Leaking Water? Start Here

A boiler leaking water usually means one of three things: the pressure relief valve is releasing excess pressure, a seal or fitting has failed, or corrosion has opened a pinhole in the tank or pipes. None of these fix themselves, and a small drip can warp flooring and soak insulation before anyone notices.

Common Causes of a Boiler Leaking Water

Most boiler leaks trace back to pressure problems or worn parts. Two categories cover the majority of cases: the relief valve doing its job, and materials that have aged out.

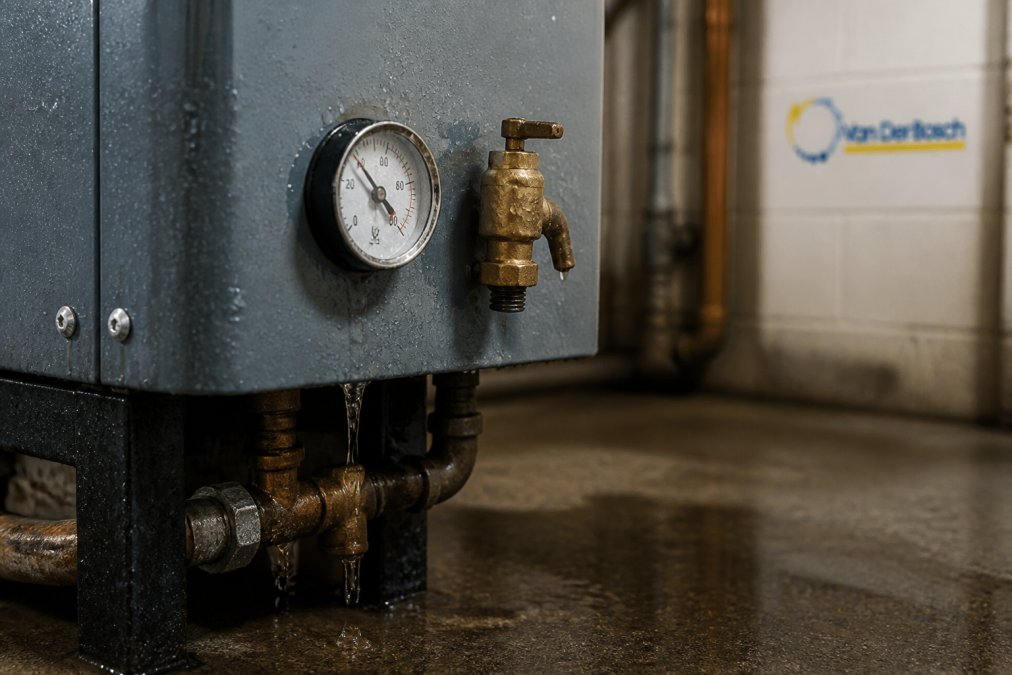
Diagram illustrating a boiler leaking water from the pressure gauge and relief valve onto the floor surface.

High Pressure and the Boiler Pressure Relief Valve Leaking

A boiler pressure relief valve leaking is often a safety feature working as designed. When internal pressure climbs too high, the valve opens to release water and steam before anything bursts.

Common reasons pressure rises:

  • The expansion tank has failed or lost its air charge
  • The fill valve is stuck open, adding water constantly
  • The system was overfilled during a recent service

Corrosion, Loose Fittings, and Seals

Older boilers, especially the steam systems common in vintage homes, develop rust inside the tank and along pipe joints, eating through metal and loosening seals around fittings.

Watch for:

  • Rust-colored water or stains near joints
  • Mineral crust around pipe connections
  • Damp spots on the boiler jacket itself

Boiler Pressure Relief Valve Leaking: What It Means

A leaking relief valve is a warning, not the problem itself. The valve opens because something else pushed pressure past its limit.

What You Can Safely Check Before Calling a Pro

Safe checks:

  • Read the pressure gauge and note the number
  • Look for the leak’s location (valve, pipe joint, tank, or floor drain nearby)
  • Check whether the expansion tank feels full of water instead of air
  • Confirm the system was recently serviced or refilled
Watch Out
Never open the boiler casing, drain the system, or attempt to adjust the relief valve yourself. Pressurized hot water and steam can cause severe burns, and improper handling can turn a small leak into a dangerous failure.

If the gauge reads high and stays high, or you can’t find the source, call a licensed plumber for a plumbing assessment to pinpoint the cause.

When a Leaking Boiler Is an Emergency

Treat a boiler leak as an emergency when water is near electrical parts, the leak is steady, or you smell gas.

Call for emergency service if you notice:

  • Water pooling around the boiler’s electrical connections
  • A strong gas odor (leave the building first, then call)
  • Steam escaping anywhere other than the relief valve
  • The boiler won’t shut off

Boiler Repair Chicago: What to Expect From a Service Call

A boiler repair visit should start with diagnosis, not guesswork. The technician inspects the leak, checks system pressure, and tests the expansion tank and relief valve before recommending anything, and documents the findings and proposed work clearly.

The Typical Service Call Flow

  1. Visual inspection of the boiler, jacket, and surrounding pipes
  2. Pressure gauge and expansion tank check
  3. Relief valve, fitting, and seal inspection
  4. A plain-language explanation of the cause and your repair options
  5. A written quote before any work begins

You should get a straight answer about what is wrong and what it takes to fix it. A good technician explains the cause in plain terms and tells you which findings are urgent versus which can wait.

How to Read a Boiler Repair Quote Before You Approve It

Most homeowners approve a quote in a hurry because the boiler is down and the house is cold, exactly when it pays to slow down and read the document.

A clear quote should separate:

Book a Visit →

  • Diagnostic or trip charge, some companies fold this into the repair, others bill it separately. Ask about the company’s policy before the visit.
  • Labor, whether it is billed hourly or as a flat rate for the job, and whether the estimate is a firm number or a range.
  • Parts and materials, listed by name or part number, not lumped into a single line item.
  • Permits, boiler work in many jurisdictions requires a permit, and the cost should be disclosed up front rather than added later.
  • Disposal, removal of an old part or unit is sometimes a separate line.

Red flags to watch for:

  • A single lump-sum figure with no breakdown
  • Verbal estimates with nothing in writing
  • Pressure to approve additional work on the spot before the original problem is confirmed
  • A quote that changes after the technician has already started

What a Fair Invoice Should Show

After the work is done, the invoice should match the approved quote, itemizing labor, each part used, any permit fees, and any diagnostic charge. If a line item wasn’t in the quote, ask about it before paying.

Warranty and Guarantee Fine Print

Ask two questions before you sign off on a repair:

  1. What does the warranty cover, parts, labor, or both? A “lifetime” or “extended” warranty that covers parts only still leaves you paying labor if the same part fails again.
  2. How long is the labor warranty, and does it require annual maintenance to stay valid? Some warranties are voided if you skip a yearly service.

Questions Worth Asking Before You Book

  • Is the diagnostic fee credited toward the repair if I approve the work?
  • Will I get a written quote before work starts?
  • Is the technician licensed and insured for boiler work?
  • Does the repair carry a parts warranty, a labor warranty, or both?
  • If the boiler needs replacement instead, will that be quoted separately?

VanDerBosch handles both modern and vintage boiler systems, including the steam boilers found in many older homes. You can schedule boiler service or review the boiler service page before booking.

Key Takeaway
A written, itemized quote and a written warranty are the two documents that protect you most on a boiler repair. Ask for both before you approve the work. VanDerBosch provides transparent pricing and a 90-day warranty on new equipment.

Repair or Replace? Deciding Factors for an Older Boiler

Repair usually makes sense when the leak is isolated and the boiler is otherwise sound; replacement is worth considering when problems keep stacking up. Because the two quotes cover different scopes, here is how to think through the decision.

The Factors That Actually Move the Decision

  • Age: Older units near the end of their service life rarely justify major repairs. A boiler that has already outlived its expected service window is a poor candidate for an expensive fix.
  • Repair history: Frequent fixes point to a system on its way out. One repair every few years is normal; three in two seasons is a pattern.
  • Leak location: A failed fitting, seal, or relief valve is different from a corroded tank section or a pinhole in the heat exchanger. Fittings and valves are serviceable. A compromised tank or heat exchanger usually is not.
  • Efficiency: An aging boiler can raise your heating and water costs. If the unit is running more to do the same job, that gap is part of the true cost of keeping it.
  • Accessibility: Hard-to-reach components make repairs costlier. A repair that requires opening a wall or ceiling changes the math.
  • Surrounding parts: If pipes, valves, and the expansion tank are also failing, one repair will not hold. You will be back in the same basement next season.
  • Safety history: Any prior issue with the relief valve, flue, or combustion side should weigh heavily toward replacement.

Do not assume replacement is automatic, plenty of leaking boilers are repairable. The right call depends on the specific system, and a professional inspection settles it.

How to Compare a Repair Quote Against a Replacement Quote

A repair quote and a replacement quote are not directly comparable because they cover different scopes. To compare them fairly, line up the same categories on both sides:

Category Repair quote Replacement quote
Equipment Part or component only Full boiler and any required controls
Labor Hours or flat rate for the fix Removal, install, startup, and testing
Permits Usually none for a minor fix Often required for a boiler swap
Disposal Old part only Old boiler and any removed piping
Warranty Parts and/or labor on the repair Parts and/or labor on the new unit
Expected service life Remaining life of the existing unit Service life of the new unit

Cost Factors That Drive Either Path

No two boiler jobs price the same, but the same factors recur:

  • The type and location of the problem
  • Accessibility of the boiler and the failed component
  • Materials and parts required
  • Extent of damage, including any water damage to surrounding structure
  • Diagnostic work required to confirm the cause
  • Whether additional components (expansion tank, relief valve, piping, controls) are affected

A Simple Decision Rule

Pro Tip
Ask the technician to write the expected remaining service life of the existing unit on the repair quote. That single number often makes the repair-versus-replace decision obvious.

If you are weighing repair against replacement on an older system, VanDerBosch can inspect the boiler and walk you through both options before you commit.

Preventing Future Boiler Leaks

Regular maintenance is the cheapest way to avoid a mid-winter emergency. Small checks catch the problems that turn into leaks.

A simple maintenance routine:

  • Schedule an annual boiler inspection before heating season
  • Watch the pressure gauge for changes
  • Keep the area around the boiler dry and clear
  • Fix small drips before they grow
  • Ask about a service agreement for ongoing checks

Frequently Asked Questions

Is a leaking boiler an emergency?

It can be. A small drip from a fitting may not be urgent, but water pooling near electrical components, a steady stream, or a leak combined with a pressure spike or strange noise warrants immediate attention. Shut off the boiler and water supply if safe, and call a licensed plumber. Leaving a leaking boiler running can cause water damage, mold, and safety hazards.

Can I fix a leaking boiler myself?

Most boiler repairs should be left to a licensed professional. Boilers involve pressurized water, gas, and electrical connections. Attempting DIY repairs can lead to serious injury, property damage, or voided warranties. You can safely check the pressure gauge and look for obvious loose fittings, but any repair involving the pressure relief valve, internal components, or gas lines requires a qualified technician.

What causes a boiler pressure relief valve to leak?

A pressure relief valve leaking usually means system pressure has exceeded safe limits. Common causes include a failed expansion tank, a faulty fill valve, or thermal expansion. The valve may also leak if it is corroded or stuck open. Because the relief valve is a safety device, it should be inspected and replaced by a professional if it continues to discharge water.

How do I know if my boiler pressure is too high?

Check the pressure gauge on the boiler. For most residential systems, normal operating pressure is between 12 and 18 psi when hot. If the gauge reads above 30 psi, the pressure is too high and the relief valve may open. High pressure can be caused by a faulty fill valve or a waterlogged expansion tank. Turn off the boiler and call a plumber to diagnose the issue.

Avoiding Hidden Fees in Plumbing Repairs: 2026 Guide

Table of Contents

Last Updated: September 22, 2026

How Hidden Fees Show Up in Plumbing Repairs

Hidden fees plumbing repairs involve charges that appear after the work starts, not before. They show up as vague line items, “shop supplies,” trip charges, or an hourly rate that quietly replaces the flat quote you agreed to.

  • A low phone quote that grows once the technician is inside your home
  • A call-out fee that was never mentioned when you booked
  • Material markups buried in a single lump-sum line

Factors Affecting Plumbing Repair Costs

Legitimate plumbing repair costs come down to a handful of real factors. Knowing them helps you tell a fair quote from a padded one.

The main cost drivers are:

  • Type and location of the problem. A leaking faucet is not a broken sewer line.
  • Accessibility. A pipe behind an open basement wall costs less to reach than one under a finished floor.
  • Materials. Copper, PEX, and cast iron carry different prices and different labor needs.
  • Extent of damage. Water damage, corrosion, and root intrusion all add work.
  • Diagnostic time. Finding the problem can take longer than fixing it.
  • Related components. A failing water heater may also need a new shutoff valve or expansion tank.

Legitimate Cost Drivers vs. Padding

Padding is what turns a fair bill into a bad one. Here’s how to tell the difference.

Line Item

Legitimate Reason

Padding Red Flag

Call-out fee

Covers the trip and initial assessment

Charged again on a return visit for the same job

Material markup

Covers sourcing, transport, and warranty on parts

Markup that isn’t disclosed or itemized

Labor rate

Reflects licensed technician time

Hourly rate swapped in after a flat-rate quote

Permit fees

Required by local code for certain work

Permit charged but never pulled

Disposal fees

Removal of old equipment or debris

Flat “shop supplies” fee with no explanation

Plumbing Repair Estimate Transparency: What a Clear Quote Looks Like

A transparent plumbing repair estimate states the scope, the price, and what happens if the job changes. It should be in writing before work begins. The estimate and the contract are two different documents, though, and the fees that surprise homeowners most often live in the contract, not the estimate.

Article image

A clear quote includes:

  • The specific problem being addressed
  • Whether the price is flat-rate or hourly
  • What’s included (parts, labor, disposal, permits)
  • What’s excluded and what would trigger a change
  • How additional work gets approved before it starts

How to Read a Plumbing Contract for Hidden Fees

Most homeowners skim the estimate, sign the work authorization, and never read the terms on the back. That’s where the charges you didn’t agree to are usually authorized in advance. Before you sign, read for these specific clauses:

  • Open-ended hourly language. Phrases like “time and materials” or “billed at prevailing rates” without a cap or estimate let the final number float. Ask for a not-to-exceed figure or a flat-rate task price.
  • Diagnostic-fee stacking. Some contracts state that the diagnostic fee is credited toward the repair only if the customer approves the recommended work the same day. If you decline, the fee stands alone, and a return visit may trigger a second one.
  • Change-order language. A clause that says the company may perform “necessary additional work” without written approval is the single biggest hidden-fee risk in a plumbing contract. Cross it out or get it amended to require your sign-off.
  • Material sourcing clauses. Language that lets the company substitute “equivalent” parts can shift the price if the substitute costs more. Ask how substitutions are priced and approved.
  • Access and restoration exclusions. Many contracts exclude drywall, flooring, or landscaping repair after the plumbing work. That’s not necessarily unfair, but it should be stated up front so it isn’t a surprise line item later.
  • Cancellation and return-visit terms. Confirm in writing whether a return trip for the same issue is covered or billed again.

Itemized Invoice Breakdown

An itemized invoice lists every charge separately instead of one lump sum. That’s your best defense against surprise costs, and your best tool for auditing the bill against the quote you approved.

Ask for these lines on the final invoice:

  • Parts, with quantity and description
  • Labor hours or the flat-rate task
  • Any permit or inspection fee
  • Disposal or haul-away
  • Taxes

Auditing the Invoice Against the Quote

Before you pay, set the invoice next to the estimate and walk through it line by line. A fair invoice should reconcile to the approved scope. Use this checklist:

  1. Scope match. Does every billed task appear on the original estimate or an approved change order?
  2. Rate match. If the estimate was flat-rate, is the invoice still flat-rate, or did it quietly convert to hourly?
  3. Parts match. Are the parts billed the same ones listed on the estimate, and are quantities reasonable for the job described?
  4. Fee match. Were call-out, diagnostic, permit, and disposal fees disclosed before work began?
  5. Change-order match. For any added work, is there a signed or written approval from you?
  6. Tax and total. Do the line items add up to the total, and is tax applied correctly?
Pro TipPhotograph the invoice and the work area before the technician leaves. If a warranty claim comes up later, that timestamped record settles most disputes fast.

Questions to Ask a Plumber Before Hiring

The best way to avoid hidden fees is to ask about them before you book. A straight answer takes ten seconds. A vague one tells you plenty.

Ask these questions on the phone:

  1. Is your quote flat-rate or hourly?
  2. Is there a call-out or diagnostic fee, and does it apply to the repair?
  3. Will I approve any added work before you start it?
  4. Do you charge again if you have to return for the same issue?
  5. Are permits and disposal included in the quote?
  6. Can I get the scope and price in writing?

Warranty and Guarantee Fine Print

Warranty terms are where hidden costs hide longest. Read the fine print before you sign.

Check three things:

  • What’s covered. Parts only, or parts and labor?
  • How long. Note the exact window and what starts the clock.
  • What voids it. Some warranties drop if another company touches the work.

Contractual Red Flags and the Cost of Delaying Repairs

Some contracts are written to protect the company, not you. Watch for blank scope sections, open-ended hourly language, and clauses that let the provider add charges without your approval.

Red flags to walk away from:

  • A signature request before any price is stated
  • “Time and materials” with no cap or estimate
  • No cancellation or return-visit policy in writing
  • Pressure to approve work on the spot
  • A scope description so vague it could cover almost any repair
  • A clause allowing the company to perform “necessary” additional work without your written approval
  • No stated process for how change orders are priced and approved

What Delaying a Repair Actually Costs

Putting off a plumbing repair rarely saves money. It usually moves the cost from the plumbing system into the structure around it.

  • Slow leaks rot framing and subfloor. Water that drips behind a wall or under a cabinet wicks into wood and drywall. By the time you see a stain, the damage behind it is often larger than the leak itself.
  • Standing water invites mold. Mold growth can begin within a day or two of a persistent leak, and remediation is a separate trade from plumbing, meaning a second contractor and a second bill.
  • Small cracks become burst pipes. A pinhole leak or a hairline crack in a supply line can fail completely under pressure, especially during a freeze-thaw cycle. A burst pipe can flood a basement or a finished lower level in minutes.
  • Sewer problems get worse, not better. A partial blockage that drains slowly tends to become a full backup. Root intrusion and grease buildup don’t clear on their own.
  • Water heaters and boilers fail at the worst time. A unit showing early warning signs, rumbling, inconsistent temperature, visible corrosion, is more likely to fail completely than to heal itself.
Watch OutNever try to stop a gas leak or repair a pressurized line yourself. Shut off the supply if you can do it safely from outside the affected area, then call a licensed plumber or the gas utility. Gas work is not a DIY job.

Warranty and Guarantee Fine Print

Warranty terms are where hidden costs hide longest. Read the fine print before you sign.

Check three things:

  • What’s covered. Parts only, or parts and labor? A parts-only warranty means you still pay labor if the part fails, that’s a hidden fee waiting to happen.
  • How long. Note the exact window and what starts the clock, the install date, the invoice date, or the manufacturer’s ship date.
  • What voids it. Some warranties drop if another company touches the work, if maintenance isn’t documented, or if the failure is attributed to a pre-existing condition.

Why DIY Repairs and Cheap Quotes Often Cost More

A cheap quote and a DIY fix share the same flaw: they skip diagnosis. The visible symptom is rarely the whole problem.

Common DIY mistakes that raise the final bill:

  • Snaking a drain that actually needs hydro jetting
  • Tightening a fitting until the pipe cracks
  • Replacing a fixture without fixing the valve behind it
  • Sealing a leak that’s feeding hidden water damage
  • A surprise invoice is a trust problem, and trust is the one thing a plumbing company can’t fake. VanDerBosch is licensed and insured, we don’t charge a service fee, and we back new equipment with a 90-day warranty. Our technicians are available seven days a week for everything from burst pipes to vintage steam boilers. Get started with VanDerBosch and know the price before the work begins. Visit vanderbosch.com to schedule service.
Key TakeawayThe cheapest quote is rarely the cheapest job. Compare scope, not price. A quote that names the problem and the fix is worth more than one that only names a number.

Frequently Asked Questions

How can I tell if my plumber is overcharging me?

Compare the itemized invoice against the quote you approved. Labor hours, material quantities, and any permits or disposal charges should match what was discussed. Ask for a written explanation of any line that changed after work began. Legitimate changes usually trace back to conditions found during the repair, such as hidden corrosion or limited access, and a licensed plumber should be able to walk you through each one without hesitation.

Is it normal for a plumber to charge a call-out fee?

Some plumbing companies charge a service or call-out fee just to send a technician, while others build that cost into their labor rates. Neither approach is wrong, but the fee should be disclosed before you book. Ask whether the fee is waived if you approve the repair, and whether it covers a diagnostic visit or only travel time. Understanding this upfront helps you compare quotes fairly instead of being surprised on the invoice.

What factors typically influence the final cost of a plumbing repair?

Factors affecting plumbing repair costs include the type and location of the problem, how accessible the pipes or fixture are, the materials required, the extent of damage, diagnostic work needed, and whether other components are affected. A leak under a sink is usually simpler than a slab leak or a sewer line issue. Emergency timing, permit requirements, and disposal of old equipment can also shift the total. A transparent quote should list which of these apply to your job.

Why do plumbing repair estimates sometimes change after work begins?

Estimates can change when a plumber finds conditions that were not visible during the initial assessment, such as corroded pipe sections behind a wall, a failed shutoff valve, or a cracked fitting inside a drain line. In those cases, a reputable company pauses, explains what was found, and gets your approval before continuing. If a quote changes without that conversation, that is a red flag worth questioning before you pay the invoice.


How to Fix a Burst Pipe in Winter: Emergency Steps

Table of Contents

Last Updated: September 21, 2026

What to Do First When a Pipe Bursts in Winter

A burst pipe can release several gallons of water per minute, so the first five minutes matter most. This guide walks through the emergency steps that limit damage before a plumber arrives.

Here’s the order that matters most:

  1. Shut off the water supply
  2. Cut power to flooded areas
  3. Drain the remaining water
  4. Document everything for your insurance claim

Shut Off the Water and Cut the Power

Find your main shutoff valve and close it. If you can’t find it, call your water utility for an emergency shutoff.

Drain the Lines and Document the Damage

Open every faucet in the house, hot and cold, and flush toilets to drain trapped water and reduce pressure on the break.

How to Shut Off the Main Water Valve in Your Home

The main water valve is usually in the basement, near the water meter, or along the front wall facing the street. Knowing how to shut off main water valve hardware before an emergency saves critical minutes.

Homeowner turning a brass ball valve on a main water line to prevent damage from a burst pipe in the basement.

Gate Valves, Ball Valves, and Older Fixtures

Older homes often have gate valves, a round handle you turn clockwise until it stops. They can seize if untouched for years, so test yours before winter. Newer homes usually have ball valves, where a quarter turn of the lever shuts the water off completely.

Can You Fix a Burst Pipe Yourself?

A burst pipe is different from a leak. A pinhole drip is contained; a burst pipe means the pipe wall has failed under household pressure. You can slow a small leak long enough to protect your floors, but you cannot restore a split pipe to service with tape and a clamp. Treat any DIY step as a holding action measured in hours, not a fix.

Here is the honest split:

  • Pinhole leak or weeping joint: A pipe clamp, self-fusing silicone tape, or a rubber patch with a hose clamp may hold until a plumber arrives.
  • Split, ruptured, or separated pipe: Shut the water off, leave it off, and call a licensed plumber.
  • Frozen section that has not split: Thaw it slowly and watch for a leak once flow returns.
  • Pipe on a boiler, steam system, or gas line: Do not touch it. These are pressurized or hazardous systems and belong to a licensed technician.

Temporary Fixes for Small Leaks

For a pinhole leak, shut the water off, dry the pipe, wrap self-fusing silicone tape around the leak, and finish with a hose clamp. Open the main valve slowly and watch the patch; if it weeps, close the valve and stop. A sleeve clamp, a rubber pad backed by a metal plate, works better on a straight run of copper or galvanized pipe than tape alone.

Repair or Replace the Failed Section?

This decision determines whether you are back on the same call next winter. A plumber evaluating a burst section looks at several factors:

  • Age and material of the pipe. Galvanized steel that has already failed once is usually near the end of its service life. Copper and PEX behave differently.
  • Extent of the failure. One clean split in a straight run is a candidate for a sectional repair. Multiple weak spots, pitting, or a long corroded stretch point toward replacement of the run.
  • Condition of surrounding pipe. If the metal on either side of the break is thin or discolored, patching the break just moves the next failure a few feet down the line.
  • Accessibility. A pipe in an open basement is straightforward to replace. A pipe inside a finished wall or under a slab changes the labor and the decision.
  • Recurring history. A line that has frozen or leaked more than once is telling you something about how it was installed or insulated.

Material Compatibility Matters

Connecting new pipe to old is not one-size-fits-all. Copper, PEX, galvanized steel, and cast iron each require different transition fittings, and mismatched connections are a common source of future leaks and corrosion. A dielectric union, for example, is used where copper meets galvanized steel to prevent galvanic corrosion. If a repair ties new material into an older system, that transition is part of the work.

When to Stop and Call a Licensed Plumber

Call a plumber right away if:

  • Water is still spraying after your patch
  • The break is behind a wall, under a slab, or in a ceiling cavity
  • You see rust, corrosion, green staining, or multiple weak spots along the pipe
  • The pipe is part of your boiler, steam system, or gas line
  • The same line has frozen or leaked before
  • You cannot find or fully close the main shutoff valve

Pressurized systems, gas lines, and boiler components are not DIY territory. A frozen pipe repair or burst pipe repair from a licensed technician protects your home, your safety, and your ability to file a clean insurance claim.

Watch Out
Never use a torch or open flame to thaw a pipe. It can ignite nearby wood framing and cause a house fire. Use a hair dryer, heat lamp, or portable heater instead, and never leave a heat source unattended.

The Insurance Angle Most Guides Skip

A burst pipe claim can go sideways for reasons unrelated to the water. Insurers look at whether the home was maintained, whether the loss was sudden or the result of long-term neglect, and whether the repair was done by a qualified professional. A DIY patch that fails weeks later and causes a second loss can complicate the claim.

Book a Visit →

Frozen Pipe Prevention Tips for Cold Months

Frozen pipe prevention comes down to three things: keep pipes warm, keep water moving, and know your weak spots. Fall prep beats an emergency call in January.

Start with these steps:

  • Insulate pipes in basements, crawl spaces, and attics
  • Seal gaps around exterior walls where cold air enters
  • Disconnect garden hoses and shut off outdoor spigots
  • Keep cabinet doors open under sinks on exterior walls
  • Let faucets drip during hard freezes

Insulation, Heat Tape, and Drip Strategy

Foam pipe insulation is easy to install, wrap it around any pipe running through an unheated space. Heat tape adds protection for pipes that freeze every year; plug it in before the first hard freeze. The drip strategy works because moving water freezes slower than still water, so a slow trickle overnight keeps the line clear.

Pro Tip
Focus your insulation budget on pipes along exterior walls and in unheated crawl spaces. Those freeze first, and they’re the hardest to reach once they burst.

How Winter Cold Causes Pipes to Burst

Water expands when it freezes, creating enormous pressure inside a sealed pipe (Essential Tasks After it Warms Up). The pipe doesn’t always split where the ice forms, pressure pushes downstream, so the break often shows up somewhere else. Older homes with galvanized steel pipes and cast iron drainage are especially vulnerable, since these materials weaken with age and lead solder joints can fail under stress.

What Affects the Cost of Burst Pipe Repair

There is no flat rate for a burst pipe, and any quote given before someone sees the break is a guess. A plumber can explain the factors that drive the number so you understand why two similar-sounding jobs can land in very different places.

The main factors:

  • Location of the break. A pipe in an open, unfinished basement is fast to reach. A pipe inside a finished wall, above a ceiling, or under a slab takes more labor to expose and more work to close back up.
  • Accessibility and restoration. Cutting into drywall, tile, or a ceiling adds scope. The plumbing repair and the drywall or finish repair are usually separate line items.
  • Pipe material. Copper, PEX, galvanized steel, and cast iron each require different fittings, tools, and techniques. Transitioning between old and new material adds a step.
  • Extent of damage. A single split section is a smaller job than a failed run with multiple weak points. If the plumber finds corrosion along the line, the scope changes.
  • Diagnostic work. Finding the break is not always obvious. Water travels along framing and can surface far from the actual failure, so leak detection may be part of the job.
  • Related components. If the burst pipe affected a water heater, boiler, or sump pump, those systems may need inspection or service as part of the same visit.
  • Time and conditions. After-hours and emergency calls, and work in a flooded or frozen space, affect how long the job takes.

Repair vs. Replace: The Cost Logic

This decision most affects what you ultimately spend, and it is where a cheap repair can become an expensive one.

  • The pipe has failed more than once
  • The material is galvanized steel or another aging system near the end of its life
  • Corrosion or pitting extends beyond the visible break
  • The line is already open and accessible, so the labor is largely paid for
  • You plan to stay in the home long enough to benefit from the reliability

What a Fair Quote Looks Like

A written estimate should separate the plumbing repair from restoration work, list materials, and describe the scope, what is being repaired or replaced and why. Ask whether the quote covers just the visible break or the full failed section, and what happens if additional weak spots are found once the pipe is exposed. Be cautious of any quote given without an inspection; a phone estimate for a burst pipe is a placeholder, not a price.

Key Takeaway
Get an inspection before you agree to a repair. A licensed plumber can tell you whether a section needs a patch or a full replacement, and that decision changes the scope of the work, and the cost, far more than any other factor.

Why the Cheapest Patch Is Not Always the Cheapest Outcome

A patch that fails in February means a second emergency call, a second round of water damage, and possibly a second insurance claim. Compare the total cost of getting through the winter reliably, not just the cost of stopping the leak today. For older homes with aging pipe, that comparison often favors doing the job once, correctly, while the line is already open.

Frequently Asked Questions

What is the first thing to do when a pipe bursts?

Shut off your home’s main water valve immediately to stop water from feeding the break. If the leak is near electrical outlets, wiring, or a breaker panel, turn off the power to that area at the breaker box before you touch anything wet. Then open the lowest faucet in the house to drain remaining water and reduce pressure. If you cannot reach the valve or the leak is spraying near live wiring, leave the area and call a licensed plumber.

Can I fix a burst pipe myself or do I need a plumber?

You can slow a small, accessible leak with a pipe clamp or silicone tape, but those are short-term measures, not repairs. A burst pipe usually means the pipe wall has split from ice expansion or corrosion, and the surrounding section is often weakened too. A licensed plumber can cut out the damaged section, check for additional freeze damage, and restore the line safely. If the pipe is behind a wall, in a crawlspace, or part of a pressurized system, leave it to a professional.

Why do pipes burst during cold weather?

Water expands as it freezes, and that expansion puts pressure on the pipe walls. The burst often happens not where the ice forms but downstream, where pressure builds between the ice blockage and a closed faucet. Pipes in unheated basements, crawlspaces, exterior walls, and garages are the most vulnerable. Older homes with galvanized steel or aging copper lines are at higher risk because the metal has already thinned from corrosion.

How much does burst pipe repair cost?

Pricing depends on several factors: where the pipe is located, how accessible it is, what material it is made of, how much of the line needs replacing, and whether water damage affected other areas. A pipe in an open basement is a different job than one inside a finished wall. Pricing depends on several factors: where the pipe is located, how accessible it is, what material it is made of, how much of the line needs replacing, and whether water damage affected other areas. A pipe in an open basement is a different job than one inside a finished wall. Visit the website to review current pricing or request a quote.

Hiring Plumbers for Vintage Homes: What to Know

Table of Contents

Last Updated: September 20, 2026

Why Vintage Homes Need Specialized Plumbing Experience

Hiring plumbers for vintage homes requires a different skill set than working on newer construction. Older properties often have plumbing systems that modern technicians rarely encounter, and mistakes during repair or replacement can damage both the mechanical systems and the home’s historic character.

A plumber experienced with vintage homes understands the materials, code requirements, and structural considerations that come with properties built decades ago. They know how to diagnose problems in galvanized steel and cast iron pipes, and recognize when lead solder is present.

When you hire the wrong plumber for a vintage home, you risk expensive mistakes. An inexperienced technician might recommend replacing an entire system when repair is possible, or they might install modern materials that conflict with the existing infrastructure. The specialized expertise matters because vintage plumbing systems operate differently and require different solutions.

Article image

Common Plumbing Issues in Older Homes

Vintage homes were built with materials and methods that no longer meet modern standards. Understanding what typically fails in older plumbing systems helps you recognize when professional service is needed.

Galvanized Steel and Cast Iron Deterioration

Galvanized steel pipes corrode over time as the zinc coating breaks down, restricting water flow. Cast iron drainage pipes can last 75 to 100 years but eventually corrode from the inside. Signs include slow drains, rust-colored water, or damp basement spots. A plumber experienced with vintage homes can assess whether targeted repair or full re-plumbing is the practical choice.

Lead Solder and Fixture Corrosion

Homes built before the 1980s often have copper pipes joined with lead solder, which was banned in 1986. While the risk from lead in solder is lower than from lead service lines, it’s a consideration for homes with young children. Old brass faucets and valve bodies also corrode, causing metallic-tasting water or green/blue staining. A plumber can determine which fixtures are worth restoring and which should be replaced.

Signs of Failing Pipes in Old Houses

Warning signs of failing vintage plumbing include: slow drains that persist despite plunging (suggesting corrosion in the pipes), discolored water with reddish or brownish tints, damp basement spots near pipes, recurring clogs in the same drain, and low water pressure. Multiple slow drains suggest the problem is in the main line rather than individual fixtures. A professional inspection with a sewer camera can pinpoint the exact location and severity of corrosion, helping you understand whether repair or replacement is the right approach.

Steam Boiler Maintenance for Historic Properties

Many vintage homes in the area rely on steam boilers for heat. These systems are fundamentally different from modern hot-water or forced-air systems, and they require specialized knowledge to maintain and repair.

Steam boilers heat water to steam that travels through pipes to radiators, then condense and return to the boiler. They’re more complex than modern systems and require specialized knowledge. Common problems include water hammer, leaking radiator valves, and pressure loss. Many general plumbers avoid steam systems because they’re less common now. Regular inspection of water level, pressure relief valves, and return lines prevents problems. If your home has a steam boiler, hire a plumber who specializes in these systems.

Code Compliance and Permitting in Vintage Home Repairs

Upgrading plumbing in a vintage home involves navigating building codes that have evolved significantly since the home was built. Modern code requirements exist for safety and performance, but applying them to older systems creates practical challenges. Understanding these requirements and how to meet them helps you work with a plumber who can balance compliance with the realities of vintage infrastructure.

Why Codes Change and What It Means for Your Home

Building codes evolve to reflect safety and best practices. A home built in 1950 was compliant then, but its plumbing may not meet today’s standards. This doesn’t mean it’s unsafe, modern code simply requires different materials, sizing, venting, or installation methods.

Material Compatibility: Connecting Old to New

Connecting modern materials to legacy systems requires specialized knowledge. Joining dissimilar metals (copper to galvanized steel, for example) causes galvanic corrosion unless a dielectric union isolates them. PEX cannot be directly joined to cast iron, a transition fitting is required. A plumber knows which fittings are code-approved and how to install them correctly to prevent future corrosion.

Permitting and Inspection

Permits are required by code for most plumbing repairs and replacements. Skipping them creates liability and can complicate home sales or insurance claims. Inspectors verify that new materials meet code, connections are proper, systems are pressure-tested, and drainage has correct trap configuration, vent sizing, and slope.

Variances and Alternative Compliance

In some cases, vintage homes qualify for variance or alternative compliance if the work meets the intent of the code.

Insurance and Code Compliance

Some insurance companies require code-compliant plumbing or charge higher premiums for outdated materials. A full or partial replumbing can improve insurability and may reduce premiums. When hiring a plumber, ask whether they’re familiar with the local building department’s approach to older homes.

Questions to Ask Before Hiring a Plumber

Asking the right questions helps you identify whether a plumber has the experience needed for your vintage home.

Experience with Historic Plumbing Systems

Ask: “How many vintage homes have you worked on, and what materials did they have?” A plumber with genuine experience can describe specific challenges and solutions. Ask about experience with galvanized steel, cast iron, and lead solder. If your home uses steam heat, confirm they’ve worked on steam boilers, this is essential.

Repair vs. Replacement Approach

Ask: “Under what circumstances would you recommend repair versus replacement?” Listen for a balanced answer that considers system age, damage extent, and cost-benefit. Be wary of immediate full-system replacement recommendations. Ask about experience with targeted repairs and connecting modern materials to older systems safely.

Licensing, Insurance, and Warranties

Verify the plumber is licensed in your state and carries liability insurance. Ask what warranty they offer on their work and what it covers. For vintage homes, ask whether they warranty work on older systems specifically, as some plumbers limit warranties on repairs to older pipes or fixtures.

Protecting Your Home’s Mechanical and Aesthetic Integrity

When plumbing fails in a vintage home, homeowners face a fundamental choice: repair the failing section or replumb the entire system. This decision involves trade-offs between cost, longevity, safety, and the home’s character. Understanding the factors that favor each approach helps you make an informed decision with your plumber.

When Repair Makes Sense

Targeted repair is often the right choice if the problem is localized and the surrounding system is sound. Repair is most practical when the failing section is easily accessible, the rest of the system is relatively new or recently upgraded, water quality and pressure are normal, and the repair doesn’t require major structural disruption.

When Full or Partial Replumbing Is Necessary

Replumbing becomes the practical choice when corrosion is widespread, when multiple sections are failing, or when the cost of repeated repairs approaches the cost of replacement.

Signs that replumbing may be unavoidable:

  • Multiple drains are slow or backing up, suggesting corrosion throughout the drainage system
  • Water is persistently discolored or has a metallic taste, indicating rust throughout the supply lines
  • You’ve had more than one major leak in the past five years
  • The home is 80+ years old and the original plumbing has never been replaced
  • Inspection with a sewer camera reveals corrosion or deterioration in multiple sections of the main drain line
  • You’re planning a major renovation (kitchen, bathroom, or addition) that requires opening walls anyway

Material Choices and Historic Preservation

Copper is durable, compatible with older systems, and visible in basements without looking out of place in a vintage home. It’s more expensive than PEX but has a longer track record in older homes.

The Long-Term Cost Perspective

The decision between repair and replacement should account for long-term reliability, not just immediate cost. A series of repairs to a failing galvanized system may cost less upfront but lead to emergency service calls, water damage, and repeated disruption. Replumbing costs more initially but eliminates the risk of cascading failures.

Preventative Maintenance for Vintage Plumbing

Regular maintenance extends the life of vintage plumbing systems and catches problems before they become emergencies.

Vintage homes deserve plumbers who understand their unique needs. When you’re ready to address plumbing concerns in an older property, contact VanDerBosch Plumbing Inc. Our technicians have extensive experience with historic plumbing systems, steam boilers, and the specialized materials found in vintage homes. We’ll assess your situation honestly, explain your options, and help you make decisions that protect both your home’s function and its character. Call today to schedule a consultation.

Frequently Asked Questions

What are the most common plumbing issues in vintage homes?

Older homes often have galvanized steel or cast iron pipes that corrode over time, leading to reduced water pressure, discolored water, and frequent clogs. Lead solder in fixture connections and outdated plumbing materials create additional concerns. Steam boiler systems common in historic properties require specialized knowledge. A licensed plumber experienced with vintage homes can identify which issues need immediate attention and which can be addressed gradually.

How do I know if my vintage home needs a full repipe?

Signs that suggest re-plumbing may be necessary include persistent low water pressure throughout the home, recurring clogs despite cleaning, rusty or discolored water, frequent leaks in multiple locations, and visible corrosion on exposed pipes. The age of your plumbing system, the materials used, and your repair history all factor into this decision. A professional plumbing diagnostics assessment can determine whether targeted repairs or a full system modernization makes sense for your property and budget.

Should I hire a specialist for antique plumbing fixtures?

Yes, if your vintage home has original or period-appropriate fixtures, a plumber experienced with historic properties can often advise on compatible replacements that maintain your home’s aesthetic while meeting current plumbing codes.

What questions should I ask before hiring a plumber for an older property?

Ask about their experience with vintage homes and the specific era of your property. Inquire whether they carry liability insurance. Request references from similar projects. Ask about their diagnostic process and how they handle unexpected discoveries during work. Understanding their approach to balancing preservation with functionality helps ensure they align with your goals.

Licensed Plumbers for Steam Boilers: What You Need to Know

Table of Contents

Last Updated: September 19, 2026

Why Steam Boilers Require Specialized Licensed Plumbers

Steam boilers operate under pressure and involve complex mechanical and safety systems that differ fundamentally from standard plumbing repair. Only licensed plumbers for steam boilers have the specialized knowledge to diagnose problems, perform repairs safely, and ensure the system meets building codes.

Steam heating involves pressurized vessels, condensate return lines, venting systems, and safety controls like the pressuretrol and low water cutoff. These components interact in ways that demand specific training. A general plumber may lack the expertise to troubleshoot a steam boiler’s unique failures.

Older homes in the region often rely on cast iron steam boilers that have operated for decades. These systems require technicians who understand vintage equipment behavior, common failure patterns, and how to maintain them without unnecessary replacement.

The stakes are higher with boiler work. A misdiagnosed problem or improper repair can lead to system failure during winter, safety hazards, or inefficient operation that wastes fuel. This is why hiring someone with proper licensing and steam heating experience matters.

Signs of Steam Boiler Failure and When to Call a Professional

Common Warning Signs

Uneven heating across radiators is one of the earliest indicators. If some rooms stay warm while others remain cold, the problem may be air trapped in the system, a blocked vent on a radiator, or insufficient steam reaching certain lines.

Banging or hammering sounds in the pipes, called water hammer, suggest condensate isn’t draining properly from the steam lines back to the boiler. This happens when the condensate return system fails or when the boiler’s water level drops too low. Water hammer can damage piping and accelerate wear on the system.

A sight glass that shows water level fluctuating wildly or staying too high or too low indicates a problem with the low water cutoff, the float mechanism, or the water feed system.

Rust staining around the boiler or on nearby walls suggests a slow leak. Small leaks allow air into the system and water out, both of which degrade performance.

A boiler that cycles on and off frequently, or one that won’t maintain pressure, points to multiple possible causes: a faulty pressuretrol, a leaking relief valve, a cracked heat exchanger, or low water level.

Safety Concerns That Demand Immediate Attention

If you smell gas near the boiler, stop using it immediately and call for emergency service. Gas leaks are dangerous and need a licensed technician to locate and repair the source.

A boiler that leaks water actively or shows signs of a major crack should not operate. Continuing to run a damaged boiler risks flooding, electrical hazards, and potential steam or hot water release.

If the relief valve is continuously dripping or venting steam, the boiler may be building excess pressure. Have this inspected promptly.

Signs of carbon monoxide, such as soot buildup around the boiler, a yellow flame instead of blue, or water dripping from the flue pipe, mean the boiler is not combusting fuel cleanly. This requires immediate professional diagnosis.

Boiler Repair vs. Replacement: Making the Right Decision

Deciding whether to repair or replace a steam boiler depends on several practical factors, not just the immediate problem.

Age of the system is the first consideration. A boiler that is 15 years old or newer and has been maintained reasonably well is usually worth repairing. An older unit, especially one over 25 or 30 years, may be nearing the end of its useful life.

Severity and cost of the repair matter significantly. A faulty pressuretrol or a leaking valve may cost a moderate amount to fix and restore full function. A cracked heat exchanger or a major leak in the boiler shell is far more expensive and may approach or exceed the cost of a new unit.

Repair history is telling. If the boiler has needed multiple repairs in the past few years, it may be entering a phase of accelerating failures. At some point, the cost of ongoing repairs exceeds the cost of replacement.

Efficiency and fuel consumption should factor into long-term economics. If your heating bills are climbing and the boiler is aging, replacement with a modern unit could reduce fuel costs over time.

Availability of replacement parts can influence the decision. For very old or obscure boiler models, replacement parts may be hard to source, making repair difficult or expensive. Newer boilers have readily available components.

Condition of surrounding components matters too. If the piping, radiators, and condensate return system are in good shape, a boiler repair makes sense. If you discover that major repiping or radiator work is also needed, replacement with a modern system becomes more attractive.

The key is that repair is often the right choice for a mid-life boiler with a single significant problem. Replacement makes sense for an aging unit with declining reliability, high repair costs, or poor efficiency.

What to Expect During a Professional Boiler Service Call

The technician will ask about symptoms: when the problem started, what you’ve noticed, and whether the boiler has had previous repairs.

They’ll perform a visual inspection of the boiler, checking the sight glass for proper water level, examining the exterior for leaks or corrosion, and inspecting piping and connections.

Book a Visit →

Professional technician in work clothes using diagnostic equipment to inspect a steam boiler in a residential basement, with sight glass, piping, and pressure gauges visible

They’ll test the pressuretrol, low water cutoff, and relief valve to confirm they’re functioning correctly and may use a combustion analyzer to check fuel combustion efficiency and safety.

If the problem is straightforward, the technician may repair it during the visit. If the issue is more complex, they’ll explain your options: repair, replacement, or a temporary fix while you decide.

Licensing, Insurance, and Certification Standards for Steam Boiler Technicians

Not every plumber is qualified to work on steam boilers. Licensing requirements exist to protect homeowners and ensure work is done safely.

A licensed plumber for steam boilers must hold a valid plumbing license issued by the state or local jurisdiction. The licensing process requires documented training, apprenticeship hours, and passing an examination covering plumbing codes, safety, and technical knowledge.

Many steam boiler specialists pursue additional certifications in heating systems, boiler operation, or steam heating, demonstrating deeper expertise in boiler-specific work.

General liability insurance is essential. This protects you if the technician accidentally damages your property during the service call. A reputable company carries this coverage as standard practice.

Some jurisdictions require a separate license or endorsement specifically for boiler work. Ask whether your technician holds any boiler-specific certifications or endorsements.

Verification matters. Before hiring, confirm that the technician’s license is current and in good standing by checking with your state or local licensing board. This takes a few minutes and gives you assurance that you’re working with someone who has met professional standards.

Preventative Maintenance and System Longevity

Regular maintenance extends the life of a steam boiler and prevents many common failures. A well-maintained system operates more efficiently, costs less to run, and is less likely to fail unexpectedly.

Annual inspection before the heating season begins is the foundation of good maintenance. A technician checks water level controls, tests the relief valve, inspects piping for corrosion or leaks, and confirms that the combustion process is clean and efficient.

Keeping the boiler and surrounding area clean matters. Dust and debris can interfere with controls and air intake. Regular cleaning prevents buildup that reduces efficiency.

Monitoring the water level and ensuring the automatic feed system is working properly prevents low-water conditions that can damage the boiler. If you notice the water level dropping frequently, have the feed system inspected.

Flushing the condensate return line periodically removes sediment and mineral buildup that can block the return of condensate to the boiler. This is especially important in areas with hard water.

Addressing small problems quickly prevents them from becoming large ones. A small leak, a slow response from a control valve, or a radiator that’s not heating properly should be investigated rather than ignored.

Systems that receive this level of attention often operate reliably for 30 years or more. Neglected boilers tend to fail sooner and require more frequent repairs.

How to Choose a Licensed Boiler Technician You Can Trust

Finding the right technician starts with verifying credentials and understanding what you’re paying for.

Check licensing and insurance. Confirm that the company holds a valid plumbing license and carries general liability insurance.

Conclusion

Hiring licensed plumbers for steam boilers ensures that your heating system receives expert care from someone trained to diagnose and repair these specialized systems safely. Steam boilers operate under pressure and involve controls and piping that demand specific knowledge. A general plumber may not have this expertise.


Frequently Asked Questions

Is a plumber the right professional to fix a steam boiler?

Yes, but only if the plumber is licensed and has specific training in steam heating systems. Not all plumbers work on boilers, many focus only on water supply and drainage. Steam boilers operate under pressure and require knowledge of pressuretrol controls, low water cutoffs, and condensate return systems. A licensed plumber with steam boiler experience can diagnose and repair these systems safely. If a plumber tells you they don’t service steam boilers, ask for a referral to someone who does.

What are the signs that a steam boiler needs professional service?

Watch for uneven heating across radiators, clanking or banging sounds in the pipes (water hammer), leaking water around the boiler base, a sight glass that’s empty or unclear, rust or corrosion on the exterior, or a boiler that won’t fire up. Some of these issues can be addressed by a licensed plumber; others may require a heating specialist. When in doubt, call a professional for inspection rather than attempting repairs yourself, steam systems operate under pressure and pose safety risks.

How often should a steam boiler be inspected by a professional?

Annual inspection before the heating season is standard practice for residential steam boilers. Older systems in particular benefit from regular preventative maintenance to catch wear early and keep the system running efficiently. A professional inspection includes checking the pressuretrol, low water cutoff, sight glass, and overall system condition. Regular maintenance can extend boiler life, improve heating performance, and prevent emergency breakdowns during cold weather.

What factors should I consider when deciding between boiler repair and replacement?

Consider the boiler’s age, the cost of the repair, frequency of recent problems, and overall system efficiency. A boiler that’s 20+ years old and requires frequent repairs may be a candidate for replacement, especially if repair costs are high. Conversely, a newer system with an isolated problem may be worth repairing. A licensed plumber can assess the damage and help you understand whether repair or replacement makes sense for your situation and budget.

Benefits of No Service Charge Plumbers

Table of Contents

**

What ‘No Service Charge’ Actually Means

When no service charge plumbers advertise their model, they’re eliminating the upfront diagnostic fee that most plumbing companies charge just to show up and assess your problem. Instead of paying separately for the visit itself, you pay only for the actual work and materials needed to fix the issue.

This is different from a free estimate or free consultation. A true no service charge model means there’s no trip fee, no dispatch charge, and no diagnostic fee, regardless of whether you decide to hire them or not. At VanDerBosch, we operate on this principle because we believe homeowners shouldn’t pay extra just to understand what’s wrong with their plumbing.

The catch that many homeowners worry about: Are these costs hidden elsewhere? The answer depends on the plumber’s business model. Some companies that advertise no service charges build those costs into their hourly rates or parts markup. Others genuinely absorb the cost as part of their operating model. Understanding the difference matters when you’re comparing quotes.

Why Traditional Service Fees Exist

Most plumbing companies charge a service call fee to cover technician time, fuel, vehicle wear, insurance, and overhead. Service fees also filter casual inquiries and reduce no-show appointments. However, this creates a barrier for homeowners, if your pipe bursts at 2 AM, a dispatch fee may make you hesitate calling for help that could prevent serious water damage.

Does Eliminating the Service Fee Actually Save You Money?

This is the question that matters most when you’re comparing plumbers. The answer depends on what happens to those diagnostic costs.

The cost doesn’t disappear, it gets redistributed. A plumber’s overhead and diagnostic time are real expenses. If a company doesn’t charge a service fee, they recover those costs through higher hourly rates, higher parts markups, or minimum labor charges. The question is whether the total cost to you is lower, higher, or the same.

For small repairs, a no-service-charge model often saves money. If you need a simple fix, a leaky faucet, a running toilet, a clogged drain, and the plumber can solve it in 30 minutes to an hour, you avoid paying a separate diagnostic fee. The total cost is lower because the repair itself is quick. This is where the no-service-charge advantage is real.

For complex diagnostics, the advantage disappears. If your problem requires investigation, a sewer camera inspection, multiple visits to pinpoint an intermittent leak, or extensive troubleshooting, the plumber’s diagnostic time gets billed as labor. You may pay more because the hourly rate is higher to compensate for the waived service fee.

For jobs where you don’t hire the plumber, the no-service-charge model saves you money. If you call three plumbers for estimates and only hire one, you avoid paying diagnostic fees to the two you didn’t use. This is a real advantage, especially if you’re comparing multiple quotes.

For follow-up visits, the structure matters. Some no-service-charge plumbers waive the fee on the initial visit but charge a full diagnostic fee if you call back. Others waive it on callbacks too. Ask this question before you hire. If the first repair didn’t fully solve the problem, you don’t want a surprise charge for the follow-up.

The Real Trade-Off: Transparency vs. Simplicity

A service fee model is transparent: you see the diagnostic cost as a separate line item. A no-service-charge model simplifies the initial decision but can obscure total cost if hourly rates or parts pricing are higher. Neither is inherently better, compare total costs across quotes, not just the presence of a service fee.

When a Service Fee Actually Protects You

A service fee can protect you if it’s credited toward the repair cost. Ask whether the fee will be credited if you hire them. If it will, the fee is less of a barrier. If it won’t, you’re paying separately for diagnosis and work.

The Real Benefits of No Service Charge Plumbers

Transparent Pricing From the Start

When there’s no service charge, your quote is simpler. You’re not calculating whether the diagnostic fee will be credited or whether you’ll be charged again for a follow-up visit. VanDerBosch’s approach to transparent pricing means you know upfront what the repair will cost before work begins.

Lower Barrier to Emergency Service

With no service charge, the decision to call becomes simpler during emergencies. Homeowners are more likely to call quickly if they’re not paying extra for diagnosis, which can mean the difference between contained water damage and significant structural problems. For recurring issues, no service charge means you can call back without penalty if the first fix didn’t fully solve the problem.

No Hidden Costs or Surprises

A no service charge model eliminates one category of hidden cost: you’re not paying for the visit. What you pay for is the work and materials. The risk is that some plumbers use “no service charge” as marketing while padding labor rates or parts costs. That’s why it’s important to ask specific questions about how they price their work.

Understanding Plumbing Repair Cost Factors

Several factors affect what you’ll pay for a repair: type and location of the problem, accessibility, materials and equipment needed, extent of damage, diagnostic work required, and whether additional components are affected. A no service charge plumber should still be transparent about these factors when giving you an estimate.

Book a Visit →

Red Flags of ‘Free Estimate’ Marketing

Not all “no charge” offers are created equal. Some plumbing companies use free estimates as a marketing hook while building their real costs into other places. Understanding how these costs get hidden is the key to spotting them in your own quote.

How ‘No Service Charge’ Companies Recover Diagnostic Costs

A plumber must recoup diagnostic costs somewhere if not charging a service fee. Common methods include inflated hourly labor rates, higher parts markups, diagnostic fees disguised as “site evaluation” or “inspection” charges, minimum labor charges on small repairs, and full diagnostic fees for follow-up visits. When comparing quotes, calculate total labor cost and verify parts pricing.

Red Flags to Watch For

Red flags include vague pricing over the phone, pressure to decide immediately, hourly rates significantly below market, unclear warranty language, refusal to provide written estimates, fear-based marketing without cause, and no mention of licensing or insurance. A straightforward plumber can give you a ballpark range based on your description and puts estimates in writing.

How to Spot Hidden Costs in Your Quote

When you receive an estimate, look for these patterns:

  • Line-item breakdown. A detailed estimate shows labor hours, hourly rate, specific parts with individual prices, and any fees separately. If the quote is just one lump sum, ask for a breakdown.
  • Comparison across quotes. If one plumber quotes significantly different hours for the same job, ask why. One may be more efficient, or they may have a different approach. Don’t assume the lower hour count is always better, sometimes it means they’re underestimating the work.
  • Parts pricing verification. For major components (water heaters, sump pumps, fixtures), you can sometimes look up the wholesale cost online. A reasonable markup is typical. If the quoted price is significantly higher, ask why.
  • Total cost comparison. Add up labor + parts + any fees on each estimate. The cheapest hourly rate doesn’t always mean the cheapest total job.

A honest no service charge plumber competes on reliability and fair pricing, not on hidden costs or fear tactics. They should be transparent about their hourly rate, parts pricing, and any minimum charges before you commit.

Questions to Ask a Plumber Before Hiring

Before you commit to any plumber, ask these questions to understand how they price work and whether they’re a good fit:

Professional plumber discussing home repairs with a client while vetting no service charge plumbers

1. How do you charge for your work? Listen for clarity. Do they charge by the hour, by the job, or a combination? Are parts marked up at a flat rate or a percentage?

2. Will you provide a written estimate before starting work? A written estimate protects you. It should list the work to be done and the cost.

3. What’s your warranty on the repair? VanDerBosch offers a 90-day warranty on new equipment and a 100% satisfaction guarantee. Other plumbers may offer different terms. Know what you’re getting.

4. If you find additional problems during the repair, will you call me before proceeding? This prevents surprise costs. A good plumber stops and asks before expanding the scope of work.

5. Are you licensed and insured? This protects you if something goes wrong.


Frequently Asked Questions

Do all plumbers charge a service call fee?

No. Many plumbing companies charge a dispatch fee, trip charge, or diagnostic fee just to show up and assess the problem. However, some plumbers operate on a no service charge model, meaning you only pay for the actual repair work and parts. This approach eliminates the barrier to getting a professional onsite assessment, which is especially valuable during emergencies like burst pipes or sewer backups when you need answers quickly.

What plumbing repair cost factors should I understand before calling for service?

Several factors affect plumbing repair pricing: the type and location of the problem, accessibility of the pipes or equipment, materials and parts required, extent of damage, diagnostic work needed, and whether additional components are affected. For example, a clogged toilet in an easily accessible bathroom costs less than repairing a sewer line issue requiring excavation. Labor costs, travel time, and technician expertise also play a role. A professional plumber should explain these factors clearly so you understand why the estimate is what it is.

What should I ask a plumber before hiring them?

Ask about their licensing and insurance, whether they charge a service call fee or dispatch fee, how they price labor (hourly rate versus flat rate), what’s included in their estimate, their warranty on repairs, and their availability for emergencies. Also ask if they offer same-day service and what their typical response time is. Request a detailed written estimate that breaks down parts, labor, and any other costs. These questions help you compare fairly and avoid surprises when the bill arrives.

How can I avoid getting ripped off by a plumber?

Work with a plumber who provides transparent pricing upfront, explains what they’re charging for, and offers a written estimate before starting work. Be cautious of companies that advertise ‘free estimates’ but then pressure you into immediate repairs or quote unexpectedly high prices once they assess the problem. Ask for references, verify licensing and insurance, and compare quotes from multiple plumbers. A no service charge model reduces one common pressure tactic, but always confirm what the final bill will include.

Book Emergency Plumbing Repair Online: A Quick Guide

Table of Contents

Last Updated: September 18, 2026

What Counts as a Plumbing Emergency

A plumbing emergency is any situation where water damage, health hazards, or system failure threatens your home or business right now. The most common emergencies include burst pipes flooding a room, sewage backing up into drains, gas leaks, no hot water in winter, or a toilet overflowing. These situations demand immediate attention, not tomorrow, but today.

A slow drain, dripping faucet, or minor leak under the sink can wait for a scheduled appointment. But if water is actively flowing where it shouldn’t be, if you smell gas, or if multiple fixtures stop working at once, you need urgent action.

Emergencies cause active damage or create safety risks. Everything else can be addressed during business hours. Understanding the difference helps you know when to book emergency plumbing repair online.

Immediate Steps Before Booking Emergency Plumbing Repair Online

Before you reach out to schedule service, take a few critical steps to minimize damage and give the technician useful information when they arrive.

Locate Your Water Shut-Off Valve

The first thing you should do in any water emergency is stop the flow at the source. Every home has a main water shut-off valve, usually located near the water meter in a basement, crawlspace, or utility closet. In some cases, it’s outside near the foundation. Knowing where this valve is before an emergency happens is invaluable.

Article image

Securing the water supply prevents further property damage while you consult this emergency plumbing guide to determine the next logical steps for a permanent fix.

The valve typically has a handle you turn clockwise to stop water flow. Some older homes have a gate valve that requires multiple full turns. If you can’t find it, look near the water meter, the valve is usually within a few feet. If you’re renting, ask your landlord or property manager.

Shutting off the water prevents further damage while you wait for a professional.

Document the Problem

Take a photo or video showing where the water is coming from and any visible damage. This helps the technician prepare and creates an insurance record if needed.

Note when the problem started, whether the water is clear or discolored, and any odors. These details help the technician diagnose faster.

Burst Pipe Repair and Temporary Containment

Burst pipes are damaging because water flows continuously until stopped. They typically occur in winter when water freezes and expands, but can also result from age, corrosion, or physical damage.

Turn off the main water valve immediately. If the burst is inside a wall, under the floor, or in a crawlspace, you may only notice water pooling or wet spots.

While waiting, move furniture away from the affected area. Place a bucket under ceiling drips and open windows to improve air circulation and prevent mold.

Do not attempt DIY repairs with solder, epoxy putty, or tape, these fail quickly and risk injury. A licensed professional has the tools to properly assess and restore your water line.

How to Book Online and What to Expect

Having the right information ready before booking makes the process smoother and helps the technician arrive prepared.

What Information You’ll Need to Provide

Have these details ready:

  • Your address and phone number
  • Description of the problem, for example, “water spraying from under the kitchen sink” or “toilet overflowing”
  • When it started, suddenly or gradually over days?
  • Photos or video if available
  • Access information, locked doors, gates, or side entrances

The Online Booking Process

VanDerBosch’s online booking system lets you describe your emergency and select available times. You’ll receive a confirmation with your appointment window.

You can also call if you prefer to speak with someone directly.

What Happens When the Technician Arrives

The technician will inspect the affected area, ask when the issue started, and explain what they found.

The technician will explain repair options. For a burst pipe, they’ll discuss whether the damaged section can be replaced or if the entire line needs attention. For a sewer backup, they may recommend a camera inspection before hydro jetting or excavation. For a gas leak, they’ll explain that your gas utility must confirm safety before repair.

Preparing Your Home for the Visit

Clear the area around the problem for easy access. Remove items from under sinks, move basement storage, and secure pets in another room.

Let the technician know if you’ve turned off the main water valve. If the problem involves gas, confirm you’ve called your gas utility.

After the Repair

The technician will test the system and explain what they did and why the problem occurred. Ask for a summary of the work and any warranty that applies.

To book emergency plumbing repair online, visit https://www.vanderbosch.com/ or call to speak with someone directly.

Understanding Plumbing Repair Cost Factors

Emergency repair costs vary based on what’s broken, where it’s located, and existing damage. Understanding cost drivers helps you make informed decisions.

Type of Problem

Simple fixes like replacing a fill valve or tightening connections cost far less than burst pipes requiring replacement. Sewer blockages requiring hydro jetting or camera inspection add diagnostic costs.

Location and Accessibility

A leak under the kitchen sink is straightforward to repair. A burst pipe hidden behind a wall, under the floor, or in a crawlspace requires locating it first, which may involve opening walls or digging. Difficult access increases labor costs and may require drywall removal and patching.

Extent of Damage

A pinhole leak costs less than a burst section. Flooded basements may require water removal and drying services. Mold remediation adds cost if water sat for hours. Early detection keeps costs lower.

Materials and Equipment

Replacing a short copper section costs less than replacing corroded galvanized steel throughout the home. Frozen pipes may need thawing and insulation. Some repairs require specialized equipment like sewer cameras or hydro jetting.

Diagnostic Work

Some emergencies require investigation before repair. A sewer camera inspection identifies blockage location and prevents unnecessary digging. Gas leaks require detection equipment to pinpoint the source. Diagnostic services add cost but solve problems correctly.

What to Ask When Getting a Repair Estimate

Ask the technician to explain what they found, why it happened, and what repair options exist. Ask whether repair is permanent or temporary, and why replacement is recommended if suggested. A professional should explain their reasoning before you commit.

Contact VanDerBosch directly or visit https://www.vanderbosch.com/ to schedule an inspection and receive a detailed estimate.

Gas Leak Signs and When to Call Emergency Services

Gas leaks are dangerous because natural gas is odorless. Utility companies add a chemical odorant that smells like rotten eggs or sulfur. If you smell that odor near your gas line, meter, or appliances, you may have a leak.

Other signs include hissing sounds near gas lines, dead plants or grass where underground gas lines run, or visible damage to connections.

If you suspect a gas leak, do not use electrical switches, lighters, or open flames. Leave your home immediately and call your gas utility’s emergency line. Once they confirm safety, call a licensed plumber for repairs.

VanDerBosch provides gas line repair and installation. Contact your gas utility first for initial detection and emergency response. Once the danger is addressed, a licensed plumber can assess repair or replacement needs.

Why Online Booking Beats Phone-Only Scheduling

Online booking is available 24/7, so you can submit your request immediately without waiting on hold or repeating information.

Online booking creates a clear record, confirms your appointment, and lets you upload photos so the technician can prepare.

Phone-only scheduling requires waiting on hold and hoping you’ve communicated clearly. Online booking simplifies the process and lets you book at your own pace.

VanDerBosch’s online booking system lets you describe your situation and select an available time without a phone call. You can also call if you prefer.

Conclusion

Knowing what counts as urgent, shutting off your water, and documenting the problem puts you in control. Online booking connects you with a licensed professional without delay.

VanDerBosch Plumbing Inc. is available for emergency repair of burst pipes, sewer backups, gas leaks, and other urgent plumbing issues. Contact VanDerBosch today to book emergency plumbing repair online, or visit https://www.vanderbosch.com/ to schedule service.

Frequently Asked Questions

What constitutes a plumbing emergency?

A plumbing emergency typically involves active water damage, gas leaks, sewage backup, or a complete loss of water supply. Burst pipes, overflowing toilets that won’t stop, and major leaks that flood your home or basement all require immediate professional attention. If water is actively damaging your property or you smell gas near plumbing fixtures, contact emergency services right away rather than waiting for standard business hours.

Can I really book emergency plumbing repair online, or do I need to call?

Many plumbing companies, including those offering emergency service, now allow online booking through their websites or apps. Online booking lets you specify your emergency, upload photos, and confirm your address without phone tag. However, if you’re in active danger (gas leak, electrical hazard, major flooding), prioritize calling 911 or the emergency dispatcher first, then book follow-up professional service once immediate safety is secured.

What factors influence the cost of emergency plumbing repairs?

Emergency plumbing repair costs depend on the type and location of the problem, accessibility of the damaged pipes or fixtures, materials needed, extent of damage, whether diagnostic work is required, and the time of day or day of the week the service is performed. A simple clogged toilet costs less than burst pipe repair or sewer line work. The best way to understand pricing for your specific situation is to describe the problem during booking so the company can provide an assessment.

What should I do while waiting for an emergency plumber to arrive?

Turn off your water at the main shut-off valve if there is active leaking or flooding. Place towels or buckets under drips to contain water damage. If the emergency involves a gas smell, evacuate the building and call your gas company or emergency services immediately—do not try to locate the leak yourself. Move valuables away from the affected area and take photos for insurance documentation. Stay accessible so the technician can reach you when they arrive.


When a pipe bursts at midnight or sewage backs up into your home, you need a plumber who answers immediately and arrives ready to work. VanDerBosch Plumbing Inc. handles emergency repair for residential and light commercial properties across the Chicagoland area. Licensed technicians, no service charges, and a 100% satisfaction guarantee mean you get professional help without surprises. Call today or book online to get emergency plumbing repair scheduled now.