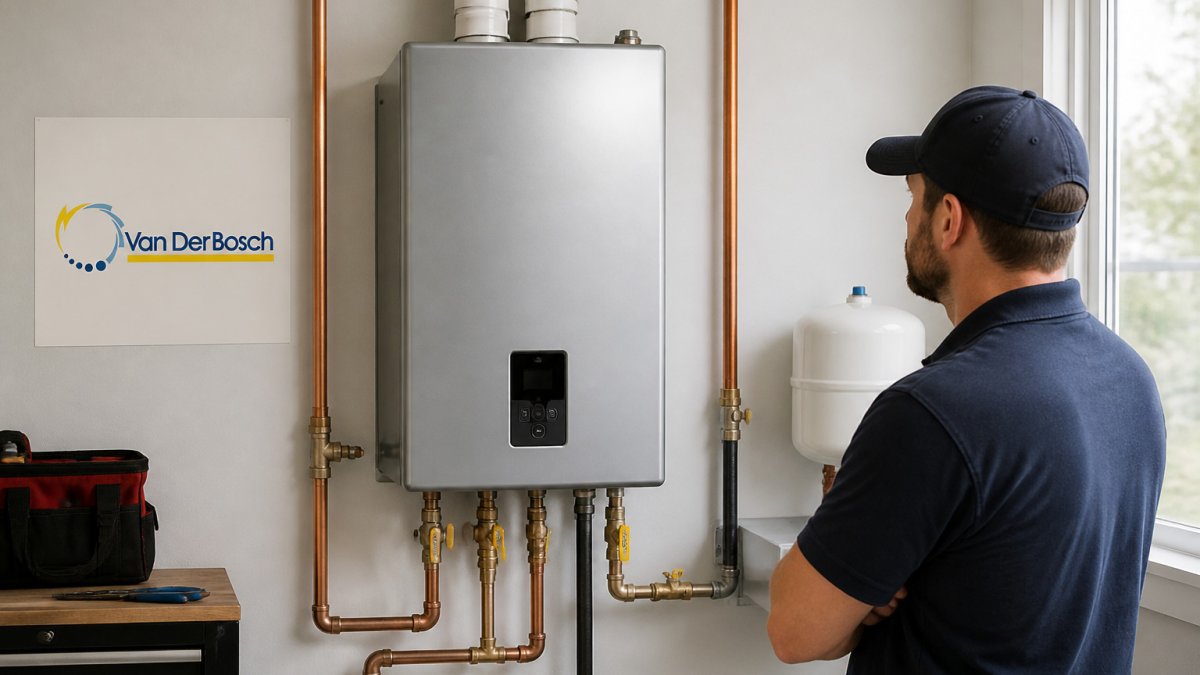
How Long Do Tankless Water Heaters Really Last?

Last Updated: October 29, 2026

Quick Summary

A tankless water heater lifespan depends mainly on maintenance, water hardness, and installation quality rather than on a single rated number. Manufacturer service-life figures are estimates for a well-maintained unit, and regular flushing matched to your water conditions is what helps a unit reach or exceed that estimate.

  • Test your water hardness first, since hard water causes scale that shortens the unit’s life.
  • Flush hard-water units every 6 to 9 months, and very hard water every 6 months or more often.
  • Keep a service log of flush dates, tasks, and error codes to support warranty claims.
  • Do not treat warranty length as the expected lifespan; the two periods rarely match.
  • Leave descaling, burner work, and gas line service to a licensed technician.

Table of Contents

What the Lifespan Numbers Actually Mean

Tankless water heater lifespan depends heavily on maintenance, water conditions, and installation quality rather than on a single rated number. Manufacturer service-life figures are estimates for a well-maintained unit, not guarantees.

Readers often mix up three different numbers: the manufacturer’s stated service life, the warranty length, and the age at which a unit actually fails. The warranty covers defects in parts; it does not tell you how long the unit should last. Those two periods rarely match.

Tankless vs. Traditional Tank Units: How Service Life Compares

Traditional tank water heaters tend to have a shorter service life than tankless units, and many homeowners begin planning for replacement as a tank ages.

The comparison is less about which type is “better” and more about what each one demands. A tank unit tolerates neglect for a while and fails predictably, usually a leak at the base.

What Shortens or Extends a Tankless Water Heater’s Life

A tankless unit’s service life is set less by the box on the wall than by the conditions it runs in, which is why the tankless water heater lifespan can differ so much between two installs. Two identical heaters installed the same day can have very different lifespans depending on water chemistry, sizing, venting, and usage.

Water Hardness and Scale Buildup

Water hardness is the single biggest factor in how quickly scale accumulates inside a tankless unit.

Hardness is measured in grains per gallon (gpg), and water hardness varies by source and by whether a home is on a municipal supply or a private well.

A home hardness test strip gives a rough reading, and municipal water quality reports or a lab test for private wells can provide more detail.

Sizing and Peak Demand

An undersized unit runs at or near its maximum firing rate whenever several fixtures run at once, accelerating wear on the heat exchanger, burner, and controls. A unit sized for one household can become undersized after a bathroom addition or occupancy change, so revisit sizing if hot water performance has slipped.

Venting, Combustion Air, and Condensation

Condensing and non-condensing tankless units have different venting requirements. A condensing unit produces acidic condensate that must drain properly; a blocked, trapped, or mispitched condensate line can shut the unit down or corrode it internally. Improper venting or inadequate combustion air can cause incomplete combustion, sooting, and corrosion, showing up as error codes and shortened component life.

Gas Pressure and Electrical Supply

Tankless heaters fire at high input rates and depend on stable gas pressure and a clean, adequately sized gas line. Undersized or obstructed gas piping can cause ignition faults, short cycling, and repeated lockouts that stress the ignition and control board. On the electrical side, a shared circuit or voltage fluctuations can cause control board failures. These are installation and supply issues, which is why a proper installation review matters.

Installation Quality

Isolation valves, a bypass, and an inlet sediment filter make future service easier and keep debris out of the exchanger. Units installed without them are harder to flush and more prone to clogging, and incorrect pipe connections, missing dielectric unions, and improper clearances can all shorten service life.

Pro Tip
If you do not know your water hardness, start there. A test strip reading and your municipal water quality report together tell you whether a standard annual flush is enough or whether your unit needs more frequent descaling and a softener upstream.

How These Factors Interact

These factors compound. A hard-water home with an undersized unit and a marginal gas line will see scale, short cycling, and ignition faults sooner than a soft-water home with a correctly sized unit on a dedicated gas line. When a technician inspects a failing unit, the goal is to identify which conditions are present so the fix addresses the cause, not just the symptom.

Tankless Water Heater Maintenance: What Keeps the Unit Running Longer

Maintenance is where most of the lifespan difference is made. A tankless unit flushed on a schedule matched to its water conditions will typically outlast one left alone until performance drops. The work splits into tasks homeowners can safely handle and tasks that require a licensed technician because they involve gas, pressurized water, or internal components.
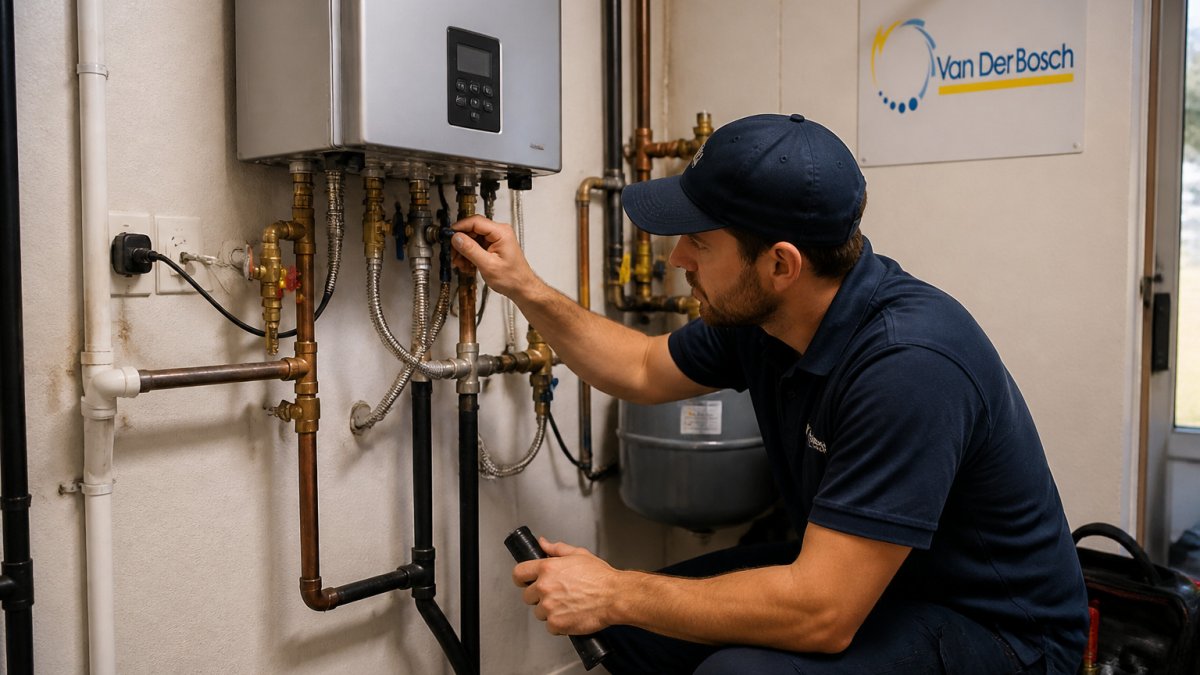
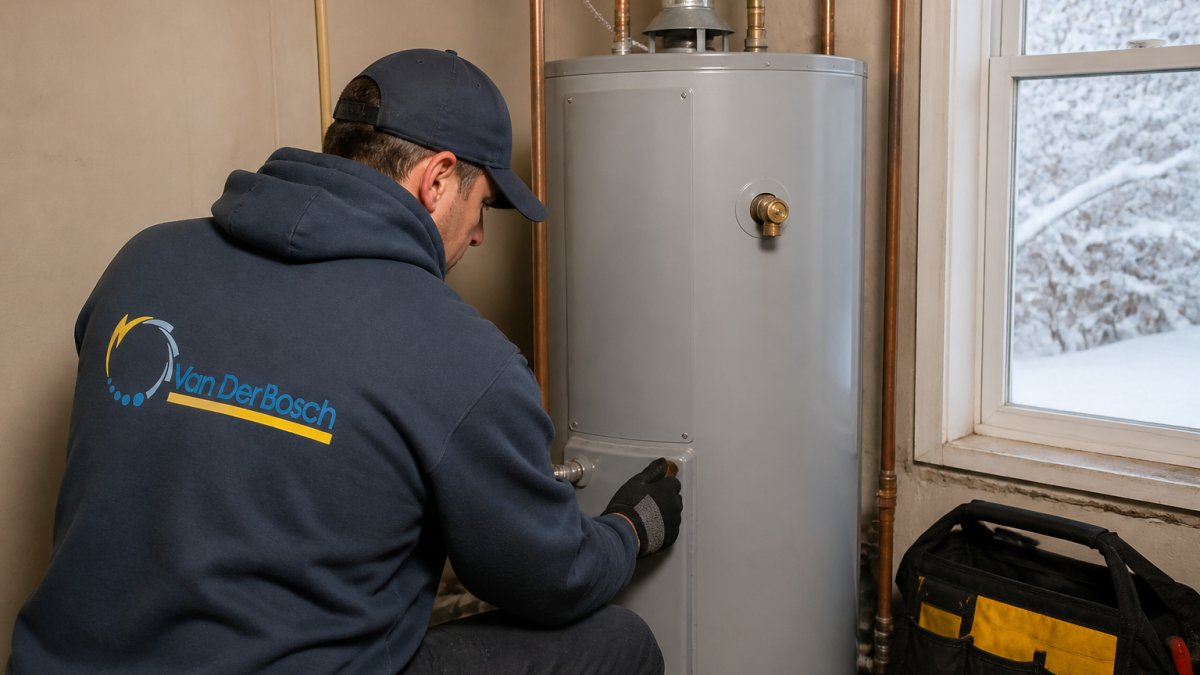
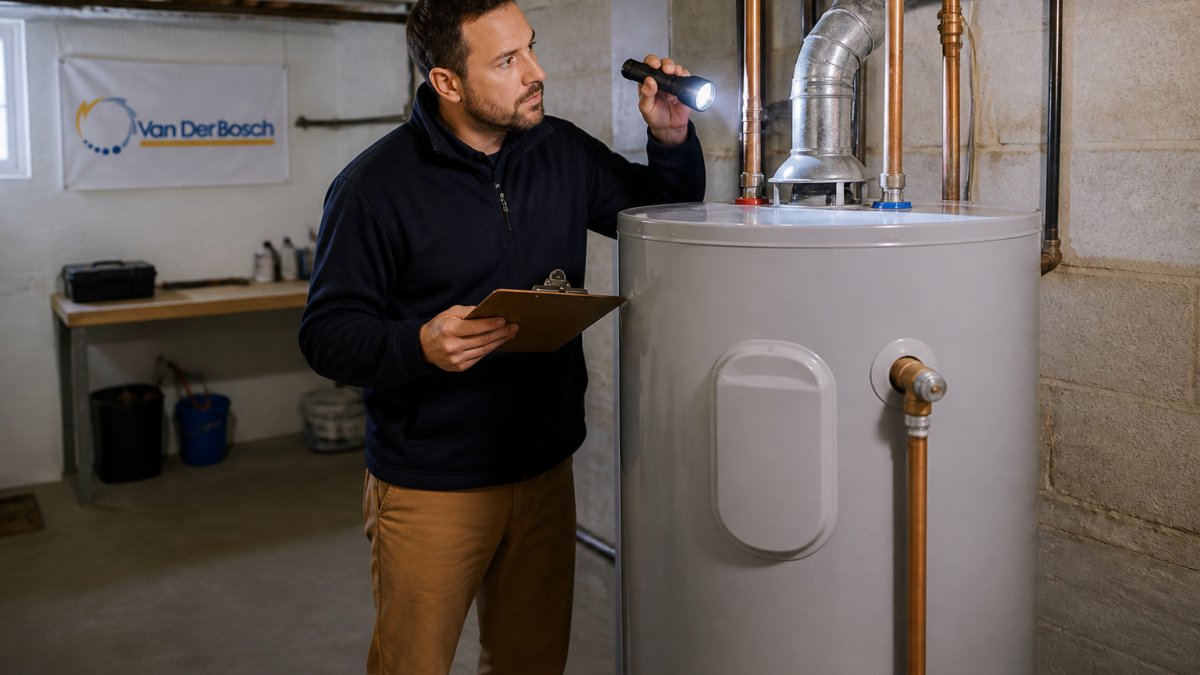
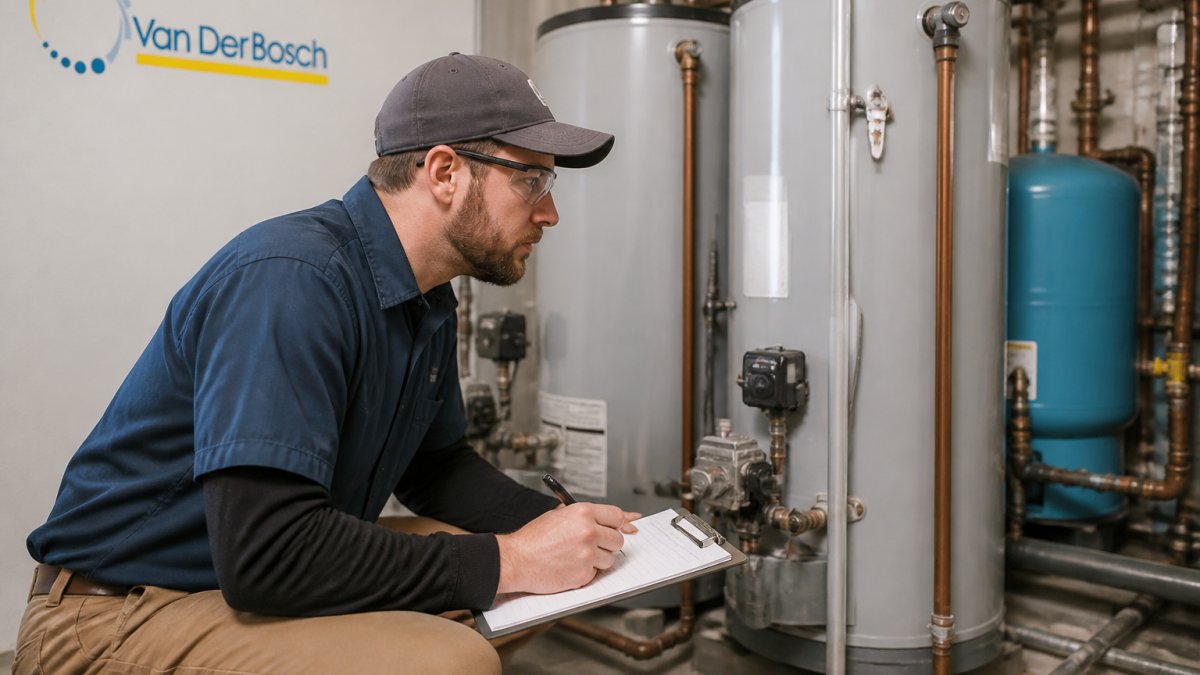
Licensed plumber inspecting a wall-mounted unit to help extend your tankless water heater lifespan

What a Professional Maintenance Visit Covers

A proper service visit goes beyond a simple flush and typically includes:

Book a Visit →

  • Circulates a descaling solution through the heat exchanger using a pump and isolation valves to dissolve mineral deposits
  • Inspects and cleans the inlet screen filter and, where present, the sediment trap
  • Checks the condensate line and trap on condensing units for blockages and correct pitch

The flush is the headline task, but the inspection around it catches small problems before they become failures.

How Often to Flush

Flushing frequency should follow water hardness and usage rather than a single blanket interval. A common approach:

Water condition Typical flushing interval
Soft water (under about 3.5 gpg) Annually
Moderately hard (3.5 to 7 gpg) Annually, or every 9 to 12 months in high-use homes
Hard (7 to 10.5 gpg) Every 6 to 9 months
Very hard (above 10.5 gpg) Every 6 months, or more often without a softener

These are starting points, not rules. A unit with a softener upstream can often follow the softer-water schedule even if the raw supply is hard. A unit serving a large household or a light commercial application runs more and may need more frequent service regardless of hardness.

What Homeowners Can Safely Do Between Visits

A few tasks are safe for most homeowners and help the unit last:

  • Check the inlet screen filter. With the unit off and the water supply isolated, the screen can be removed and rinsed. A clogged screen restricts flow and can trigger error codes.
  • Keep the area clear. Do not store items against the unit or block combustion air openings and vent terminations.
  • Watch the condensate line. On condensing units, confirm the line drains freely and is not kinked or frozen in winter.
Watch Out
Do not attempt to open the unit, service the burner, adjust gas pressure, or work on gas piping yourself. These tasks require a licensed professional and involve combustion and pressurized gas. If you smell gas, leave the building and contact your gas utility or emergency services before calling for service.

Why Descaling Is Not a DIY Task for Most Homes

A proper descale uses a pump, hoses, and isolation valves to circulate solution through the heat exchanger in a closed loop, then requires a thorough clean-water flush before the unit returns to service. Done wrong, it can leave solution in the exchanger, damage components, or miss scale in the passages that matter, and gas-fired units add combustion safety concerns during service.

Keeping a Service Log

Keep a simple record of service dates, tasks performed, and any error codes displayed. That log helps a technician spot a unit scaling faster than expected, supports warranty claims requiring documented maintenance, and gives you a clear history when weighing repair against replacement.

Warranty Coverage and What It Does Not Include

Warranty terms vary by manufacturer, and most tankless warranties separate parts coverage from labor. Coverage often requires documented annual maintenance, and a missed flush can affect heat exchanger coverage even when the defect looks like a manufacturing problem. Read the warranty for conditions on water quality, service intervals, and installation standards, and check whether labor is covered, how long parts coverage lasts, and whether it transfers if you sell the home.

Key Takeaway
Maintenance is the lever you control. Test your water hardness, set a flushing interval that matches it, handle the safe checks between visits, and keep a log. That combination is what separates a unit that reaches its rated service life from one that fails early.

Signs Your Tankless Water Heater Is Failing

Several symptoms commonly point to a unit that is wearing out or needs professional attention:

  • Hot water temperature that swings unpredictably during use
  • Slower-than-normal heating or longer waits for hot water
  • Unusual noises, such as rumbling or knocking, which often indicate scale
  • Error codes on the display that repeat after a reset

Some of these symptoms are minor and fixable, such as a clogged inlet screen. Others, like a leaking heat exchanger or a gas smell, call for immediate professional service. If you smell gas, leave the home and contact your gas utility or emergency services first.

Tankless Water Heater Repair vs. Replacement: A Decision Matrix

Whether to repair or replace depends on the unit’s age, the type of failure, and the cost of the repair relative to a new unit. Use this framework to organize the decision:

Factor Lean toward repair Lean toward replacement
Age of unit Under about 10 years Near or past its expected service life
Type of failure Sensor, control board, screen, or ignition part Cracked or leaking heat exchanger
Maintenance history Regularly flushed and serviced Repeated scale problems or missed service
Repair frequency First major repair Recurring repairs within a short period
Efficiency Still heating at expected rate Significant efficiency loss from scale

A single repair on a well-maintained, relatively young unit is often a sound investment. A unit with a cracked heat exchanger, a long repair history, or heavy scale buildup often makes more sense to replace, particularly if the replacement offers better efficiency or capacity for the home’s needs.

Scheduling a Tankless Water Heater Inspection With VanDerBosch

If your tankless water heater is showing any of the warning signs above, or you are not sure when it was last flushed, a professional inspection will give you a clear picture of its condition. At VanDerBosch Plumbing Inc., our licensed and insured technicians can assess scale buildup, check venting and gas connections, and recommend whether the unit should be repaired or replaced.

Frequently Asked Questions

What is the average lifespan of a tankless water heater?

Tankless water heater lifespan depends on how the unit is installed and maintained. Actual service life varies with water hardness, the quality of the installation, how often the unit is flushed and descaled, and how hard it works in a household with high hot-water demand. Units in hard-water areas often show scale buildup sooner than units in softer water, so an inspection after the first few years is a practical way to catch problems early.

Should I flush my water heater after 10 years?

A tankless unit should be flushed and descaled regularly, typically once a year, rather than waiting until a set number of years. Flushing removes mineral deposits that build up on the heat exchanger and restrict water flow. If the unit is already around 10 years old, a professional inspection can show how much scale has accumulated and whether the heat exchanger is still performing well. Skipping maintenance is one of the most common reasons these units fail early.

Is it worth repairing an older tankless water heater?

It can be, depending on the cause of the problem, the age of the unit, and how many repairs it has already needed. A single failed part on a unit that is otherwise in good condition may be a reasonable repair. Repeated failures, heavy scale in the heat exchanger, or a unit that is near the end of its typical service life often make replacement the better long-term choice. A technician can compare repair cost against the remaining useful life before you decide.

What are the common signs that a tankless water heater is failing?

Common warning signs include inconsistent hot water temperature, lower flow than before, error codes on the display, unusual noises such as rumbling or popping, and visible leaks around the unit. Reduced flow is often linked to scale buildup in the heat exchanger. Any gas odor, visible leaking gas connections, or a burning smell should be treated as an emergency, and the gas should be shut off and the utility or a licensed professional contacted right away.

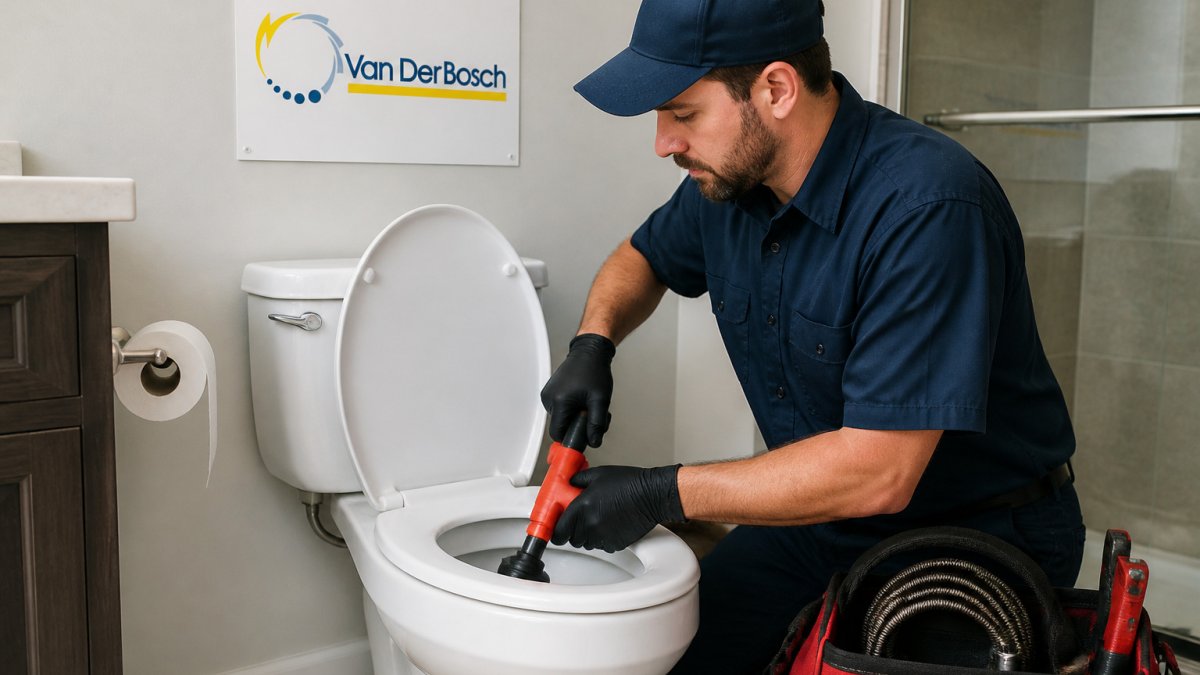
How to Unclog a Toilet Safely and Fix a Repeat Clog

Last Updated: October 28, 2026

Quick Summary

A clogged toilet can often be cleared with a flange plunger used at a slight angle with firm, repeated strokes. A toilet auger can reach clogs past the trap. Avoid chemical drain cleaners, and call a plumber if the clog returns or other fixtures back up.

  • Use a flange plunger designed for toilets, not a standard sink cup plunger.
  • Plunge 15 to 20 times, then check whether the water drains freely.
  • Never combine a chemical drain cleaner with a plunger or auger.
  • Multiple fixtures backing up at once may signal a problem beyond the toilet.
  • Call a plumber if the clog keeps returning or sewage appears at floor drains.

Table of Contents

A clogged toilet can often be addressed with a plunger, but recurring clogs or problems affecting other fixtures may need professional attention. This guide explains basic steps and signs that the issue may extend beyond the toilet.

How to Unclog a Toilet With a Plunger, Step by Step

A plunger is one tool people use for toilet clogs. The key is using the right plunger and technique.

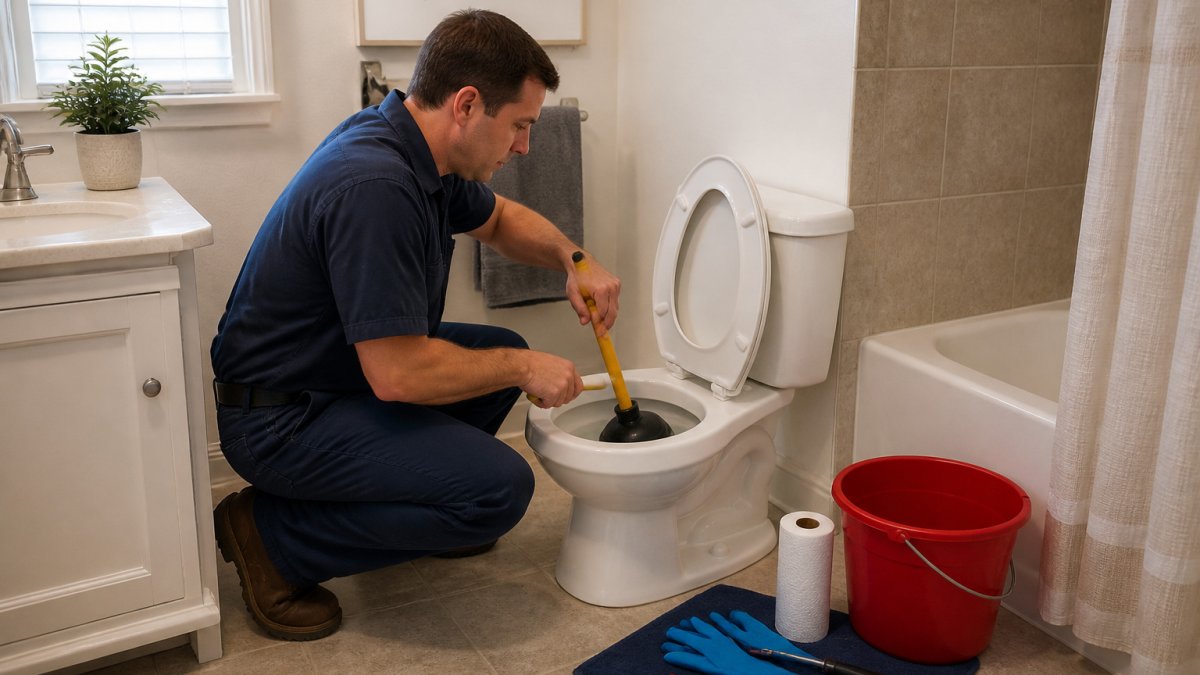
Homeowner using a flange plunger to clear water in a clogged toilet

Start by looking at the water level. If the bowl is already overflowing, stop flushing and turn off the water supply if there is a shutoff valve behind the toilet. Then put on gloves and work carefully.

Watch out: Never mix a chemical drain cleaner with a plunger. Splashing and the heat from a chemical reaction can cause burns and damage the bowl.

Choosing the Right Plunger

Use a flange plunger, sometimes called a toilet plunger, not a standard sink cup plunger. The flange, the rubber extension at the bottom, fits into the drain opening and creates a better seal.

  • Pick a plunger with a flange designed for toilets
  • Make sure the rubber is in good shape with no cracks
  • Keep a plunger used only for toilets, separate from sinks

Plunger Technique That Works

  1. Add enough water so the plunger cup is covered, but do not overfill the bowl.
  2. Place the plunger at a slight angle to get a good seal over the drain.
  3. Push down gently first to push air out, then press firmly.
  4. Pull up sharply, then push down again. Repeat 15 to 20 times.
  5. Lift the plunger and check whether the water drains freely.

If the water drains slowly or not at all after several rounds, stop and consider calling a plumber.

Other Methods to Try Before Calling a Plumber

Household methods vary in their suitability for a toilet clog. The table below summarizes some methods and potential risks.

Method Best for Reliability Main risk
Dish soap plus a few minutes of dwell time Soft paper or waste clogs Moderate, mainly a lubricant before plunging Slippery bowl; little effect on solid blockages
Hot (not boiling) tap water Soft buildup near the trap Low to moderate Boiling water can crack porcelain; too much water can overflow
Baking soda and vinegar Odor and light film, not blockages Low for actual clogs Foaming can push water up; rarely clears a real plug
Toilet auger (closet auger) Clogs past the trap that a plunger cannot reach High when used correctly Scratching the bowl or jamming if forced
Chemical drain cleaner Almost never the right first move on a toilet Low, and often makes things worse Heat, splashing, burns, damaged pipes, hazardous for a plumber later

Baking soda and vinegar is the most repeated tip online and the least useful for a true clog. The fizzing is carbon dioxide, not a drain-clearing force, and it does nothing to a wad of paper or wipes wedged in the trapway. It is fine for freshening a bowl that already drains.

The Tool That Actually Reaches the Clog

A toilet auger, also called a closet auger, is another tool used for toilet clogs. It has a crank handle, a flexible cable inside a sleeve, and a curved end.

  1. Set the auger’s rubber sleeve against the drain opening so the cable does not scrape the bowl.
  2. Crank the handle clockwise while applying light downward pressure. Let the cable feed itself.
  3. When you feel resistance, keep cranking gently. Do not force it, the cable can kink or the trap can be damaged.
  4. Once the cable breaks through, retract it slowly and flush to confirm flow.
Watch Out
Never combine a chemical drain cleaner with a plunger or auger. The chemical can splash back when the clog releases, and the heat from the reaction can damage the bowl and the trap. If a chemical has already gone in, do not plunge, call a plumber and tell them what was used.

Let It Sit, Then Check Before Flushing

If you use a remedy, follow its directions before testing it. When you test, flush once and watch the water level. If it rises instead of draining, stop, do not flush again.

Why a Clogged Toilet Keeps Coming Back

Possible causes of repeat clogs include:

Book a Visit →

  • Too much toilet paper flushed at once
  • Baby wipes, “flushable” wipes, and paper towels
  • Feminine hygiene products and other non-flushable items
  • Small objects that fell in, such as toys or cotton swabs

Prevention is mostly a matter of habit. For drains beyond the toilet, see fast fixes for blocked drains. Keep the wastebasket next to the toilet, flush only toilet paper, and flush once per use when possible.

A Troubleshooting Guide: Is the Clog in the Toilet or Beyond It?

A clog may be in the bowl or trapway, or it may be farther along the drain system. The observations below can help you decide whether the problem may extend beyond the toilet.

Step 1: Check the Water Level

  • Bowl is full but stable: The clog is likely in the trapway. A flange plunger is the right first tool.
  • Bowl is overflowing or rising: Stop flushing. Turn off the supply valve behind the toilet if you can reach it, and wait for the bowl to settle before doing anything else.
  • Bowl drains slowly but does not back up: A partial clog is likely. Plunge first, then auger if it returns.

Step 2: Check the Rest of the Fixtures

  • Other fixtures flow normally: The issue may be limited to the toilet.
  • Water rises in the tub or shower when the toilet flushes: The restriction may be downstream of the toilet.
  • Several drains are slow at once: The issue may involve a shared drain or sewer line.
  • Gurgling from other drains: This can be a sign of a drain or venting issue.

Step 3: Check for Main-Line Warning Signs

Stop plunging and call a plumber if you see any of these:

  • Sewage backing up in a floor drain, laundry sink, or basement fixture
  • A sewage smell that does not clear after the bowl drains
  • Water pooling around the base of the toilet or at a floor drain
  • The clog returns within a day or two of clearing
  • Multiple fixtures back up at the same time

These signs may indicate a problem beyond the toilet. A sewer video inspection can help identify conditions inside the line before a repair method is recommended.

Key Takeaway
A plunger may help with a bowl clog, but it will not address a problem farther along the drain system. If more than one fixture is affected, consider professional diagnosis rather than continuing to plunge.

What the Plumber Will Likely Do

A plumber may assess where the blockage is and determine whether further inspection is needed. The appropriate service depends on the cause and condition of the plumbing.

Mistakes to Avoid When Working on a Clogged Toilet

  • Do not keep flushing when the bowl is full. This can cause an overflow.
  • Use caution with chemical drain cleaners. Follow product directions and avoid combining them with other methods.
  • Do not use a plunger on a bowl that has a cracked or damaged base.
  • Do not force an auger into the trap. Turn it gently and stop if you feel strong resistance.
  • Pay attention to slow drains elsewhere in the home, as they may indicate an issue beyond the toilet.

When to Call a Plumber for a Clogged Toilet

Call a professional if:

  • The plunger and auger have not cleared the clog after a few attempts
  • The toilet overflows repeatedly
  • Several fixtures back up at once
  • Sewage smell or water appears around floor drains or outside
  • The clog keeps returning after you clear it

A plumber can inspect the toilet and drain system. If the problem involves a clogged toilet, VanDerBosch Plumbing Inc. provides clogged toilet repair and toilet installation services.

Get a Clogged Toilet Fixed Right With VanDerBosch Plumbing

When a clogged toilet will not clear, or keeps coming back, VanDerBosch Plumbing Inc. can help identify the cause and handle the repair. Our licensed and insured technicians offer clogged toilet repair and toilet installation services, and we can also check the wider drain system if the problem goes beyond the bowl. If you are dealing with a clog right now, call today to schedule service.

Frequently Asked Questions

What should I do when my toilet is clogged up?

Stop flushing first so the bowl does not overflow. Then try a plunger with a flange, pushing gently and then firmly before pulling back. If the bowl is close to overflowing, shut off the water supply valve behind the toilet. Call a plumber if the water does not go down after several tries or if other drains start backing up.

How do I use a plunger to unclog a toilet?

Make sure the plunger’s rubber cup covers the drain hole fully and that there is enough water in the bowl to cover the cup. Press down slowly, then use controlled up-and-down strokes. Check whether the water drains. Stop if the bowl risks overflowing. Do not use a plunger on a toilet that has been treated with chemical drain cleaner.

What can cause a toilet to clog repeatedly?

Possible causes include excessive toilet paper, wipes, paper towels, feminine hygiene products, and other items not intended to be flushed. Repeated clogs can also be associated with a problem in the drain system. If the toilet clogs repeatedly, consider a professional inspection.

When should I call a plumber for a clogged toilet?

Call a plumber if the toilet clogs repeatedly or if more than one drain in the home is backing up. Water rising in a floor drain, gurgling sounds from other fixtures, or sewage odors may indicate a problem beyond the toilet. A professional can assess whether further inspection is needed.

How to Prepare for Water Heater Installation Day

Last Updated: October 27, 2026

Quick Summary

Preparing for water heater installation means clearing a path and the area around the unit, confirming the new model’s size and fuel type match your home, and asking your installer what they need from you. Shut off water, power, or gas only as described in the guide, and leave immediately if you smell gas.

  • Clear a path from the door to the water heater and keep a few feet of open floor in front of the unit.
  • Size the new unit using peak-hour demand, including bathrooms, high-flow fixtures, and recovery time.
  • Confirm the fuel type and venting or electrical requirements before the appointment.
  • Ask who pulls the permit, what it covers, and whether a post-installation inspection is required.
  • Plan for hot water to be off for part of the day and for the work area to be noisy.

Table of Contents

What Preparation Actually Involves Before a Water Heater Installation

Good preparation helps you get ready for installation day. You can clear the space and confirm the new unit matches your home’s needs.

Preparation falls into three parts. First, you make the area safe and accessible. Second, you confirm the replacement unit is the right type and size. Third, you know what the installer will need from you on the day.

Plan to clear the space before the installer arrives.

Ask your installer what they need from you in advance.

Water Heater Installation Checklist: Tank, Tankless, Gas, and Electric

Each type of water heater has different preparation needs. Use the checklist for your unit type, and confirm the sizing and fuel items with your installer before the appointment.

Sizing and household demand

Before you compare models, estimate what your household actually uses. A few practical inputs help:

  • Peak-hour demand. Count showers, dishwasher cycles, and laundry loads that could overlap in the busiest hour of the day. A tank’s first-hour rating and a tankless unit’s flow capacity are both measured against that peak, not against average use.
  • Number of bathrooms. Two or more full bathrooms in simultaneous use usually push toward a larger tank or a higher-capacity tankless unit.
  • Fixtures with high flow. Multiple showerheads, a soaking tub, or a body-spray system raise demand quickly.
  • Recovery time. A tank’s recovery rate determines how fast hot water returns after a heavy draw. A unit that is the right size but slow to recover will still run cold during back-to-back showers.

Bring these numbers to your installer.

Tank water heater checklist

  • Confirm the new tank’s capacity and first-hour rating match your peak demand, not just the old unit’s gallonage
  • Confirm the fuel type (natural gas, propane, or electric) matches what the home supplies
  • Check that there is room to drain the old tank into a floor drain, utility sink, or bucket
  • Note the location of the cold water shutoff valve and the gas valve or electrical breaker
  • Confirm the tank’s dimensions fit the space, including clearance for the flue or vent on gas models

Tankless water heater checklist

  • Confirm the unit’s maximum flow rate against your peak simultaneous demand
  • Confirm the required gas line size (gas models) or electrical capacity and breaker size (electric models), tankless units often need larger supply lines than the tank they replace
  • Check wall space for mounting, plus clearance for venting and future service access
  • Ask whether the existing vent material is compatible or must be replaced; many tankless units require specific venting that a tank’s flue does not provide
  • Confirm the unit’s minimum and maximum incoming water temperature range suits your climate and incoming water. If you are weighing this option, our Tankless Water Heater Installation service covers the unit types we install.

Gas water heater checklist

  • Clear the area around the gas valve and flue
  • Confirm the space has adequate combustion air; a utility closet with a solid door may not
  • Check that the flue is intact and properly sized for the new unit
  • Note any sediment trap or shutoff valve the installer will need to access

Electric water heater checklist

  • Confirm the circuit breaker and wire size match the new unit’s requirements
  • Keep the electrical panel and breaker accessible
  • Confirm the unit is properly grounded and that the circuit has the correct protection
Watch Out
Gas connections, gas line resizing, venting changes, and electrical work should always be handled by a licensed professional. Do not attempt to modify gas piping, flues, or electrical circuits yourself, these are the areas where preparation mistakes become safety hazards.

If you are unsure which unit type fits your home, review our tank vs. tankless water heater comparison or ask your installer to walk through the sizing math with you before you commit.

Clearing the Installation Area and Checking Access

Clear a path from the front door or garage to the water heater before the appointment. Move stored items, laundry, and tools away from the unit.

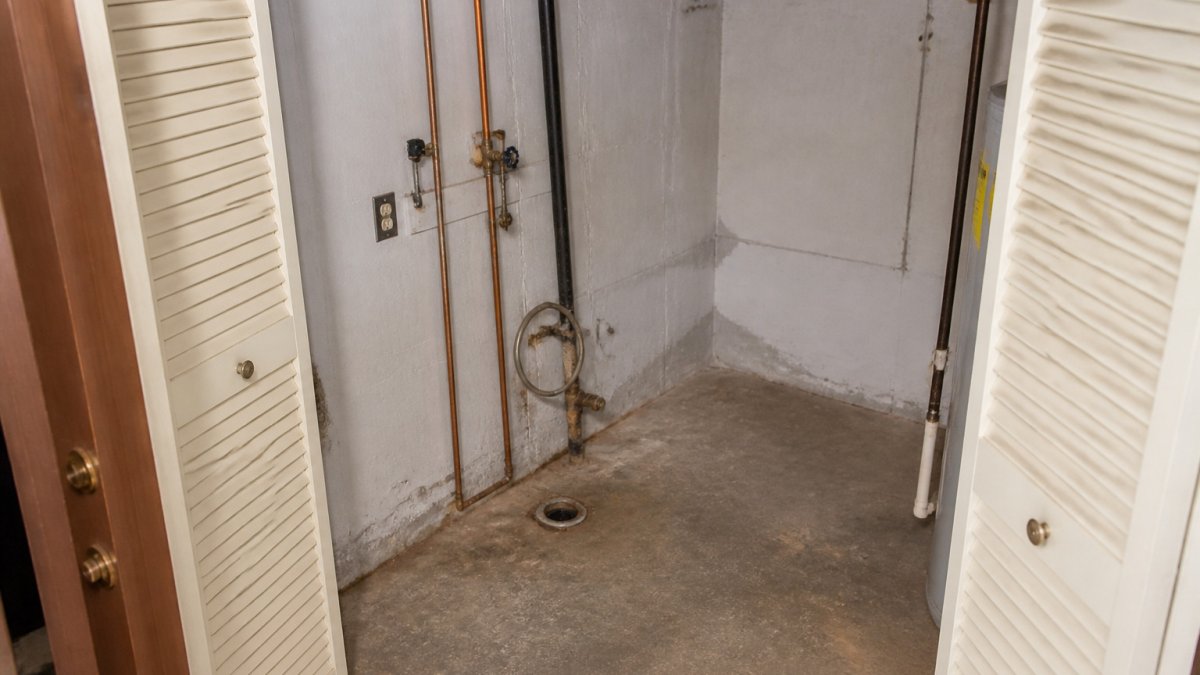
A cleared basement utility closet prepared for a new water heater installation.

Check the space around the water heater. Look for the following:

  • At least a few feet of open floor in front of the unit
  • Clear access to the water supply, gas, and electrical connections
  • A floor drain or bucket nearby for draining the old tank
  • Good ventilation and no stored chemicals or flammable items nearby

A cleared utility closet beside a basement wall, with the old water heater’s connections and floor space visible and nothing stored in front of it, is the goal. For more on keeping the unit area in good shape through cold months, see how to maintain your water heater in winter.

Check access from the door to the unit too. Measure the doorways if your new unit is large.

Shutting Off Water, Power, and Gas Safely

Do not attempt to shut off utilities if you smell gas. Leave the home and call your gas company or emergency services from outside. If you suspect a gas leak, your first priority is getting everyone out safely.

Water:

  1. Locate the cold water supply valve on the pipe feeding the water heater
  2. Turn it clockwise until it stops
  3. Open a hot water tap in the house to relieve pressure

Power (electric units):

Book a Visit →

  1. Find the water heater’s breaker in your electrical panel
  2. Switch it to the off position
  3. Confirm power is off before touching any wires

Gas (gas units):

  1. Turn the gas control valve on the unit to “Pilot” or “Off”
  2. Do not adjust the gas line fittings yourself

What to Expect During Water Heater Installation and How Long It Takes

Most replacements take a few hours. Tank swaps are usually quicker than tankless installs, which may need new gas lines or venting. The exact time depends on the unit type, access, and any updates needed to the home.

A typical visit includes these stages:

  • Shutting off utilities and draining the old tank
  • Disconnecting and removing the old unit
  • Setting the new unit in place
  • Connecting water, gas or electric, and venting
  • Turning utilities back on and testing for leaks and proper operation
  • Walking you through the new unit and any maintenance steps

Keep pets and children away from the workspace.

The table below summarizes the typical stages of a water heater replacement visit so you can see what happens and in what order.

Stage What happens Note
Shut off utilities Water, power, or gas is turned off Gas leaks: leave and call
Drain old tank Old tank is emptied Needs a floor drain or bucket
Remove old unit Old unit is disconnected and removed Tank swaps are usually quicker
Set new unit New unit is placed in position Check access and doorways beforehand
Connect and vent Water, gas or electric, and venting connected Tankless may need new lines or venting
Restore and test Utilities restored, leaks and operation checked Done before the crew leaves
Walkthrough Installer explains the unit and maintenance Ask questions before they leave

Water Heater Replacement Questions to Ask Your Installer

Asking the right questions before the appointment helps you avoid surprises on installation day. The list below covers the practical items, permits, scope, disposal, and access, that are easy to overlook until the crew is already at the door.

Permits, code, and inspection planning

Before work begins, confirm:

  • Who pulls the permit. In many areas the licensed installer is responsible for obtaining the permit; confirm this in writing so it is not left to chance.
  • What the permit covers. A permit may cover the unit replacement, gas line work, venting, and electrical changes, or only part of the job. Ask which items are included.
  • Whether an inspection is required. Many jurisdictions require a post-installation inspection before the unit is considered complete. Ask who schedules it and what the homeowner needs to provide access for.
  • What code requirements apply to your home. Venting, expansion tanks, drip legs, seismic strapping, and pan/drain requirements vary. Your installer should be able to explain which apply to your unit and location.
  • What happens if the inspection finds an issue. Confirm who is responsible for corrections and whether that work is included in the scope.
Pro Tip
Ask for the permit and inspection details in writing before the appointment. A clear scope that names the permit, the inspection, and any code upgrades prevents the most common post-installation disputes.

Scope, disposal, and access questions

  • What type and size of unit do you recommend for my household, and why?
  • Does the new unit need a new gas line, venting, or electrical circuit, and is that included in the scope?
  • Will you remove and dispose of the old unit, and is disposal included?
  • How will the crew access the installation area, and what do you need me to clear beforehand?
  • How long will the installation take, and how long will hot water be unavailable?
  • What warranty covers the unit and the labor, and what voids it?
  • What maintenance should I do to keep the new unit running well?

Installation-day logistics

A few practical confirmations make the day go smoother:

  • Parking and access. Confirm where the crew can park and the route from the door to the unit. Tight stairs, narrow hallways, and basement turns can slow a tank move.
  • Floor and surface protection. Ask whether the crew brings floor protection or whether you should clear and cover the path yourself.
  • Pets and children. Plan to keep pets and children away from the work area for the duration.
  • Utilities. Confirm what the installer needs shut off and whether they will handle it or expect you to.
  • Water and power interruptions. Plan for hot water to be off for part of the day and for the work area to be noisy and dusty.

Get clear answers in writing.

Booking Your Water Heater Replacement With VanDerBosch Plumbing

VanDerBosch Plumbing Inc. provides water heater repair and installation services. If you are ready to replace your unit, you can review our Water Heater Repair and Installation services.

If your current unit is older, leaking, or producing inconsistent hot water, you may be weighing repair against replacement. Our water heater repair and replacement guide walks through the decision. For a leak at the base of the tank, our guide to bottom leaks explains the common causes and when to call a professional.

When you are ready to schedule, call VanDerBosch Plumbing Inc. You can also review water heater installation steps and scheduling details before you book.

Frequently Asked Questions

Is it easy to install a water heater?

Water heater installation can involve water, gas, venting, and electrical connections. For help with water heater installation, contact a professional.

Do I need to turn off the water before a water heater is installed?

The water supply needs to be shut off before the water heater is disconnected. Because installation can involve gas or electrical equipment, have a professional handle the work.

What should I clear before a water heater installation?

Clear the path from the entry door to the installation area, along with the floor space around the unit. Remove stored boxes, laundry, tools, and anything stacked near the water heater.

What is the average lifespan of a water heater?

A water heater’s service life depends on its condition and use. When deciding between repair and replacement, consider its age, the severity of the problem, and whether issues keep recurring. A professional can inspect the unit and discuss the appropriate service.

How to Identify Main Sewer Line Failure in Apartments

Last Updated: October 25, 2026

Quick Summary

Main sewer line failure apartments occurs when a shared central line serving multiple units becomes blocked or damaged, disrupting wastewater flow for all residents at once. Common causes include tree root intrusion, grease and debris accumulation from multiple kitchens, pipe deterioration from age, and ground movement that cracks or misaligns pipes.

  • Multiple drains backing up simultaneously across different units and floors is the clearest sign of a shared main line problem.
  • Tree roots, grease buildup, flushed items like wipes and paper towels, and aged pipe materials are the primary causes of blockages.
  • A sewer camera inspection can determine whether the problem is in one unit’s branch line or in the shared main line serving the building.
  • Responsibility for repair typically falls to the building owner or association for the main line, though exact boundaries depend on lease terms and local law.
  • Stop water use in affected fixtures and contact a licensed plumber immediately if sewage is actively backing up into occupied units or pooling near electrical or mechanical equipment.

Table of Contents

Why Main Sewer Line Failure Happens in Apartments

Main sewer line failure apartments differs sharply from single-family homes: one failure disrupts multiple residents and creates shared responsibility issues that complicate diagnosis and repair. Recognizing warning signs early lets property managers and tenants act before a backup becomes an emergency.

Apartment sewer systems may have multiple units funneling wastewater through a shared main line.

Shared Plumbing Systems and Concentrated Stress

Apartment buildings use a centralized design where all units connect to one main sewer line that exits the building.

A single-family home and a multi-unit building can have different patterns of fixture use.

The main line may collect wastewater and debris from kitchen drains, bathrooms, and laundry.

Age and Material Deterioration

Sewer pipe materials can deteriorate over time:

  • Clay pipes crack as soil shifts and ground freezes and thaws
  • Cast iron pipes corrode from the inside out and become brittle
  • Concrete sewer mains develop cracks and lose structural integrity

Age is one factor to consider when assessing a main sewer line.

Common Causes of Apartment Sewer Line Blockage

Knowing what causes blockages helps property managers prevent them and respond quickly when they occur.

Tree Root Intrusion

Tree roots seek moisture and nutrients and are drawn to wastewater flowing through underground pipes. Roots enter through cracks, joints, and small gaps in older pipe, then grow until they block the line. Watch for large trees on or near the building, including trees on adjacent properties whose roots extend under it.

Grease, Debris, and Foreign Objects

Grease from multiple kitchen drains cools and solidifies in the main line, coating pipes and trapping debris. Residents also flush items that shouldn’t go down: “flushable” wipes (which don’t break down), paper towels, feminine hygiene products, dental floss, food scraps, and coffee grounds. Across dozens of units, those habits compound quickly into major blockages.

Ground Movement and Pipe Misalignment

Ground movement can crack or misalign sewer pipes. Misaligned pipes may create low spots where wastewater and solids collect.

Recognizing Sewer Line Warning Signs

Early warning signs let property managers schedule an inspection before an emergency. A single sign may point to one unit’s drain, but several together suggest a building-wide problem.

Multiple Drains Backing Up

The clearest sign of main sewer line failure apartments is multiple drains backing up at once. Watch for:

  • Multiple bathrooms backing up simultaneously
  • Water pooling in lowest-level drains or fixtures
  • Sewage appearing in basement or floor drains

When drains in different units fail together, the problem may be in a shared line. A branch-line clog may affect only the fixtures it serves.

Slow Drains and Recurring Clogs

Slow drains throughout the building, especially on lower floors, suggest a partial main-line blockage. Recurring clogs are another red flag. If a drain clogs again after being cleared, the cause may require further diagnosis. When this pattern appears across multiple units, a professional sewer camera inspection may help assess the line.

Sewage Odors and Gurgling Sounds

Foul odors around the building exterior, in the basement, or near the main cleanout can have several causes and warrant professional assessment. Gurgling can occur when air moves through plumbing fixtures as water drains. These signs may occur before a visible backup.

Using Sewer Camera Inspection to Diagnose Problems

Warning signs can indicate a problem; a camera inspection can help assess the pipe’s condition and locate an issue. In an apartment building, determining whether the problem is in one unit’s branch line or a shared stack or main can help guide the response.

Building-Wide Main Failure vs. Unit-Level Clog

The pattern of symptoms across floors, fixtures, and units can help form a working hypothesis before anyone opens a cleanout.

Pattern More likely a unit-level clog More likely a shared stack or main issue
Which fixtures One toilet, sink, or shower Multiple fixtures across several units
Which floors One unit, any floor Lowest floors first, then spreading upward
Timing Isolated, one-time Recurring, often at peak-use hours
Basement or floor drains Unaffected Backing up or gurgling
Cleanout Dry Overflowing or under pressure
Odor Localized to one fixture Building-wide or near the main cleanout

A single slow sink may be a local clog. Toilets gurgling on upper floors while the basement floor drain backs up may point to a shared-line issue.

A Practical Troubleshooting Workflow

For property managers and building staff, a short, repeatable sequence keeps a bad situation from getting worse:

  1. Stop risky water use. Ask residents on affected floors to avoid flushing, dishwashers, and laundry until the line is assessed; continued use can push sewage into more units.
  2. Record the symptoms. Note which units, fixtures, floors, and times. A simple log is more useful to a plumber than a verbal summary.
  3. Check the main cleanout. If it’s accessible and safe to observe, note whether it is dry, slow, or overflowing. Do not open a cleanout under pressure or attempt to rod it.
  4. Isolate the affected zone. If the building has sectional valves or multiple stacks, identify which stack or zone is involved so the plumber can focus the inspection.
  5. Call for professional diagnosis. A camera inspection can help assess the cause and location of a problem, including whether a section may be collapsed or misaligned.
Pro Tip
Photograph or video the symptoms, standing water, backed-up floor drains, gurgling fixtures, before cleanup begins. Those images help the plumber and support any later responsibility or insurance discussion.

What a Camera Inspection Reveals

A sewer camera inspection can help assess the pipe interior. For an apartment building, it may help determine:

  • Whether the blockage is in a unit branch, a stack, or the main.
  • Whether the cause is grease, roots, debris, a broken section, a sag, or misalignment.
  • The approximate location and depth, so excavation or repair can be targeted.
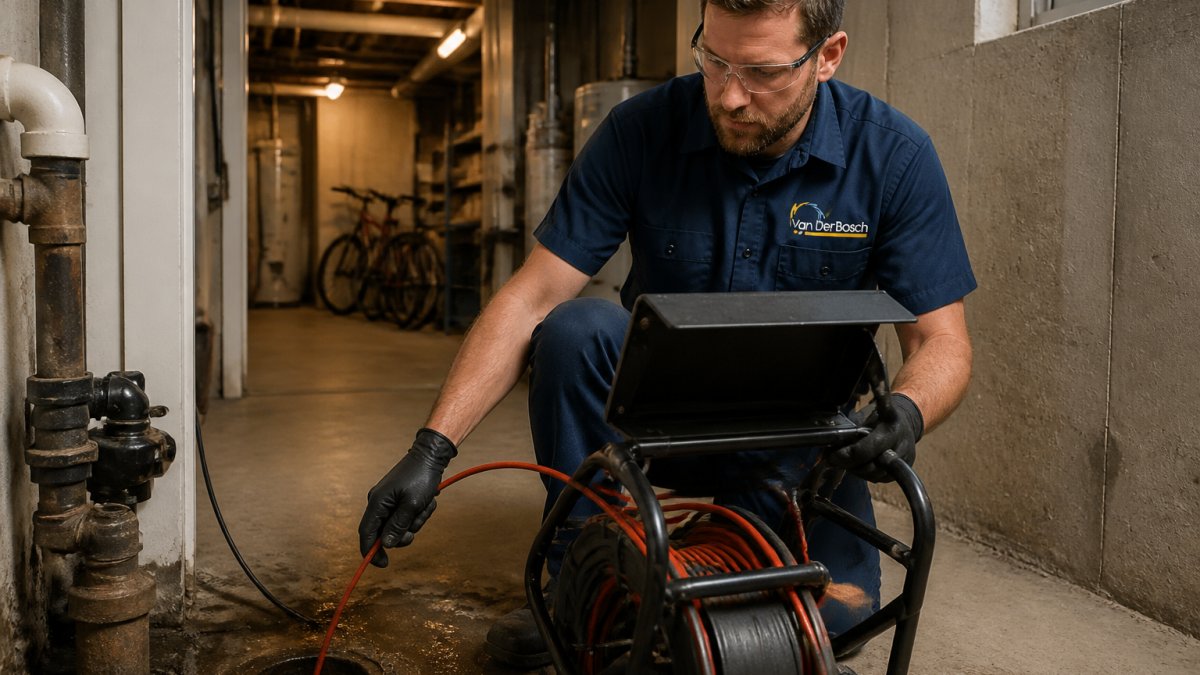
Plumber using a sewer camera to diagnose a main sewer line failure in an apartment building basement

Why the Distinction Changes the Response

If the problem is a unit-level clog, the response is usually a drain cleaning call for that unit. If the problem is in a shared stack or main, the response is a building-level service call that may involve hydro jetting services to clear grease and debris, root cutting, or a repair if the pipe itself has failed.

Book a Visit →

The Drain Camera Inspection Process Explained covers how the inspection is performed and what to expect during the visit.

When to Escalate Immediately

Some situations should not wait for a scheduled inspection:

  • Sewage is actively backing up into occupied units.
  • Water is pooling near electrical panels, boilers, or water heaters.
  • The cleanout is overflowing and cannot be controlled.

In those cases, isolate the affected area, keep residents away from standing sewage, and contact a licensed plumbing professional right away. Sewage exposure carries health risks, and cleanup of an affected unit is a separate step from clearing the line.

Apartment-Specific Responsibility and Coordination

In a single-family home, one owner coordinates the repair. In a multi-unit building, a main sewer line failure usually involves the building owner, the property manager, individual unit owners in a condo or co-op, tenants, and sometimes an association board. Plumbing for Multi-Unit Buildings: A Complete Guide explains how plumbing systems work in multi-unit buildings and clarifies the responsibilities that apply to shared infrastructure.

How Responsibility Usually Breaks Down

Responsibility generally follows the physical location of the failed pipe, but the exact boundaries depend on the lease, the condo declaration or association bylaws, and applicable state and local law. A plumber can identify where the problem is; only the building’s documents and legal counsel can confirm who pays.

A common pattern:

  • The building main, from the foundation or lowest cleanout to the municipal sewer connection, is typically common-area infrastructure and the owner’s or association’s responsibility.
  • Vertical stacks and horizontal branch lines serving more than one unit are usually common elements, even inside a single unit’s wall or ceiling.
  • Branch lines and fixtures serving only one unit are often the unit owner’s or tenant’s responsibility, but this varies widely.
Watch Out
Do not assume the split based on where water appears. Sewage backing up into a first-floor unit is frequently caused by a blockage in a shared line downstream, which means the visible mess is in one unit while the failure is in common infrastructure. Confirm the location with a camera inspection before assigning responsibility.

Coordinating Access, Notice, and Communication

A main line repair may require access to common areas, basements, mechanical rooms, or individual units, so access may need to be coordinated. A practical sequence:

  1. Confirm the scope first. Have the line inspected and the failure located before notifying residents, so the notice describes the actual work rather than a guess.
  2. Identify every affected unit. A camera inspection and a walkthrough of low-floor fixtures may help identify which units could be affected and where access may be needed.
  3. Give written notice. State the dates, hours, unavailable fixtures, and whether water will be shut off building-wide or only in sections.
  4. Designate a single point of contact. One coordinator fielding questions prevents conflicting instructions to residents and the plumbing crew.
  5. Document everything. Keep the inspection report, photos, invoices, and resident notices together. If responsibility is later disputed, that file is the record.

What Tenants and Unit Owners Should Do

If you rent or own a unit and sewage is backing up, the safe steps are limited:

  • Stop using water in the affected fixtures, and avoid flushing until the line is cleared.
  • Notify the building manager or landlord immediately, in writing, and note the time.
  • Warn neighbors on lower floors, since a shared-line blockage often shows up there next.

Avoid attempting to snake or chemically treat a shared main line.

Where the Ambiguity Usually Sits

The genuinely contested cases tend to be:

  • A branch line serving one unit but running through a common wall.
  • A blockage caused by one tenant that backs up into several other units.
  • A failed section under a slab or parking area serving multiple buildings on one parcel.

In each case, a plumbing assessment can help establish the condition and location. The building’s governing documents and legal counsel can help determine responsibility.

When to Call for Professional Sewer Line Repair

Main sewer line problems may require professional diagnosis and repair. Avoid attempting to clear a shared main line yourself.

Property managers should contact a licensed plumber when:

  • Multiple units report slow drains or backups simultaneously
  • Sewage odors appear around the building exterior or basement
  • Water pools in basement floor drains

Professional plumbers use specialized equipment to clear blockages, repair cracks, or replace failed sections. Main Sewer Line Repair & Replacement Services in Chicago, Illinois covers repair and replacement options available for apartment buildings. Methods include hydro jetting services for blockage removal and trenchless repair techniques for cracks and breaks.

VanDerBosch Plumbing Inc. provides plumbing, sewer, and drain solutions in the Chicagoland area.

Schedule Your Sewer Inspection Today

When multiple drains in your apartment building show warning signs, professional diagnosis prevents small problems from becoming emergencies.

If you manage a property in the Chicagoland area and suspect a sewer or drain problem, contact VanDerBosch Plumbing Inc. to discuss plumbing service.

We’re available seven days a week. Call VanDerBosch Plumbing Inc. today to discuss your plumbing needs.

Frequently Asked Questions

What are the signs of a main sewer line blockage in an apartment?

Multiple drains backing up simultaneously can indicate a problem in a shared sewer line, though symptoms alone do not confirm the cause. Other signs may include slow drains throughout the building, gurgling sounds from toilets or drains, sewage odors near plumbing fixtures or in the basement, and standing water in lower-level units. If you see these signs, seek professional assessment, especially if sewage is backing up into living spaces.

Can a sewer camera inspection identify the cause of a sewer line failure?

A sewer camera inspection can help assess the pipe interior and may reveal issues such as root intrusion, cracks, debris, or misalignment. The findings may help inform whether further assessment or repair is needed. In apartment buildings, an inspection may help locate whether an issue is in a shared line or a branch line.

Who is responsible for a sewer line problem in an apartment building?

Responsibility depends on the building’s governing documents and the location of the problem. Leases, property agreements, and applicable rules may affect who is responsible. Property managers can review the relevant documents and arrange a plumbing assessment to help locate the issue. A camera inspection may help assess the pipe, but responsibility should be determined from the applicable documents and circumstances.

Why are multiple drains backing up in an apartment at the same time?

When multiple drains back up simultaneously in different units, a shared line may be involved, but symptoms alone cannot confirm the cause. A blockage or failure in a shared line can affect connected fixtures, while a single-unit clog may be limited to that unit. If sewage is backing up, keep people away from it and seek professional help promptly.


Main sewer line failure in apartments creates disruption across entire buildings, but early detection through professional inspection prevents emergencies and keeps residents’ plumbing functioning reliably. Understanding the causes and warning signs helps property managers respond quickly when problems emerge.

Which Water Heater Works Best for a Large Family?

Last Updated: October 24, 2026

Quick Summary

The best water heater large families need matches peak-hour demand and recovery rate, not tank size alone. A family of five with overlapping showers and laundry typically requires a 75-80 gallon tank with strong recovery, or a properly sized tankless system, to avoid running out of hot water during morning rush.

  • Peak-hour demand for a family of five often reaches 70-90 gallons when two showers overlap with laundry and dishwasher use.
  • First-hour rating (FHR) predicts real performance better than tank capacity; compare FHR across models rather than gallon labels.
  • Gas tanks recover faster than electric tanks, making them better suited to concentrated morning demand in large households.
  • Tankless systems suit large families only if flow rate capacity is adequate and home infrastructure supports the fuel and electrical requirements.
  • Heat pump water heaters recover slowly and work best for smaller households or homes with moderate climates and spread-out demand.

Table of Contents

Understanding Water Heater Size for a Family of Five

A water heater large families need must handle peak-hour demand when multiple showers, laundry, and dishes run simultaneously.

At VanDerBosch Plumbing Inc., we help homeowners choose the right water heater by first understanding their actual hot-water demand.

Calculating Peak-Hour Demand

Peak-hour demand is the total hot water your household consumes during its busiest hour, for a family of five, usually the morning, when showers, handwashing, and laundry overlap.

To estimate peak-hour demand, add up the hot-water requirements for each activity:

  • Shower: 2.5 gallons per minute (GPM) for 10 minutes = 25 gallons
  • Washing machine: 40 gallons per load
  • Dishwasher: 27 gallons per cycle

Sequential showers plus one load of laundry during peak hour may require 40-50 gallons available immediately. Two simultaneous showers with laundry pushes demand past 70 gallons.

Tank Capacity vs. Simultaneous Use

Tank capacity alone doesn’t tell the whole story. A 50-gallon tank delivers 50 gallons initially, then must reheat before supplying more, which is where recovery rate matters.

If peak-hour demand exceeds tank capacity, you’ll run out of hot water mid-shower. A family of five often needs a larger tank (75-80 gallons) or a unit with strong recovery capability, the ability to reheat quickly during high demand.


Tank vs. Tankless Water Heater: Which Fits Large Households

Families choosing between tank and tankless systems face different trade-offs. Tank water heaters store and maintain hot water continuously. Tankless units heat water on demand but may struggle if multiple fixtures draw hot water simultaneously.

Storage Tank Systems for Predictable Demand

A traditional tank water heater keeps a reservoir of hot water ready at all times. For families with predictable peak-hour patterns, it’s reliable and straightforward: you know how much hot water is available.

Tank systems handle simultaneous demand without hesitation, two showers, a washing machine, and a dishwasher at once is fine. Professional water heater installation ensures the tank is sized correctly and positioned for efficient distribution. The trade-off is continuous heating, even during off-peak hours.

For most families of five, a 75-80 gallon tank balances capacity with efficiency. Larger tanks (100+ gallons) provide extra cushion but consume more energy maintaining standby heat. Water heater repair and installation ensures the tank is sized correctly and positioned for efficient distribution.

Tankless Systems for Continuous Supply

Tankless water heaters heat water only when you turn on a tap, eliminating standby energy loss. They’re compact and efficient, and supply hot water continuously as long as flow rates stay within capacity.

The challenge for large families is flow rate. Most tankless units deliver 3-5 GPM.

Tankless systems suit large families with upgraded infrastructure or who can stagger hot-water use. Review top tankless water heater options to compare models and their suitability for large households. Tankless water heater installation can help you determine whether your home’s gas or electrical capacity supports one.


Water Heater Recovery Rate and First-Hour Rating Explained

Recovery rate and first-hour rating (FHR) are the two numbers that determine whether a large family actually gets hot water during the morning rush, not the tank size printed on the label. A 50-gallon tank and a 75-gallon tank can deliver the same first-hour output if the smaller unit recovers faster.

What Recovery Rate Actually Measures

Recovery rate is how many gallons the heater can raise by a set temperature rise in one hour.

Recovery rate depends on three things:

  • Heat input, the burner’s BTU rating or the element wattage
  • Tank size, more stored water means more thermal mass to reheat
  • Temperature rise, the gap between incoming cold water and the setpoint

That last factor is the one large families overlook. Incoming water is colder in winter, so the same heater recovers more slowly in January than in July, a unit that keeps up in mild weather can fall behind during a cold snap.

How First-Hour Rating Is Calculated

FHR combines stored capacity with one hour of recovery. The simplified relationship is:

FHR ≈ tank capacity × (usable fraction) + recovery rate for one hour

Most tanks aren’t drawn down to zero, the dip tube and outlet sit above the bottom, so usable capacity is a portion of the nominal size.

Manufacturers publish FHR on the yellow EnergyGuide label and in the spec sheet. When you compare models, compare FHR, not tank gallons.

Sizing FHR to a Large Family’s Peak Hour

Start with the fixtures that run at the same time during your busiest hour, then add their hot-water draws:

Activity

Typical hot-water draw

Shower (10 min)

~20-25 gallons

Washing machine load

~30-40 gallons

Dishwasher cycle

~20-27 gallons

Bathroom sink (5 min)

~5 gallons

A family of five where two people shower back-to-back, one load of laundry runs, and the dishwasher cycles can easily land in the 70-90 gallon range for that hour. If two showers overlap with laundry, the number climbs higher.

Pro TipAdd up your busiest hour honestly, including the second shower that starts before the first one finishes. That overlap is what separates a heater that keeps up from one that quits halfway through.

What FHR to Look For

  • Moderate overlap (one shower at a time, laundry staggered): an FHR in the 60s may be enough.
  • Two showers plus laundry in the same hour: target an FHR in the 70s or higher.
  • Three or more simultaneous draws: look at high-recovery gas tanks or a properly sized tankless system, and confirm the fuel and venting can support it.

Gas tanks generally reach higher FHR for the same footprint because of faster recovery. Electric tanks can work for large families when demand is spread out, but they recover more slowly and may need a larger tank to hit the same FHR.

Book a Visit →

Why This Matters More Than Tank Size

A 75-gallon tank with weak recovery can still run cold; a 50-gallon gas tank with strong recovery may never run short. FHR predicts real-world performance, so bring it to a professional water heater consultation and match the unit to your actual peak hour rather than a rule of thumb.

Heat Pump Water Heater Pros and Cons for Large Families

Heat pump water heaters extract warmth from surrounding air and transfer it to the water, using far less energy than electric resistance heating.

Heat pump units excel at efficiency and low operating costs over time, but work best where air temperature stays moderate year-round.

Recovery rate is the bigger issue.

For large families in cold climates, a traditional gas or electric tank remains the more practical choice.


Energy Efficiency and Operating Costs Over Time

Operating costs depend on fuel type, recovery rate, and how much hot water your family uses. Gas units typically cost less to operate because natural gas is cheaper per BTU, while electric units have lower upfront costs and suit homes without gas service.

A family of five using 80-100 gallons daily will see meaningful differences in annual operating costs between fuel types and efficiency levels. Learn how much a new water heater costs and what factors affect pricing for your home. More efficient units, through better insulation, higher recovery rates, or advanced technology, reduce monthly utility bills. Follow essential maintenance steps to boost efficiency, prevent leaks, and extend your unit’s lifespan. Maintenance steps that improve efficiency and extend your unit’s lifespan also reduce operating costs by keeping the system running at peak performance.


Fuel Type and Installation Considerations

Before comparing models, confirm what your home can actually support. The right water heater for a large family fits your existing gas, electrical, venting, and space constraints, or justifies the upgrade costs you’re willing to absorb. This is where large-family projects most often stall.

Gas vs. Electric: The Practical Trade-offs

Gas water heaters recover faster and generally cost less to operate per unit of heat delivered, making them a strong fit for concentrated morning demand.

For a family of five with overlapping showers and laundry, gas usually wins on recovery. Electric can work when demand is spread across the day or when the home has no gas service.

Electrical Service: The Hidden Constraint

Electric tank water heaters typically run on a dedicated 240-volt circuit. Electric tankless units draw much more power and often require upgraded service and additional circuits. Before choosing an electric tankless unit for a large family, have an electrician confirm the panel has capacity for the added load, a common reason a planned tankless swap turns into a larger project.

Watch OutDo not attempt to upgrade electrical service or wiring yourself. Panel capacity, circuit sizing, and grounding are licensed electrical work. Have the service evaluated before committing to an electric tankless unit.

Gas Line Capacity

A gas tank water heater needs a gas line sized for its input. High-capacity tanks and gas tankless units often need a larger line or dedicated run, so confirm this during the site visit, not after delivery. If your home’s existing gas line is undersized or damaged, gas line repair and installation may be necessary before a new water heater can be safely connected.

Venting: What Your Home Allows

Gas water heaters must vent combustion gases safely. The common configurations are:

  • Atmospheric (natural draft): relies on a vertical flue; common in older homes but sensitive to backdrafting and shared chimney conditions.
  • Power vent: uses a fan to push exhaust horizontally or vertically; more flexible placement but needs electricity.
  • Direct vent: pulls combustion air from outside and vents outside; suited to tighter spaces and some basement installations.

Tankless gas units have their own venting rules, and some homes lack the flue or wall path to support them without modification. Confirm venting feasibility before selecting a model.

Space and Clearance

Tank units need floor space plus clearance for combustion air and service access. Tankless units are wall-mounted and free up floor space but still need clearance and, for condensing models, a condensate drain. In basements and utility closets, clearance and air supply often decide which type fits.

Retrofit Complexity: What Drives the Project

The scope of an installation depends on:

  • Whether fuel type is changing (gas to electric or the reverse)
  • Whether gas line or electrical service needs upgrading
  • Whether venting must be added or rerouted

A like-for-like tank replacement is usually straightforward. A switch from tank to tankless, or from electric to gas, is a larger project with more variables. Water heater repair and installation starts with an on-site assessment so the recommendation matches what your home can support, and so the unit you buy is one that will actually deliver the hot water your family needs.

Warranty, Reliability, and Long-Term Performance

Water heater warranties vary but typically cover the tank for 6-12 years and parts for 1-3 years. A longer warranty suggests the manufacturer expects a longer life, but warranty length alone doesn’t guarantee reliability.

Tank lifespan depends on water quality, maintenance, and operating conditions. Hard water, corrosive minerals, and high temperature settings shorten tank life. Regular maintenance, flushing sediment, checking the anode rod, extends performance and reliability.

Gas water heaters generally last 8-12 years. Electric units often reach 10-15 years. Tankless units, if properly maintained, can last 15-20 years.


Schedule Your Water Heater Installation or Upgrade

Choosing the right water heater for a family of five means matching capacity, recovery rate, and fuel type to your actual peak-hour demand and home infrastructure. Most families benefit from a system that matches their peak-hour demand and home infrastructure.

VanDerBosch Plumbing Inc. helps families throughout the area select and install water heaters that deliver reliable hot water without waste. Our licensed technicians understand the demands of large households and can recommend the right system for your home’s setup.

Frequently Asked Questions

How many gallons should a water heater hold for a family of five?

A family of five typically needs a 50-gallon tank water heater or larger, depending on peak-hour demand. If multiple people shower, do laundry, and run the dishwasher simultaneously, a 75-gallon tank or a tankless system may be necessary. The right size depends on your first-hour rating and recovery rate—factors a professional can assess during a consultation.

Is a tank or tankless water heater better for a large family?

Tank water heaters are reliable for large families with predictable demand patterns and lower upfront installation costs. Tankless systems provide unlimited hot water and occupy less space, but require higher flow rates and may need upgrades to your gas line or electrical capacity. Large families often benefit from a tank heater unless simultaneous high-demand use is constant.

What does water heater recovery rate mean, and why does it matter?

Recovery rate is how quickly a water heater reheats water after it’s been used. A higher recovery rate means the tank refills with hot water faster, which is critical for large families. If your recovery rate is too low and demand is high, you may run out of hot water during peak morning or evening hours.

Can I install a water heater myself?

Water heater installation involves gas lines, electrical connections, venting, and pressure relief systems—all of which require professional expertise and local code compliance. Improper installation can lead to safety hazards, reduced efficiency, and voided warranties. A licensed plumber ensures the job is done correctly and safely.

Commercial Plumbing Contractors for Restaurants

Last Updated: October 23, 2026

Quick Summary

Commercial plumbing contractors restaurants specialize in kitchen drainage, grease management, high-volume water systems, and code compliance that standard residential plumbers cannot handle. They understand grease interceptors, health code requirements, and how to schedule maintenance around service hours to prevent kitchen shutdowns.

  • Grease interceptors require cleaning every 1 to 3 months depending on kitchen volume to prevent drain backups.
  • Verify any contractor’s license, insurance certificate, and restaurant references before hiring.
  • Hydro-jetting removes grease buildup more thoroughly than standard drain cleaning and lasts longer in commercial kitchens.
  • Scheduled maintenance prevents emergency repairs that disrupt service and cost more than planned work.
  • Ask contractors specific questions about grease sizing, health code familiarity, backflow prevention, and gas line experience to confirm restaurant expertise.

Table of Contents

What Commercial Plumbing Contractors for Restaurants Actually Do

Restaurant plumbing faces far different demands than residential work: constant water use, grease buildup, high-temperature discharge, and drainage challenges that require specialized expertise from commercial plumbing contractors restaurants depend on.

Restaurant plumbing isn’t just about fixing leaks. A backed-up drain during service can shut down your kitchen, a water heater failure means no hot water for sanitizing, and gas line issues create serious safety hazards.

Commercial plumbing contractors for restaurants combine commercial code knowledge with high-volume kitchen experience.

Restaurant Plumbing Services You Need to Know About

Restaurant plumbing needs fall into three categories: drainage and grease management, hot water and heating systems, and construction or renovation work. Knowing what each service does helps you recognize when you need professional help.

Kitchen Drain Systems and Grease Trap Management

Restaurant kitchens send grease, food solids, and high volumes of water through drains constantly. Standard residential drain systems can’t handle this load.

A grease interceptor (also called a grease trap) captures grease before it enters the municipal sewer system and is required in most commercial kitchens.

Commercial plumbing contractors for restaurants treat grease management as a system, not a single component. Understanding the benefits of commercial plumbing maintenance contracts helps you see how scheduled service prevents the emergency calls that disrupt your kitchen.

Water Heaters and Hot Water Supply

Restaurants need reliable hot water for sanitizing dishes, cleaning equipment, and food prep. A residential water heater won’t meet a busy kitchen’s demand.

Tank water heaters store and maintain temperature constantly; they’re straightforward but require space and regular maintenance.

The right choice depends on peak demand, available space, and energy priorities. A commercial plumbing contractor evaluates your actual hot water usage to recommend equipment sized to your real load.

New Construction and Remodeling Plumbing

Building or remodeling a restaurant requires plumbing that complies with commercial building codes, including specific pipe sizing, backflow prevention, grease interceptor installation, and drainage designed for simultaneous fixture use.

A commercial plumbing contractor participates in planning, reviews architectural drawings, and coordinates with other trades (HVAC, electrical, gas). They pull permits, schedule inspections, and ensure the installation passes code review; mistakes here delay opening and create liability issues.

Building Your Commercial Plumber Hiring Checklist

Choosing a commercial plumbing contractor means evaluating a partner who will influence your operational reliability, regulatory compliance, and how quickly you can reopen after a failure. A contractor who is excellent on residential work can still be a poor fit for a commercial kitchen.

Licensing, Insurance, and Permits

A legitimate commercial plumbing contractor carries proper licensing for the state and jurisdiction where your restaurant operates.

Insurance is equally critical. Ask for a current certificate showing commercial general liability and workers’ compensation coverage, and confirm the limits suit a commercial project.

Permits matter more in commercial work. Most plumbing installations, gas line work, grease interceptor replacements, and water heater swaps require a permit, and inspections verify the work meets code.

Watch Out
If a contractor offers to do gas line work, water heater replacement, or grease interceptor installation without a permit, treat that as a disqualifying signal. Unpermitted commercial plumbing can void insurance coverage and complicate a future sale or lease renewal.

Restaurant-Specific Experience to Verify

General commercial experience is not the same as restaurant experience. Ask directly whether the contractor has worked in commercial kitchens, then verify with concrete questions:

  • Grease management. Can they size a grease interceptor to your fixture load and local code, coordinate with your grease hauler, and explain how interceptor cleaning intervals should be set for your volume?
  • Health-code familiarity. Do they understand how plumbing work interacts with local health department inspections, including hand-sink placement, indirect waste, and air-gap requirements?
  • Backflow prevention. Can they test and certify backflow prevention assemblies where required, and do they know your water utility’s testing schedule?

A contractor who answers these questions specifically, rather than in generalities, is more likely to anticipate problems before they become emergencies. Use a detailed guide to questions to ask before hiring a plumber to ensure you’re evaluating the right contractor for your restaurant’s needs.

Response Time and Emergency Availability

Restaurants operate on schedules, and a backed-up drain during Friday dinner service is a business emergency. Before you hire, ask directly: What is your actual response time for emergency calls?

Some contractors offer maintenance agreements that prioritize your calls; others publish response windows for emergency service. Understand what “available” actually means before you need it, and ask for the response commitment in writing.

Track Record with Restaurant Projects

Ask for references from other restaurants the contractor has served, and call them. Ask concrete questions: Did they show up when promised? Did they understand grease interceptor maintenance and health-code requirements?

Look for contractors who specialize in commercial work or have meaningful restaurant experience. If a contractor can’t provide restaurant references, that’s useful information too.

Key Takeaway
A restaurant-ready plumbing contractor should be able to show you a current license, a certificate of insurance, restaurant references, and a written response-time commitment. If any of those is missing, keep looking.

Restaurant Plumbing Inspection: What to Expect

A professional plumbing inspection for a commercial kitchen goes beyond a visual walk-through. The contractor assesses your entire plumbing system to identify problems before they disrupt service.

Book a Visit →

Professional plumber in uniform inspecting commercial kitchen sink drainage and connections under the counter with tools visible nearby, bright kitchen lighting

The inspection produces a report that prioritizes issues by urgency.

Commercial Drain Cleaning for Restaurant Kitchens

Restaurant drains clog for reasons that differ from residential drains. Standard drain cleaning often doesn’t work because the blockage isn’t just hair or soap, it’s accumulated grease, food solids, and mineral deposits that require specialized removal.

Why Standard Drain Cleaning Isn’t Enough

A plumbing snake or basic drain cleaning tool can break through a blockage temporarily, but it doesn’t remove the underlying buildup. In a restaurant kitchen, the problem returns quickly because grease continues flowing into the drain.

Grease buildup also damages pipes over time. It sticks to pipe walls, traps food particles, and creates an environment where bacteria and odors develop. A temporary fix treats the symptom, not the cause.

Hydro-Jetting and Preventive Maintenance

Hydro-jetting uses high-pressure water to scour pipe walls clean, removing grease, mineral deposits, and buildup that standard tools miss. It’s more thorough and longer-lasting than conventional drain cleaning, especially in commercial kitchens with constant heavy grease use.

Many restaurants benefit from scheduled hydro-jetting as preventive maintenance. A professional hydro-jetting service performed quarterly or semi-annually removes buildup before it causes blockages, costs less than emergency drain cleaning, and keeps your kitchen operational.

Drain Cleaning Method Best For Frequency Result
Standard Snake/Auger Minor clogs in residential lines As-needed Temporary relief, blockage may return
Hydro-Jetting Heavy grease buildup, commercial kitchens Quarterly to semi-annually Deep cleaning, longer-lasting results
Sewer Camera Inspection Diagnosing recurring problems, underground lines Before major work Identifies root cause, guides repair decisions

Evaluating Cost and Getting Transparent Quotes

Cost varies based on the scope of work, your kitchen’s complexity, and the contractor’s experience level. Rather than comparing single numbers, evaluate what each quote includes and whether it lets you plan. The framework below helps you compare quotes on equal footing and avoid two common budgeting mistakes: choosing the lowest number without reading the scope, and deferring maintenance until an emergency forces the work.

What a Transparent Quote Should Include

A transparent quote specifies the work, materials and equipment, labor approach, and contingencies if the contractor discovers additional problems once work begins. Ask each contractor to break the quote into the same categories so you can compare line by line:

  • Diagnosis and inspection. Is diagnostic time included, or billed separately?
  • Scope of work. Which fixtures, lines, or equipment are being repaired or replaced, and which are excluded?
  • Materials and equipment. Are grease interceptors, water heaters, backflow assemblies, and other equipment specified by model or capacity, or left open-ended?

A contractor who will not provide a detailed, itemized quote makes fair comparison impossible.

Planned Work vs. Emergency Repairs

Restaurant plumbing spending falls into two categories that should be budgeted separately.

Planned work includes scheduled maintenance, grease interceptor cleaning, hydro-jetting, water heater service, backflow testing, and small repairs identified during inspections. It can be scheduled during slower hours, compared across contractors, and budgeted in advance, almost always less disruptive and less expensive than the same work performed as an emergency.

Emergency repairs happen when a drain backs up during service, a water heater fails, or a gas line issue forces a shutdown.

Maintenance Contracts and Lifecycle Planning

Many commercial plumbing contractors offer maintenance agreements that bundle regular inspections, grease interceptor cleaning, drain maintenance, and priority emergency service.

When evaluating a maintenance agreement, ask what is included, how often each service occurs, what is excluded, and how priority response works.

Lifecycle planning matters as much as the contract itself. Water heaters, grease interceptors, and backflow assemblies have finite service lives, and replacing them on a planned schedule is usually less disruptive and less costly than replacing them after a failure.

Pro Tip
Ask each contractor to quote both a one-time repair and a maintenance agreement for the same issue. Comparing the two side by side shows you what the contractor believes will prevent the next failure, not just fix the current one.

Comparing Quotes Fairly

When you have two or three quotes in hand, compare them on scope, not just total. A lower quote that excludes permits, disposal, or equipment specification is not actually lower once those items are added. A higher quote that includes a maintenance plan, documented inspections, and a written response commitment may be the better value over a year of operation. Ask each contractor to explain any line item you do not understand, and do not sign until the scope, exclusions, and contingency process are clear in writing.

Why Operational Disruption Matters

A plumbing emergency during service hours costs revenue, frustrates customers, and stresses your staff. A commercial plumbing contractor understands this pressure and plans work to minimize disruption.

Preventive maintenance, scheduled during slower hours or closed periods, prevents emergencies. A commercial plumbing maintenance checklist helps you and your contractor identify what needs attention and when it can be handled without affecting service.

Some contractors offer after-hours or early-morning service windows specifically for restaurants.


Restaurant plumbing demands expertise beyond standard residential work. Commercial plumbing contractors for restaurants combine technical knowledge, code compliance experience, and practical understanding of kitchen operations.

Frequently Asked Questions

How do I choose a commercial plumber for a restaurant?

Look for a contractor with specific restaurant experience, active licensing and insurance, and a track record completing projects in commercial kitchens. Ask for references from other restaurant owners, verify they understand grease trap maintenance and code compliance, and confirm they can respond to emergencies without excessive downtime. Request a detailed quote that breaks down labor, materials, and any diagnostic fees so you know exactly what you’re paying for.

What restaurant plumbing services should I prioritize?

Prioritize grease trap cleaning and maintenance, kitchen drain cleaning, water heater repair and installation, and preventive inspections. Regular commercial drain cleaning prevents backups that shut down food prep areas. Grease trap management is mandatory under health codes and prevents sewer line damage. A contractor experienced in restaurant plumbing understands these compliance requirements and can schedule maintenance around your operating hours.

How often should restaurant plumbing be inspected?

Most restaurants benefit from quarterly inspections of grease traps, drains, and water systems. High-volume kitchens may need monthly checks. After any major equipment installation or remodeling, a full plumbing inspection ensures new lines are properly installed and integrated with existing systems. Regular inspections catch small problems before they become emergency shutdowns.

What causes recurring drain clogs in restaurant kitchens?

Grease and food debris accumulate in drain lines despite strainers, especially under high-volume conditions. Grease hardens as it cools and builds up on pipe walls, narrowing the passage for water and waste. Standard drain cleaning may clear the immediate clog but doesn’t remove hardened grease buildup. Commercial drain cleaning using hydro-jetting removes accumulated grease and buildup more effectively than conventional methods and extends the time between cleanings.

Why Your Water Heater Is Leaking From the Bottom

Table of Contents

Last Updated: October 21, 2026

Why Your Water Heater Is Leaking From the Bottom

Water pooling at the base of a tank is one of the clearest warning signs a water heater is failing. If you’re wondering why your water heater is leaking from the bottom, the leak usually comes from one of five places: the drain valve, the temperature-and-pressure relief valve, a loose plumbing connection, a corroded tank, or condensation that only looks like a leak.

Most guides treat every bottom leak as a dead tank. That’s not true. Some are minor fixes; others mean the tank is finished. Telling them apart decides whether you’re looking at a repair or a replacement.

Below, we’ll show you how to find the source, what each cause means, and when to call a professional plumber.

Watch Out
A leaking water heater can involve electrical connections, gas lines, or pressurized hot water. If water is near the electrical panel or you smell gas, stop and call a professional immediately. Do not open panels or touch gas fittings.

What to Do When a Water Heater Is Leaking

When a water heater is leaking, shut off the water supply and, if it’s safe, the power or gas, then contain the water and call a plumber. Water spreads fast and finds every crack in a basement floor.

Work through this in order:

  1. Shut off the cold water supply at the valve on the inlet pipe above the tank.
  2. Cut the power at the breaker for an electric unit, or set the gas valve to the off position. Do not relight anything yourself.
  3. Contain the water with towels, a bucket, or a wet vacuum, and move anything nearby off the floor.
  4. Photograph the scene for insurance before you clean up.
  5. Call a licensed plumber to diagnose the leak source.

If the water is rising fast or reaching outlets, treat it as an emergency and get help moving. For active leaks and burst pipe situations, professional burst pipe repair and leak detection service is available for this kind of call.

The U.S. Department of Energy water heating guidance is a solid reference for understanding how these systems are meant to operate and why safety shutoffs exist.

How to Identify the Source of the Leak

To find the source of a bottom leak, dry the base of the tank and the floor completely, then watch where moisture returns first.

Each leak point below has a distinct signature, and the location of the moisture usually points to the cause before anyone touches a wrench.

A homeowner kneeling beside a tank water heater in a basement, shining a flashlight on the base of the unit where water is pooling, with a towel and bucket nearby

Step 1: Dry Everything and Mark the Starting Point

Wipe the tank base, the drain valve spout, the relief valve discharge pipe, and the floor dry. Place a dry paper towel or a piece of cardboard under the tank and another under the relief valve discharge. Wait two to four hours, then check. The first spot to show moisture is your lead.

Step 2: Check the Drain Valve

Look at the spout at the bottom of the tank. A drip clinging to the spout, mineral crust around the threads, or a valve that feels loose when you touch the handle points to the drain valve. This is the most common bottom leak and usually the most fixable.

Step 3: Check the Temperature-and-Pressure Relief Valve

The T&P valve sits on the side or top of the tank and has a discharge pipe that runs down toward the floor. If the paper towel under the discharge pipe is wet, especially if the valve has recently opened, the leak is coming from the relief valve, not the tank. Water from this valve can mean excess pressure, a failing valve, or an overheating condition.

Step 4: Check the Inlet and Outlet Connections

Water from a loose fitting on top of the tank runs down the side and pools at the base, which makes it look like a bottom leak. Run a dry finger along the fittings and look for a wet trail on the tank shell above the puddle. Rust streaks that start high and run down are a strong clue.

Step 5: Inspect the Tank Seam and Shell

If the base is wet but the valve, relief pipe, and top connections are dry, the leak is likely coming through the tank itself. Look for rust streaks, bubbling paint, or a visible seam leak near the bottom of the shell. A leaking tank seam or pinhole in the shell cannot be patched reliably, this is the point where replacement becomes the conversation.

Condensation Versus a Persistent Leak

Not every wet floor is a leak. Condensation forms on a cold tank when warm, humid air touches it and dries up on its own; a real leak keeps coming back. Dry the area, wait a few hours, and check again, if moisture returns in the same spot, it’s a leak. This matters most in humid basements and summer months, when a cold tank and warm air can produce alarming moisture.

Pro Tip
If you can’t tell whether the moisture is condensation or a leak, dry the area and place a dry paper towel under the tank. A towel that stays dry rules out condensation; a towel that gets wet in the same spot points to a leak.

What the Leak Location Tells You

Where the moisture appears Likely cause What it usually means
Drain valve spout Worn seal or grit Repair or valve replacement
Relief valve discharge pipe Excess pressure or bad valve Diagnose pressure, replace valve
Top connections running down Loose fitting Tighten or reseal
Tank seam or shell Corrosion Replacement
Base wet, all fittings dry Condensation or tank failure Dry-test, then inspect tank

If you’ve worked through these steps and the source is still unclear, or if the leak is fast, near electrical components, or accompanied by a gas smell, stop and call a licensed plumber. For active leaks and burst pipe situations, our burst pipe repair and leak detection service is built for exactly this kind of call.

Water Heater Leaking From the Drain Valve

A water heater leaking from the drain valve is often the most fixable bottom leak. The valve sits at the lowest point of the tank, and it’s the first place water escapes when the seal wears out or grit gets trapped.

Common signs include:

  • A slow drip from the spout, even when the valve is closed.
  • A valve that won’t fully shut or feels loose.
  • Mineral buildup around the valve threads.

Sometimes a valve just needs tightening or flushing; other times it needs replacement. A plumber can tell you which quickly, and if the valve is the only issue, this is a repair, not a replacement.

Book a Visit →

Water Heater Leaking From the Pressure Relief Valve

A water heater leaking from the pressure relief valve usually points to excess pressure or a faulty valve, not a cracked tank. The temperature-and-pressure relief valve is a safety device.

Water from this valve can mean:

  • Excessive water pressure in the home’s supply.
  • A failing relief valve that won’t seat properly.
  • Overheating from a thermostat or heating element problem.

A relief valve that keeps discharging is a safety concern, not a nuisance. Don’t cap it or plug it. That valve is the last line of defense against a tank rupture.

Loose Connections, Tank Corrosion, and Tank Failure

Loose connections: The inlet and outlet fittings on top of the tank can loosen over time.

Tank corrosion and failure: Steel tanks have a glass lining and a sacrificial anode rod to fight rust. When that protection runs out, the steel rusts from the inside.

Here’s how to think about it:

Leak Location Likely Cause Typical Path
Drain valve Worn seal or grit Repair or valve replacement
Relief valve Excess pressure or bad valve Diagnose pressure, replace valve
Top connections Loose fitting Tighten or reseal
Tank seam or shell Corrosion Replacement

The CDC guidance on preventing water damage and mold is worth a read if a leak has been sitting for a while.

Pro Tip
Check your anode rod every few years. It’s the part that sacrifices itself to protect the tank, and replacing it early can extend the life of the whole unit.

Water Heater Repair or Replacement: How to Decide

The repair-or-replace decision comes down to where the leak is and the tank’s condition. A leak at a valve or fitting is a repair; a leak through the tank wall is a replacement. That simple rule holds up most of the time.

Use these factors to decide:

  • Leak location: valve or fitting means repair; tank seam or shell means replace.
  • Age of the unit: an older tank near the end of its service life makes repair harder to justify.
  • Repair history: repeated problems point toward replacement.

A Leak-Location Decision Framework

Use this framework to sort the situation before you call anyone:

Leak location Typical cause Repair reasonable? Replacement likely?
Drain valve Worn seal or grit Yes, valve repair or replacement is minor Only if the tank is otherwise failing
T&P relief valve Excess pressure or bad valve Yes, diagnose pressure and replace valve Only if the tank shows corrosion or age
Top connections Loose fitting Yes, tighten or reseal Rarely
Tank seam or shell Corrosion No, cannot be patched reliably Yes
Base wet, all fittings dry Condensation or tank failure Dry-test first If the tank is confirmed leaking

When Repair Makes Sense

A dripping drain valve, a relief valve that won’t seat, or a loose top fitting are all repairable without replacing the unit. If the tank is otherwise sound, no rust streaks, no bulging, no history of repeated leaks, repair is usually the reasonable path.

When Replacement Is the Better Call

A leak through the tank seam or shell is the end of the road for the unit. A rusted seam or pinhole can’t be patched reliably, and if the tank is also older, has a repair history, or shows rust streaks and a corroded base, replacement is usually the better long-term decision.

Questions to Ask Before You Decide

  • Where exactly is the leak coming from?
  • How old is the unit, and what is its repair history?
  • Is the tank itself corroded, or is the leak at a valve or fitting?

Don’t let anyone push replacement when a valve repair will do. And don’t sink money into a rusted tank that’s on its way out. A licensed plumber should give you an honest read on both.

If replacement is the right call, we install traditional tank and tankless water heater systems, and our water heater repair and installation service covers both diagnosis and replacement. For broader context on how these systems are rated, the ENERGY STAR water heater information explains efficiency standards in plain terms.

Frequently Asked Questions

Should I turn off my water heater if it is leaking?

Yes. Shut off the water supply to the heater and cut the power at the breaker for an electric unit, or set the gas valve to the off position for a gas unit. Turning it off limits further water damage and prevents the heating element or burner from running while the tank is compromised. Then call a licensed plumber to diagnose the leak. Do not attempt to repair gas valves, relief valves, or tank fittings yourself, since these involve pressurized systems and, on gas units, open flame.

Can a water heater leaking from the bottom be repaired, or does it need replacement?

It depends on where the water is coming from. A leak at the drain valve, a loose inlet or outlet connection, or a relief valve that is discharging can often be repaired by tightening or replacing the faulty part. A leak from the tank itself, especially one that shows rust or corrosion along the seam, usually means the tank has failed and replacement is the practical option. A plumber can confirm the source and give you repair or replacement guidance based on the tank’s condition and age.

Could water near the bottom of my water heater be condensation?

It can be, especially in humid basements or when the tank is first filled with cold water. Condensation usually appears as a light film of moisture that dries on its own. A persistent puddle that returns after you wipe it up points to an actual leak. To tell the difference, dry the area completely, wait a few hours without using hot water, and check again. If water returns, treat it as a leak and have it inspected.

When should I call a plumber for a leaking water heater?

Call a plumber as soon as you notice a leak you cannot trace to condensation, or any time water is pooling near the base of the unit. If the leak is active, shut off the water and power first, then call. Signs that need prompt professional attention include rust-colored water, a tank seam that is wet, a relief valve that keeps discharging, or a gas smell near the unit. A licensed plumber can diagnose the source and recommend water heater repair or replacement.

How to Maintain Your Water Heater in Winter: 7 Steps

Table of Contents

Last Updated: October 21, 2026

Start With a Water Heater Inspection Checklist

Learning how to maintain your water heater in winter starts with one habit: look before you touch. A water heater inspection checklist turns a vague worry about cold weather into a short, repeatable walkthrough you can finish in ten minutes.

The checklist below is built for a facility walkthrough, not a repair manual. It separates what staff can safely observe from what requires a licensed plumber, and it gives you a place to record readings so you can compare this month to last.

What to Check Before You Touch Anything

Safety comes first. Clear the area and know your limits.

  • Shut off power at the breaker before touching an electric unit
  • Set gas units to pilot or vacation mode before close inspection
  • Never open the TPR valve if it looks corroded or scaled

The Inspection Walkthrough

Work top to bottom, and write down what you see. A clipboard or phone note with the date, unit ID, and each reading is enough to start a maintenance log.

  1. Top fittings and nipples. Look for rust streaks, corrosion, or moisture where the hot and cold lines connect. A damp fitting that is dry an hour later may be a slow weep that only shows under heat.
  2. Tank body. Check for bulges, cracks, or weeping seams. Rust at a seam is a stop-and-call finding; rust on a fitting may be a replaceable part.
  3. TPR valve and discharge pipe. Confirm the valve has an unobstructed discharge pipe that runs to a safe drain or exterior. Do not test a valve that is corroded, scaled, or has not been exercised in years.
  4. Thermostat and gauge. Read the thermostat setting and note the gauge reading. A tank set near 120°F is a common starting point for most homes; a commercial kitchen or laundry may need a different target. Record the number rather than trusting the dial alone.
  5. Venting and exhaust path (gas units). Check that the flue is connected, sloped correctly, and free of dents or blockages. Look for soot, scorching, or a yellow burner flame, which point to a combustion problem rather than a maintenance task.
  6. Burner and combustion air (gas units). Confirm the burner compartment and air intake are not blocked by stored items or insulation. Blocking combustion air is a carbon monoxide hazard.
  7. Base and floor. Note any water on the floor near the base. A dry floor today does not rule out a slow leak that appears only during a heating cycle.
  8. Anode rod (tank units). If the rod is accessible and you are comfortable checking it, note its condition. A heavily consumed rod is a maintenance item for a plumber, not a same-day emergency.

Equipment-Type Variations

A single checklist does not fit every heater. Note the type on your log and adjust the walkthrough:

  • Gas storage tank: venting, burner flame, combustion air, and TPR discharge are the priority checks.
  • Electric storage tank: breaker, element condition, and thermostat readings matter more; there is no flue or burner to inspect.
  • Tankless: follow the manufacturer’s freeze guidance, check the condensate line on condensing models, and confirm the intake and exhaust are clear of snow and ice.

Documenting Findings

A checklist only earns its keep if you write down the results. A simple log with the date, unit ID, each reading, a photo of anything unusual, and a follow-up date turns a walkthrough into a maintenance record.

Watch Out
Never test a TPR valve that is corroded, scaled, or has not been exercised in years. A stuck valve can fail to reseat and release scalding water. If you are unsure of its condition, leave it alone and have a licensed plumber check it.

A homeowner in a basement utility room holding a flashlight and clipboard, inspecting the top connections of a tank water heater, with the floor dry and clear around the unit

Set the Right Water Heater Temperature Setting for Winter

The correct water heater temperature setting balances comfort, safety, and energy use. Many households run their tank hotter than needed, which wastes energy and raises scald risk.

Here is where winter changes the math:

  • Colder incoming water means the heater works harder to recover
  • A slightly higher setting can help if hot water runs out fast
  • Higher storage temperatures raise scalding risk at taps

That last point matters. Legionella bacteria thrive in lukewarm stored water, so a tank set too low can create a water-quality risk, especially in larger buildings with long pipe runs (the CDC). Property managers should treat this as a real decision, not a guess.

If you turn the temperature up for winter, test the water at the farthest tap before anyone showers. A thermometer reading at the tap tells you what people actually feel, not what the dial claims.

Add Water Heater Insulation in Winter Without Blocking Safety Devices

Water heater insulation in winter slows heat loss from the tank and the first few feet of hot pipe. It is one of the cheapest comfort upgrades available, and it matters most in cold basements and mechanical rooms.

Follow these rules:

  • Use a blanket rated for your tank type
  • Keep the thermostat and burner access clear
  • Never cover the TPR valve or its discharge pipe

For gas units, the burner compartment and air intake must stay open. Blocking combustion air is a carbon monoxide hazard, not a small mistake.

Signs a Water Heater Needs Repair (and When to Stop Troubleshooting)

The signs a water heater needs repair are usually obvious once you know what to look for. Catch them early and you may avoid a flooded basement in January. The harder question is not whether something is wrong, but whether you should keep troubleshooting, schedule a repair, or start planning for replacement.

Symptom Likely Cause What to Do
Rust streaks or weeping seams Tank corrosion Stop and call a pro; tank leaks rarely repair
Popping or rumbling Sediment buildup Schedule flushing and inspection
Lukewarm or short hot water Failing element, thermostat, or dip tube Have it diagnosed
Water on the floor Leak at fittings or tank Shut off water and call
Yellow burner flame or soot Combustion problem Stop use and call for gas service
TPR valve dripping Pressure or valve fault Treat as urgent

Where Safe Observation Ends

Some findings are safe to note and report. Others are stop-and-call problems that should not be touched.

  • Safe to observe and log: a gauge reading, a thermostat setting, a photo of rust on a fitting, a note that the floor was damp.
  • Stop and call: a dripping or stuck TPR valve, a yellow flame or soot, a smell of gas, water actively pooling at the base, or a tank seam that is weeping.

A dripping TPR valve or a sooty burner is not a maintenance task. Those are stop-and-call problems. Do not open the valve, adjust the burner, or attempt to reseat a relief valve on your own.

Repair or Replace: Decision Factors

When a plumber diagnoses the problem, the repair-versus-replacement decision usually comes down to a few practical factors:

Book a Visit →

  • Age of the equipment. An older tank near the end of its expected service life is a weaker candidate for a major repair.
  • Severity and location of the damage. A failed element or thermostat is a repair; a leaking tank seam is usually a replacement.
  • Recurring problems. Repeated failures of the same component point to a system issue rather than a one-off fix.

Do not assume replacement is the only answer. A failed heating element, a bad thermostat, or a sediment problem are often repairable. A corroded tank or a combustion fault that cannot be corrected safely is a different conversation. Restoring your unit to peak efficiency not only resolves these immediate mechanical failures but also serves as a foundational step to lower heating bills throughout the colder months.

Tank corrosion and combustion faults cannot be fixed with a wrench and a tutorial. If you see rust at the seams or a yellow flame, stop troubleshooting and call a licensed plumber.

Protect the Heater and Pipes From Freezing Temperatures

Freezing temperatures are the real enemy in winter. A water heater in an unheated garage, crawl space, or drafty basement faces the same risk as any exposed pipe. Frozen supply lines can stop the heater from filling, and a burst line can flood the space before anyone notices.

Use this checklist:

  • Seal drafts around the mechanical room or garage
  • Insulate exposed hot and cold supply lines
  • Keep the heat above freezing in the space

If a pipe does freeze, do not torch it. Use a hair dryer or warm towels on the pipe, and call for frozen pipe repair guidance if the line is behind a wall or will not thaw. The EPA’s water heating guidance also notes that insulating the tank and pipes reduces standby heat loss, which pays off in cold months.

Build a Winter Maintenance Schedule That Fits the Building

A maintenance schedule only works if it matches the building. A single-family home needs a light fall check.

Frequency Task Who
Monthly Visual check: leaks, rust, floor moisture Staff or owner
Quarterly Test TPR valve, note readings Staff or plumber
Annually Flush tank, inspect anode rod, check venting Licensed plumber
Pre-winter Insulate, seal drafts, confirm settings Owner or plumber

Documenting findings matters as much as the inspection itself. A simple log of dates, readings, and photos gives you a repair history.

For commercial properties, note each heater by type: tank, tankless, or boiler. A steam boiler in an older building needs its own seasonal routine, separate from a storage tank.

When to Call a Professional

Some tasks belong to a licensed plumber. Gas supply, burner, and combustion components are not homeowner projects. Neither is a tank leak, a failing TPR valve, or a boiler that will not hold pressure.

Call for professional service when you see:

  • Rust, corrosion, or moisture at the tank seams
  • A dripping or stuck TPR valve
  • A yellow flame, soot, or a smell of gas

Gas leaks deserve special caution. Then call a licensed plumber for gas line repair. The U.S. Consumer Product Safety Commission also warns that a faulty TPR valve can cause a tank to rupture, so never ignore a dripping valve.


Winter puts real stress on any hot water system, and the difference between a quiet season and a flooded basement is usually a short inspection you did in October. Call today or visit VanDerBosch water heater service to schedule your winter check before the first hard freeze.

Frequently Asked Questions

How often should a water heater be maintained?

Most manufacturers recommend an annual professional service visit, with monthly owner checks in between. A practical routine includes a quick monthly look for leaks, corrosion, or water on the floor; a quarterly test of the temperature-and-pressure relief valve; and a yearly flush to clear sediment. In cold climates, add a mid-winter check of the venting, insulation, and any exposed piping. If the heater serves a commercial space or a multi-unit building, a written schedule with logged readings makes it easier to spot trends before they become failures.

What temperature should a water heater be set to in winter?

A setting of 120°F is a common starting point for most households because it reduces scalding risk while still covering daily use. If the home has a dishwasher without a booster or a large tub, some owners prefer a slightly higher setting. Above 120°F, the risk of scalding rises quickly, especially for children and older adults. Rather than turning the dial up to fight winter chill, address the real cause, such as a cold incoming supply line, a failed heating element, or sediment buildup, with a professional diagnosis.

How do I protect my water heater from freezing in winter?

Tank water heaters in conditioned spaces rarely freeze, but the pipes feeding them can. Keep the mechanical room above freezing, seal drafts around windows and vents, and insulate exposed supply lines. If the unit sits in an unheated garage or crawl space, insulation blankets and pipe wrap help, but never cover the burner compartment, vent, or relief valve. During a deep cold snap, run a trickle of water through a distant faucet overnight. If you suspect a frozen line, shut off the water and call a plumber rather than thawing it with an open flame.

When should I call a plumber about my water heater?

Call a licensed plumber for any gas smell, water pooling around the base, a relief valve that keeps discharging, rusty or discolored hot water, repeated pilot or ignition failures, or a heater that cannot keep up with demand. These point to problems that are unsafe or beyond routine maintenance. A plumber can confirm whether a repair is reasonable or whether replacement makes more sense based on age, condition, and repair history. Shut off the gas and water if you smell gas or see active leaking, and keep people away from the area until help arrives.

How to Inspect Commercial Water Heaters

Table of Contents

Last Updated: October 20, 2026

Why Commercial Water Heater Inspection Matters

Learning how to inspect commercial water heaters isn’t just maintenance, it’s a safety and compliance requirement.

How to inspect commercial water heaters means knowing what to look for and when professional diagnosis is needed.

Inspection also protects occupants. A malfunctioning relief valve won’t prevent dangerous pressure buildup, and inconsistent temperature control can create scalding hazards or allow bacterial growth.

Safety Precautions Before You Begin

Commercial water heaters operate under pressure and heat, so mistakes can cause injury or equipment damage.

Electrical and Gas Hazards

Electrical hazards include shock from live wiring, arc flash from energized components, and electrocution if water contacts electrical elements. Gas hazards include explosion or fire if gas accumulates, carbon monoxide exposure, and uncontrolled flame if ignition fails.

Pressurized System Risks

The tank holds water under pressure; if pressure builds too high and the relief valve fails, it can rupture.

If you smell gas, hear hissing, or see water spraying from the relief valve discharge, stop immediately, leave the area, and call a professional.

Professional technician inspecting a large commercial water heater tank in a mechanical room, examining corrosion and metal connections with a flashlight and clipboard

Visual Inspection of Tank and Surroundings

A visual inspection reveals corrosion, leaks, physical damage, and installation problems before they become emergencies.

Tank Condition and Corrosion

Rust and corrosion on the tank exterior indicate the protective coating is failing and the metal underneath is being attacked.

Check the tank’s support structure and straps. Rust on the base or legs means moisture is present and the foundation may be unstable; a corroded support can fail suddenly.

Leaks and Water Connections

Where to check for leaks: the base of the tank (most common failure point), connection points where pipes enter the tank, the relief valve discharge line, flanges and threaded connections, and welded seams. Small leaks can escalate into significant water damage, and persistent moisture around the heater may indicate a burst pipe or connection failure that requires prompt attention.

Commercial Water Heater Inspection Checklist

A structured checklist keeps inspections consistent. The items below separate observation-level checks staff can safely handle from work requiring a qualified technician: reading a gauge or looking at a flame is observation; testing a relief valve, opening a burner compartment, or probing electrical components is service work.

Watch Out
Do not open burner compartments, remove electrical covers, disconnect gas piping, or operate relief-valve test levers on a live commercial system unless you are trained and authorized to do so. Observation only for facility staff.

Temperature and Pressure Relief Valve

The temperature and pressure relief (TPR) valve is the primary safety device on any storage-type heater. It opens when internal pressure or temperature exceeds its rated setpoint, protecting the tank from rupture.

A valve that weeps continuously or won’t reseat after a test needs replacement. Do not plug, cap, or ‘fix’ it by tightening the bonnet; those shortcuts turn a nuisance leak into a pressure vessel hazard.

Temperature and Pressure Readings

Gauge readings are only useful if you know what normal looks like for that unit.

Reading What to record Typical concern
Storage temperature Thermostat setpoint and measured tank or outlet temperature Large gap between setpoint and actual; wild swings
Delivered temperature Temperature at the nearest fixture after a short flush Below setpoint by a wide margin; above setpoint (scald risk)
System pressure Gauge reading at rest and during a draw Continuous climb; pressure that will not drop when water is drawn
Recovery time Time to return to setpoint after a heavy draw Lengthening recovery suggests sediment or a failing element/burner

Acceptable ranges depend on the heater’s data plate, manufacturer’s instructions, and applicable code. Use those sources, not a generic number, to judge pass or fail; a stable reading outside the manufacturer’s range is still worth escalating.

Gas Supply and Burner Components

Gas-fired heaters add combustion and carbon monoxide risk. Staff can observe; only a qualified technician should adjust, disassemble, or test the gas train.

Technician-level checks: combustion analysis (carbon monoxide, oxygen, and stack temperature); gas pressure at the manifold and at the appliance inlet; burner cleaning, orifice inspection, and ignition system testing; venting verification against the manufacturer’s venting tables and applicable code.

A yellow or orange flame, lifting flame, burner rollout, or a carbon monoxide alarm is an immediate stop-and-call condition.

Electrical Components and Connections

Electric heaters carry line-voltage and, on larger units, three-phase power. Visual checks are appropriate for staff; opening a control panel or testing voltage is technician work.

Observation-level checks: junction box and control covers in place; no scorching, melted insulation, or burning smell near the electrical enclosure; conduit and fittings intact; no water pooling near electrical components.

Technician-level checks: element resistance and amperage draw; contactor and sequencer operation; high-limit and thermostat continuity; grounding and bonding verification.

Book a Visit →

Venting and Exhaust

Venting failures are a leading cause of carbon monoxide incidents in commercial mechanical rooms. Check the visible flue run for corrosion, sagging, separated joints, and proper slope, and confirm the vent terminates outdoors and isn’t blocked by snow, nests, or debris. On power-vented units, listen for the inducer before ignition; firing without it is a safety issue.

Sediment, Scale, and Flushing

Sediment accumulates at the bottom of any storage tank and insulates the heat source from the water, driving up recovery time and energy use; hard-water facilities accumulate it faster. Flushing is a technician task on commercial equipment because it involves isolating the unit, connecting to a drain, and managing scalding water.

Equipment-Type Variations

The checklist above is written for a gas-fired storage heater. Adjust emphasis for other configurations:

  • Electric storage: weight the electrical section heavier; sediment and element scaling are the dominant failure modes.
  • Gas storage: combustion, venting, and gas train checks are the priority.
  • Tankless (gas or electric): scale buildup in the heat exchanger and inlet filter condition replace tank corrosion as the main concern; venting and condensate management are critical on condensing models. Tankless water heater installation and maintenance differ significantly from storage systems and should be handled by a technician familiar with the specific model.

What Staff Should Not Do

  • Do not test the TPR valve on a live commercial system unless trained.
  • Do not open burner or electrical compartments.
  • Do not adjust gas pressure, thermostats, or high limits.
  • Do not attempt to clear a sediment-bound tank by draining it without isolation and scald protection.

When in doubt, document the observation and escalate. A clear escalation boundary protects staff and keeps the inspection useful.

Commercial Water Heater Maintenance Schedule

Preventive maintenance extends equipment life and catches problems early. Establish a routine inspection schedule for your facility.

Monthly visual checks: look for new leaks or corrosion, confirm the relief valve discharge is clear, verify the thermostat holds set temperature, and listen for unusual sounds.

Facilities with high water demand or hard water should increase inspection frequency, as should systems in older buildings or those showing early corrosion.

Documenting Findings and When to Call a Professional

An inspection that isn’t documented is a conversation, not a record. For commercial properties, the log turns a checklist into a maintenance program: it shows whether a condition is stable, worsening, or resolved, supports budgeting and vendor conversations, and provides a defensible record if a failure later causes damage or injury.

A Simple Severity Framework

Assign every finding a severity so the next action is obvious without re-reading the whole report.

Severity Meaning Response window
Critical Immediate safety hazard: gas odor, CO alarm, active tank leak, continuous TPR discharge, scorched wiring Stop use, isolate if safe, call a qualified technician or emergency service now
High Condition likely to fail soon or cause damage: pitting corrosion, weeping TPR, yellow flame, rising pressure trend Schedule service promptly; do not defer past the next operating cycle
Medium Degrading condition with a known cause: sediment symptoms, worn insulation, minor connection corrosion Schedule within the normal maintenance cycle
Low Cosmetic or housekeeping: dust, labeling, minor rust staining without active leak Note and address at next service

Severity is a judgment call; the same reading can move up a level if the unit serves a critical process, a healthcare or food-service space, or a building with no backup capacity.

What Every Log Entry Should Contain

  • Date, time, and name of the person inspecting
  • Unit identifier (asset tag, location, model, serial, and data-plate ratings)
  • Readings: setpoint, measured temperature, pressure at rest, pressure during draw, recovery time
  • Observations by checklist section (tank, TPR, gas/burner, electrical, venting, sediment)

A photo taken at the same angle each visit shows progression a written note can miss.

Prioritizing Corrective Actions

When several findings compete for the same maintenance budget, rank them by:

  1. Safety first. Anything in the Critical or High tier outranks efficiency or cosmetic items, regardless of cost.
  2. Failure consequence. A unit serving a production line, a commercial kitchen, or a tenant-occupied building carries more risk than one with redundant capacity.
  3. Trend direction. A reading that has moved steadily over three inspections is more urgent than a stable reading at the same value.
  4. Repair vs. replace economics. Weigh equipment age, severity of damage, recurring problems, efficiency loss, repair history, accessibility, and the condition of surrounding piping and venting. Replacement is not automatically the answer; a repairable unit with good remaining life and a single fixable fault is often the better call.

When to Call a Professional Immediately

Treat the following as stop-and-call conditions. Isolate the unit only if safe, then contact a qualified technician or the appropriate emergency service.

  • Gas odor, hissing at a gas connection, or a carbon monoxide alarm
  • Active water leak from the tank shell, base, or a fitting that will not stop
  • Continuous flow from the TPR discharge
  • Pressure that climbs and will not relieve

For gas or carbon monoxide events, leave the area, avoid operating switches or phones near the source, and call from a safe location. Do not relight or adjust a unit that has tripped a safety control.

Turning the Log Into a Maintenance Plan

Review the log on a set cadence, not just when something breaks. A quarterly review of open High and Medium items, temperature and pressure trends, and each unit’s age surfaces replacement decisions before they become emergencies.

VanDerBosch Plumbing Inc. provides water heater repair and installation and commercial plumbing services to help you maintain reliable hot water systems.

Frequently Asked Questions

How often should commercial water heaters be inspected?

Commercial water heaters typically require inspection at least quarterly, with some facilities needing monthly checks depending on usage and local codes. Regular inspections catch corrosion, leaks, and pressure issues early, preventing downtime and extending equipment life. High-demand facilities should establish a maintenance schedule with a licensed professional to ensure consistent operation and compliance with safety standards.

What are the most common problems found during commercial water heater inspection?

Common issues include sediment buildup affecting heating performance, corrosion on tank walls and connections, faulty temperature and pressure relief valves, leaks at water connections, and problems with gas burners or combustion venting. Many problems start small but worsen quickly in commercial settings where demand is constant. Early detection through routine inspection prevents emergency shutdowns and costly repairs.

Can I inspect a commercial water heater myself, or do I need a professional?

While basic visual checks for obvious leaks or damage are safe, a thorough commercial water heater inspection requires licensed professional expertise. Pressure testing, burner evaluation, combustion analysis, and safety valve function testing demand specialized equipment and training. A professional inspection also ensures compliance with local codes and identifies risks that untrained eyes may miss.

What should I look for during a visual inspection of a commercial water heater?

Check for visible corrosion or rust on the tank exterior, water pooling or dripping at connections, proper clearance around the unit, secure gas and electrical connections, and signs of damage. Inspect the relief valve discharge line for leaks or blockages, and verify that the storage room or mechanical room is properly ventilated. Document any concerns and contact a professional if you spot rust, active leaks, or unusual odors.


Regular inspection of your commercial water heater isn’t optional, it’s essential for safety, compliance, and reliable operation. If you’re unsure about the condition of your system or need professional testing of pressure, temperature, and relief valve function, contact VanDerBosch Plumbing Inc. today. We’ll conduct a thorough inspection, document findings, and recommend the right service to keep your facility running smoothly.

Rental Plumbing Inspection Checklist: Step-by-Step Guide

Table of Contents

Last Updated: October 19, 2026

Why a Rental Plumbing Inspection Matters

A rental plumbing inspection protects your investment and keeps tenants safe.

Regular inspections also catch small issues early. A slow drain or minor leak is a small fix; ignored for months, it can mean water damage, mold, and structural repairs.

This guide walks you through building your own rental plumbing inspection checklist so you can assess your properties confidently.

What Do Plumbing Inspectors Look For

Professional plumbers check for visible damage, water pressure problems, and safety hazards, spotting corrosion, leaks, and aging systems tenants might miss.

Visible Pipes and Corrosion

Start with any pipes you can see: under sinks, in basements, and around the water heater.

Corrosion looks like:

  • Green or white crusty buildup on copper pipes
  • Rust-colored stains or flaking on steel pipes
  • Discolored water coming from taps (a sign of rust inside the pipes)

Corrosion on visible pipes may extend to pipes inside your walls. Corroded pipes restrict flow and eventually fail, so this warrants professional evaluation.

Check for water stains on ceilings, walls, or floors near pipes. Even if the leak stopped, the stain signals a problem.

Water Supply and Shutoff Valves

Every rental should have a main water shutoff valve that’s easy to locate and operate.

The shutoff valve is usually near where the water line enters the building, in the basement, crawl space, or utility room.

Check water pressure at a sink faucet with hot and cold fully on.

Check the flexible supply lines under sinks and behind toilets.

Building Your Rental Property Plumbing Inspection Checklist

A checklist is only useful if you run it the same way every time. The sequence below moves from the water source outward, catching supply-side problems before testing drains and fixtures.

When to Run the Inspection

Plumbing condition changes with occupancy, season, and system age. A practical cadence for most rentals:

  • Move-in: Full walkthrough with the tenant present, documented and signed.
  • Periodic (roughly annually, or per your lease terms): Full checklist plus a water heater and shutoff valve check.
  • Seasonal: Before the first freeze, confirm exterior and unheated-area pipes are protected; in spring, check the basement and sump pump after snowmelt and heavy rain.

Entry notice and inspection rights vary by jurisdiction and lease. Confirm local rules and lease language before scheduling any inspection that requires entry.

A Repeatable Inspection Sequence

Run the checklist in this order so one step informs the next:

  1. Main shutoff and supply. Locate the main valve, confirm it operates, and note its condition.
  2. Water pressure at a reference fixture. Use one sink as your baseline and compare other fixtures to it.
  3. Supply lines and connections. Check under sinks, behind toilets, at the washing machine, and at the water heater.
  4. Faucets and fixtures. Run hot and cold at every fixture.
  5. Toilets. Flush, watch refill, check the base and supply.
  6. Drains and traps. Run water in every sink, tub, shower, and floor drain.
  7. Water heater. Check the tank, connections, pan, and hot-water delivery.
  8. Visible piping. Look for corrosion, staining, and support problems in basements, crawl spaces, and utility areas.
  9. Drainage-adjacent equipment. Sump pump, laundry standpipe, and any floor drains.
  10. Documentation. Photos, notes, and signatures before you leave.

Safe Tests You Can Do Without Specialist Tools

These checks are safe for a landlord or property manager and don’t require opening pressurized systems or working on gas, boilers, or electrical components:

  • Shutoff test: Turn the main valve off and back on to confirm it isn’t seized. If it won’t move or won’t fully close, note it for professional service.
  • Pressure comparison: Run hot and cold at one sink, then compare flow at a second fixture on a different branch. A big drop between fixtures points to a branch or fixture issue; low pressure everywhere points upstream.
  • Dye test on toilets: Add a few drops of food coloring to the tank, wait, and check the bowl without flushing. Color in the bowl means the flapper is passing water.

Do not open gas valves, disassemble a boiler, work inside a water heater’s electrical compartment, or attempt to clear a main sewer line yourself. If you smell gas, see sewage backing up, or find an active leak you can’t isolate with the main shutoff, stop and call a licensed plumber or the appropriate emergency service.

Property manager inspecting under kitchen sink with flashlight, checking pipes and connections for leaks and corrosion, natural lighting from window

Consistent monitoring of these fixtures prevents minor drips from escalating into structural damage, serving as a vital component of your broader rental property maintenance strategy.

Faucets and Fixtures

Turn on every faucet and check hot and cold water separately.

Look for:

  • Water pressure (should be steady and strong)
  • Leaks from the spout or base of the faucet
  • Drips or slow leaks after you turn the water off
  • Discolored water (rust, sediment, or cloudiness)

A slow drip wastes water and signals a worn washer or cartridge. A leaking faucet base means water is getting behind the sink, damaging cabinets and promoting mold.

Toilets and Drainage

Flush every toilet and watch the bowl refill. A healthy toilet drains quickly and refills without hesitation.

Check for:

  • Water running continuously after flushing (a sign the flapper or fill valve is worn)
  • Slow drainage or incomplete flushing
  • Cracks in the porcelain
  • Leaks at the base where the toilet meets the floor

A running toilet wastes water continuously, and the bill is yours. A leaking toilet base damages the floor and subfloor and creates conditions for mold.

Test drains by running water in sinks, showers, and tubs. Water should drain without backing up or pooling; slow drains signal buildup or a clog farther down the line.

Water Heater and Hot Water

Check the water heater for leaks and rust at the tank, connections, and floor around it.

Test hot water at multiple fixtures.

Feel the hot water temperature. It should be hot but not scalding; excessively hot water is a safety hazard, especially for children and elderly tenants.

Visible rust or corrosion on the tank often means rust is forming inside, and the tank may be nearing the end of its life.

A checklist that always runs in the same order, uses safe tests, and records results the same way is what makes findings comparable across units and across time. That consistency is what protects you in a deposit dispute or insurance claim.

Book a Visit →

Creating a Rental Plumbing Inspection Form

A written form keeps inspections consistent and creates documentation for disputes or insurance claims.

Your form should include:

  • Property address and unit number
  • Date of inspection
  • Inspector name
  • Tenant name (for move-in/move-out inspections)

Create a separate section for each area: kitchen, bathrooms, basement, laundry room, and any other spaces with plumbing.

For each item, note whether it’s in good condition, needs minor maintenance, or needs immediate repair.

Take dated photos of any problems and attach them to your form.

Have the tenant sign the form during a move-in inspection.

Rental Property Plumbing Maintenance Between Tenants

Regular maintenance prevents emergency repairs and keeps systems running longer.

Maintenance tasks:

  • Flush drains with hot water to clear buildup
  • Check under sinks for leaks or water damage
  • Test all shutoff valves to make sure they operate
  • Look at visible pipes for corrosion or damage

If your inspection found slow drains, consider professional drain cleaning between tenants.

If you found corrosion on visible pipes, have a plumber assess whether the whole system needs attention.

Replace worn toilet flappers and fill valves. These parts are inexpensive and easy to replace. They prevent running toilets and water waste.

When to Call a Professional Plumber

Not every finding needs the same response. Sorting issues by severity helps you decide what to handle now, what to schedule, and what to monitor. This framework is a starting point, not a substitute for professional diagnosis.

Severity and Response Framework

Urgent, stop, isolate, and call now

  • Active water leak you cannot stop with the main shutoff
  • Sewage backing up into fixtures or floor drains
  • Gas odor or a suspected gas leak
  • No heat from a boiler in freezing conditions

For gas odor, leave the area, avoid operating switches or flames, and contact your gas utility or emergency services first, then a licensed plumber for the repair.

Priority, schedule service promptly

  • Multiple slow drains or gurgling fixtures (possible main-line issue)
  • Water pressure that has dropped across the whole unit
  • Discolored water that persists after running the tap
  • Water heater not delivering hot water, or rust and corrosion on the tank

Routine, schedule at your convenience

  • A single dripping faucet
  • A running toilet with a worn flapper or fill valve
  • Loose fixture, worn supply hose, or minor mineral buildup
  • Slow drain limited to one fixture with no other symptoms

What a Professional Evaluation Adds

A plumber can do what a landlord checklist can’t: pressure-test the system, camera a drain line to find the actual cause of a backup, evaluate whether corrosion is isolated or systemic, and confirm whether a water heater is repairable or at end of life. For sewer concerns, a sewer video inspection shows the inside of the line so you’re not guessing. For buildup in older lines, hydro jetting can clear stubborn deposits a cable won’t.

When a water heater is leaking, rusted, or repeatedly failing, repair versus replacement comes down to age, severity, repair history, and condition of the surrounding connections. A plumber can walk you through those factors rather than pushing replacement by default.

Repair vs. Replace: Decision Factors

Use the same factors for any major component:

  • Age and expected service life relative to the equipment type
  • Severity and location of the damage
  • Recurring problems despite prior repairs
  • Efficiency compared with current equipment

If a repair is reasonable and the surrounding components are sound, repair is often the right call. Replacement makes more sense when failures are recurring, the equipment is near end of life, or the surrounding system is already compromised.

Documentation and Compliance Notes

Keep the inspection form, photos, and any professional reports together. If a repair is recommended, note the date, finding, and action taken.

If your inspection turns up slow drains, gurgling, or repeat backups, a professional drain cleaning and camera inspection is often cheaper than waiting for a mid-lease emergency. If it turns up corrosion on visible piping, have the system evaluated before a pinhole becomes a burst pipe.

VanDerBosch Plumbing Inc. provides residential and light commercial plumbing, drain cleaning, sewer video inspection, hydro jetting, water heater service, and related repair work. If your checklist flags something you’re not sure about, schedule a professional assessment and get a clear answer before it becomes an emergency.

Conclusion


A rental plumbing inspection checklist is your first line of defense against costly repairs and tenant disputes.

Start with a simple written form that covers all fixtures and systems. Check faucets, toilets, drains, and visible pipes. Document everything with notes and photos.

VanDerBosch Plumbing Inc. is ready to help when you need professional inspection, drain cleaning, or water heater service.

Frequently Asked Questions

What should be included in a rental plumbing inspection checklist?

A rental plumbing inspection checklist should cover water supply and shutoff valves, visible pipes for leaks and corrosion, all faucets and fixtures, toilets and drainage, water heater condition and temperature, and signs of water damage on walls, ceilings, and flooring. Include sections for pass/fail ratings, notes on observed conditions, and priority levels for any repairs needed. Document findings with photographs and dates to protect both landlord and tenant interests.

How often should landlords inspect plumbing in a rental property?

Conduct a thorough plumbing inspection before a new tenant moves in and again before they move out to document condition changes. Many landlords also perform preventive maintenance inspections annually or semi-annually, especially for older rental properties. After any tenant-reported plumbing issues or water damage, schedule an inspection promptly to assess the extent of damage and plan repairs.

What are the biggest red flags during a rental plumbing inspection?

Red flags include visible water damage on walls, ceilings, or flooring; corrosion or rust on pipes; persistent dripping faucets or running toilets; slow drains or clogs; water discoloration indicating sediment or mineral buildup; low water pressure; and lack of accessible shutoff valves. Any signs of leaks, mold, or structural water damage require professional assessment. Older properties may have corroded galvanized pipes or outdated systems that need expert evaluation.

Which plumbing problems require a professional plumber?

Water heater issues, burst or frozen pipes, sewer line problems, persistent clogs that don’t respond to basic plunging, low water pressure affecting multiple fixtures, corrosion or rust on main supply lines, and any signs of water intrusion or damage require professional diagnosis and repair. Licensed plumbers can identify hidden problems, test water pressure and quality, and recommend whether repair or replacement is appropriate for aging systems.