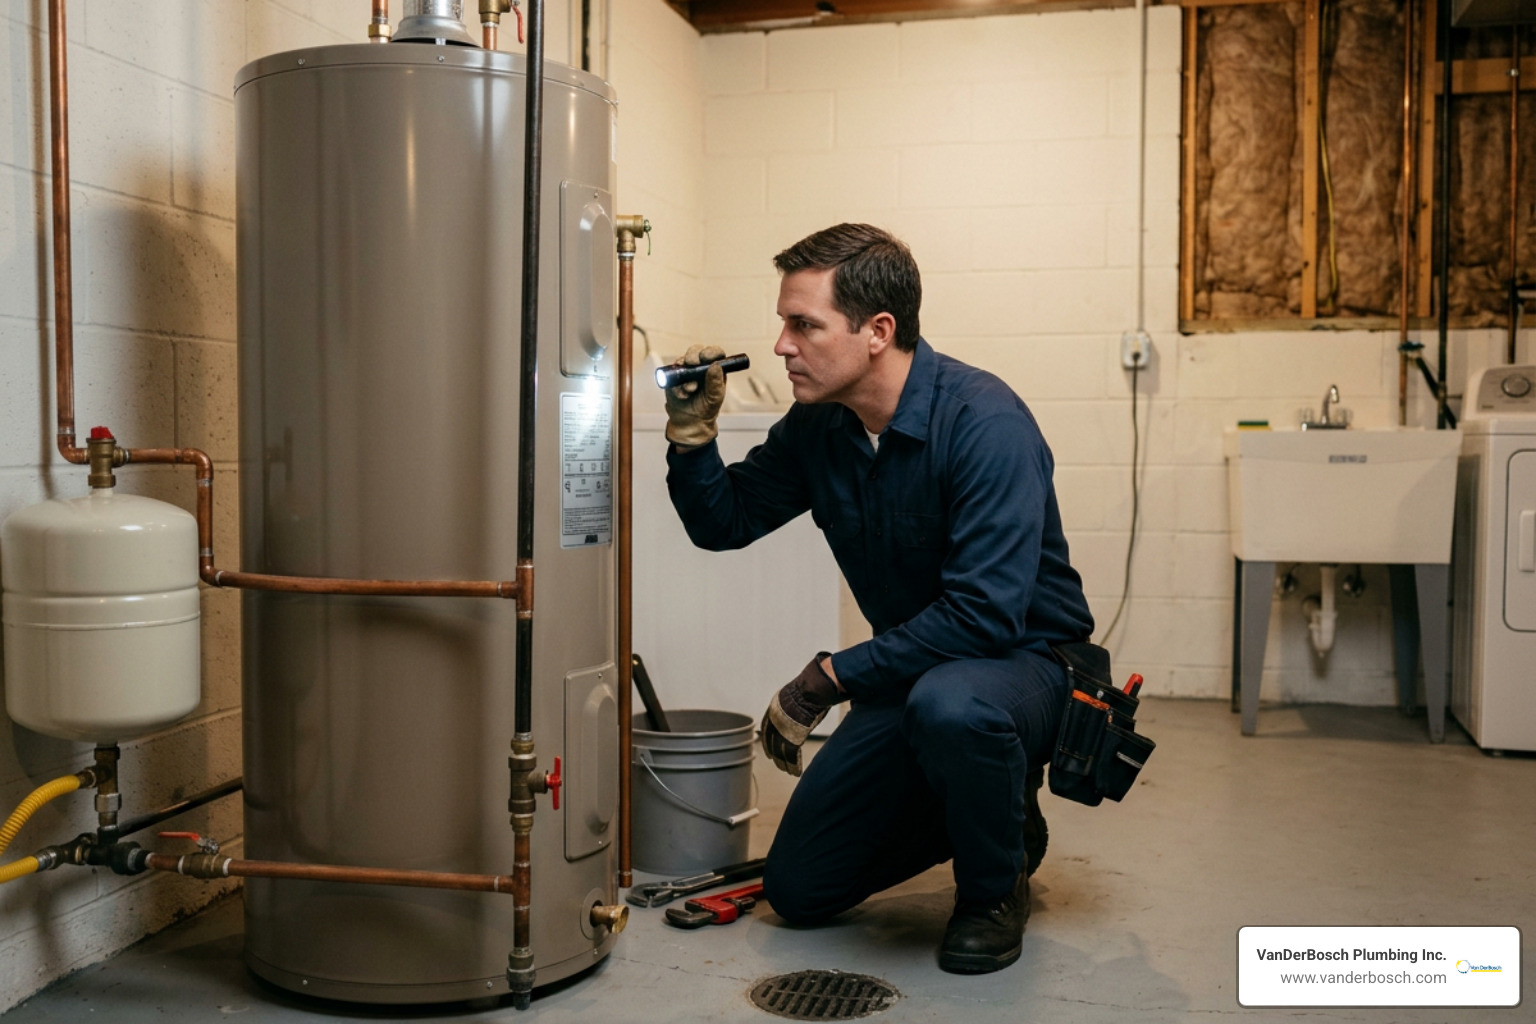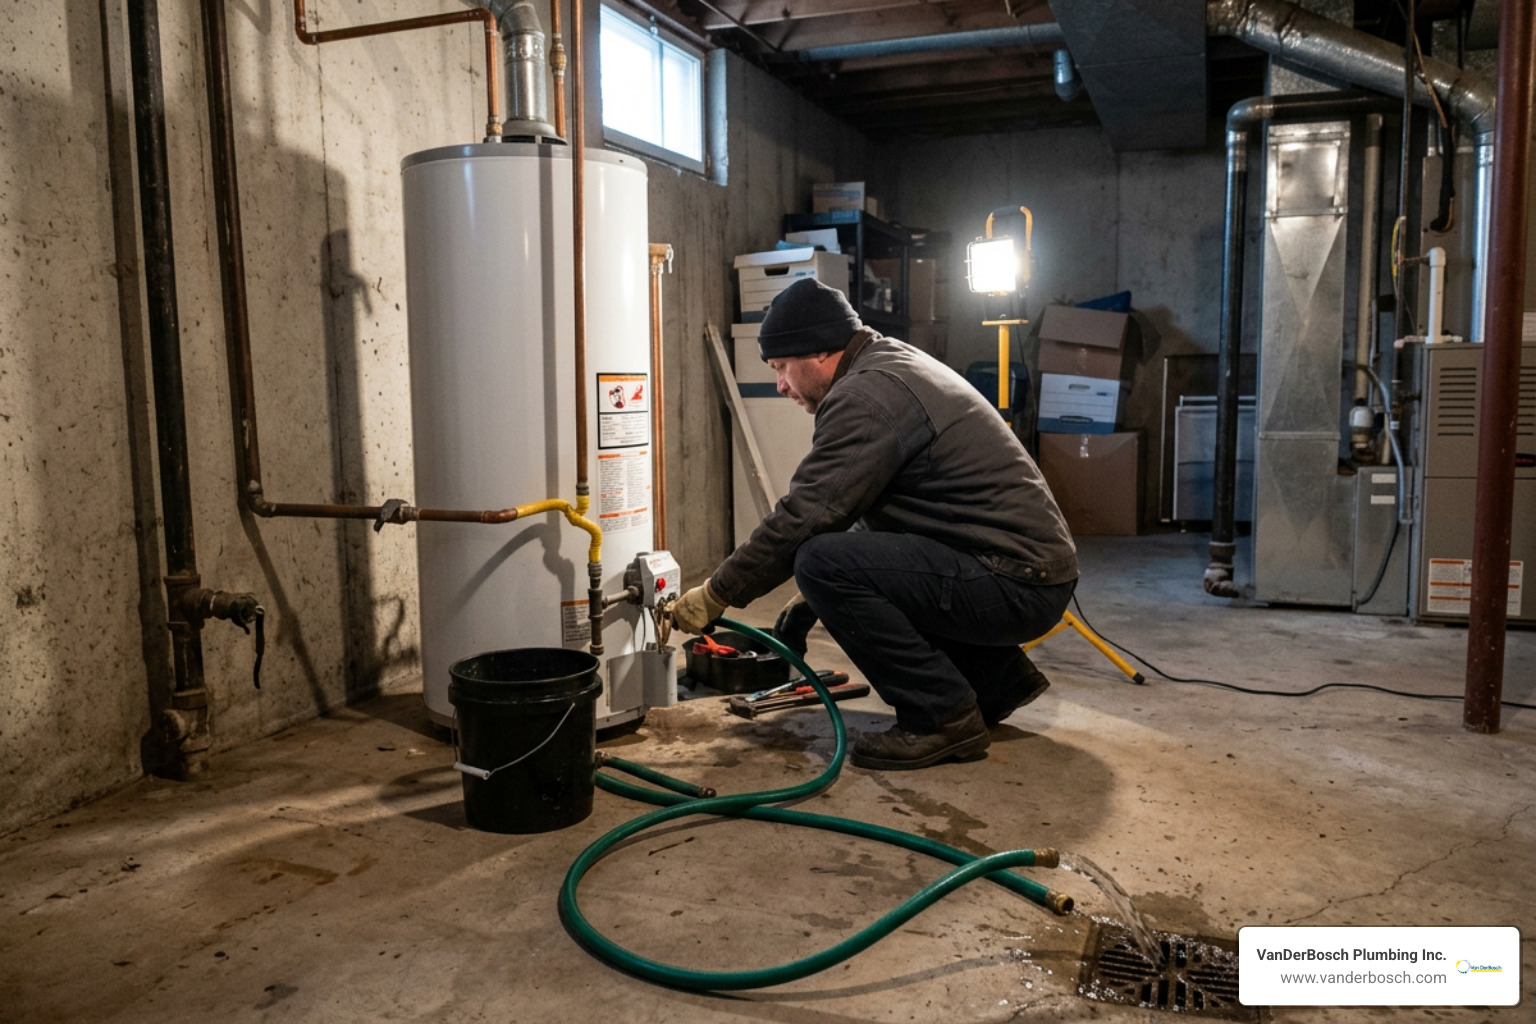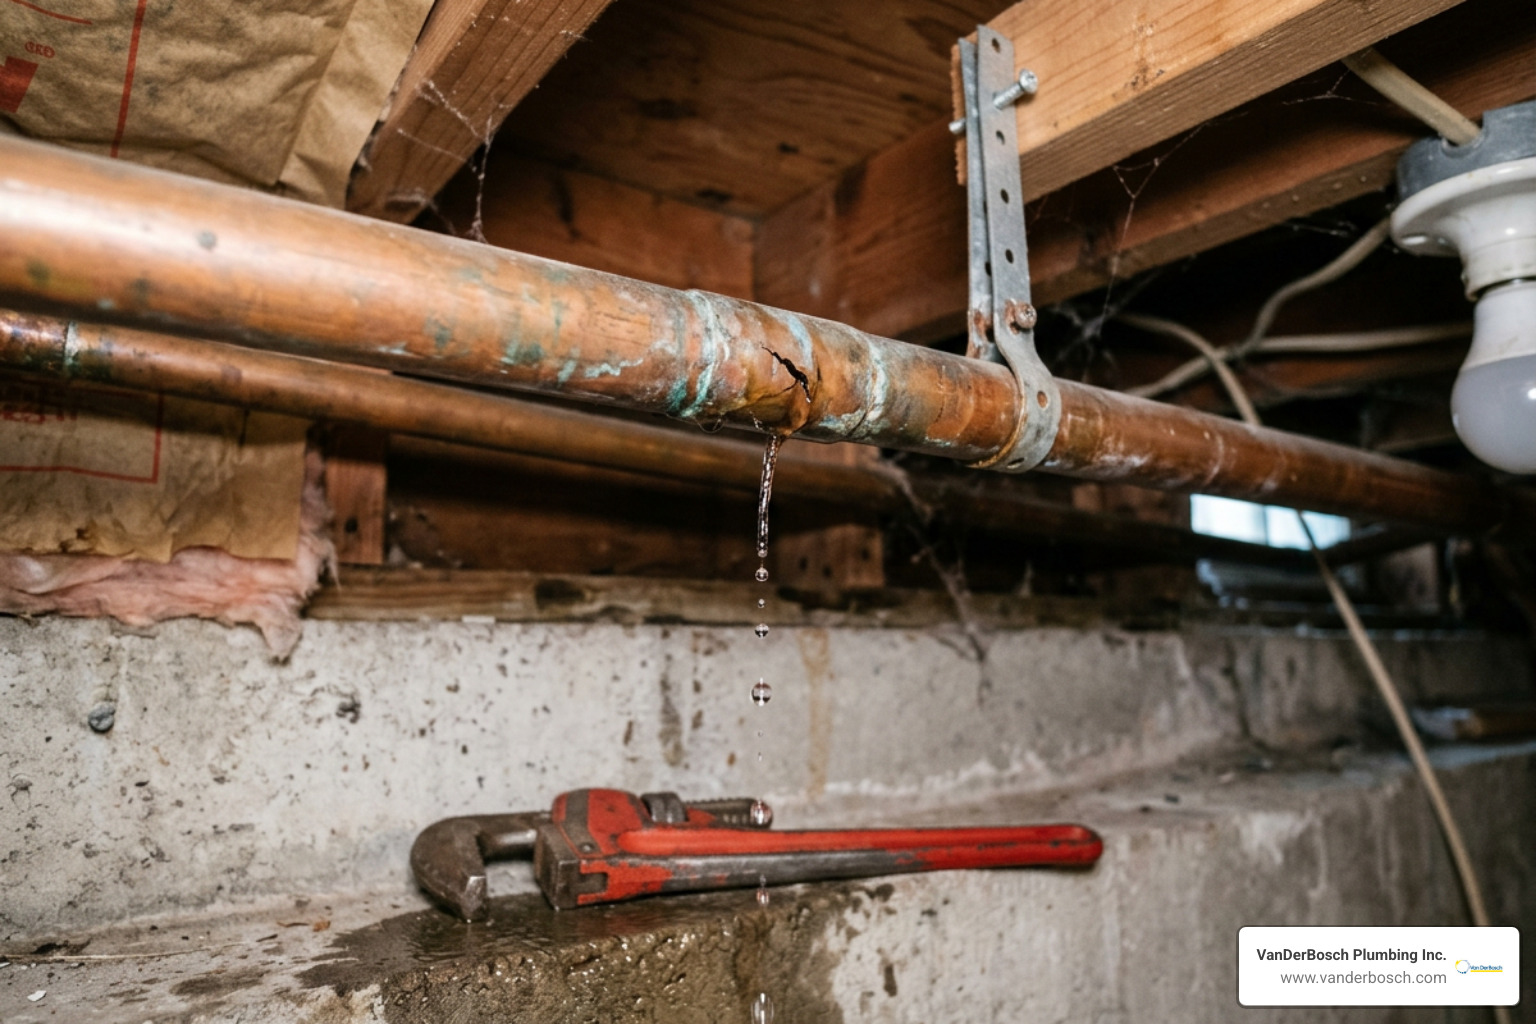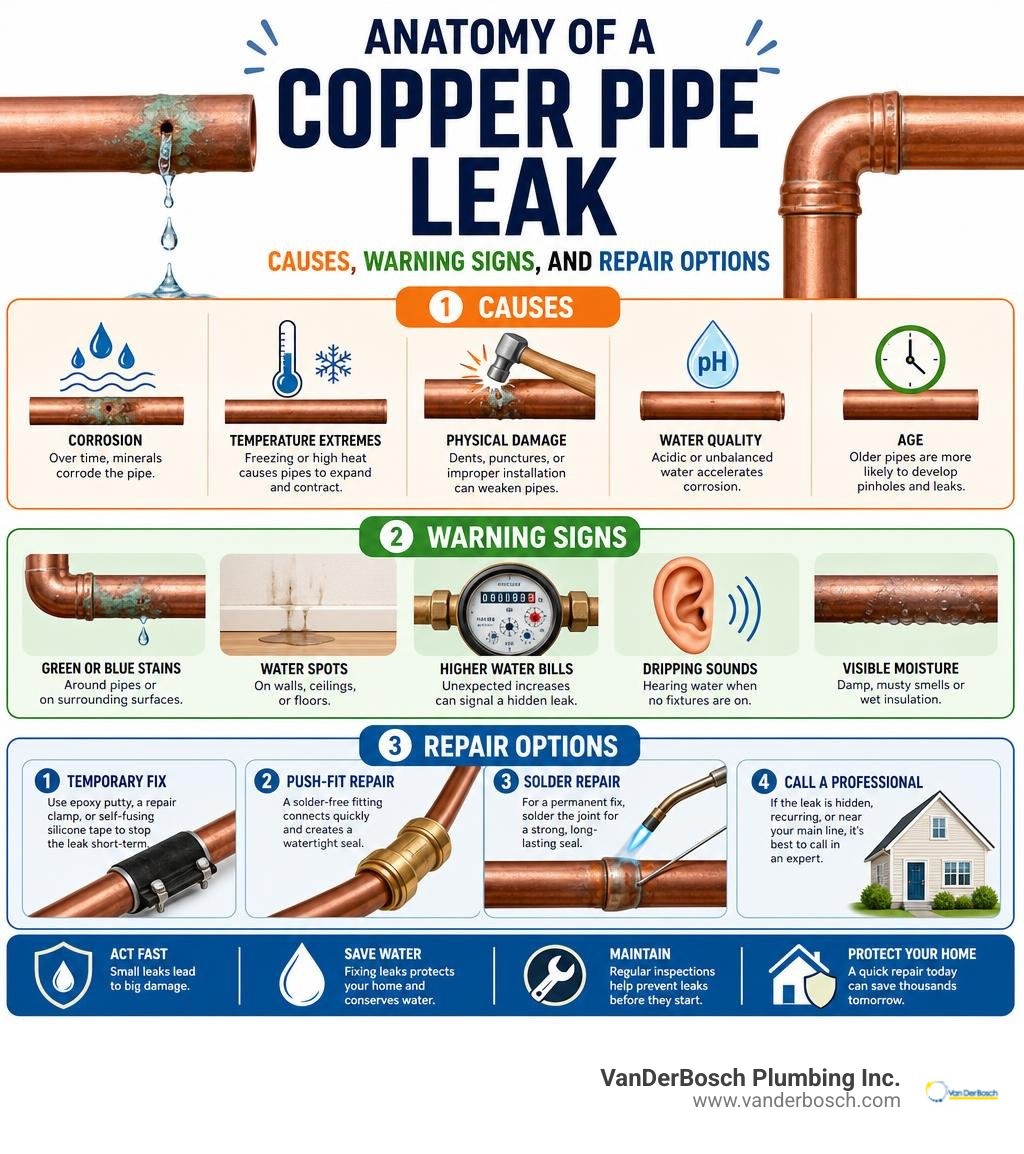
How to Choose the Best Sulfur Filter for Well Water Without the Stink

best sulfur filter for well water

That Rotten Egg Smell in Your Well Water Has a Fix — Here Are the Best Options

If you’re searching for the best sulfur filter for well water, here’s a quick answer before we dive in:

Rank System Best For Approx. Cost
1 SpringWell WS Best overall (iron + sulfur) ~$2,205
2 SoftPro Iron Master Heavy iron + sulfur loads ~$1,519
3 Matrixx InFusion Stubborn sulfur odor ~$2,815
4 RKIN WF10/WF13 Smart app monitoring ~$2,016–$2,470
5 SpringWell SCN1 Low pH / acidic well water ~$1,535

Bottom line: For most homes, a chemical-free Air Injection Oxidation (AIO) system with Katalox Light media is the most effective and lowest-maintenance solution — removing up to 10 ppm of sulfur and up to 30 ppm of iron without any monthly chemicals.

If your well water smells like rotten eggs, you’re not imagining it. That odor comes from hydrogen sulfide gas — and it can range from faintly unpleasant to genuinely unbearable. Some homeowners describe walking into their bathroom and barely being able to breathe.

The problem is more common than most people realize, especially for private well owners in the Chicagoland area. And unfortunately, many people waste money on the wrong fix — carbon filters, box-store softeners, or expensive local installs — before finding something that actually works.

This guide cuts through the noise. You’ll learn exactly what’s causing the smell, which filter technologies work (and which ones make it worse), and how to pick the right system for your home’s water chemistry and flow rate.

I’m Hugh Hodur, President of VanDerBosch Plumbing, and through years of overseeing water filtration installations across the Chicagoland area, I’ve helped homeowners navigate the exact problem of finding the best sulfur filter for well water — without overpaying or buying the wrong system. Let’s get into what actually works.

Infographic: How hydrogen sulfide enters well water aquifers through decaying vegetation and sulfate-reducing bacteria

Key best sulfur filter for well water info:

What Causes the Rotten Egg Smell in Well Water?

That unmistakable rotten egg smell is caused by dissolved hydrogen sulfide gas ($H_2S$). But how does it actually get into your well?

Deep underground, decaying organic matter and vegetation in aquifers create a feast for sulfate-reducing bacteria. These naturally occurring, non-pathogenic bacteria feed on the sulfates present in the soil and rocks, producing hydrogen sulfide gas as a byproduct. As groundwater flows through these subterranean pockets, it dissolves the gas and carries it straight up into your home’s plumbing.

Because hydrogen sulfide is a gas, it escapes into the air the second it leaves your faucet, filling your kitchen or bathroom with that signature stink.

To solve the issue permanently, you must first confirm that hydrogen sulfide is indeed the culprit and measure its concentration. This is done through professional water testing. A certified laboratory test is always the gold standard because hydrogen sulfide is highly volatile and can dissipate quickly from a sample if not handled correctly. Testing also reveals other co-contaminants like iron and manganese, which heavily influence which filter will work best for your home. Understanding your water profile is the first step in realizing Why Water Filtration Systems Are Important for protecting your plumbing, appliances, and overall quality of life.

well water testing kit

The Hot Water Heater vs. Well Water Test (Anode Rod)

Before you spend thousands of dollars on a whole-house filtration system, you need to perform a simple diagnostic test. Is the smell actually coming from your well, or is your water heater playing a trick on you?

To find out, run the cold water from an outside spigot or a cold tap that hasn’t been used for a few hours.

  • If the cold water smells like rotten eggs: The hydrogen sulfide is coming directly from your well. You need a whole-house sulfur filter.
  • If only the hot water smells: Your well water is likely fine. The issue is your water heater’s anode rod.

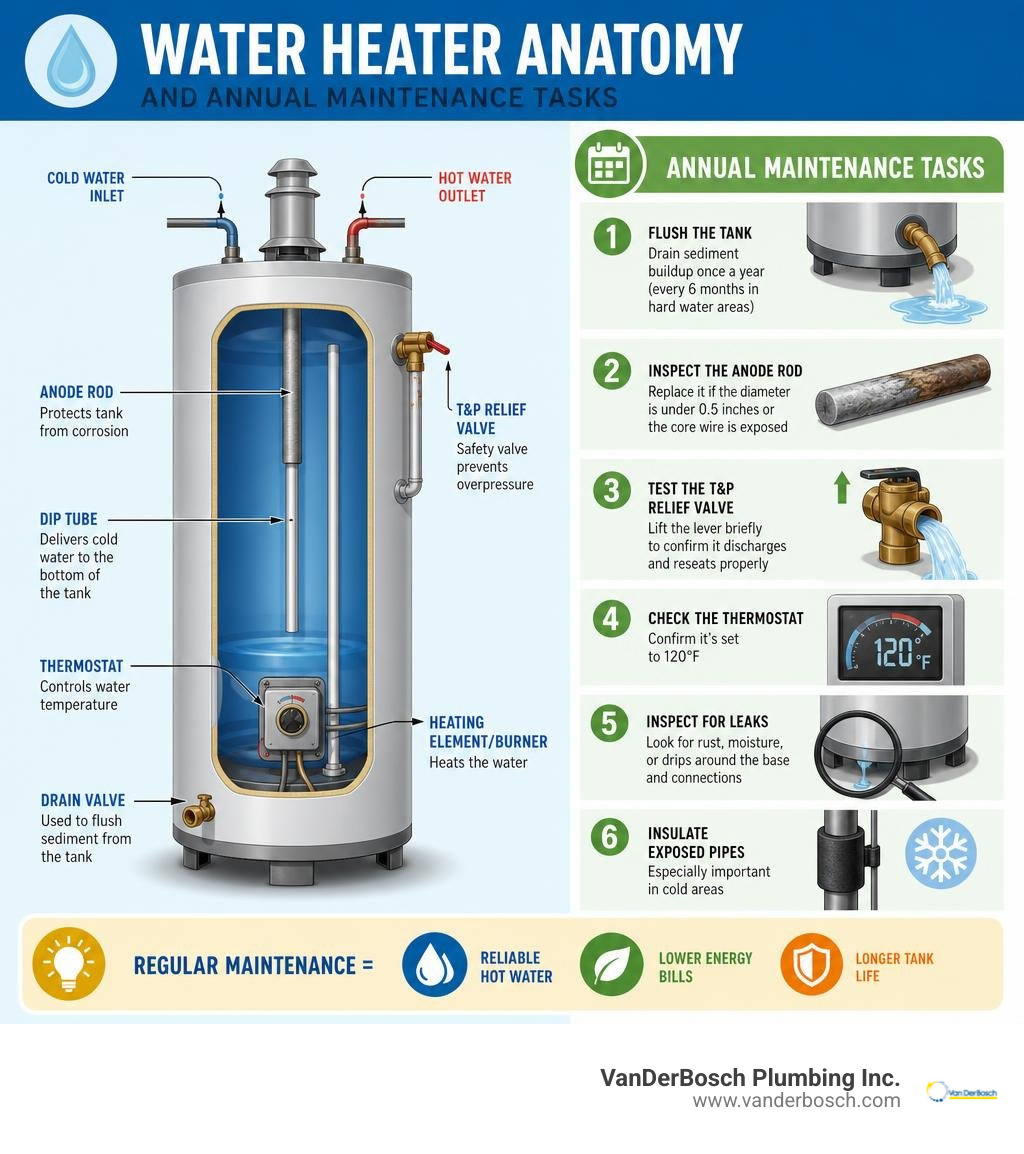
Most standard water heaters come equipped with a magnesium anode rod designed to corrode slowly to protect the steel tank from rusting. However, if your well water contains naturally occurring sulfates, the magnesium rod reacts chemically with sulfate-reducing bacteria in the warm environment of the tank, converting those sulfates into smelly hydrogen sulfide gas.

The Fix: If the smell is isolated to your hot water, you don’t need a whole-house filter. Simply have a licensed plumber replace your magnesium anode rod with an aluminum-zinc alloy rod or a powered electrical anode rod. This simple swap will eliminate the chemical reaction and stop the odor in its tracks.

Why Standard Softeners and Carbon Filters Fail

When homeowners first notice a sulfur smell, they often run to the nearest big-box store to buy an activated carbon filter or a standard water softener. This is a classic, costly mistake.

  • The Carbon Filter Trap: While activated carbon is excellent at removing chlorine and improving taste, it acts like a sponge. At very low sulfur levels (under 1 ppm), carbon can temporarily absorb the odor. However, with moderate to high sulfur levels, the carbon media becomes saturated almost instantly. Once exhausted, it can dump the trapped gas back into your water lines all at once, making the stink significantly worse.
  • The Softener Mistake: Water softeners are engineered to remove hard minerals like calcium and magnesium through ion exchange. They are completely incapable of filtering out hydrogen sulfide gas. In fact, passing sulfur through a standard softener can coat the resin beads, ruining the system’s softening capacity and leading to expensive resin replacement.

Choosing the Best Sulfur Filter for Well Water: Technology Comparison

To remove hydrogen sulfide permanently, you must convert the dissolved gas into a solid particle through a process called oxidation, and then filter those solid particles out of the water.

There are three primary technologies used to achieve this. Here is how they stack up:

Feature Air Injection Oxidation (AIO) Hydrogen Peroxide ($H2O2$) Injection Chlorine Chemical Feed
Chemicals Used None (Uses oxygen) Hydrogen Peroxide Chlorine / Bleach
Max Sulfur Removed Up to 10 PPM Up to 20+ PPM Up to 10 PPM
Iron Removal Excellent (Up to 30 PPM) Excellent Moderate
Maintenance Extremely low (Self-cleaning) Moderate (Refilling tanks) High (Mixing chemicals, pump upkeep)
Lifespan 6–8 years (Media) 5–7 years (Carbon media) 3–5 years
Upfront Cost Moderate ($1,500 – $2,500) High ($2,500 – $3,500) Moderate ($1,800 – $2,800)

For a broader look at how these technologies integrate into your overall home water system, check out The Complete Guide to Water Filtration Systems.

Why Air Injection Oxidation is the Best Sulfur Filter for Well Water

For the vast majority of well owners, Air Injection Oxidation (AIO) is the undisputed champion. It is highly effective, environmentally friendly, and requires virtually no day-to-day maintenance.

An AIO system works by maintaining a pocket of compressed air at the top of the filter tank. As smelly well water enters the tank, it passes through this air pocket, instantly oxidizing the dissolved hydrogen sulfide gas, iron, and manganese into solid particles.

The water then flows down through a specialized catalytic media bed—most notably Katalox Light. This media acts as a powerful catalyst to accelerate the oxidation process while trapping the physical particles. Every few days, the system automatically backwashes, flushing the trapped sulfur and iron down the drain and replenishing the air pocket.

According to the Water Quality Association Guide to Water Treatment, physical filtration combined with natural aeration is one of the safest and most reliable methods for treating private well water without introducing harsh chemical residues.

Hydrogen Peroxide Injection vs. Chlorine Feed Systems

While AIO systems are perfect for sulfur levels up to 10 ppm, extreme cases (above 10 ppm) or wells with heavy bacterial slime may require a chemical injection system.

  • Hydrogen Peroxide Injection: This system uses a chemical feed pump to inject a precise dose of food-grade hydrogen peroxide into the water line before it enters a contact tank. Hydrogen peroxide is an incredibly rapid, powerful oxidizer. It destroys sulfur odors instantly on contact, leaving behind only oxygen and water. While highly effective, it requires you to purchase and handle heavy jugs of peroxide, and you must maintain the chemical pump.
  • Chlorine Feed Systems: Similar to peroxide systems, these inject liquid chlorine (bleach) into the water. However, chlorine reacts much slower than peroxide, requiring a large 80-to-120-gallon contact tank to give the chemical enough time to work. It also leaves behind a strong chlorine taste and smell, requiring a secondary activated carbon filter to clean up the water before it reaches your taps.

Crucial Factors: pH, Iron, and System Sizing

Choosing the best sulfur filter for well water isn’t just about picking a brand; it’s about matching the system to your specific water chemistry and flow rate.

Before making a purchase, consult resources like the EPA Guide on Drinking Water Well Testing to understand standard testing parameters and safety limits for private wells.

The Role of pH and Acid Neutralizers

Water pH is the single most critical factor in determining whether an oxidation-based sulfur filter will work.

For AIO systems and catalytic media like Katalox Light to oxidize sulfur effectively, your water’s pH must be at least 7.0, and ideally around 8.0.

If your well water is acidic (below 7.0):

  1. The oxidation reaction slows down significantly.
  2. Dissolved sulfur will slip right through the filter, leaving you with smelly water.
  3. The acidic water will slowly dissolve your copper pipes and brass fixtures.

The Solution: If your water test reveals a pH below 7.0, you must install an acid neutralizer (usually containing calcite media) before your sulfur filter to raise the pH to an alkaline level.

How to Size the Best Sulfur Filter for Well Water for Your Home

If your filter is too small, you will experience a significant drop in water pressure when multiple showers or appliances are running. Worse, the system won’t have enough flow to backwash properly, causing the media bed to become permanently fouled with sulfur and iron.

To size your system correctly, you need to calculate two things:

  1. Service Flow Rate (Peak Demand): Measured in Gallons Per Minute (GPM). As a general rule of thumb:
    • 1–2 Bathrooms: Requires a system with a minimum of 8–10 GPM.
    • 3–4 Bathrooms: Requires 12–15 GPM.
    • 5+ Bathrooms: Requires 18–20+ GPM.
  2. Backwash Flow Rate: This is the GPM required to backwash and lift the heavy filtration media inside the tank during its self-cleaning cycle. You must ensure your well pump can supply the required backwash GPM (typically 5 to 10 GPM depending on tank size) or the system will eventually fail.

Maintenance, Costs, and What to Look For Before Buying

Investing in a whole-house water filter is a long-term commitment. Understanding the maintenance requirements and certifications upfront will save you from unwanted surprises down the road.

To protect your investment, always look for systems that carry independent certifications. You can verify product testing and safety standards through the NSF Guide to Home Water Treatment Devices.

Certifications, Warranties, and Support

When shopping for the best sulfur filter for well water, look for these key indicators of quality:

  • NSF/ANSI Standard 42: Certifies that the system is independently tested and proven to reduce aesthetic contaminants, specifically sulfur odors and iron.
  • NSF/ANSI Standard 372: Ensures the system is certified lead-free, protecting your family’s health.
  • Warranty Length: Quality systems will offer a lifetime warranty on the mineral tank and brine tank, and at least a 5-to-10-year warranty on the smart control valve.
  • Smart Control Valves: Look for systems utilizing modern, digital control valves (like Fleck or Clack valves). Many newer systems feature Bluetooth-enabled smart valves, allowing you to monitor water usage, backwash cycles, and system health directly from a mobile app.

Frequently Asked Questions About Sulfur Filters

Will a water softener remove sulfur smell?

No. A water softener is designed solely to remove hard water minerals like calcium and magnesium through ion exchange. It cannot filter out gaseous hydrogen sulfide. In fact, high levels of sulfur can coat and permanently damage the softener resin, leading to system failure.

How long does sulfur filter media last?

In a standard Air Injection Oxidation (AIO) system, high-quality media like Katalox Light typically lasts between 6 to 8 years before needing replacement, assuming the system is sized correctly and backwashes regularly. Traditional greensand media generally lasts 3 to 5 years.

Is sulfur in well water harmful to health?

At typical household levels, hydrogen sulfide in well water is not toxic or harmful to your health, though it is highly unpleasant. However, extremely high concentrations can cause digestive issues or diarrhea. Additionally, sulfur gas is highly corrosive and will slowly darken, tarnish, and corrode copper pipes, brass fixtures, and silver utensils, while leaving black stains in toilets and sinks.

Conclusion: Get Professional Help in Chicagoland

Choosing and installing the best sulfur filter for well water can feel overwhelming, but you don’t have to tackle the stink alone.

At VanDerBosch Plumbing Inc., we provide licensed residential and light commercial plumbing services across Chicagoland—including Chicago, Cook County, Roselle, Niles, Winnetka, Melrose Park, Oakbrook Terrace, Hyde Park, Sauganash, West Ridge, Ukrainian Village, Elmhurst, and Mount Prospect. We understand the unique aquifer geology of northeastern Illinois and know exactly how to treat local well water issues.

We stand behind our work with a 100% satisfaction guarantee, 24/7 availability, transparent pricing with no hidden service charges, and highly experienced, background-checked plumbers.

If you are located in the Roselle area, you can learn more about our localized services on our Roselle Services – Water Filtration System page.

Ready to banish the rotten egg smell from your home for good? Schedule a professional water filtration system consultation with VanDerBosch Plumbing Inc. today, and let our family take care of yours!
5 Best Water Line Services Compared

water line services residential installation - water line services

Why Water Line Services Matter for Every Chicagoland Homeowner

Water line services cover everything from leak detection and emergency repairs to full pipe replacement — and knowing what you need can save you thousands of dollars in water damage.

Here’s a quick overview of the most common water line services:

Service What It Covers When You Need It
Leak Detection Hidden leaks, meter testing, pressure checks Rising water bill, soggy yard
Water Line Repair Patching, clamp repairs, section fixes Isolated damage, minor leaks
Water Line Replacement Full or partial line swap Aging pipes, frequent failures
Trenchless Repair Pipe bursting or lining underground Landscaped yards, minimal disruption
Lead Line Abatement Removing old lead or galvanized pipes Older homes, discolored water
Emergency Service 24/7 burst pipe and shutoff response Sudden water loss or flooding

Your water line is the single pipe that carries clean water from the city main into your home. It runs underground, out of sight — which means problems can go unnoticed for months. By the time you see a wet spot in your yard or notice a spike in your water bill, the damage may already be significant.

The good news? Most water line problems are fixable — often the same day — when you catch them early and call the right professionals.

I’m Hugh Hodur, President of VanDerBosch Plumbing Inc., and I’ve overseen hundreds of water line services across the Chicagoland area, from emergency burst pipe repairs to full trenchless replacements. Let’s break down exactly what your options are and how to choose the right one for your situation.

Infographic comparing water main vs. service line, homeowner responsibility, and top water line service types - water line

Essential Water Line Services for Homeowners

Understanding your plumbing infrastructure is the first step toward maintaining a healthy home. Many homeowners use the terms “water main” and “water line” interchangeably, but they are quite different. The water main is the large pipe owned by the city or municipality (like the City of Chicago) that runs under the street. Your water line (or service line) is the pipe that branches off that main and brings water directly into your house.

In Chicagoland, from the North Side to Roselle and down through Cook County, the homeowner is typically responsible for the maintenance and repair of the water service line from the street meter or the buffalo box (B-box) all the way into the home. Because these pipes are buried deep to avoid the Chicago frost line, issues often remain “out of sight, out of mind” until a disaster occurs.

As we move through April 2026, infrastructure standards have evolved. Whether you are in Winnetka or Melrose Park, modern Water Line Repair Services now prioritize longevity and water quality. If your home was built more than 50 years ago, you likely have outdated materials like galvanized steel or even lead, which deteriorate over time and can restrict flow or contaminate your drinking water.

Comparing Professional Water Line Services for Leak Detection

Not every leak announces itself with a geyser in the front yard. In fact, some of the most damaging leaks are “silent killers” of your monthly budget. Professional water line services utilize several methods to find these hidden issues:

  • Water Meter Testing: This is the simplest check. If you turn off all fixtures in your home and the triangular “leak indicator” dial on your meter is still spinning, you have a leak.
  • Electronic Sonar/Acoustic Detection: We use specialized microphones to “listen” for the sound of pressurized water escaping a pipe deep underground.
  • Pressure Testing: By isolating sections of your plumbing, we can determine exactly which run of pipe is failing to hold pressure.
  • Moisture Sensors: Advanced sensors can detect changes in soil saturation that indicate a slow, persistent leak.

Adhering to Chicago Water Management Standards ensures that these diagnostic methods are non-invasive, preventing unnecessary digging while we hunt for the source of the problem.

Emergency Water Line Services and Rapid Response

When a pipe bursts, time is your greatest enemy. A major line break can dump hundreds of gallons of water into your foundation or yard in a matter of minutes. This is why we provide 24/7 availability for emergency water line services.

Beyond property damage, a broken water line carries significant contamination risks. When a pipe loses pressure, groundwater and soil contaminants can actually be sucked into the line through the crack (a process called back-siphonage), potentially polluting your home’s drinking water. Rapid response includes immediate shut-off at the main valve and same-day repair to restore safe, pressurized water to your family.

5 Best Water Line Services for Modern Infrastructure

Choosing between a quick patch and a full replacement is a big decision. While a repair might cost less today, if your pipe is 60 years old and brittle, you’ll likely be calling us back in six months for the next leak.

Infographic comparing water line repair vs. replacement costs and pipe longevity - water line services infographic

Trenchless Pipe Replacement

For years, the only way to replace a water line was to dig a massive, ugly trench through your lawn, driveway, and sidewalk. In 2026, we prefer the “no-dig” approach. Trenchless technology, such as pipe bursting or pipe lining, allows us to replace your line by only digging two small access points.

This service is a lifesaver for homeowners in areas like Oakbrook Terrace or Elmhurst who have invested heavily in mature landscaping or expensive brick pavers. You can learn more about how this works on our Trenchless Technology Benefits page.

Lead Service Line Abatement

This is perhaps the most critical service for older Chicago homes. Lead service lines were the standard for decades, but we now know the severe health risks they pose, especially to children. You can identify a lead pipe by its dull matte gray color; if you gently scrape it with a screwdriver, the metal will look shiny and silver.

Since the 1986 federal ban on lead solder, the industry has shifted toward copper and PEX. Upgrading to copper not only removes the lead risk but often significantly improves your home’s water pressure, as old lead and galvanized pipes tend to “close up” with mineral scale over time.

Advanced Trenchless Technology and Diagnostic Methods

trenchless pipe bursting equipment in action - water line services

Modern water line services rely on high-tech equipment to ensure the job is done right the first time. One of our most effective tools is the High-Density Polyethylene (HDPE) pipe used in pipe bursting. This material is incredibly strong, flexible, and resistant to the root intrusion that plagues older clay or metal pipes.

Benefits of Trenchless Solutions

Why choose trenchless?

  1. Lower Labor Costs: Fewer hours spent operating heavy machinery means lower costs for the homeowner.
  2. Faster Completion: Most trenchless replacements are finished in a single day.
  3. Structural Integrity: The new seamless pipes have fewer joints, which are the most common points of failure.
  4. Root Resistance: Without joints for roots to “sniff out” water, your new line is virtually immune to tree damage.

For More info about water line repair, we always recommend starting with a professional assessment to see if your property is a candidate for these eco-friendly methods.

High-Definition Camera Inspections

We don’t guess; we see. By feeding a high-definition waterproof camera into your lines, we can identify exactly what is causing your trouble. Common culprits include:

  • Root Intrusion: Tree roots from those beautiful Chicago maples can find even the tiniest crack in a pipe.
  • Pipe Bellies: This happens when the soil shifts or settles, causing the pipe to sag and collect sediment.
  • Mineral Buildup: Especially common in older galvanized pipes, which can eventually choke off water flow entirely.

Cost Analysis and Material Selection for 2026

When it comes to water line services, the “best” material depends on your specific needs and budget. In the Chicagoland area, we primarily work with three materials:

Comparing PEX, Copper, and HDPE

  • Copper: The gold standard for durability and drinking water quality. It is naturally antimicrobial and can last 50 to 70 years. However, it is the most expensive option.
  • PEX (Cross-linked Polyethylene): Highly flexible and resistant to the freeze-thaw cycles we experience in Niles and Mount Prospect. It is easier to install in tight spaces but isn’t always suitable for the main underground run from the street.
  • HDPE: The go-to for trenchless replacements. It is incredibly tough and can be pulled through old pipes without breaking.

Budgeting for Repair vs. Replacement

Based on current data for the region, the majority of main water line projects fall into these ranges:

  • Low: $3,000 (Minor repairs or short, shallow runs)
  • Average: $5,000 (Standard replacement for a typical single-family home)
  • High: $12,500 (Complex replacements involving deep excavation, long distances, or street-side obstacles)

While a $5,000 investment sounds steep, consider that a single major leak can cause $10,000+ in foundation damage and mold remediation. Furthermore, a new water line is a significant selling point that preserves your property value.

Frequently Asked Questions about Main Water Lines

Who is responsible for the water line between the street and my house?

In most of Chicagoland, including Cook County, the homeowner is responsible for the “service line” that runs from the shut-off valve near the street (the B-box) to the house. The city is responsible for the large main under the road. If the leak is on your property side of that valve, the repair bill is yours.

What are the most common signs of a water line leak?

Keep an eye out for these “Big Four” warning signs:

  1. Unexplained High Water Bills: If your usage hasn’t changed but your bill has doubled, water is going somewhere.
  2. Low Water Pressure: A sudden drop in pressure often means water is escaping before it reaches your faucets.
  3. Wet Spots in the Yard: If it hasn’t rained but you have a “marsh” in your front lawn, your water line is likely leaking.
  4. Discolored Water: Rusty or brown water often indicates that your old metal pipes are corroding from the inside out.

Is water line replacement covered by homeowners insurance?

Standard policies often do not cover the replacement of a line that failed due to age or wear and tear. However, they may cover the damage caused by the leak (like a flooded basement). Some homeowners opt for “service line coverage” as an add-on to their policy, which can be a lifesaver. It is always best to check your specific policy details before an emergency happens.

Conclusion

At VanDerBosch Plumbing Inc., we understand that dealing with underground plumbing is stressful. That’s why we’ve built our reputation on being the most reliable provider of water line services in the Chicago area. From the historic homes of Hyde Park and Ukrainian Village to the newer builds in Sauganash and West Ridge, we bring over 30 years of local expertise to every job.

We offer a 100% satisfaction guarantee, 24/7 emergency availability, and transparent pricing with absolutely no hidden service charges. Our technicians are fully licensed, insured, and background-checked, so you can feel safe inviting us into your home.

Whether you need a simple leak check or a full Water Line Repair using the latest trenchless technology, we are here to help. Don’t wait for a small leak to become a major flood. Give us a call today, and let’s keep your water flowing safely.

Main Sewer Line Explained: Everything You Need to Know

main sewer line

Understanding Your Home’s Wastewater Highway

Your Main sewer line is the primary pipe that carries all wastewater from your home to either the municipal sewer system or your septic tank. Think of it as the wastewater highway for your entire plumbing system—every toilet flush, shower, and sink drain ultimately flows through this critical pipe.

Quick Answer: What is a Main Sewer Line?

  • Definition: The main underground pipe (typically 4-6 inches in diameter) that connects all your home’s drain lines to the city sewer or septic system
  • Function: Transports wastewater away from your property using gravity flow at a slight downward angle
  • Location: Runs from your home’s foundation, through your yard, to the street or septic tank (usually buried 4-6 feet underground)
  • Responsibility: Homeowners typically own and maintain the lateral line from the house to the property line; municipalities maintain the main in the street
  • Average Lifespan: Approximately 50 years, though materials like cast iron or clay may fail sooner

Your home’s plumbing system is more complex than most Chicagoland homeowners realize. Each drain pipe in your house—from the bathroom sink to the basement floor drain—connects to this single main line. When this vital artery becomes clogged, cracked, or damaged, the consequences can range from slow drains and foul odors to catastrophic sewage backups that threaten your property and health.

The good news? Understanding how your main sewer line works and recognizing early warning signs can save you thousands in emergency repairs. Regular maintenance and knowing when to call a professional can prevent small issues from becoming major disasters.

Infographic showing the path of wastewater from home fixtures like toilets, sinks, and showers through branch drain lines that connect to the main sewer line, which then flows to either the municipal sewer system in the street or a septic tank, with labels indicating the homeowner's lateral line responsibility versus the city's main line responsibility - Main sewer line infographic

Telltale Signs of a Main Sewer Line Problem

A healthy main sewer line works silently, but when trouble brews, it leaves unmistakable clues. Ignoring these signs can lead to costly repairs, so it’s crucial for Chicagoland homeowners to recognize them early.

basement floor drain with water backing up - Main sewer line

Here are the common warning signs that your main sewer line might have an issue:

  • Slow Drains: Water draining slowly in multiple sinks, tubs, or showers is a strong indicator of a main line blockage.
  • Gurgling Noises: Hearing gurgling from toilets or drains after using other fixtures suggests trapped air from an obstruction.
  • Multiple Fixture Clogs: When several fixtures, especially on lower levels, back up or drain slowly at once, the problem likely points to the main line. For instance, flushing a toilet might cause a shower backup.
  • Sewage Backups: The most obvious sign is a sewage backup. If sewage comes up through a basement floor drain, toilet, or tub, your main sewer line is severely clogged or damaged.
  • Foul Odors: A persistent sewage smell in or around your home indicates a leak or blockage is allowing sewer gases to escape.
  • Soggy Yard: Unexplained soggy patches of grass, especially above the sewer line, can signal a leak or break. These areas might also be unusually green.
  • Foundation Cracks or Sinkholes: A leaking sewer line can erode soil around your foundation, leading to cracks or even sinkholes in your yard.
  • Pest Issues: Moisture and organic matter from a leaking sewer line can attract rodents and other pests.

If you’re noticing any of these symptoms, don’t delay. Early detection can prevent extensive damage and save you money. You can find more information on specific symptoms and what they mean by visiting our guide on Signs a Sewer Line May Need Repair or Replacement.

Main Drain Clog vs. Main Sewer Line Clog

Understanding the difference between a local drain clog and a more serious main sewer line clog is crucial for diagnosis.

  • Main Drain Clog (Local Clog): This affects a single fixture. For example, if only your kitchen sink is draining slowly, it’s likely a clog in that specific drain line, often caused by hair, soap scum, or food particles.
  • Main Sewer Line Clog (System-Wide Clog): This impacts multiple fixtures throughout your house, especially on the lowest level. If flushing a toilet causes a shower backup, or all drains are slow, you’re likely dealing with a main sewer line clog in the primary pipe.

The key to isolating the problem is observation. If the problem is widespread, affecting multiple drains at once, it’s time to suspect the main sewer line.

Signs of a Leaky or Broken Sewer Line

A broken main sewer line is a homeowner’s nightmare. Unlike a clog, a break allows wastewater to escape into the soil, causing environmental and structural issues.

Here’s what to look for:

  • Soggy Patches of Grass: Unexplained wet spots in your lawn along the sewer line’s path are a classic sign of a leak.
  • Unpleasant Yard Smells: Foul, sewage-like odors outdoors near the sewer line could mean a break is allowing wastewater and gases to escape.
  • Sinkholes or Ground Indentations: A persistent leak can wash away soil around the pipe, leading to depressions or sinkholes in your yard.
  • Foundation Issues: A leak can saturate the ground under your foundation, causing instability. This may appear as cracks in the foundation, walls, or floors.
  • Mold Growth: A leak near your foundation or in the basement can cause mold growth on walls or floors, often with a musty smell.

A broken sewer pipe is a serious issue that requires immediate attention to prevent further damage and health risks. To learn more about identifying and addressing these problems, refer to our comprehensive guide on Signs of a Broken Sewer Pipe and How to Fix It.

Common Causes of Sewer Line Damage and Consequences

Understanding what causes main sewer line problems is the first step toward prevention. In Chicagoland, our homes and landscapes present unique challenges that can lead to clogs and damage.

tree roots that have grown into and cracked a sewer pipe - Main sewer line

Here are the most common culprits we encounter:

  • Tree Root Intrusion: This is the number one cause of sewer line issues in our area. Tree roots seek water and can penetrate tiny cracks or loose joints in pipes. Once inside, they grow into a dense net that traps debris and can eventually crush or break the pipe. For more on this, see our article on Dealing With Intrusive Tree Roots and Their Impact on the Plumbing.
  • Grease and Oil Buildup: Pouring cooking grease, oils, and fats down the drain is a common mistake. These substances cool and solidify in pipes, sticking to the walls. Over time, this buildup restricts flow and traps other debris, leading to stubborn clogs.
  • Flushing Non-Flushable Items: Toilets are only for human waste and toilet paper. Items like “flushable” wipes, feminine hygiene products, and paper towels don’t dissolve and can quickly form significant blockages in your main sewer line.
  • Aging Pipes: Many older Chicagoland homes have cast iron or clay pipes with a finite lifespan. Cast iron can corrode, creating rough surfaces that snag debris. Clay pipes can become brittle, crack, and are susceptible to root intrusion. The average lifespan is around 50 years, but cast iron can fail sooner.
  • Pipe Corrosion: Pipe corrosion can also be caused by chemical reactions, often from harsh drain cleaners (which we advise against) or certain types of wastewater. This weakens the pipe, making it prone to cracks.
  • Shifting Soil: Chicagoland’s freeze-thaw cycles and ground movement put pressure on underground pipes. This can cause pipes to become misaligned, crack, or collapse, disrupting wastewater flow.
  • Poor Installation: Improper installation, such as incorrect sloping or weak joints, can lead to recurring clogs, bellies (sags in the pipe that collect water and debris), or premature failure.

The consequences of ignoring these issues are severe:

  • Health Hazards: Raw sewage contains harmful bacteria, viruses, and pathogens, posing serious health risks during backups.
  • Property Damage: Sewage backups cause extensive water damage to basements, flooring, and personal belongings, and can lead to mold growth.
  • Environmental Contamination: Leaking sewer lines release untreated wastewater into the soil, potentially contaminating groundwater and local waterways.

Your Guide to Diagnosing and Fixing a Main Sewer Line

When you suspect a main sewer line problem, acting swiftly is key. While it can be a daunting experience, the right diagnostic tools and repair options can restore your peace of mind.

Professional Diagnostic Methods

Identifying the precise location and nature of a sewer line issue requires specialized tools and expertise. Here’s our approach:

  • Plumbing Cleanout Access: The first step is locating your plumbing cleanout, a capped pipe providing direct access to your main sewer line. It’s often in the basement or outside near the foundation. An accessible cleanout is vital for diagnosis and clearing.
  • Sewer Camera Inspection: Our go-to method is a sewer camera inspection. We insert a high-resolution camera into the sewer line via the cleanout. Live video allows us to see blockages, cracks, corrosion, or other damage, pinpointing the problem’s exact location and severity. To understand more about this process, check out The Basics of Sewer Video Inspection Explained.
  • Smoke Testing: To detect leaks, we may use smoke testing. Non-toxic smoke is blown into the sewer line; if it escapes through your yard or foundation, it indicates a leak.
  • Hydrostatic Testing: For suspected leaks, we might perform a hydrostatic test. We plug the sewer line, fill it with water, and monitor for a pressure drop, which indicates a leak.

Clearing and Repairing Your Main Sewer Line

After diagnosis, we recommend the most effective solution. Our goal is a lasting repair with minimal disruption.

  • Hydro Jetting: For stubborn clogs from grease, sludge, or roots, hydro jetting is a powerful solution. It uses high-pressure water jets to scour the inside of the pipe, breaking apart blockages and cleaning the walls. It’s often more effective than snaking for a thorough clean. We also provide comprehensive Drain Cleaning services.
  • Mechanical Augers (Sewer Snakes): For many blockages, a professional-grade mechanical auger (sewer snake) can be used. Its rotating head breaks through roots, retrieves objects, or clears debris.
  • Traditional Excavation: For severely damaged or collapsed pipes, traditional excavation may be needed. This involves digging a trench to expose and replace the damaged pipe section. It is effective but invasive and disruptive to landscaping.
  • Trenchless Pipe Repair: We specialize in trenchless technologies that minimize excavation, ideal for preserving lawns, driveways, and landscaping.
    • Pipe Lining (Cured-In-Place Pipe – CIPP): This involves inserting a resin-coated liner into the damaged pipe. The liner is inflated and cured, creating a new, seamless pipe within the old one. It seals cracks and strengthens the pipe without digging.
    • Pipe Bursting: For collapsed pipes, pipe bursting is an excellent trenchless option. A new pipe is pulled through the old one, breaking it apart while installing the new pipe. This requires only small access points, eliminating extensive trenching.

You can learn more about these innovative solutions in our guide What to Know About Trenchless Pipe Repairs.

Understanding Repair Costs and Timelines

The cost and timeline for main sewer line repairs vary based on several factors:

  • Average Cost Range: National averages for main sewer line replacement can range from $1,500 to $10,000. Minor repairs might be under $1,000, but major repairs requiring excavation or trenchless methods are more substantial.
  • Factors Influencing Cost:
    • Severity and Type of Damage: Simple clog removal is much cheaper than replacing a collapsed pipe.
    • Length and Depth of Repair: Longer or deeper repairs incur higher costs.
    • Pipe Material: The replacement material (e.g., PVC, ductile iron) impacts the price.
    • Accessibility: Difficult-to-reach areas (under concrete, landscaping) increase labor and equipment costs.
    • Repair Method: Trenchless methods can be more expensive upfront but save on landscaping restoration.
    • Permit Fees: Local permit fees in Chicagoland (e.g., Chicago, Roselle, Elmhurst) are added to the overall cost.
  • Repair Duration: Simple clogs can be cleared in hours. Trenchless repairs might take a day. Full replacement with excavation can take up to two days, depending on the work.

We always provide transparent pricing and detailed estimates before we begin any work. For more information on our services, visit our dedicated page for Sewer Line Repair.

Prevention, Maintenance, and Homeowner Responsibilities

An ounce of prevention is worth a pound of cure, especially when it comes to your main sewer line. Proactive maintenance and understanding your responsibilities can help you avoid costly and messy emergencies.

How to Prevent Future Sewer Line Clogs

Here are our top tips for keeping your main sewer line flowing freely:

  • Proper Disposal Habits: This is perhaps the most crucial step.
    • Avoid Grease: Never pour cooking grease, fats, or oils down any drain. Wipe greasy pans with a paper towel and dispose of it in the trash.
    • Flush Only Toilet Paper: The only things that should go down your toilet are human waste and toilet paper. “Flushable” wipes, feminine hygiene products, paper towels, cotton balls, dental floss, and similar items do not break down in water and are major contributors to clogs.
    • Use Drain Screens: Install screens over all your drains (sinks, showers, tubs) to catch hair, food particles, and other debris before they enter your pipes.
  • Regular Drain Cleaning: Even with the best habits, some buildup is inevitable. Consider professional drain cleaning every few years, especially if you have an older home or notice consistently slow drains. This proactive measure can clear minor blockages before they escalate.
  • Strategic Tree Planting: When planting new trees or shrubs, be mindful of their proximity to your main sewer line. Research the root systems of different species and plant them a safe distance away from underground pipes. If you have mature trees, consider annual inspections. For more guidance, see How to Prevent Clogged Toilets and Sewer Lines.
  • Annual Inspections: For older homes or properties with known issues (like frequent root intrusion), an annual sewer camera inspection can catch problems early, allowing for targeted cleaning or repair before a major backup occurs.
  • Consider a Backwater Valve: In areas prone to municipal sewer backups, installing a backwater valve can provide an extra layer of protection, preventing sewage from flowing back into your home.

Here’s a quick reference for your daily habits:

  • DO’S:
    • Flush only human waste and toilet paper.
    • Scrape food scraps into the trash before washing dishes.
    • Wipe grease from pans and dispose of it in the garbage.
    • Use drain screens in sinks and showers.
    • Pour water into basement floor drains periodically to keep P-traps from drying out.
  • DON’TS:
    • Flush “flushable” wipes, paper towels, feminine hygiene products, or cotton balls.
    • Pour grease, oils, or fats down the drain.
    • Dispose of coffee grounds in the sink.
    • Use harsh chemical drain cleaners.
    • Plant trees with aggressive root systems near your sewer line.

Homeowner vs. Municipality: Who is Responsible?

Understanding who is responsible for which part of the sewer system is a common point of confusion for Chicagoland homeowners. While specific regulations can vary slightly between municipalities like Chicago, Roselle, or Elmhurst, the general division of responsibility typically follows this pattern:

  • Homeowner Responsibility (Sewer Lateral): As a homeowner, you are generally responsible for the “sewer lateral.” This is the pipe that carries wastewater from your house, across your property, all the way to its connection with the city sewer main, which is often located in the street or an easement. This includes any cleanouts on your property. If a clog or damage occurs anywhere along this lateral line, it’s typically your responsibility to diagnose, clear, and repair it.
  • Municipality Responsibility (City Sewer Main): The city (or the Metropolitan Water Reclamation District of Greater Chicago, MWRD, in our region) is responsible for the main sewer line in the street. This large pipe collects wastewater from multiple properties and transports it to the treatment plant. If the blockage or damage is within the city’s main line, they are responsible for its repair.

Key Points on Responsibility:

  • Property Line Boundary: The exact point where homeowner responsibility ends and municipal responsibility begins can sometimes be debated or depend on local ordinances. It’s often at the property line, but can sometimes extend to the connection point in the street.
  • Easements: If your main sewer line runs through an easement on your property, you are still generally responsible for its maintenance and repair.
  • Permit Requirements: Any significant work on your main sewer line, especially excavation or replacement, will almost certainly require a permit from your local city or village. This ensures the work is done to code and inspected properly.

When in doubt, we can help you understand the specifics for your property and municipality. For a broader understanding of your sewer system, we recommend resources like Understanding Your Sewer System (MWRD).

Frequently Asked Questions about the Main Sewer Line

We often hear similar questions from Chicagoland homeowners about their main sewer lines. Here are some of the most common ones, with our expert answers.

How often should my main sewer line be inspected?

The frequency of main sewer line inspections depends on several factors:

  • General Recommendation: For most homes, a professional sewer camera inspection every 2-5 years is a good proactive measure.
  • Older Homes: If your home was built before 1970 and still has original cast iron or clay pipes, we recommend annual inspections due to their susceptibility to corrosion and root intrusion.
  • Properties with Mature Trees: If you have large, mature trees near your sewer line, annual inspections are highly advisable to catch root intrusion early.
  • After Recurring Clogs: If you’ve experienced frequent clogs or backups, an inspection can identify the underlying cause and prevent future issues.
  • Before Purchasing a Home: A pre-purchase sewer camera inspection is a wise investment for any home buyer, revealing the condition of the main sewer line before you commit.

Regular inspections can save you from unexpected and costly emergencies. Learn more about our inspection process at Sewer Video Inspection.

Are chemical drain cleaners safe for my main sewer line?

In short: No, we do not recommend using chemical drain cleaners for your main sewer line.

  • Harsh Chemicals: These products contain corrosive chemicals that can damage your pipes, especially older ones made of cast iron or PVC. They can eat away at pipe material, leading to leaks, cracks, and premature failure.
  • Environmental Concerns: The chemicals are harmful to the environment and can pose health risks if mishandled.
  • Ineffectiveness on Major Clogs: While they might temporarily clear a minor surface clog, chemical cleaners are rarely effective against deep, stubborn main sewer line clogs caused by roots, grease, or foreign objects. They often just sit on top of the blockage, creating a caustic pool that makes professional clearing more hazardous.
  • Professional Alternatives: For serious clogs, professional methods like hydro jetting or mechanical augers are far safer, more effective, and provide a longer-lasting solution without risking your plumbing system.

For safe and effective clog removal, always opt for professional solutions. Our A Short Guide to Professional Drain Cleaning offers more insights.

What’s the difference between a force main and a gravity sewer?

While most residential main sewer lines in Chicagoland operate on gravity, it’s helpful to understand the difference, especially when discussing municipal systems:

  • Gravity Sewer: This is the most common type of sewer system. It relies on gravity to move wastewater. Pipes are laid with a continuous downward slope, allowing wastewater to flow naturally from your home to the municipal sewer main and then to a treatment plant. Your home’s main sewer line is typically a gravity sewer.
  • Force Main: A force main is a pressurized pipeline that conveys wastewater from a lower elevation to a higher elevation, or across flat terrain where gravity flow isn’t feasible. It requires a pump station (or lift station) to push the wastewater through the pipe. Force mains are typically used in municipal systems to overcome geographical challenges or to connect remote areas to the main sewer network. They are less common for individual residential connections unless a property is significantly below the municipal sewer main and requires a private pump system.

The EPA’s Wastewater Technology Fact Sheet: Sewers, Force Main provides a comprehensive technical overview of force mains.

Protect Your Home with Professional Sewer Line Care

Your main sewer line is an unsung hero of your home, silently working day in and day out. But when it falters, it can quickly turn into a major headache. We’ve explored the telltale signs, common causes, and effective solutions for main sewer line problems. The key takeaway is this: early detection and prompt action are your best defenses against costly and unsanitary plumbing emergencies.

Whether you’re noticing slow drains, gurgling noises, foul odors, or a soggy spot in your yard, these are not issues to ignore. They are your home’s way of telling you something is wrong with its vital wastewater highway.

At VanDerBosch Plumbing Inc., we’re committed to keeping Chicagoland homes safe and functional. Our experienced, background-checked technicians are experts in diagnosing and repairing all types of main sewer line issues. We offer a 100% satisfaction guarantee, transparent pricing with no service charges, and are available 24/7 for emergencies because we know plumbing problems don’t keep business hours.

Don’t let a main sewer line issue disrupt your life. If you suspect a problem, trust the professionals who serve your local communities like Chicago, Roselle, Niles, Winnetka, Melrose Park, Oakbrook Terrace, Elmhurst, and Mount Prospect.

Explore advanced trenchless pipe repair solutions or contact us today for an inspection and peace of mind. We’re here to help you protect your home.

How to Replace Your Main Water Line from Meter to House

replacing main water line from meter to house

What You Need to Know Before Replacing Main Water Line from Meter to House

Replacing the main water line from meter to house is one of the most significant plumbing projects a homeowner can face. Here’s a quick overview of what it involves:

Key facts at a glance:

  • What it is: Replacing the underground pipe that carries water from your street meter to your home’s plumbing system
  • Average cost: $1,712, with a typical range of $647 to $2,833 (up to $5,000+ for complex jobs)
  • Cost per linear foot: $50 to $150, depending on method and materials
  • Methods: Traditional trenching or trenchless (pipe lining or pipe bursting)
  • Time to complete: A few hours to several days, depending on length, depth, and method
  • DIY-friendly? No — this work requires a licensed plumber in nearly all jurisdictions
  • Pipe materials: PEX, PVC, copper, or HDPE — each with different costs and lifespans
  • Permits required? Yes, in most municipalities — typically $150 to $500

Your water line is buried underground and quietly does its job every day. Most homeowners never think about it — until something goes wrong. A sudden drop in water pressure, a soggy patch in the yard, or an unexplained spike in your water bill can all point to a failing line that may need more than a simple repair.

I’m Hugh Hodur, President of VanDerBosch Plumbing, and I’ve overseen hundreds of water line projects across the Chicagoland area — including complex cases involving aging infrastructure, lead pipe removal, and trenchless replacement. My team deals with replacing main water line from meter to house regularly, so I’ll walk you through everything you need to know to make a confident, informed decision.

Infographic showing water line path from street meter to house with cost ranges and method options - replacing main water

Understanding the Importance of Your Main Water Line

The main water line is the lifeline of your home. It is a single, pressurized pipe that connects the municipal water supply (usually at a meter located near the sidewalk or street) to your home’s internal plumbing system. This pipe is responsible for delivering every drop of potable water you use for drinking, bathing, and cleaning.

Because this line is under constant pressure, any compromise in its integrity can lead to significant issues. In the Chicagoland area, where we experience deep freezes, the depth of this line is critical. It must be buried below the frost line—which can be up to 4 to 5 feet deep in our region—to prevent the water inside from freezing and expanding. When this happens, the physical stress can cause the pipe to split. You can learn more about this in our guide on Why Do Pipes Burst?.

Beyond just functionality, the health of your water line impacts your home’s value and the safety of your water. Older homes in Chicago, Melrose Park, or Oakbrook Terrace may still have lead or galvanized steel service lines. These materials degrade over time, potentially leaching contaminants into your water or suffering from internal corrosion that restricts flow. Recognizing Signs Repiping Services May Be Needed is the first step in ensuring your family has access to clean, high-pressure water for decades to come.

Cost Breakdown for Replacing Main Water Line from Meter to House

When budgeting for replacing main water line from meter to house, it’s important to understand that no two jobs are exactly alike. In 2026, the national average for this project sits around $3,500, though many straightforward replacements fall between $1,500 and $3,000. If you are dealing with a short run—say, a 10-foot line from a sidewalk meter to the foundation with light digging—you might see costs as low as $700 to $1,200.

However, for most Chicagoland homeowners, the distance is longer and the digging is deeper. You can expect to pay between $50 and $150 per linear foot for standard installation, though this can climb to $250 per foot if we have to navigate around heavy landscaping, driveways, or deep frost lines.

2026 Cost Comparison Table

Factor Estimated Cost Range
National Average Total $1,712 – $3,500
Cost Per Linear Foot $50 – $150
Material (Pipe only) $0.40 – $13.00 per foot
Labor (35% – 40% of total) $45 – $150 per hour
Permits & Inspections $150 – $500
Trenchless Method $75 – $250 per foot

Labor typically accounts for a large portion of your estimate, often 35% to 60% of the total price. This is because the equipment required—whether it’s a backhoe for trenching or a hydraulic ram for pipe bursting—requires skilled operators. For more detailed data on how these prices fluctuate, you can view the How Much Does Main Water Line Replacement Cost? [2026 Data] | Angi report.

Signs You Need to Consider Replacing Main Water Line from Meter to House

How do you know if you’re looking at a minor Water Line Repair or if it’s time for a full replacement? Often, the symptoms of a failing line are subtle before they become catastrophic.

  1. A Sudden Drop in Water Pressure: If your morning shower feels more like a light drizzle, and it’s happening at every faucet, the main line might be leaking or clogged with mineral buildup.
  2. Discolored Water: Rusty or brownish water often indicates that an old galvanized steel pipe is corroding from the inside out.
  3. Unexplained High Water Bills: If your usage hasn’t changed but your bill is skyrocketing, water is likely escaping somewhere between the meter and your house.
  4. Soggy Patches in the Yard: If it hasn’t rained in a week but your lawn has a “marshy” spot, you’ve likely found the location of your leak.
  5. Foundation Cracks or Damp Basements: Water leaking near the foundation can cause soil to shift or seep through the walls.

If you are experiencing these issues, it is worth investigating whether Do You Need Repiping? for the rest of the home as well, as the same conditions affecting your main line may be affecting your indoor plumbing.

Methods for Replacing Main Water Line from Meter to House

At VanDerBosch Plumbing, we evaluate every property to determine which replacement method is the most cost-effective and least disruptive.

Traditional Trenching

This is the “old school” way. We use an excavator or backhoe to dig a trench from the meter all the way to the house.

  • Pros: Allows for a visual inspection of the entire path; often cheaper if there are no obstacles like driveways.
  • Cons: Extremely disruptive to landscaping; requires backfilling and reseeding.
  • Cost: $50 to $200 per linear foot.

Trenchless Pipe Bursting

This modern method is a favorite for homeowners who love their manicured lawns. We dig two small access points at either end of the line. A heavy-duty cable pulls a new pipe through the old one, literally “bursting” the old pipe apart as the new one takes its place.

  • Pros: Minimal digging; preserves driveways and gardens.
  • Cons: Requires specialized equipment.
  • Cost: $50 to $200 per linear foot.

Trenchless Pipe Lining (CIPP)

Often called “cured-in-place pipe,” this involves inserting an epoxy-saturated felt tube into the existing pipe. Once it cures, it creates a “pipe within a pipe.”

  • Pros: No digging required; creates a seamless, jointless line.
  • Cons: Can slightly reduce the diameter of the pipe.
  • Cost: $75 to $150 per linear foot.

For many of our clients in Chicago and the surrounding suburbs, Trenchless Pipe Repair is the preferred route. You can find more information on these “no-dig” solutions in our Trenchless Pipe Repair in Chicago: A Guide to No-Dig Solutions guide.

A professional plumber using trenchless pipe bursting equipment to replace a water line without digging a full trench

Material and Labor Factors in 2026

The material you choose for your new water line will impact both the upfront cost and how long the line lasts. In 2026, we primarily see four materials used for residential service lines:

  • Copper tubing ($2 – $10+ per foot): The gold standard for durability. Copper is resistant to corrosion and has a lifespan of 50 to 100 years. It is often required by local codes in many Chicago neighborhoods.
  • PEX (Cross-linked Polyethylene) ($0.40 – $2 per foot): Extremely flexible and resistant to scale and chlorine. Its ability to expand makes it highly resistant to freeze-bursting.
  • HDPE (High-Density Polyethylene) ($1 – $5 per foot): This is the preferred material for trenchless “pulls” because it is incredibly strong and comes in long, seamless coils.
  • PVC ($0.50 – $5 per foot): While common and inexpensive, PVC can be more brittle than HDPE or PEX, especially in cold climates.

If you’re considering a larger project, such as a Whole Home Repipe, we often coordinate the main line material with your internal plumbing for maximum longevity.

Comparison of different pipe materials: Copper, PEX, and HDPE - replacing main water line from meter to house

Additional Expenses: Permits, Valves, and Landscaping

When we provide an estimate for replacing main water line from meter to house, we make sure to include the “hidden” costs that often surprise homeowners:

  • Main Shut-off Valve Replacement: If you’re replacing the line, it’s the perfect time to replace an old, crusty gate valve with a reliable ball valve. This typically adds $400 to $800 to the project.
  • Pressure Regulators: If your municipal water pressure is too high, a regulator ($150 – $350) protects your appliances from damage.
  • Permits and Inspections: Most local governments in Cook County require a permit for water line work, costing between $150 and $500. This ensures the work is inspected and meets safety codes.
  • Lead Service Line Considerations: In Chicago, there are specific initiatives for Lead Service Line Replacement – Lead-Safe Chicago. The city often waives permit fees (up to $3,100) if you are proactively removing lead lines.
  • Landscaping Restoration: If we have to trench, you may need to budget for new sod or repair to a driveway. Trenchless methods significantly reduce these costs.

Professional vs. DIY: Why Expertise Matters

We’ve seen the “DIY” videos online, and while we admire the gumption, replacing main water line from meter to house is not a weekend project for a hobbyist. In fact, in most of our service areas—like Niles, Winnetka, and Elmhurst—it is illegal for an unlicensed individual to perform this work.

Here is why professional expertise is non-negotiable:

  1. Utility Locating: Before we even touch a shovel, we call 811. Hitting a gas line or an underground electrical main isn’t just expensive; it’s deadly.
  2. Specialized Equipment: You can’t rent a pipe-bursting hydraulic ram at a local hardware store.
  3. Code Compliance: We ensure the pipe is at the correct depth and uses approved materials. If you do it yourself and it’s not to code, you may have to dig it all up again when you try to sell your house.
  4. Warranty and Insurance: VanDerBosch Plumbing provides a 100% satisfaction guarantee. If something goes wrong, we’re the ones who fix it—not your bank account.

Our team of background-checked, experienced technicians is available 24/7 to handle these high-stakes Services.

Frequently Asked Questions about Main Water Line Replacement

How long does a main water line replacement take?

For most residential properties, the actual replacement takes one to two days.

  • Trenchless methods are often the fastest, with the new pipe being pulled in just a few hours once the access points are ready.
  • Traditional trenching takes longer because of the extensive digging and the time required to properly backfill and compact the soil. You will typically be without water for 4 to 8 hours on the day the final connections are made.

Does homeowners insurance cover the cost?

Standard homeowners insurance policies usually do not cover water line replacement if the cause is “wear and tear” or age. However, you might be covered if:

  • The damage was caused by a sudden peril (like an explosion or a third-party contractor hitting the line).
  • You have a specific “Service Line Coverage” rider on your policy. We always recommend checking your policy for these riders, as they are often very affordable and can save you thousands.

How often should I inspect my water line?

If your home is over 50 years old, you should have a professional plumbing inspection every 1 to 3 years. We use acoustic sensors and cameras to check for small leaks that haven’t surfaced yet. Soil conditions in the Chicagoland area—especially clay-heavy soils—can shift and put stress on pipes, so regular check-ups are a smart preventative measure.

Conclusion

Replacing the main water line from meter to house is a significant investment, but it’s one that pays off in peace of mind, improved water pressure, and the long-term health of your home’s infrastructure. Whether you choose the surgical precision of trenchless technology or the tried-and-true method of traditional trenching, the goal is the same: a reliable, clean water supply for the next 50+ years.

At VanDerBosch Plumbing, we pride ourselves on transparent pricing and expert service throughout Chicago and the surrounding suburbs. If you’ve noticed the signs of a failing line—or if you’re ready to proactively replace an old lead service pipe—don’t wait for a basement flood to take action.

Ready to secure your home’s water supply? Contact us today for a professional assessment and a clear, honest quote on your Water Line Repair or replacement in Chicago, IL.

Best Plumbing Repairs Services in Chicago, IL

plumbing repairs

Why Plumbing Repairs Deserve Your Immediate Attention

Plumbing repairs are fixes made to a home’s water supply, drainage, or fixture systems when they fail or leak. Here’s a quick look at the most common ones Chicagoland homeowners deal with:

Repair Type Typical Cost Range DIY Friendly?
Dripping faucet $150 – $250 Sometimes
Running toilet $200 – $350 Sometimes
Pipe leak (visible) $200 – $300 Rarely
Pipe leak (behind wall) $400 – $800 No
Water heater repair $150 – $500 No
Drain clearing $100 – $300 Sometimes

Most plumbing problems start small — a slow drip, a gurgling drain, a toilet that runs a few seconds too long. But left alone, they grow fast. In fact, a faucet that drips just five times per minute wastes roughly 230 gallons of water per year. Multiply that across a few ignored leaks, and you’re looking at real damage to your home and your wallet.

More than half of homeowners say their biggest challenge is simply finding a reliable repair person they can trust. That frustration is completely understandable — especially when water is pooling under your sink at midnight.

I’m Hugh Hodur, President of VanDerBosch Plumbing Inc., where I oversee everything from emergency burst pipe repairs to water heater installations across the Chicagoland area. With years of hands-on experience managing residential and commercial plumbing repairs, I’ve seen how fast a minor issue can become a major crisis. In this guide, I’ll walk you through the most important plumbing repairs every homeowner should know — so you can act fast and make smart decisions when something goes wrong.

Common residential plumbing system components and most frequent repair points infographic - plumbing repairs infographic

Essential Guide to Residential Plumbing Repairs

Maintaining a home in areas like Roselle, Elmhurst, or downtown Chicago means staying ahead of the wear and tear that our local climate and aging infrastructure can cause. Residential plumbing repairs aren’t just about stopping a leak; they are about protecting the structural integrity of your property. Whether you are dealing with a vintage home in Ukrainian Village or a modern condo in the Loop, the basics of fixture maintenance and pipe integrity remain the same.

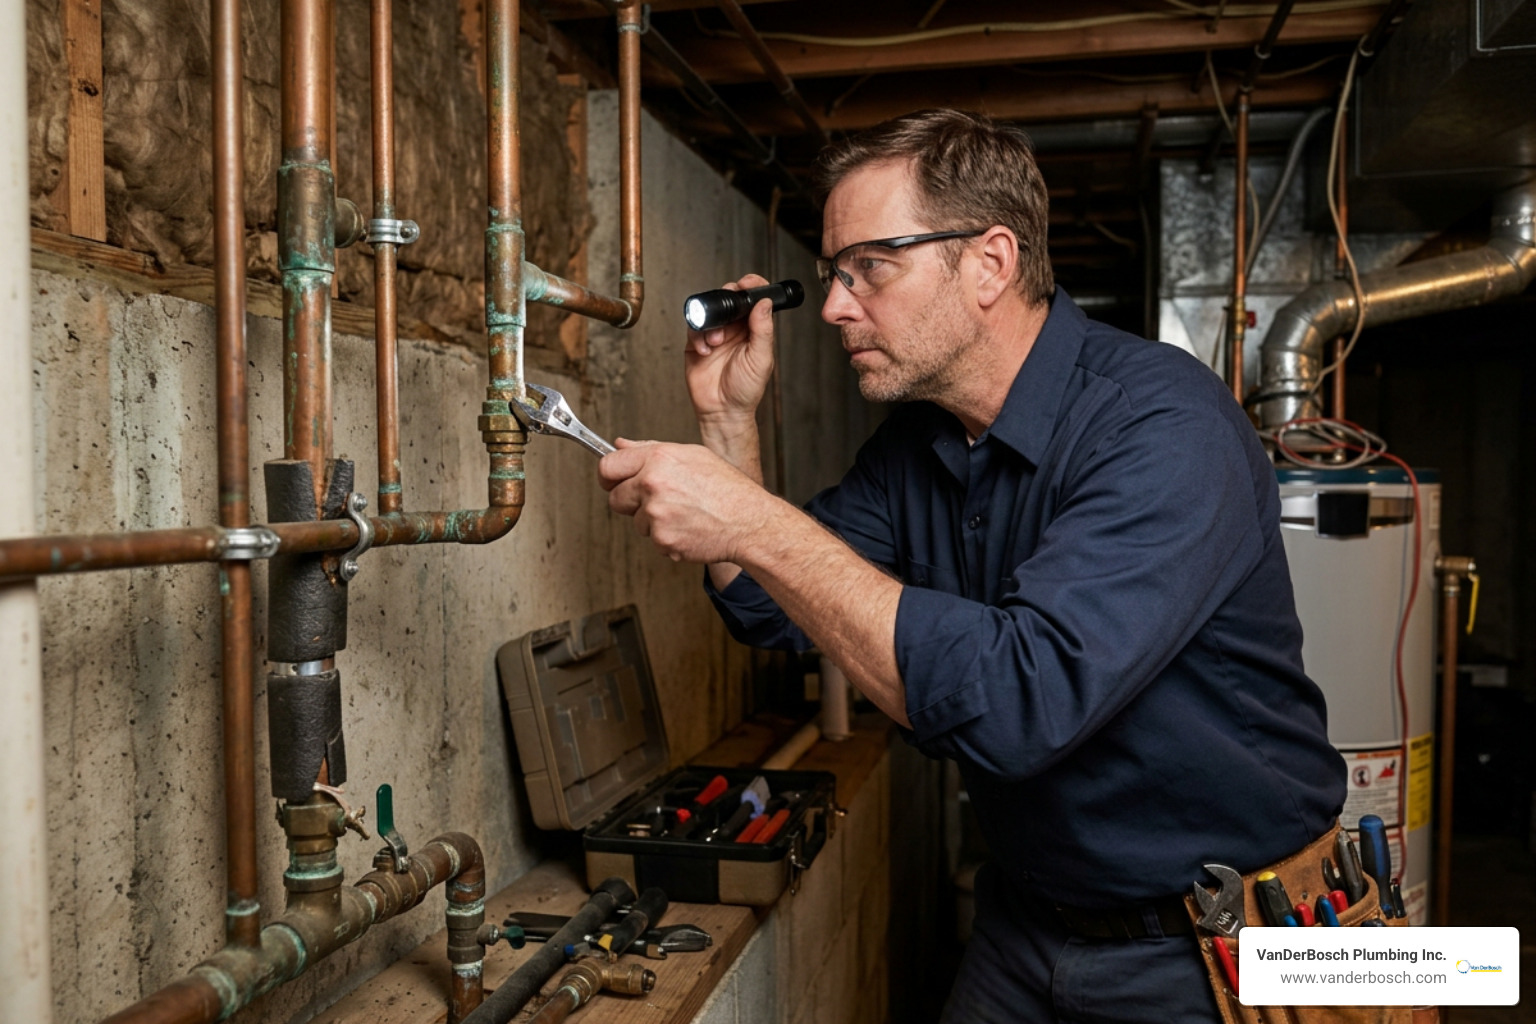
Professional plumber repairing a copper pipe in a residential basement - plumbing repairs

When we talk about essential repairs, we focus on the systems you use every day: your faucets, your toilets, and your drains. If these aren’t functioning correctly, your daily routine grinds to a halt. Understanding why issues occur is the first step toward a fix. For instance, there are 5 reasons your drain is clogged, ranging from hair and soap scum to more serious structural issues. For residents in our area, resources like Cook County Leak Repair provide additional context on the importance of water conservation and infrastructure.

Professional Plumbing Repairs for Leaky Faucets

We’ve all heard that rhythmic drip-drip-drip in the middle of the night. While it might seem like a minor annoyance, those dripping taps are silent budget-killers. As mentioned, a faucet dripping just five times a minute wastes about 230 gallons of water annually.

Most faucet plumbing repairs involve replacing worn-out internal components. Over time, O-rings can crack, and valve seats can become corroded by mineral deposits common in Illinois water. While a handy homeowner might attempt a DIY fix, modern high-end fixtures often require specialized tools to avoid scratching the finish or damaging the internal cartridge. If your sink is backed up while the faucet is leaking, you may also need to learn how to fix a clogged sink to prevent an overflow.

Toilet and Drain Clearing Services

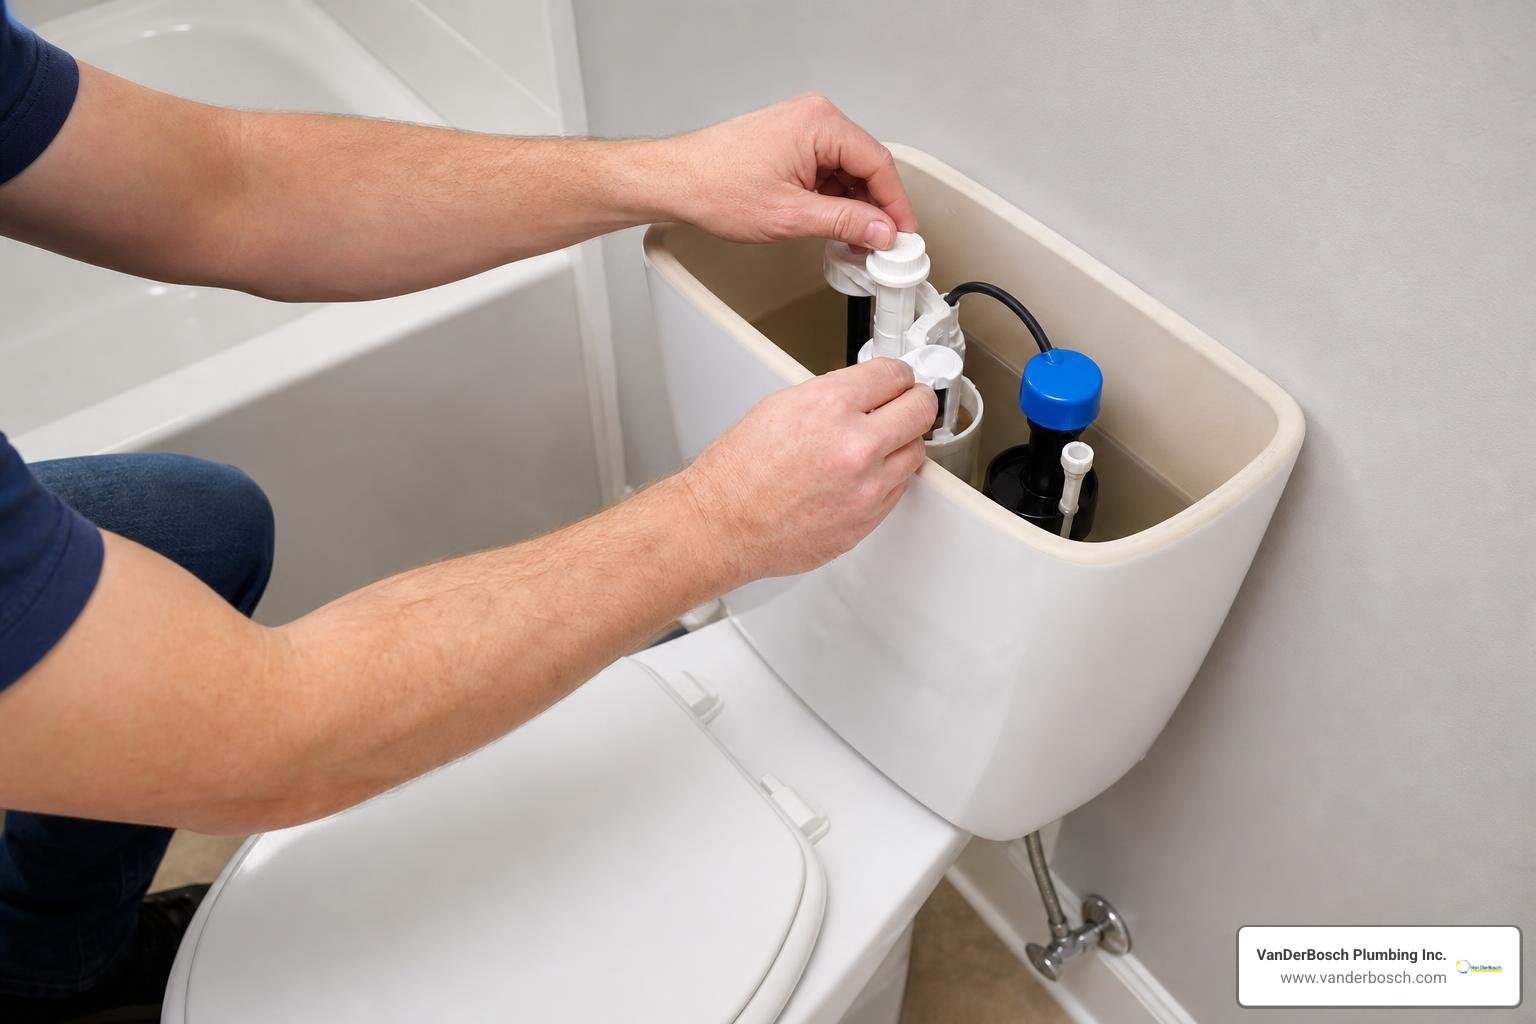
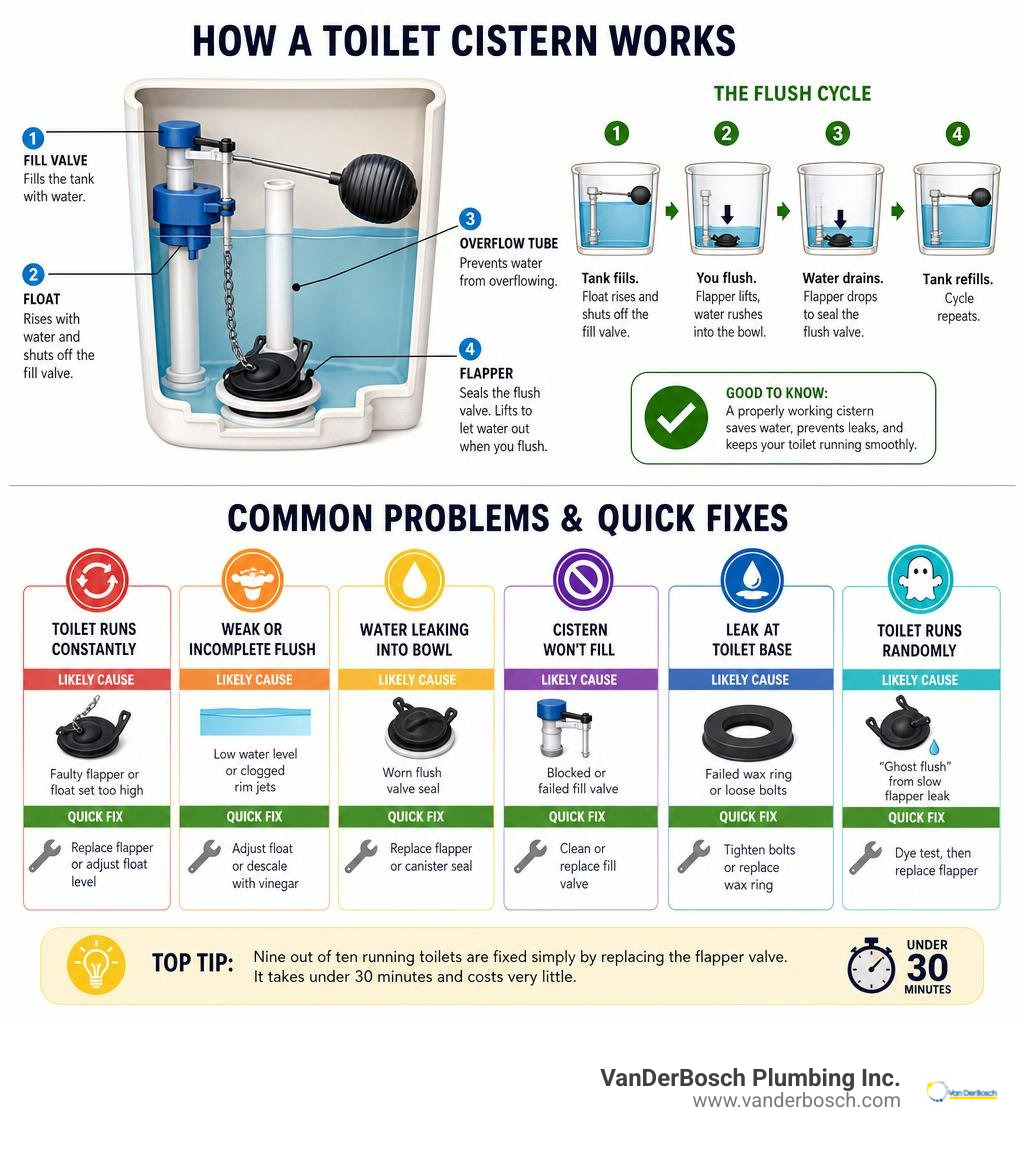
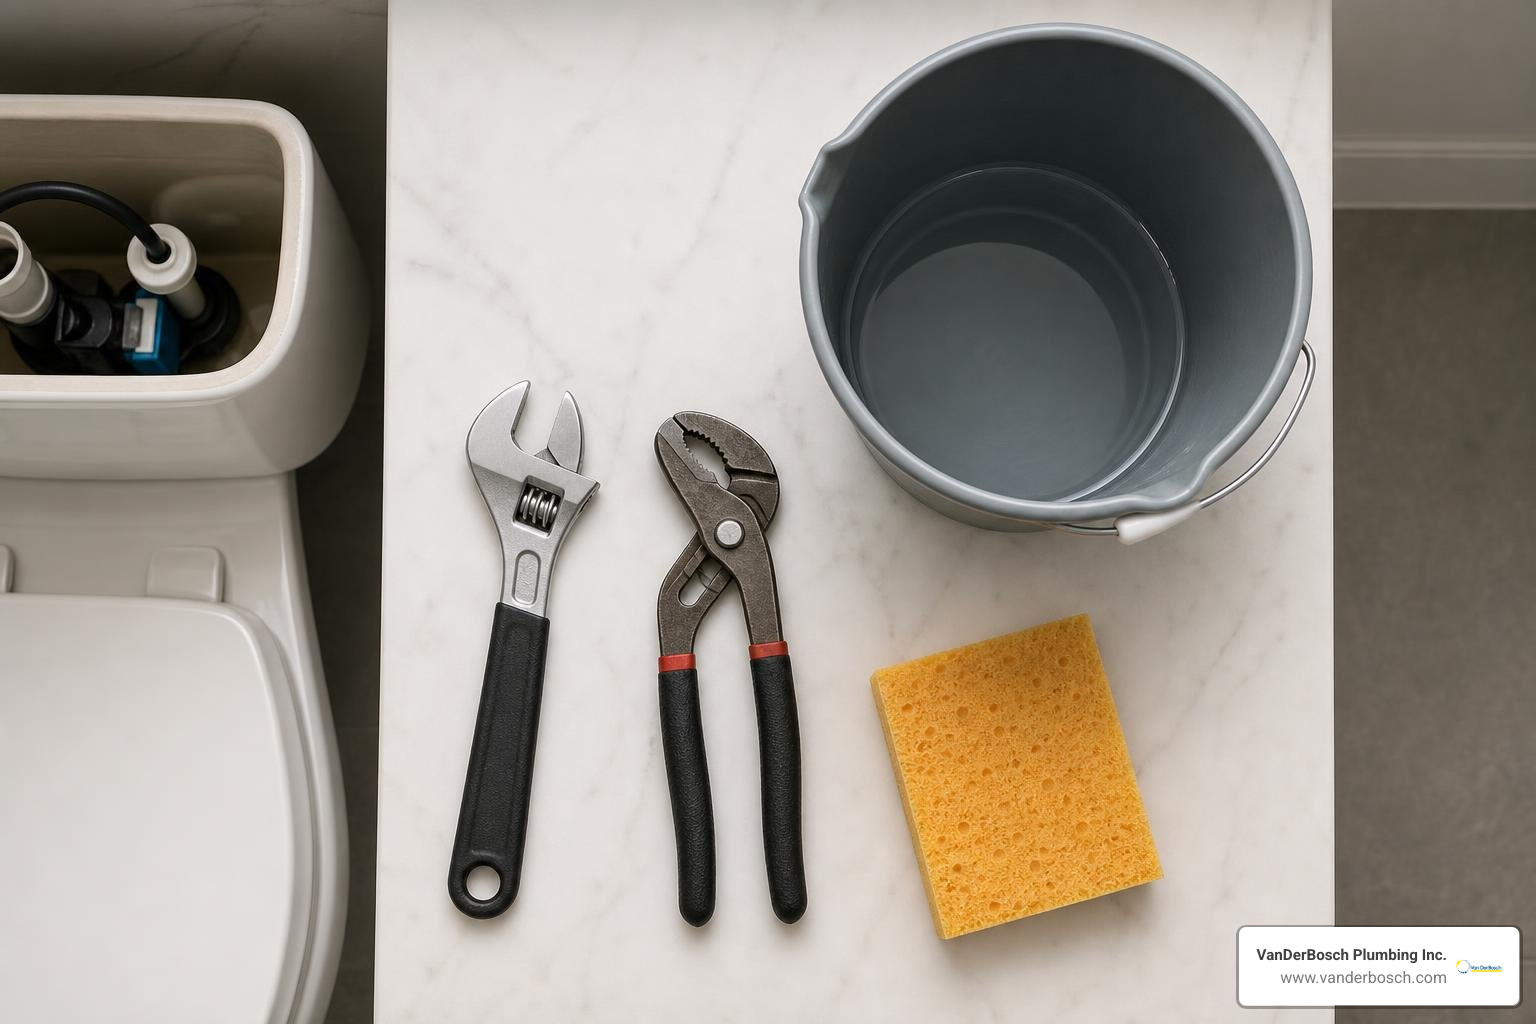
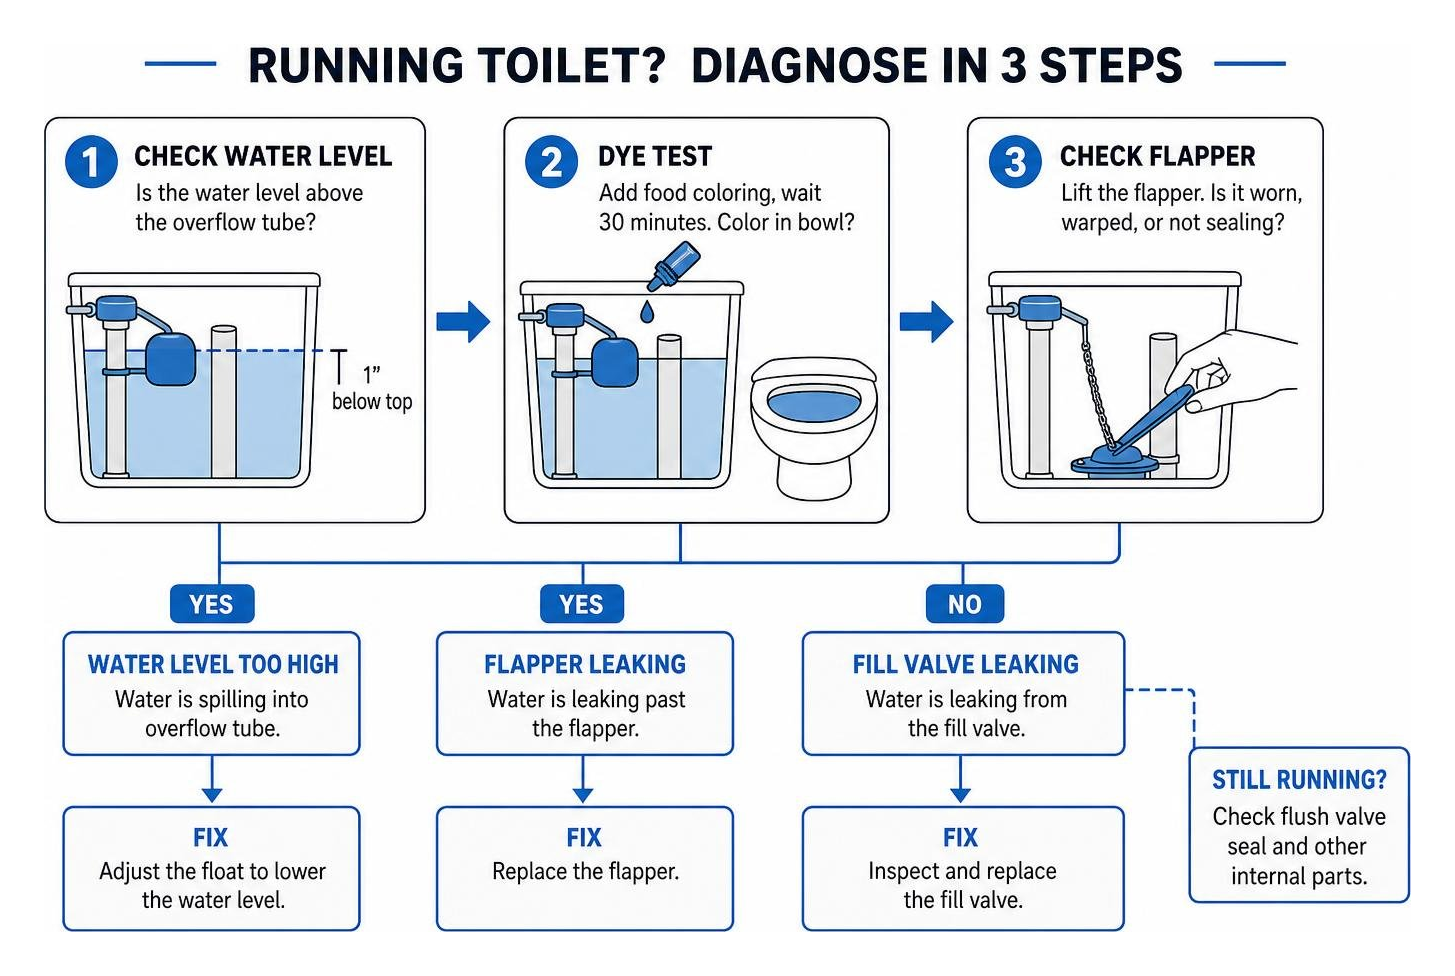
A running toilet is another common culprit for high water bills. This is usually caused by a faulty flapper valve that no longer creates a watertight seal, allowing water to constantly leak from the tank into the bowl. Other times, the issue is more complex, involving the fill valve or the wax ring at the base of the unit.

In places like Roselle, a toilet that won’t flush can be a major headache. You can explore this clogged toilet fix in Roselle to understand the mechanics behind the problem. Beyond just fixing the immediate clog, we always emphasize prevention. Knowing how to prevent clogged toilets and sewer lines—such as avoiding “flushable” wipes and grease—can save you thousands in long-term repair costs.

Signs You Need Immediate Service

Not every plumbing issue is as obvious as a puddle on the floor. Sometimes, the signs are subtle, but the consequences of ignoring them are severe.

If you notice a sudden drop in water pressure, discolored (brownish or yellow) water, or foul odors coming from your drains, these are “red alerts.” In Chicago’s harsh winters, these symptoms can precede a disaster. It is vital to understand why pipes burst — often due to frozen lines or excessive pressure — before it happens to you. Furthermore, for those with older heating systems, knowing the signs you need boiler repair in Chicago can prevent a total loss of heat during a sub-zero cold snap.

Emergency Plumbing Repairs for Water Heaters

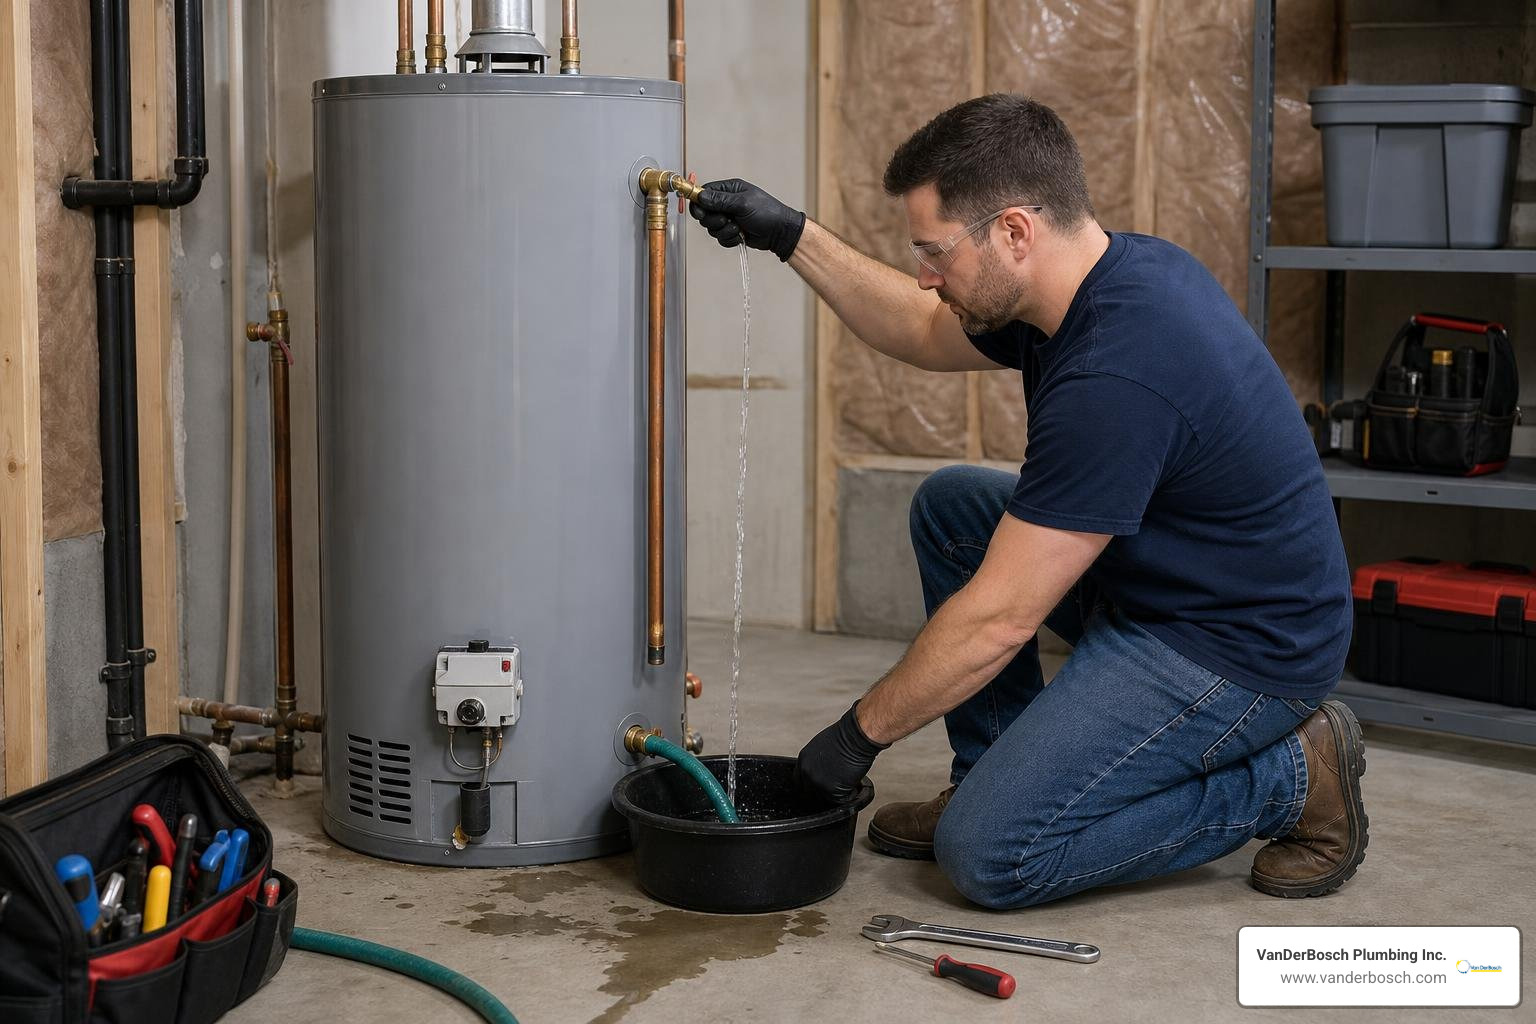
There is nothing quite like a freezing cold shower to tell you your water heater is failing. Most water heaters last between 8 to 12 years, but sediment buildup in the bottom of the tank can lead to overheating and tank corrosion much sooner.

If you hear popping or rumbling noises coming from your utility closet, or if you see rust-colored water, check out these signs your water heater may need repair. A leaking tank is often an emergency because it can lead to catastrophic flooding. If you find yourself asking, “Why is my water heater leaking?” the answer could range from a simple loose valve to a total tank failure.

Detecting Hidden Pipe Leaks

The most dangerous leaks are the ones you can’t see. Slab leaks (leaks under your home’s foundation) or pinhole leaks behind drywall can cause massive structural damage and mold growth before they are discovered.

We use advanced technology to find these hidden problems. Sewer video inspection allows us to see exactly what is happening inside your pipes without tearing up your floors. By using a drain camera inspection, we can identify cracks, root intrusions, or collapsed sections of pipe with pinpoint accuracy, ensuring that the plumbing repairs we perform are necessary and effective.

Understanding Costs and Causes of Damage

When it comes to plumbing repairs, transparency is key. Homeowners are often surprised by the range of pricing, but it typically depends on the accessibility of the pipe and the cost of the parts.

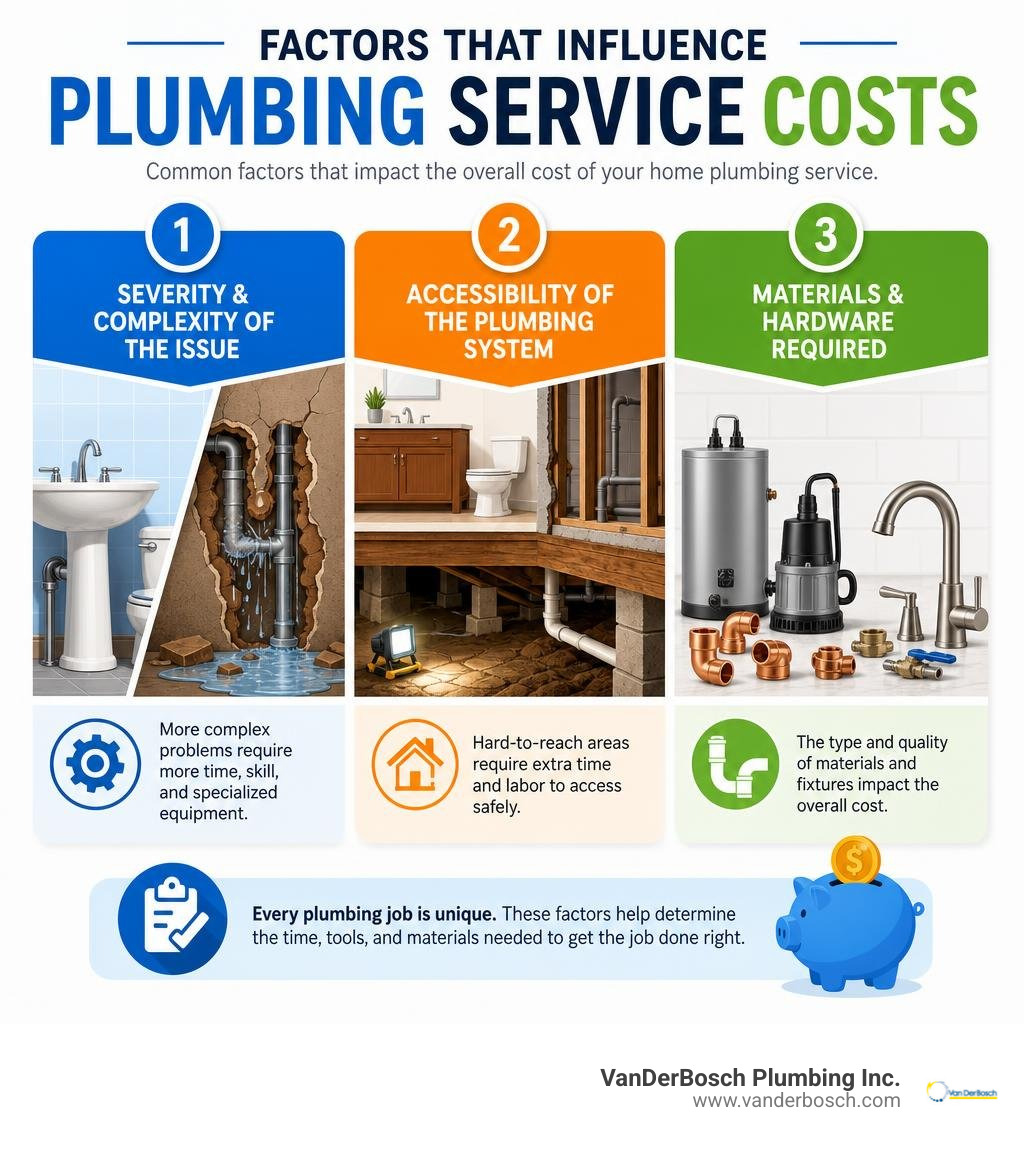
Most common repairs fall in the $150 to $400 range. However, if a leak is hidden behind a wall or requires excavation, costs can climb to $800 or more. At VanDerBosch Plumbing Inc., we believe in upfront pricing. We don’t believe in “service charges” just for showing up; we want to diagnose the problem and give you a fair price to fix it right the first time.

Common Causes of System Failure

Why do systems fail in the first place? In Chicagoland, the culprits are often:

  • Corrosion: Older homes in Hyde Park or Sauganash often have galvanized steel pipes that rust from the inside out.
  • Frozen Pipes: Rapid freeze-thaw cycles stress metal and plastic pipes until they crack.
  • Tree Roots: Roots are naturally drawn to the moisture in sewer lines, eventually breaking through joints.
  • Mineral Deposits: Hard water creates “scale” that narrows pipes and damages water heaters.

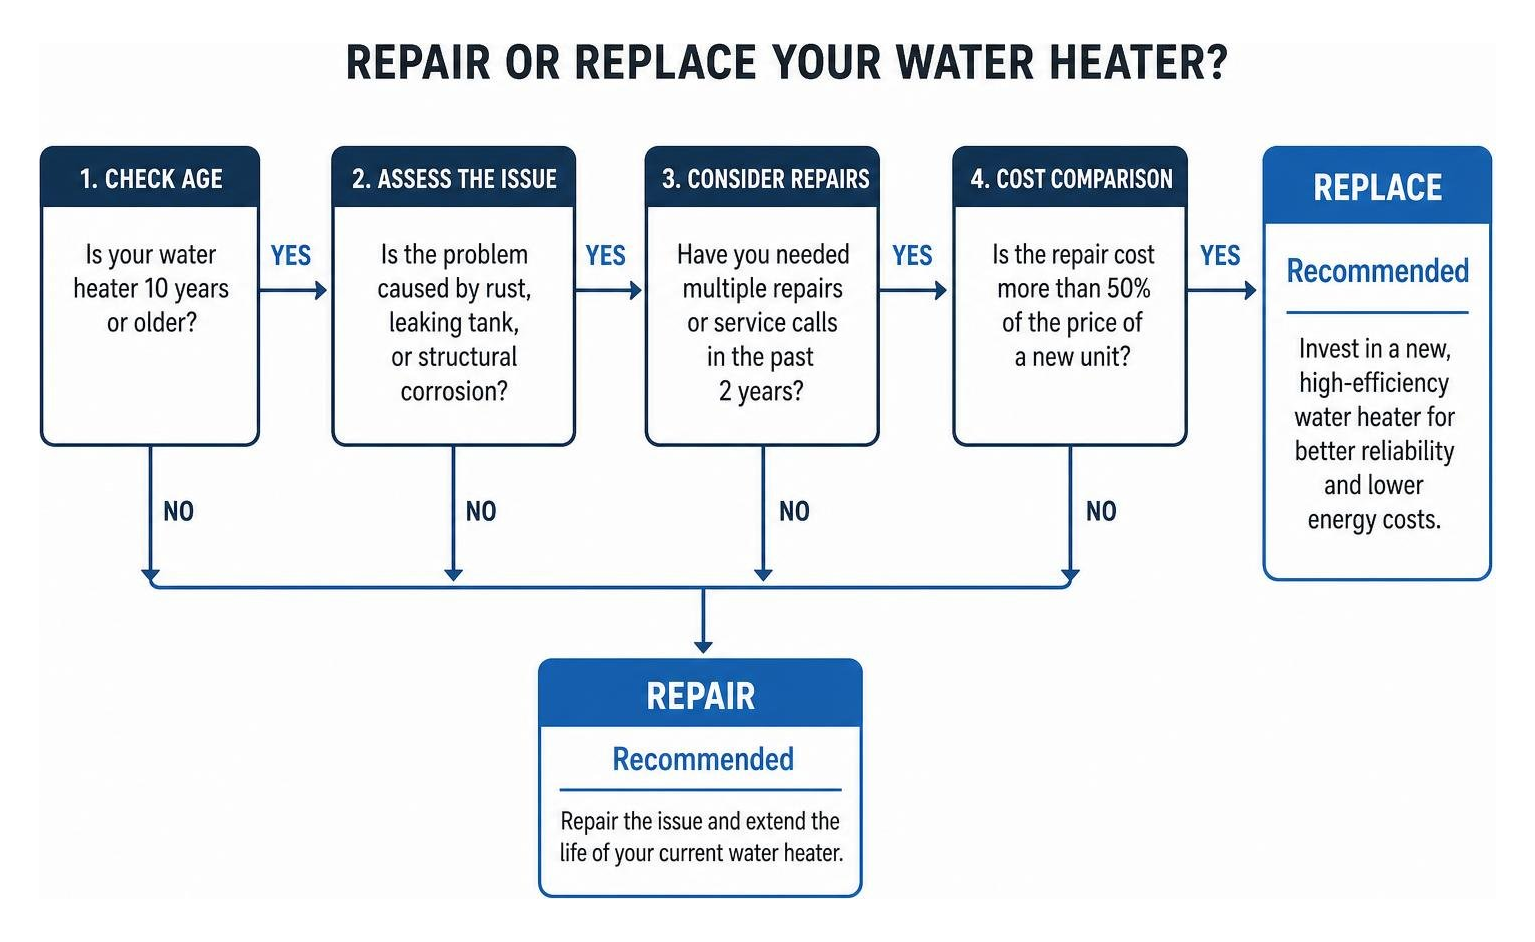
Knowing when to break up with your water heater or replace aging pipes is a financial decision. Sometimes, continuing to pay for small plumbing repairs on a dying system is more expensive than a one-time replacement.

Advanced Solutions: Sewer and Trenchless Technology

Modern plumbing has come a long way from the days of digging up your entire front yard to fix a single pipe. Today, we utilize “no-dig” solutions that save your landscaping and your sanity.

If you’re facing a major line failure, trenchless pipe repair in Chicago is often the best path forward. Before you commit to a traditional excavation, it’s important to understand what to know about trenchless repairs. While the upfront cost might seem higher, a cost breakdown for sewer repair usually shows that trenchless is cheaper once you factor in the cost of replacing your driveway, sidewalk, or prize-winning rose bushes.

Sewer Line Restoration

Sewer issues are perhaps the most stressful plumbing repairs a homeowner can face. Signs of trouble include multiple clogged drains, sewage smells, or “green spots” in the yard. If you suspect a problem, look for these signs a sewer line needs repair.

To keep things flowing, we recommend hydro jetting—a high-pressure water treatment that clears out grease and debris. We also offer sewer video inspections to answer your most frequent questions and provide visual proof of the line’s condition.

No-Dig Pipe Lining

Is trenchless sewer repair worth the cost? For most Chicago residents, the answer is a resounding yes. By understanding no-dig sewer repair, you’ll see how we use epoxy liners to create a “pipe within a pipe.” This new lining is seamless, root-proof, and can last for decades, providing a permanent solution to recurring sewer backups.

Frequently Asked Questions about Plumbing Repairs

How much do typical plumbing repairs cost?

In the Chicago area, expect to pay between $150 and $250 for minor fixture repairs (like a faucet). Toilet repairs generally run between $200 and $350. More significant issues, like repairing a pipe leak behind a wall or in a basement, can range from $300 to $800 depending on the complexity and materials needed.

When should I call a professional instead of DIY?

If a repair involves the main water shut-off, gas lines, or anything inside a wall, it is time to call a professional. DIY attempts on water heaters or garbage disposals can be dangerous and often void warranties. If you aren’t 100% confident in your ability to seal a connection, a professional plumber ensures the job meets local Illinois building codes.

How can I prevent major plumbing emergencies?

Prevention is the best form of repair. We recommend:

  • Annual plumbing inspections.
  • Insulating pipes in unheated areas like crawlspaces or garages.
  • Never flushing anything other than toilet paper.
  • Replacing washing machine hoses every 3 to 5 years.
  • Monitoring your water bill for unexplained spikes.

Conclusion

At VanDerBosch Plumbing Inc., we take pride in serving our neighbors across Chicagoland—from Niles and Mount Prospect to Melrose Park and Oakbrook Terrace. We know that when you need plumbing repairs, you want someone who is licensed, background-checked, and ready to help 24/7.

Our commitment to you is simple: transparent pricing with no hidden service charges and a 100% satisfaction guarantee. Whether it’s a dripping faucet that’s driving you crazy or a sewer line that needs a high-tech, no-dig solution, our team has the expertise to get your home back to normal.

Don’t wait for a small leak to become a big flood. Contact us today for more info about professional plumbing services and let us take the stress out of your home maintenance.

What’s the Best Quick Fix for a Damaged Drain Pipe?

Leaking drain pipe under kitchen sink - Drain pipe repair

Why Quick Action on Drain Pipe Damage Saves You Money and Headaches

Drain pipe repair is often urgent—a small leak can quickly escalate into serious water damage, mold growth, and even structural problems in your Chicagoland home or business. Whether you’re dealing with a cracked PVC pipe under your sink or a broken sewer line in your yard, understanding your repair options can help you act fast and avoid costly disasters.

Quick Answer: How to Repair a Drain Pipe

  1. Identify the damage – Look for leaks, cracks, or persistent clogs
  2. Assess severity – Small cracks may be DIY-fixable; major breaks need professionals
  3. Temporary fixes – Use rubber clamps, repair tape, or epoxy putty to stop leaks immediately
  4. Permanent DIY repairs – Cut out damaged sections and replace with new pipe using solvent cement
  5. Professional solutions – Consider trenchless methods like pipe lining or pipe bursting for underground or extensive damage
  6. Test thoroughly – Run water through the repaired pipe and monitor for 24 hours

The reality is stark: if you have a leaking drain pipe, it is almost imperative that you fix it immediately. A leak can start out small but quickly grow into a big problem, as research shows. The good news? Many drain pipe repairs are within reach of a DIYer with basic tools, and even when professional help is needed, modern trenchless technology means minimal disruption to your property.

From identifying warning signs like foul odors and water stains to choosing between epoxy patches and full pipe replacement, this guide walks you through everything you need to know about drain pipe repair. You’ll learn which fixes you can tackle yourself, when to call in the experts, and how to prevent future problems.

Infographic showing the top 5 warning signs of a damaged drain pipe: 1) Persistent clogs and slow drains in multiple fixtures, 2) Foul sewage odors from drains or yard, 3) Water stains or dampness on floors, walls, or ceilings, 4) Unexplained puddles or unusually lush grass patches in yard, 5) Gurgling sounds from drains or foundation cracks - Drain pipe repair infographic

Spotting the Problem: Signs and Causes of Drain Pipe Damage

Before you can fix a drain pipe, you need to know what to look for. Since pipes are mostly hidden, problems can go unnoticed, leading to serious and expensive issues for your property in Chicago, Roselle, Elmhurst, or elsewhere in Chicagoland.

Plumber using a camera for a sewer video inspection - Drain pipe repair

Telltale Signs Your Drain Pipe Needs Repair

Recognizing the signs early can save you significant stress and money. Here’s a detailed list of what to look for:

  • Persistent Backups & Slow Drains: If your sinks, tubs, or toilets are frequently backing up or draining slowly, it’s a clear indication of a blockage or pipe damage.
  • Unpleasant Sewer Gas Smells: A persistent, foul smell resembling sewage from your drains or yard is a strong indicator of a cracked pipe. Sewer gas can also be a health hazard.
  • Dampness or Mold Growth: Unexplained damp spots, discoloration, or mold on walls, floors, or ceilings often point to a hidden leak.
  • Lush Patches of Grass: An unusually green patch of grass in your yard can signal a broken underground drain pipe, as the escaping wastewater acts as a fertilizer.
  • Gurgling Sounds: Gurgling from your drains can indicate trapped air in the system due to a blockage or a damaged pipe.
  • Insect or Rodent Problems: Leaking sewer lines provide water and an entry point for pests. An increase in rodents or insects could be linked to a damaged drain pipe.
  • Foundation Issues: Persistent leaks can saturate and erode the soil around your home’s foundation, leading to cracks and structural damage.

When these signs appear, it’s crucial to investigate. A professional sewer video inspection can pinpoint the exact location and nature of the damage. If you suspect your main line is compromised, learn more about the signs a sewer line may need repair or replacement.

Common Causes of Pipe Damage

Drain pipes are resilient, but several factors can lead to damage:

  • Tree Roots: Roots seek moisture and can invade even tiny cracks in pipes, causing blockages and expansion. Learn more about dealing with intrusive tree roots and how tree growth can wreak havoc on plumbing.
  • Old Age & Material Degradation: Older cast iron or clay pipes are prone to cracking and corrosion. A sewer line’s typical lifespan is around 50 years.
  • Ground Movement: Chicagoland’s freezing and thawing cycles can cause the ground to shift, stressing pipes and leading to cracks or misalignment.
  • Clogs and Blockages: Pressure from persistent clogs caused by grease or foreign objects can rupture pipes. See the 5 reasons your drain is clogged.
  • Physical Impact: Accidental damage during construction or from heavy traffic can crack or break underground pipes.
  • Corrosion: Chemicals and minerals in wastewater can cause pipes, especially metal ones, to corrode from the inside out. Find out more about why pipes burst.

DIY Fixes: From Temporary Patches to Minor Repairs

Sometimes, you need a quick fix to stop a leak until a permanent solution can be arranged, or you might be able to tackle a minor drain pipe repair yourself. Because drain pipes are not pressurized like water supply lines, temporary repairs can be surprisingly effective.

Various DIY repair materials like epoxy putty, repair tape, and pipe clamps - Drain pipe repair

Before any DIY repair, prepare the pipe. Ensure the area is completely dry, then clean the surface with a wire brush or sandpaper to remove grime and rust. A clean, rough surface helps repair materials adhere. Always wear gloves and safety goggles.

How to Temporarily Fix a Leaking Drain Pipe

These methods are for immediate relief and are not permanent solutions.

  • Rubber and Hose Clamps: Wrap a piece of rubber tightly around the leak and secure it with hose clamps. This works best on straight pipe sections.
  • Silicone Repair Tape: This self-fusing tape creates a watertight seal. Stretch it tightly as you wrap it around the leak, overlapping as you go.
  • Pipe Wrap that Hardens: These fiberglass cloths are coated with a water-activated resin. You wrap them around the pipe, and they harden into a rigid patch. You can find these pipe wraps that harden in most hardware stores.

Essential Tools and Materials for DIY Drain Pipe Repair

  • Repair Epoxy: Epoxy putty or liquid epoxy is great for sealing small cracks and leaks, especially at fittings.
  • Fiberglass Wrap/Repair Tape: For patching cracks in straight pipe sections.
  • Pipe Clamps & Hose Clamps: For securing rubber patches.
  • PVC/ABS Solvent Cement & Primer: For permanently joining plastic pipes.
  • Pipe Cutter or Hacksaw: For cutting out damaged pipe sections.
  • Sandpaper/Emery Cloth: For cleaning and preparing pipe surfaces.
  • Safety Gear: Gloves and safety goggles are a must.

Step-by-Step Guide to Permanent DIY Drain Pipe Repair

For plastic drain pipes, the best DIY repair is often replacing the damaged section.

  1. Prepare the Area: Turn off the water supply to the fixture. Clean and dry the area around the leak.
  2. Cut Out the Damage: Use a pipe cutter or hacksaw to remove the cracked or broken section of pipe. Make your cuts clean and straight.
  3. Measure and Cut Replacement: Measure the gap and cut a new piece of pipe to fit. Dry-fit the new piece with any necessary couplings to ensure it’s the right size.
  4. Prepare Pipe Ends: Clean and deburr the cut edges of all pipes and fittings with sandpaper.
  5. Apply Primer and Cement: For PVC (white) pipe, apply PVC primer to the outside of the pipe ends and the inside of the fittings, followed by PVC solvent cement. For ABS (black) pipe, apply ABS solvent cement directly (primer is not usually needed).
  6. Assemble and Cure: Quickly push the pieces together with a slight twist to spread the cement. Hold firmly for 30 seconds. Allow the cement to cure fully according to the manufacturer’s instructions (typically 1-24 hours) before use.
  7. Test the Repair: Once cured, run water through the drain and carefully check the repair for any leaks. Monitor it for the next 24 hours to be sure the seal is complete.

Advanced & Professional Drain Pipe Repair Methods

While DIY fixes are great for minor leaks, some situations require professional expertise, especially for underground drain pipes, main sewer lines, or extensive damage.

When deciding between repair and replacement, a professional will consider the damage, pipe age, and long-term cost-effectiveness. Traditional repair involves digging a trench, which can be disruptive. However, modern trenchless technology offers a less invasive alternative.

When to Replace a Drain Pipe Instead of Repairing It

Replacement is the smarter long-term solution in these cases:

  • Widespread Damage: If an old pipe (especially cast iron or clay) has extensive corrosion or multiple weak spots.
  • Frequent Problems: If you’re constantly dealing with new leaks or recurring backups, it points to a systemic issue.
  • Collapsed Pipe: A crushed or severely misaligned pipe cannot be patched and must be replaced.
  • Old Age: Pipes nearing the end of their 50-year lifespan are prime candidates for replacement to prevent future failures.
  • Cost-Effectiveness: If the cost of multiple repairs will exceed the cost of a full replacement.

If you suspect a major issue, exploring our Sewer Line Repair Services can provide clarity.

Trenchless Repair Methods: Pipe Lining and Pipe Bursting

Trenchless sewer repair is a no-dig solution that minimizes property damage and is often faster and more cost-effective than traditional excavation.

  • Cured-In-Place Pipe (CIPP) Lining: This method involves inserting a resin-saturated liner into the damaged pipe. The liner is inflated and cured, creating a strong, seamless “pipe within a pipe.” It seals cracks and restores structural integrity without digging. CIPP is excellent for repairing localized defects like cracks and joint failures.
  • Pipe Bursting: This technique pulls a new pipe through the old one, fracturing the old pipe outward. It simultaneously replaces the old line with a new, durable one of the same or even a larger diameter. This is ideal for pipes that are too damaged for lining.

Both methods avoid the need for extensive excavation, preserving your yard and driveway, which saves time and money on restoration. For more details, see the EPA’s Fact Sheet on Trenchless Sewer Rehabilitation and our guide on What to Know About Trenchless Pipe Repairs.

Comparing Drain Pipe Repair Methods

Here’s a quick overview of your options:

Method Best For Pros Cons DIY-Friendly?
Epoxy/Putty Small, accessible cracks or holes. Quick, easy, inexpensive. Temporary; not for large cracks or pressure. Yes
Tape/Wrap Small cracks on straight pipe sections. Fast application, good seal. Temporary; less effective on joints. Yes
Clamps Pinhole leaks or cracks on straight pipes. Strong temporary fix, reusable. Bulky; not for joints or bends. Yes
Section Replacement Larger cracks or damaged fittings on accessible plastic pipes. Permanent, reliable, strong bond. Requires cutting pipe, proper tools/skills. Yes (for confident DIYers)
Pipe Lining (CIPP) Long sections with cracks, root intrusion, or corrosion. No-dig, durable, seamless, fast. Professional job, higher initial cost. No
Pipe Bursting Collapsed or severely damaged pipes needing full replacement. No-dig, replaces old pipe, can upsize diameter. Professional job, requires access points. No

The Bottom Line: Risks, Costs, and When to Call a Professional

Even with the best intentions, some drain pipe issues are beyond the scope of a DIY repair, or they pose risks that only a professional should handle.

Understanding the Costs of Drain Pipe Repair

The cost of drain pipe repair varies based on the damage, pipe location, and repair method.

  • DIY Repair Costs: Materials for a temporary fix, like epoxy or repair tape, are affordable, typically costing $5 to $25.
  • Professional Repair Cost Factors: Costs are influenced by the severity of damage, pipe location (under a sink vs. underground), pipe material, and labor rates. Emergency calls also cost more. At VanDerBosch Plumbing, we offer transparent pricing with no service charges and 24/7 availability.
  • Trenchless vs. Traditional Costs:
    • Trenchless Repairs: While the initial cost might seem higher, the total cost is often lower than excavation because it eliminates the need for extensive digging and landscape restoration. Costs can range from a few thousand to over $10,000.
    • Excavation Repairs: Traditional dig-and-replace methods can cost $10,000 to $20,000 or more, as they include labor for digging and significant restoration costs for your property.

Always get a detailed estimate from a professional plumber for larger jobs.

When You Should Always Call a Professional Plumber

For certain situations, calling a licensed plumber is a necessity:

  • Main Sewer Line Issues: Problems with the main line connecting your home to the municipal sewer are complex and not DIY projects.
  • Underground Pipe Breaks: Locating and repairing underground pipes requires specialized equipment like sewer cameras to avoid damaging other utilities.
  • Extensive Damage: Severely corroded, collapsed, or cracked pipes require professional replacement or trenchless solutions.
  • Lack of Proper Tools or Experience: A botched DIY repair can lead to more costly damage. If you’re not confident, call a professional.
  • Recurring Problems: If a leak or clog keeps returning, it signals a deeper issue that needs professional diagnosis.
  • Sewer Gas Odors: Persistent sewer gas smells indicate a serious problem and potential health hazard that requires immediate professional attention.
  • Need for a Sewer Video Inspection: For an accurate diagnosis of hidden problems, a professional video inspection is essential.

Our experienced technicians at VanDerBosch Plumbing are equipped to handle any drain pipe repair, ensuring the job is done right the first time.

Frequently Asked Questions about Drain Pipe Repair

What is the difference between repairing PVC and ABS drain pipes?

PVC (white) and ABS (black) are common plastic drain pipes with key repair differences:

  • Cement: They require different types of solvent cement. You cannot use PVC cement on ABS pipes or vice-versa.
  • Primer: PVC pipe requires a primer to be applied before the cement to ensure a strong chemical weld. ABS cement is a one-step process and typically does not need a primer.
  • Permanent Repair: Because the joints are chemically fused, a permanent repair for a leak in either type of pipe requires cutting out the damaged section and replacing it with new pipe and fittings, using the correct cement for the material.

How do I test a repaired drain pipe to ensure it’s leak-free?

Testing is a critical final step for any drain pipe repair.

  1. Cure: Allow any glue or epoxy to fully cure according to the manufacturer’s instructions.
  2. Test: Run water through the drain, starting with a small amount and then increasing the flow.
  3. Inspect: Visually and manually check the repaired area for any drips or moisture.
  4. Monitor: Place a dry paper towel under the repair and check it periodically over the next 24 hours to catch any slow leaks.

If you find a leak, the repair has failed and needs to be redone.

What are the risks of ignoring a damaged drain pipe?

Ignoring a damaged drain pipe will lead to more expensive and serious problems. The primary risks include:

  • Water Damage: A slow leak can saturate and ruin drywall, flooring, and structural wood, leading to costly home repairs.
  • Mold and Mildew: Constant moisture creates a breeding ground for mold, which can damage your home and pose serious health risks.
  • Foundation Damage: Leaks from underground pipes can erode soil, causing your home’s foundation to shift, settle, and crack.
  • Health Hazards & Pests: Leaking sewer lines can release raw sewage and hazardous gases into your home. The moisture and waste also attract pests like rodents and insects.

Conclusion

Navigating drain pipe repair can seem daunting, but armed with the right knowledge, you’re well-equipped to tackle minor issues or make informed decisions about professional assistance. We’ve explored everything from the subtle signs of damage and common culprits like tree roots and aging pipes, to immediate DIY fixes and advanced trenchless technologies.

Acting quickly on any signs of drain pipe damage is paramount to preventing minor inconveniences from escalating into major disasters. While temporary patches can buy you time, and permanent DIY repairs are feasible for certain situations, understanding the limits of your own expertise is crucial. For complex problems, especially those involving underground pipes or your main sewer line, professional help ensures a safe, effective, and long-lasting solution.

At VanDerBosch Plumbing Inc., we pride ourselves on being your trusted partner for all plumbing needs in Chicagoland. With our 24/7 availability, transparent pricing (no service charges!), and a team of experienced, background-checked technicians, we offer a 100% satisfaction guarantee on all our services. We’re here to provide expert, minimally-invasive solutions that restore peace of mind to your home or business.

For expert, minimally-invasive solutions in Chicagoland, explore our Trenchless Pipe Repair services.

How to Repair Frozen Pipes the Right Way

frozen pipe repair

When You Need Frozen Pipe Repair: What to Do Right Now

Frozen pipe repair is urgent — acting fast can mean the difference between a minor inconvenience and thousands of dollars in water damage. Here’s what to do immediately:

  1. Turn off your main water supply at the shut-off valve
  2. Open the faucet connected to the frozen pipe to relieve pressure
  3. Apply gentle heat to the frozen section using a hair dryer, heating pad, or warm towels
  4. Check for cracks or bulging before restoring water flow
  5. Call a licensed plumber if you can’t locate the freeze point, thawing fails, or a pipe has burst

Frozen pipes are more common — and more dangerous — than most homeowners realize. More than 20% of U.S. homes face the risk every winter. When water freezes inside a pipe, it expands by roughly 9%, creating enormous pressure. That pressure can split a pipe open in less than five hours at 20°F or below. A burst pipe can then release more than 250 gallons of water in a single day, causing serious damage to walls, floors, ceilings, and belongings.

Chicago winters make this risk especially real. Extended cold snaps, wind chill, and aging housing stock all push local pipes to their limits.

The good news? Most frozen pipe situations are manageable — if you know what to do and move quickly.

I’m Hugh Hodur, President of VanDerBosch Plumbing Inc., and I’ve overseen frozen pipe repair and emergency plumbing services across the Chicagoland area for years. In this guide, I’ll walk you through everything you need to handle this safely — from thawing a frozen pipe at home to knowing when it’s time to call in a pro.

Infographic showing why pipes burst: water expands 9% when frozen, pressure builds, pipes fail in under 5 hours at 20°F

Identifying the Need for Frozen Pipe Repair

In April 2026, looking back at the winter season, we see that many homeowners in neighborhoods like Sauganash or Ukrainian Village were caught off guard by sudden deep freezes. Knowing the early warning signs can save you from a full-blown emergency.

a bulging water pipe showing signs of ice pressure - frozen pipe repair

The magic number to remember is 20°F. While water technically freezes at 32°F, research shows that pipes are most likely to freeze and burst when the outside temperature hits 20°F or lower. This is especially true for pipes in unheated areas like basements, attics, or crawl spaces.

So, how do you know if you’re dealing with a freeze?

  • No Water Flow: This is the most obvious sign. You turn on the tap, and nothing comes out, or perhaps just a pathetic trickle.
  • Visible Frost: If you can see the pipe, look for a coating of frost on the exterior. This is a clear indicator that the water inside has turned to ice.
  • Bulging Pipes: As water expands, it can actually deform the metal or plastic. If a section of your pipe looks like it’s “swelling,” it is under extreme pressure. You can learn more about this physical process in our guide on Why Do Pipes Burst?.
  • Strange Noises: If you hear clanking or banging sounds coming from the walls when you try to use the water, it could be ice chunks moving or pressure fluctuations caused by a blockage.
  • Foul Odors: Sometimes, a frozen pipe prevents sewer gases from escaping correctly. If an unused sink starts smelling like a swamp, check the pipes below.
  • Condensation: Excessive “sweating” on a pipe in a cold area often precedes a freeze.

According to the American Red Cross, the pipes most at risk are those against exterior walls or those that enter the home through the foundation. For those of us living in older Chicago bungalows or Victorians in Niles and Roselle, these vulnerabilities are common. Check out our specific advice for Frozen Pipes in Chicago, IL: What Homeowners Need to Know to see how local architecture plays a role.

Immediate Steps and Safe Thawing Techniques

If you’ve confirmed the pipe is frozen but hasn’t burst yet, you are in a race against time. Your goal is to melt the ice safely without causing the pipe to crack from thermal shock.

The Safe Thawing Process

  1. Open the Faucet: Before you start heating, open the tap. As the ice melts, water needs a place to go. Keeping the faucet open also helps relieve the pressure buildup between the ice blockage and the faucet—which is actually where most bursts occur.
  2. Locate the Blockage: Feel along the pipe. The coldest spot or the area with visible frost is your target.
  3. Apply Heat Gradually: Start heating from the faucet end and work your way toward the blockage. This ensures that as the ice melts, the water can flow out through the open tap.
    • Hair Dryer: Keep it on a low or medium setting and move it back and forth.
    • Electric Heating Pads: Wrap these around the pipe and plug them in.
    • Warm Towels: Soak towels in hot water, wring them out, and wrap them around the frozen section. Replace them as they cool.
    • Space Heaters: You can place a portable heater near the pipe, but never leave it unattended and keep it away from flammable materials.

If these DIY steps don’t yield results within 30 to 45 minutes, or if the pipe is located behind a wall, it’s time for professional frozen pipe repair. We utilize specialized Frozen Pipes Repair equipment that can safely thaw pipes without needing to tear down your drywall in many cases.

Methods to Avoid During Frozen Pipe Repair

Safety is paramount. Every winter, we hear horror stories of DIY attempts gone wrong in Chicagoland. To protect your home and your family, never use the following:

  • Open Flames: Blowtorches, propane heaters, or charcoal broilers are incredibly dangerous. Not only do they pose a massive fire risk, but the intense, localized heat can cause the pipe to explode or melt.
  • Boiling Water: Pouring boiling water directly onto a frozen pipe can cause “thermal shock,” leading the pipe to crack instantly.
  • Unattended Devices: Never leave a space heater or any electrical heating device running if you aren’t in the room to monitor it.
  • Kerosene Heaters: These produce dangerous fumes and are a fire hazard indoors.

The City of Winnipeg and other cold-weather municipalities emphasize that most structure fires during winter storms are caused by improper thawing techniques. Don’t let a plumbing problem turn into a fire department visit.

Professional Frozen Pipe Repair and Maintenance

Sometimes, the freeze is simply out of reach. If your pipes are in a crawl space under a home in Elmhurst or buried deep in a wall cavity in a West Ridge apartment building, a hair dryer isn’t going to cut it.

Licensed plumbers use industrial-grade heat guns and electronic pipe thawers that pass a safe, low-voltage current through the pipe to generate heat from the inside out. We also have diagnostic tools like thermal imaging cameras to pinpoint exactly where the ice is located without guessing. This precision preserves your home’s structural integrity and ensures the frozen pipe repair is completed before a burst occurs. You can find more professional tips on the Lowe’s guide to prevention and repair.

How to Handle a Burst Pipe Emergency

If you hear the sound of rushing water or see a geyser in your basement, the pipe has already burst. A burst pipe can leak 10 gallons of water per minute. That’s 600 gallons an hour. In the time it takes to watch a movie, your basement could be underwater.

Immediate Action Plan:

  1. Shut off the Main Water: Every adult in your home should know where the main shut-off valve is. It’s usually near the water meter.
  2. Kill the Power: If the water is near electrical outlets, breaker boxes, or appliances, shut off the electricity to that area of the house immediately.
  3. Call VanDerBosch Plumbing Inc.: We provide 24/7 emergency service throughout Cook County.
  4. Start Cleanup: Use a wet/dry vac, mops, and towels. Mold can begin to grow in as little as 24 to 48 hours.

Temporary vs. Permanent Repairs

While you wait for a plumber, you might need to make a temporary fix to stop a small leak.

Repair Method Best For Durability
Pipe Clamp Small cracks or pinholes Temporary (Days)
Epoxy Putty Small leaks in joints Temporary (Hours/Days)
Rubber Patch & Hose Clamps Longer cracks in straight sections Emergency only
Professional Replacement All burst scenarios Permanent (Decades)

A temporary patch is just that—temporary. The structural integrity of the pipe is compromised, and it will likely fail again during the next temperature swing. For more on keeping your system resilient, see our Tips on Keeping Your Plumbing Safe in Colder Temperatures.

The City of Toronto reminds residents that property owners are responsible for the pipes from the property line into the home. Don’t wait for the city to fix a private burst; call a licensed professional immediately.

Long-Term Prevention and Winterization Strategies

Prevention is always cheaper than frozen pipe repair. In fact, the average insurance claim for a burst pipe is over \$10,000, while a few rolls of insulation cost less than a dinner out in Ukrainian Village.

  1. Insulate Exposed Pipes: Use foam sleeves or UL-listed heat tape on pipes in unheated areas. This is the most effective way to delay freezing.
  2. Seal the Gaps: Use caulk or spray foam to seal cracks in exterior walls where cold air might whistle in and hit a pipe. Check around dryer vents, electrical wiring, and windows.
  3. The 55°F Rule: Never set your thermostat lower than 55°F, even if you are leaving for a vacation. In Chicago, we actually recommend 68°F to 70°F during extreme “Polar Vortex” events.
  4. Open Cabinet Doors: Let the warm air from your kitchen or bathroom reach the pipes under the sink.
  5. Let the Faucets Drip: A very slow drip (about 5-10 drops per minute) keeps water moving. Moving water is much harder to freeze than standing water.
  6. Install Frost-Free Spigots: Also known as frost-free sillcocks, these have a long stem that places the shut-off valve deep inside the warm interior of your home.
  7. Heat Tape: For particularly vulnerable pipes, thermostat-controlled heat tape can provide just enough warmth to prevent ice formation.
  8. Winterize Outdoor Plumbing: Disconnect all garden hoses and shut off the indoor valves leading to outdoor faucets.

For more detailed steps, check out Angi’s guide on unfreezing and prevention.

Frequently Asked Questions about Frozen Pipes

What temperature causes pipes to freeze and burst?

While 32°F is the freezing point of water, pipes generally don’t freeze until the outside temperature drops to 20°F or below for several hours. Wind chill can accelerate this process by stripping heat away from the house faster. Typically, it takes about 4 to 5 hours of exposure to these sub-20 temperatures for a pipe to reach the breaking point.

Does homeowners insurance cover frozen pipe repair?

Usually, yes, but there are catches. The average homeowner insurance claim for water damage and freezing is \$10,849, and severe flooding can drive that up to \$18,000. However, many insurance companies will deny a claim if they can prove “negligence.” For example, if you turned off your furnace while on vacation and the pipes froze, they may refuse to pay. Always document your prevention efforts and keep receipts for any professional maintenance.

How do you prepare pipes if you are going away during winter?

If you’re heading south for the winter from Mount Prospect or Winnetka, do the following:

  • Shut off the main water valve.
  • Drain all the water from the system by opening every faucet until they run dry.
  • Flush all toilets to empty the tanks.
  • Keep the heat set to at least 55°F.
  • Ask a neighbor to check the house every few days.
  • Consider installing a smart leak detector that sends alerts to your phone.

Conclusion

Frozen pipes are a reality of living in Chicagoland, but they don’t have to be a disaster. By understanding the 20°F threshold, knowing how to thaw pipes safely, and acting instantly if a burst occurs, you can protect your home from devastating water damage.

At VanDerBosch Plumbing Inc., we’ve been the trusted choice for Chicago, Roselle, Niles, and the surrounding suburbs for decades. We offer:

  • 24/7 Emergency Service: Because pipes don’t wait for business hours to burst.
  • 100% Satisfaction Guarantee: We stand by our work.
  • Transparent Pricing: No hidden fees or surprise service charges.
  • Expert Technicians: Background-checked and highly experienced in Chicago’s unique plumbing challenges.

Don’t wait for a drip to become a flood. If you suspect your pipes are frozen or you need professional winterization, contact us today for expert Frozen Pipe Repair Services in Chicago, IL. We are here to keep your water flowing and your home dry, no matter how low the temperature drops.

How to Learn Plumbing Installations

plumbing installations

What You Need to Know About Plumbing Installations

Plumbing installations cover the full setup of water supply, drainage, and fixture systems in a home or business. Here’s a quick overview of what’s involved:

  • Water supply system – Pressurized pipes that deliver hot and cold water to fixtures
  • Drain-waste-vent (DWV) system – Gravity-fed pipes that remove wastewater and vent sewer gases
  • Fixture installation – Toilets, faucets, water heaters, sump pumps, and appliances connected to both systems

Costs typically range from $4 to $15+ per square foot for new construction, depending on home size, materials, and complexity.

Permits are required for most plumbing work in the Chicagoland area. Licensed master plumbers must pull them — homeowners generally cannot self-permit.

Most installations should be handled by a licensed professional. Simple fixture swaps like a faucet replacement can be DIY-friendly, but full system installs carry real risks: leaks, code violations, mold, and costly repairs down the road.

Three out of four U.S. homeowners faced a home repair emergency last year, and plumbing problems ranked among the most common. Whether you’re building new, renovating, or dealing with an aging system, understanding how plumbing installations work puts you in a much stronger position — as a homeowner and as a customer.

I’m Hugh Hodur, President of VanDerBosch Plumbing Inc., where I oversee residential and commercial plumbing installations across the Chicagoland area, including water heater installs, whole-home repiping, sewer solutions, and emergency service. In this guide, I’ll walk you through everything you need to know — from pipe materials and permits to cost ranges and common mistakes.

Infographic showing the three subsystems of home plumbing: water supply, DWV, and fixtures - plumbing installations

Understanding the Core Components of Plumbing Installations

To understand plumbing installations, you have to look past the shiny chrome faucets and see the “circulatory system” of your home. In April 2026, modern plumbing is more efficient than ever, but the physics remains the same: water comes in under pressure and leaves via gravity.

A complete installation consists of three primary subsystems:

  1. Potable Water Supply: This is the pressurized network. In the Chicago area, this water usually comes from municipal sources (like Lake Michigan) and is distributed through your home via copper or PEX piping.
  2. Drain-Waste-Vent (DWV): This system is the unsung hero. It uses gravity to carry wastewater to the city sewer. The “vent” part is crucial—it allows sewer gases to escape through the roof and maintains air pressure so your drains don’t “glug” or air-lock.
  3. Natural Gas Lines: About half of U.S. households use natural gas for heating or cooking. Installing these lines requires extreme precision and strict adherence to fire codes.

various pipe materials used in modern plumbing like PEX, Copper, and PVC - plumbing installations

Choosing the Right Materials

The materials we choose during plumbing installations dictate the system’s longevity. Here is how the most common pipes compare:

Material Best Use Pros Cons
Copper Water Supply Durable, antimicrobial, fire-resistant Expensive, can corrode in hard water
PEX Water Supply Flexible, freeze-resistant, fewer joints Cannot be used outdoors (UV sensitive)
PVC / ABS Drainage (DWV) Cheap, won’t rust, easy to install Can be noisy; ABS is better for shifting soil

Selecting the right pipe is just the start. You also need to consider the equipment that keeps your home comfortable. For example, Choosing the Right Type of Water Heater for Installation is a major decision that affects your monthly utility bills. Additionally, many homeowners in areas like Winnetka or Niles are opting for water filtration systems to ensure the highest water quality directly from the tap.

Residential vs. Commercial Plumbing Installations

While the basics are similar, the scale of plumbing installations changes drastically between a single-family home in Roselle and a commercial space in downtown Chicago.

  • Scale and Load: Commercial systems handle much higher “fixture units.” Think of an office building where twenty toilets might flush nearly simultaneously. This requires much larger pipe diameters and sophisticated pressure-regulating valves.
  • Complexity: Commercial installations often involve backflow preventers to protect the city’s water supply and grease traps for restaurants.
  • Materials: While residential projects use PEX frequently, many commercial codes in Cook County still require cast iron for drainage to reduce noise and increase fire resistance.

Common Fixtures in Modern Plumbing Installations

The fixtures are the parts of the system you actually interact with. In 2026, we are seeing a massive shift toward “smart” and high-efficiency fixtures.

  • Faucets and Toilets: Modern low-flow toilets use less than 1.28 gallons per flush, a huge drop from the 3.5 gallons used in older Chicago bungalows.
  • Water Heaters: Many of our clients are switching to a Tankless Water Heater to save space and enjoy endless hot water.
  • Flood Prevention: In areas prone to heavy rain, Sump Pumps are essential. We often install backup battery systems to ensure they work even during Chicago’s infamous spring storms.

The Professional Step-by-Step Process for Plumbing Installations

Professional plumbing installations aren’t just about “slapping pipes together.” It is a choreographed dance that happens in stages alongside the rest of the home construction or remodel.

1. Design and Planning

Before a single hole is drilled, we create a blueprint. This ensures that the water lines are sized correctly for the home’s demand and that the drain lines have the proper 1/4-inch-per-foot slope.

2. The Underground Rough-In

If you’re building an addition or a new home, this happens before the concrete slab is poured. We lay the heavy-duty drainage pipes and the main water service line. These must be buried below the frost line—in Chicago, that means deep enough to avoid the “Deep Freeze” of January.

3. Aboveground Rough-In (Top-Out)

Once the “skeleton” (studs) of the house is up, we run the supply lines and the drain/vent pipes through the walls and floors. We use nailing plates on the studs to ensure that when the drywallers come in, they don’t accidentally drive a screw into a fresh PEX line.

4. Fixture Setting (Trim-Out)

After the walls are closed and the tiling is done, we install the “jewelry”—the faucets, toilets, and showerheads. This is also when we hook up the Water Heater. If you’re looking for a DIY project, Installing a New Faucet is one of the few areas where a handy homeowner can succeed with a little patience.

5. Pressure Testing and Inspection

This is the most critical step. We cap the system and fill it with air or water to check for leaks. Only after it passes our internal test do we call the city inspector. If you’re ready to start this process, you can Book a Time with our team to discuss your layout.

Essential Tools and Materials for Modern Plumbing Installations

To do the job right, we use a specialized arsenal:

  • Basin Wrench: For reaching those impossible nuts behind the kitchen sink.
  • PEX Crimpers: For making watertight connections in flexible tubing.
  • Soldering Torches: For traditional “sweating” of copper joints.
  • PTFE Tape and Pipe Dope: To ensure threaded connections never weep.
  • Hydrostatic Pumps: For high-pressure testing of the supply lines.

Project Timelines and Home Preparation

How long does it take? A standard bathroom installation usually takes 1–2 days. A full 2,000 sq ft home in a place like Mount Prospect typically requires 3–5 days for the rough-in and another 2 days for the final trim.

To prepare, we ask homeowners to clear a path to the main shut-off valve and remove personal items from under sinks. If you’re planning a major project, Contact Us for a specific timeline based on your home’s layout.

In 2026, the regulatory landscape for plumbing installations is stricter than ever, but for good reason. Codes like the International Plumbing Code (IPC) ensure that your water is safe to drink and your home is protected from sewer gas.

Understanding Installation Costs and Factors

Budgeting for plumbing can be tricky. For new construction in the Chicagoland area, you can expect to pay between $4 and $8 per square foot for standard builds. However, if you are doing a major remodel or a luxury build with high-end fixtures, that can jump to $15+ per square foot.

Factors that drive up the price include:

  • Material Choice: Copper is significantly more expensive than PEX.
  • Number of “Wet Walls”: Grouping bathrooms back-to-back saves money on piping.
  • Foundation Type: It’s much cheaper to install plumbing in a home with a crawlspace or basement than one built on a concrete slab.

If your home is older and experiencing frequent leaks, a Whole Home Repipe might be more cost-effective than constant piecemeal repairs.

Local Regulations and Permit Requirements

In Chicago and surrounding suburbs like Niles or Oakbrook Terrace, the law is clear: plumbing installations require permits. These permits ensure that a third-party inspector verifies the work. In Cook County, a licensed master plumber must be the one to pull these permits. Attempting unpermitted work can lead to fines of up to $2,000 and can even void your homeowner’s insurance if a leak occurs.

DIY vs. Professional: Avoiding Common Mistakes

We get it—the “Do-It-Yourself” spirit is strong in Illinois. However, there is a reason that master plumbers go through years of apprenticeship. Plumbing installations involve high-pressure water and dangerous gases. One wrong turn of a wrench can lead to thousands of dollars in water damage or mold.

Frequent Installation Errors and Prevention

Even seasoned DIYers make these classic mistakes:

  • Improper Venting: If you don’t vent a sink properly, the water draining will suck the water out of the “P-trap,” allowing sewer gas to enter your home. (If your bathroom smells like rotten eggs, this is why!)
  • Incorrect Slope: Drains rely on gravity. Too much slope is actually just as bad as too little—the water can outrun the solids, leading to clogs.
  • Cross-Connections: This is the most dangerous mistake, where “grey” or waste water accidentally mixes with your clean drinking water.
  • Over-tightening: Modern plastic fittings will crack if you go too hard with a wrench.

Before you grab the pipe glue, ask yourself: Do You Need a Plumber for Sump Pump Installation? or is this something you can truly handle? If you see Signs Repiping Services May Be Needed, such as rusty water or low pressure, it’s time to call in the pros. If you’re still wondering Do You Need Repiping?, a professional inspection is the only way to be sure.

Post-Installation Maintenance and Warranties

Once your plumbing installations are complete, the work doesn’t stop. To ensure longevity:

  1. Annual Inspections: Have a plumber check your shut-off valves and water heater.
  2. Flush the Water Heater: Sediment buildup can kill a tank in just a few years.
  3. Check the Sump Pump: Test it every spring before the rains start.
  4. Service the Boiler: If you have radiant heat, your Boiler needs an annual tune-up to stay efficient.

Professional companies like VanDerBosch Plumbing Inc. offer labor warranties. We stand by our work with a 100% satisfaction guarantee, so if a joint we soldered leaks six months later, we fix it at no cost to you.

Frequently Asked Questions about Plumbing Installations

How long does a standard plumbing installation take?

For a single fixture like a toilet or sink, it usually takes 2–4 hours. A full bathroom remodel takes about 2 days. A complete new home rough-in and trim-out generally takes about a week of total labor spread across the construction phases.

Should I attempt a DIY plumbing installation?

Simple tasks like replacing a showerhead or a kitchen faucet are great DIY projects. However, anything involving the main stack, gas lines, or underground piping should be left to licensed professionals to ensure code compliance and safety.

What are the best pipes for modern homes in 2026?

Currently, PEX (Cross-linked Polyethylene) is the industry standard for water supply because it’s flexible, cheaper than copper, and resists scale buildup. For drainage, PVC or ABS remains the best choice for residential homes.

Conclusion

Plumbing installations are the backbone of a healthy, functional home. From the initial design to the final turn of the faucet, every step requires precision and a deep understanding of local Chicagoland codes. Whether you are in Hyde Park, Ukrainian Village, or Elmhurst, having a reliable system isn’t just a luxury—it’s a necessity.

At VanDerBosch Plumbing Inc., we’ve built our reputation on transparent pricing, background-checked technicians, and a 24/7 commitment to our neighbors. We don’t believe in service charges or hidden fees; we just believe in doing the job right the first time.

Ready to upgrade your home or start a new project? Schedule Appointment today or Explore Our Professional Plumbing Services to see how we can help you build a better, leak-free future.

The Best Whole House Water Filtration and Softener System

best whole house water filtration and softener system

Is Your Home’s Water Actually Clean? What Chicagoland Homeowners Need to Know

The best whole house water filtration and softener system treats all the water entering your home at the main line — removing contaminants and softening hard water in one combined setup.

Top picks for 2026 at a glance:

System Best For Key Feature
SpringWell CF + Softener City water 9–20 GPM, 1M gallon capacity
Aquasure Signature Elite Well water 5-in-1 with UV + fine mesh resin
TrueHome ECO-SMART Combo Smart home users Bluetooth app control
Aquasura Signature Pro Budget-conscious 3-in-1 with RO included
WaterChef TrueHome Eco-focused Reduced salt and water waste

Turn on any tap in your home. That water has traveled through pipes, a municipal treatment plant (or a private well), and your home’s entire plumbing system before reaching you. Along the way, it can pick up chlorine, sediment, heavy metals, hard water minerals, and even PFAS “forever chemicals” — nearly half of all U.S. tap water supplies contain PFAS, according to recent testing data.

For Chicagoland homeowners, hard water is a daily reality. It leaves scale on fixtures, shortens the life of water heaters and appliances, and can affect your skin and hair. A standalone filter helps — but it doesn’t fix hardness. A standalone softener helps — but it doesn’t remove chemical contaminants. A combined system does both.

Choosing the right one isn’t simple. Capacity, flow rate, salt vs. salt-free, well vs. city water — there’s a lot to sort through. That’s exactly what this guide is for.

I’m Hugh Hodur, President of VanDerBosch Plumbing, and I’ve spent years overseeing water treatment installations across the Chicagoland area — so I know what separates the best whole house water filtration and softener system from one that underperforms or fails within a few years. In the sections below, I’ll walk you through everything you need to make a confident decision.

Infographic comparing whole house water filtration vs water softening: filtration removes chlorine, PFAS, sediment

What is a Combined Whole House Water Filtration and Softener System?

When we talk about a combined system, we are referring to a “Point-of-Entry” (POE) solution. Unlike a small filter attached to your kitchen faucet or a pitcher in your fridge, these systems are installed where the main water line enters your home. This ensures that every drop of water—whether it’s for your morning shower in Winnetka or the dishwasher in your Roselle kitchen—is treated.

But what makes a combo system different from standalone units? A standalone filter focuses on “polishing” the water by removing chemicals like chlorine, chloramines, and sediment. A standalone softener focuses exclusively on “ion exchange,” swapping out hardness minerals (calcium and magnesium) for sodium ions to prevent scale.

The best whole house water filtration and softener system integrates these two technologies. Typically, the water first passes through a sediment pre-filter to catch dirt and rust. Then, it moves through a carbon media tank (often using high-grade catalytic carbon) to strip away chemicals and odors. Finally, it enters the softening stage where the resin beads handle the mineral content.

Understanding Why Water Filtration Systems Are Important is the first step in realizing that your home’s plumbing is an ecosystem. If you have hard water but no filter, your softener resin can be degraded by chlorine. If you have a filter but no softener, your pipes will eventually choke with scale. A combo system offers the ultimate protection.

Multi-stage whole house water filtration tanks installed in a clean basement utility room - best whole house water

Key Benefits of the best whole house water filtration and softener system

Investing in a high-quality water treatment setup isn’t just about the taste of your coffee—though that certainly improves! There are several heavy-hitting benefits that impact your wallet and your health.

  1. Appliance Longevity: Hard water is the silent killer of water heaters, dishwashers, and washing machines. By removing scale-forming minerals, you extend the life of these expensive appliances by years.
  2. Skin and Hair Health: Chlorine and hard minerals strip the natural oils from your skin and hair. Many of our clients in neighborhoods like Sauganash and Hyde Park report that their eczema or dry scalp issues cleared up significantly after installing a Water Filtration System.
  3. PFAS Removal: With the alarming statistic that almost half of all tap water supplies in the U.S. contained toxic PFAS ‘forever chemicals’, a high-quality carbon filtration stage is essential. These chemicals don’t break down in the environment or your body, so stopping them at the door is vital.
  4. Air Quality: When you shower in chlorinated water, the heat turns that chlorine into steam, which you then inhale. A whole-house filter removes 97% of chlorine (as seen in systems like the Aquasana Rhino), meaning you aren’t breathing in chemical fumes during your morning routine.

Top Features to Look for in 2026

The market for water treatment has evolved rapidly. In 2026, the best whole house water filtration and softener system is smarter and more efficient than ever. Here is what you should be looking for:

Salt-Based vs. Salt-Free: The Great Debate

One of the most common questions we get at VanDerBosch Plumbing is whether to go salt-free. Here is a quick breakdown:

Feature Salt-Based (Ion Exchange) Salt-Free (Conditioner/TAC)
Primary Action Removes minerals entirely Neutralizes minerals (prevents sticking)
Feel “Slippery” or soft feel Natural water feel
Maintenance Requires salt refills Low maintenance (no salt)
Effectiveness Best for very hard water Best for moderate hardness (<30 GPG)
Wastewater Produces brine during regen No wastewater

Flow Rates and Capacity

You don’t want your shower to turn into a drizzle just because someone started the laundry. The flow rate is measured in Gallons Per Minute (GPM). For a standard 2-3 bathroom home in Elmhurst or Mount Prospect, you should look for a system with at least 10–12 GPM. Larger homes with 4+ bathrooms should aim for 15–20 GPM to ensure no drop in pressure.

Capacity is also key. Systems like the SpringWell CF are rated for 1,000,000 gallons, which can last a family of four up to 10 years before the media needs replacing.

Certifications

Always look for NSF/ANSI certifications. NSF 42 covers aesthetic effects (taste and odor), while NSF 53 covers health effects (lead and VOCs). If a system isn’t third-party tested, take their claims with a grain of salt (pun intended). According to the 6 Best Whole House Water Filter Systems of 2026, verified testing is the only way to ensure the system actually does what it says on the box.

best whole house water filtration and softener system for Well Water

In some parts of Cook County and surrounding areas, homes rely on private wells. This presents a different set of challenges. 43 million Americans rely on private wells, and these sources are not federally monitored.

For well water, we recommend a “5-in-1” style system. A prime example is the Signature Elite | 5-in-1 Whole House Water Treatment Bundle. These bundles often include:

  • UV Sterilization: To kill 99.99% of bacteria and viruses (crucial for wells).
  • Fine Mesh Resin: Specifically designed to remove up to 10 ppm of iron, which prevents those nasty orange stains in your sinks.
  • KDF85 Media: To target heavy metals and hydrogen sulfide (the “rotten egg” smell).

best whole house water filtration and softener system with Smart Features

The “Smart Home” has officially reached the basement. Modern systems like the TrueHome™ ECO-SMART Carbon Filter & Water Softener Combo feature Bluetooth monitoring.

Why does your softener need an app?

  • Salt Alerts: It notifies your phone when salt levels are low.
  • Efficiency Tracking: It uses “smart metered” technology to regenerate only when necessary, which can slash salt consumption by up to 77%.
  • Leak Detection: Some high-end systems can actually detect unusual water flow and shut off the main valve to prevent a flood while you’re away on vacation.

Determining the Right Size and Capacity for Your Home

One size does not fit all. If you install a system that’s too small, you’ll suffer from low water pressure. If it’s too large, you’re overpaying for capacity you don’t need.

When we visit a home in Melrose Park or Ukrainian Village, we look at three main factors:

  1. Bathroom Count: This is the best indicator of potential peak water demand.
  2. Household Size: More people means more gallons used per day.
  3. Water Hardness: Measured in Grains Per Gallon (GPG).

You can test your water hardness using a simple DIY strip kit, or better yet, let us perform a professional analysis. If your hardness is over 10 GPG, you definitely need a softener. If it’s over 50 GPG, you might need a heavy-duty industrial-grade residential unit or even a Whole Home Repipe if your old pipes are already too far gone with scale.

Installation and Maintenance Requirements

While some manufacturers market these as “DIY-friendly,” we generally advise professional installation for the best whole house water filtration and softener system. These systems involve cutting into your main water line, setting up bypass valves, and ensuring proper drainage for the regeneration cycle. A mistake here can lead to basement flooding or cross-contamination.

Ongoing Maintenance

Maintenance is usually straightforward but essential:

  • Sediment Filters: These should be swapped every 6–9 months. They are your system’s first line of defense.
  • Salt Refills: For salt-based systems, you’ll need to add a bag of salt roughly once a month, depending on usage.
  • Resin Regeneration: This happens automatically, but you should check the settings to ensure it’s regenerating at an efficient interval (usually every 5–10 days).
  • Annual Costs: Expect to spend between $100 and $300 annually on filters and salt. This is a small price to pay compared to the cost of replacing a water heater.

If you’re in the Roselle area, you can learn more about our specific Water Filtration System services to see how we handle these installations from start to finish.

Frequently Asked Questions about Water Treatment

How do I test my water quality at home?

You can start with a basic DIY kit from a hardware store to check for hardness, pH, and chlorine. However, for a deep dive into contaminants like lead, arsenic, or PFAS, you should request a lab-certified water quality report. For city residents, your local utility (like the City of Chicago) publishes an annual Consumer Confidence Report (CCR) that lists average contaminant levels.

Do these systems reduce water pressure?

A properly sized system should have a negligible impact on water pressure. High-end systems are designed with high-flow valves to maintain 12–20 GPM. However, if you neglect your sediment filter and it becomes clogged, you will notice a significant drop in pressure. This is why regular maintenance is key!

What is the difference between salt-based and salt-free softeners?

As mentioned earlier, salt-based systems remove the minerals through ion exchange. This gives you that classic “soft water” feel. Salt-free systems are actually “water conditioners.” They use a process called Template Assisted Crystallization (TAC) to change the crystal structure of the minerals so they don’t stick to your pipes. They don’t “soften” the water in the traditional sense, but they are excellent for preventing scale without the use of chemicals or salt.

Conclusion

Finding the best whole house water filtration and softener system is one of the most impactful upgrades you can make for your home. From protecting your skin and hair to ensuring your plumbing lasts for decades, the benefits are clear.

At VanDerBosch Plumbing Inc., we have been serving the Chicagoland area—from the North Shore to the West Suburbs—for years. Whether you are in Niles, Winnetka, or Oakbrook Terrace, our team of licensed, background-checked technicians is ready to help you navigate the complexities of water chemistry.

We pride ourselves on transparent pricing, 24/7 availability, and a 100% satisfaction guarantee. Don’t let hard water or contaminants dictate your home’s health. If you’re ready to experience the difference that pure, soft water can make, reach out to us today to discuss your Water Filtration System options. We’ll make sure your water is nothing short of extraordinary.

How to Detect Gas Leaks the Right Way

gas leak detection

Why Gas Leak Detection Could Save Your Life

Gas leak detection is the process of identifying dangerous natural gas escaping from pipes, appliances, or connections in your home or business. Here’s a quick overview of what you need to know:

  • Smell it? Natural gas is odorless by nature, but utility companies add a chemical called mercaptan that smells like rotten eggs or sulfur.
  • Hear it? A hissing or whistling sound near a gas line or appliance is a serious warning sign.
  • See it? Dead vegetation, bubbling water, or blowing dirt near a gas line can indicate an underground leak.
  • Feel it? Headaches, dizziness, or nausea indoors with no clear cause may signal gas exposure.
  • Suspected leak? Evacuate immediately, then call 911 and your gas utility from a safe distance.

Over 189 million Americans use natural gas in their homes. It’s one of the cleanest fossil fuels available — but when a line is damaged or an appliance fails, the results can be deadly. Most leaks come from faulty appliances or accidentally ruptured lines, and many go undetected far longer than they should.

Knowing how to spot, test for, and respond to a gas leak is one of the most important safety skills a homeowner can have.

I’m Hugh Hodur, President of VanDerBosch Plumbing Inc., and through years of leading residential and commercial plumbing services across Chicagoland, gas leak detection and gas line safety have been a core part of what our team handles every day. Read on for everything you need to know to protect your home and family.

Infographic showing the Smell Look Listen method for detecting natural gas leaks at home - gas leak detection infographic

Recognizing the Signs of a Natural Gas Leak

Natural gas is a fantastic, clean-burning energy source, but it is naturally colorless and odorless. To make it safer for the 189 million Americans who use it, utility companies inject a chemical called mercaptan. This additive is what gives the gas its “personality”—specifically, a pungent, unmistakable rotten eggs or sulfur odor. If you catch a whiff of this in your kitchen or basement, your nose is giving you a life-saving heads-up.

However, smell isn’t the only way to identify a problem. You should also “listen” and “look” for physical clues. A damaged pipe or a loose fitting often emits a distinct hissing or whistling sound. If the leak is occurring underground, you might notice blowing dirt in your yard or bubbles in standing water or mud after a rainstorm.

One of the most subtle signs of a leak is “unexplained” landscaping issues. Natural gas displaces oxygen in the soil, which can lead to patches of dead vegetation or yellowish grass even when you’ve been watering regularly. If you see a patch of brown grass in an otherwise green lawn right above where your gas line runs, it’s time to pay attention. According to Natural Gas Leaks | SoCalGas, these visual cues are just as important as the smell.

A patch of dying grass and yellowed vegetation near an underground gas line - gas leak detection

Physical Symptoms of Exposure

Sometimes, the house doesn’t show signs, but your body does. Because natural gas displaces oxygen, being in a room with a leak can lead to physical distress. Common symptoms of exposure include:

  • Persistent headaches
  • Dizziness or lightheadedness
  • Unusual fatigue or drowsiness
  • Nausea
  • Chest pains or difficulty breathing

In extreme cases, high concentrations can lead to a loss of consciousness. If you find that these symptoms disappear when you leave the house but return shortly after you come home, you may be dealing with a slow leak. Residents in areas like Niles should be aware that local authorities often provide Carbon Monoxide & Natural Gas Testing | Niles, IL to help identify these invisible threats.

Monitoring Appliance Performance and Gas Usage

Your appliances are often the first place a leak begins. We recommend keeping a close eye on your stove flames. A healthy burner should produce a crisp, steady blue flame. If you see a yellow or orange flame, it indicates improper combustion, which could mean a gas-to-air imbalance or a leak. This is also a major red flag for carbon monoxide production.

You should also keep an eye on your monthly bill. While gas prices fluctuate, a sudden, unexplained usage spike when your habits haven’t changed could indicate a leak located somewhere after the meter. For more tips on maintaining your home’s infrastructure, check out our guide on how to keep a household safe from gas leaks.

Immediate Steps for Suspected Leaks and Safety

If you suspect a gas leak, your priority is simple: Get out. Do not stay to investigate. Do not try to find the source. Do not stop to open every window in the house.

  1. Evacuate immediately: Ensure everyone, including pets, leaves the building.
  2. Call for help: Once you are at a safe distance (across the street or further), call 911 or your local gas utility’s emergency line.
  3. Stay away: Do not re-enter the home until a professional has declared it safe.

Utility companies like NJNG emphasize that you should never assume someone else has called; it is always better to report a suspected leak yourself.

What NEVER to Do During a Suspected Leak

When natural gas fills a room, even the tiniest spark can trigger an explosion. While it’s tempting to try and help, many common actions can be fatal:

  • DO NOT flip any light switches or use electrical outlets.
  • DO NOT use a telephone or cell phone inside the house.
  • DO NOT use a flashlight if it was already off (the click of the switch can create a spark).
  • DO NOT start your car if it is in the garage or parked near the house.
  • DO NOT smoke or light a match.
  • DO NOT attempt to shut off the gas if you have to enter a “gassy” area to do so.

Even static electricity from walking across a carpet can be enough to ignite a high concentration of gas. “Smell. Go. Let us know.” is the golden rule.

How to Shut Off the Natural Gas Supply

If you can access your gas meter safely (usually located outside the home) and you have a wrench handy, you can stop the flow of gas to the entire property.

Find the main valve on the pipe coming out of the ground. Using a large wrench, give the valve a quarter-turn until it is in the perpendicular position (crossing the pipe). When the valve is “in line” with the pipe, the gas is on. When it is “across” the pipe, it is off.

As Oklahoma Natural Gas notes, once you turn the gas off at the meter, do not turn it back on yourself. Only a licensed professional or utility technician should restore service after performing a full safety inspection.

Safe Methods for DIY Gas Leak Detection

While professional gas leak detection is the only way to be 100% sure your home is safe, there are a few DIY methods you can use to check connections if you suspect a very minor, non-emergency leak (like a faint smell near a new stove connection).

Method Best For Pros Cons
Soapy Water Test Pipe joints and valves Free, easy, instant Only works on accessible pipes
Electronic Sniffer Hard-to-reach areas Very sensitive, portable Requires batteries and calibration
Visual Inspection Underground lines Detects outdoor leaks Won’t find small indoor leaks
Professional Test Whole-home safety Most accurate, provides peace of mind Costs money for the service

The Soapy Water Test

This is the “old school” plumber’s trick. Mix a teaspoon of dish soap with a cup of water. Using a brush or spray bottle, apply the solution to the gas pipe connections, valves, or hoses. If there is a leak, the escaping gas will create bubbles in the soapy film. If you see bubbles growing, you’ve found your leak. This is a common method suggested by Chicago 311 for residents checking their own appliances.

Using Electronic Gas Leak Detection Tools

For a more modern approach, you can purchase a portable sniffer or a residential methane detector. These devices use sensors to identify the chemical signature of combustible gases.

  • Placement: Install permanent detectors near gas-burning appliances (like the furnace or water heater) but at least 10 feet away to avoid “nuisance” alarms from normal startup.
  • Maintenance: Check the batteries every six months, just like your smoke detectors.
  • Professional Grade: Tools like the Panther PRO Gas Leak Detector are used by pros to find leaks in high-interference environments, but consumer-grade versions are available for home use.

Why You Cannot Always Rely on Your Sense of Smell

Relying solely on your nose is dangerous. There is a phenomenon known as odor fade. This happens when the mercaptan odorant is absorbed by new steel pipes, moisture, or even the soil if a leak is underground.

Furthermore, some people suffer from olfactory fatigue, where their nose “gets used” to a smell and stops reporting it to the brain. Others may have a diminished sense of smell due to medical conditions or age. This is why having electronic detectors in your Chicagoland home is a critical backup.

Long-Term Prevention and Maintenance Strategies

Prevention is always cheaper and safer than a middle-of-the-night emergency. The best way to avoid a gas emergency is through regular maintenance.

  • Call 811: Before you do any digging in your yard—whether it’s for a new fence or just a mailbox—call 811. They will come out and mark your underground lines for free. Striking a gas line with a shovel or backhoe is one of the most common causes of major leaks.
  • Inspect Appliances: Have your furnace and water heater serviced annually.
  • Replace Old Connectors: If you have an older stove or dryer, check the flexible brass connectors. Older “corrugated” connectors are prone to cracking and should be replaced with modern, plastic-coated stainless steel versions.

Our team provides comprehensive gas leak detection services in Chicago and beyond to help homeowners identify potential weak points before they become hazards.

Professional Gas Leak Detection and Repair

When you call a licensed plumber for gas leak detection, we don’t just “sniff around.” We use specialized equipment, including:

  • Pressure Testing: We can isolate your gas system and apply air pressure to see if the gauge drops, which confirms a leak exists even if it can’t be smelled.
  • Electronic Analyzers: These tools can find gas concentrations in parts per billion, locating leaks hidden behind walls or under floors.
  • Line Replacement: If a pipe is corroded or damaged, we can perform a gas line repair in Roselle or provide gas leak detection in Edgewater to ensure your home meets current safety codes.

Frequently Asked Questions about Gas Leak Detection

Is a gas leak outside my home dangerous?

Absolutely. While gas dissipates more easily outdoors, an underground leak can travel through the soil and build up inside a basement or crawlspace. It can also create an explosion hazard for the entire neighborhood. If you see dead grass or blowing dirt near the street, call the utility immediately.

What is the difference between a gas detector and a CO alarm?

A carbon monoxide (CO) alarm detects the byproduct of incomplete combustion (poisonous exhaust). A natural gas detector (or methane detector) detects the raw fuel itself. You need both. A CO alarm will not go off if you have a gas leak, and a gas detector won’t help if your furnace is venting exhaust poorly.

Why should I call 811 before any digging project?

In Illinois, it is the law. Calling 811 prevents “line strikes,” which are not only dangerous but can result in massive fines and repair costs for the homeowner. It is a free service that protects the utility infrastructure and your safety.

Conclusion

At VanDerBosch Plumbing Inc., we’ve been the trusted experts for Chicagoland families for decades. Whether you are in Chicago, Roselle, Niles, or Winnetka, we understand the specific needs of our local infrastructure. We offer 24/7 availability because we know that a gas smell doesn’t wait for business hours.

With our 100% satisfaction guarantee, background-checked technicians, and transparent pricing with no hidden service charges, we make it easy to keep your home safe. If you suspect a problem or just want a professional safety inspection, don’t wait. Contact us for professional gas leak detection services today. Your safety is our business.